50 inch Reflector "Monster Light"

LightSward

Flashlight Enthusiast
Joined
Feb 1, 2009
Messages
1,164
Location
Portland, Oregon
Working on several things at once, I figured I'd try and save a few thousand off my next HMI ballast, so I built one. It's progressed past this stage already and has a protective metal cooling case and fan to be added next. Already has wheels and handle I built in unit frame, for easy transport of the hundred plus pound beast. 80 pounds less than the real 4,000 watt ballast I purchased a couple years ago.
:devil:
24757664779_94ec5e6e5a_h.jpg

I plugged it in and flipped the built in circuit breaker and it came on with just a slight auto-transformer buzz. All the voltage readings checked out and now it just has to be tested on the bulb itself....
Friday..? Should go well....I hope...:confused: Fingers crossed.:scowl::party::caution::eek::thumbsup:

As you can probably tell, I combined four standard metal halide probe start ballasts with my ingenious hand activated manually controlled ignition system, similar to ones used on the early florescent lights. All tests show readings well with-in range...with all the modifications. Actual bulb test later today..!


b
 
Last edited:

LightSward

Flashlight Enthusiast
Joined
Feb 1, 2009
Messages
1,164
Location
Portland, Oregon
Well, damn Sam! Color me impressed!

YES..! Works better than anticipated. Voltages better than expected. Bulb voltage slightly low so bulb has a bluer tint, but lights the sky just as well..! Much easier to transport than "real" ballasts, doesn't blow the main breaker from saturated ballast core like "real one", and is smaller and lighter in weight so will be easier to move around.

YES...SUCCESS..!!! :twothumbs:clap::takeit: HAPPY CAMPER. :):hitit: I'm ordering more 1,000 watt ballast to make more of these..!:thumbsup:
 

guiri

Flashlight Enthusiast
Joined
Feb 18, 2007
Messages
4,136
Location
NC, USA
So, what you're saying, it was a positive test?

I wasn't sure I could read your subtle messages so to speak...
 

LightSward

Flashlight Enthusiast
Joined
Feb 1, 2009
Messages
1,164
Location
Portland, Oregon
So, what you're saying, it was a positive test?

I wasn't sure I could read your subtle messages so to speak...

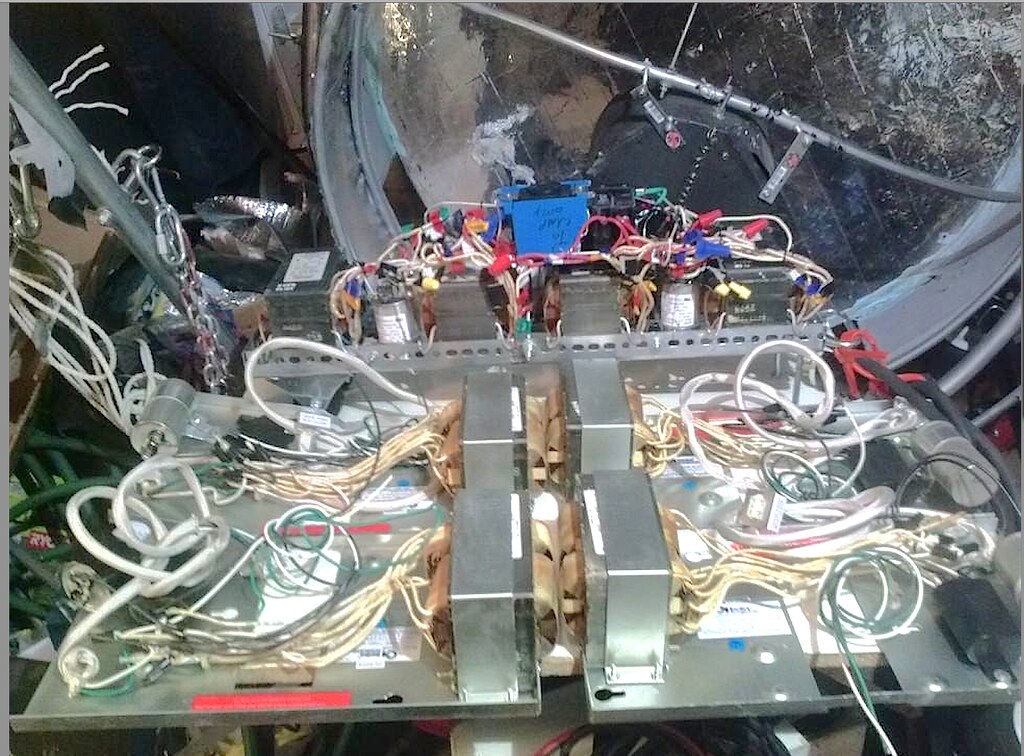
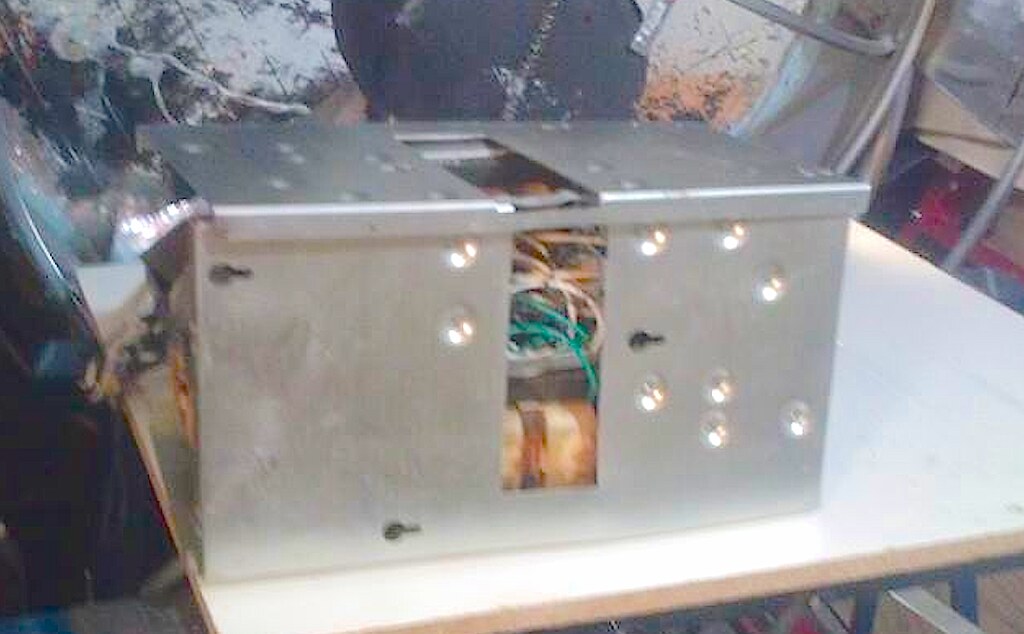
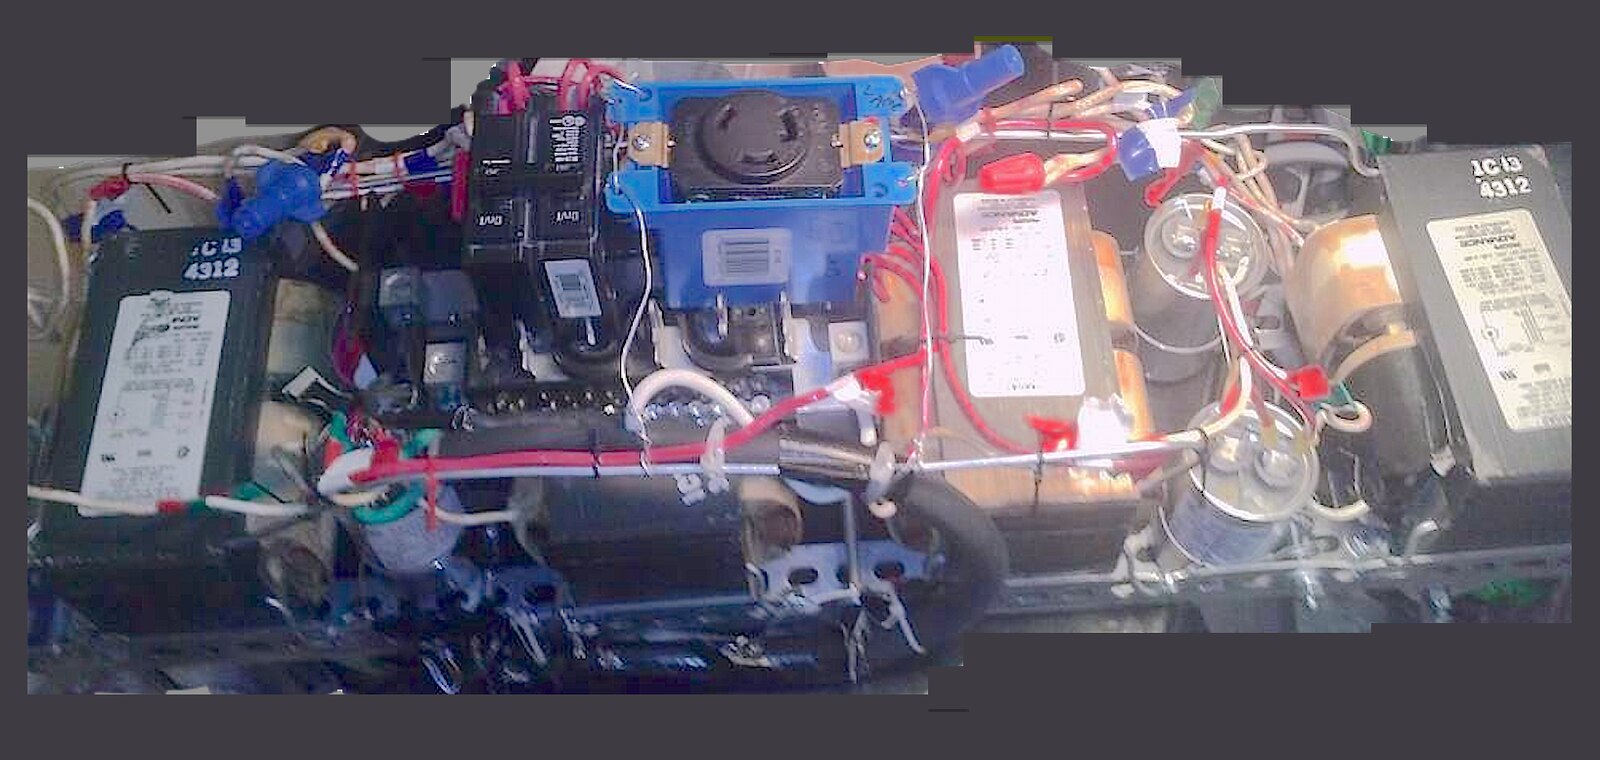
Tried several different wiring configurations when the first test sequence just resulted in a sputtered and blackened bulb. Later realized, while trying several alternate wiring configurations; had by-passed one of the capacitors when removing a jumper cable, wrongly installed earlier on one of the simple capacitor multi-tab terminals, (many possible connections are close together), so I returned the wiring of the ballasts to the configuration as originally designed, and is now working very well. :thumbsup:

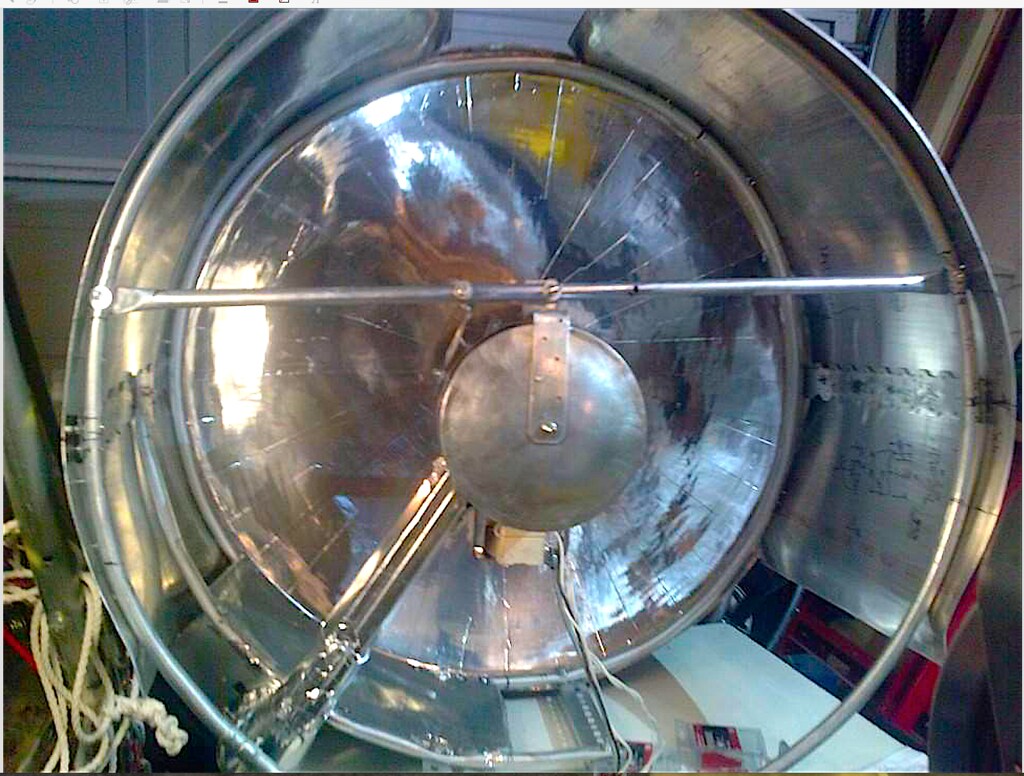
Running the blackened bulb through the "Real Ballast", for sort of a Halide cycle, clearing the bulb in less than fifteen minutes, (whew!),. After wires fixed, the bulb was again fired up on homemade ballast, ready, set, "ignition" went well, but bulb voltages are a little lower than expected, since I'm running 240 into the 277 volt tabs, the lower operating and start-up input voltage of this particular voltage tab of 23% variation, (as my original plan to bring the ballast's normal output voltage down from 265 volts to the 178-237 volt range the bulb is designed to run at, just didn't expect this low of voltage of just under 180 volts, thus the bluer color, (looks the same in sky since the blue color of the air is lit up as normal),., so I will try either the 120 on these this homemade ballast, and/ or just see what happens when I wire up the new expected arrivals with the 240 volt terminals and see if the voltage is about 205-210, which I'd prefer for a "whiter color" and more halide cycling, but if not, the current situation would be adequate. . No problem bringing the voltages up, have to tweak some issues to get input voltages as specified, as this batch of ballasts was very inexpensive because of the commercial voltage ranges ballasts are designed for. Just had to order some inexpensive accessories to remedy the costly low voltage input gauge increases normally associated with standards. :broke: ...For my personal searchlights I can use adequate cabling that I wouldn't use in commercial products meant for re-sale.

Am paying a nearly 60% increase in ballast price on the next batch to have more of the common voltages as input tabs, that are more in line with smaller generators commonly found at hardware stores. All the ballasts I work with have 120 volts, but I avoid this like the plague, because the wiring gauge jumps to a dramatically more expensive size that doesn't have to be used with the higher voltages..! The less expensive ballasts use higher voltages more commonly associated with large warehouses, football fields and traffic street lights. My original plan was to use these voltages, but may not be as economical as just purchasing the slightly more expensive ones. However, if I was to make these for the Hollywood set lights that use mostly giant 110 volt cabling, I'd just use the warehouse type ballasts at 120 volts, since these ballasts can handle up to and over 23%, plus or minus, voltage variation. Once electricity is dropped from the transmission and distribution high voltages of the many thousands of volts down to the hundreds of volts, the voltage leaving the transformer drops rapidly with every foot of wire. After several hundred feet, the voltage has dropped substantially, and to lower the costs associated with lighting large areas where voltages would be all over the scale, ballasts with large voltage input ranges were developed, and the fact that these are auto-transformers as well with the power factor capacitor, makes these ideal old school devices..! After having experimented with many different configurations, I'm absolutely amazed at how well these worked, even with all my wiring variations and capacitor changes and placement experiments...Laugh:welcome:

Great learning experience. Now I can make some inexpensive ballasts for the "Big Bright Beasts".
 
Last edited:

LightSward

Flashlight Enthusiast
Joined
Feb 1, 2009
Messages
1,164
Location
Portland, Oregon
Experimenting with various sized metal reflectors from 6" on up to hopefully 50", mostly aluminum. Excellent results, in fact stunning..! Maybe not yet perfect, but at least now I have a relativity fast, inexpensive, reliable, customization-able and fairly accurate production source of reflectors in a variety of sizes and design configurations, all virtually at my finger tips.

Most of my searchlight reflectors will be smaller, more compact, lighter weight, better light-beam characteristics and all in an affordable yet strong housing for a light fixture that is sure to last for many years. These new reflectors will offer the same performance characteristics as their older, wonderful fiberglass cousins they'll be replacing, yet to get even more, I'm keeping many of these larger sizes now in Aluminum, to improve them all.

In my college years, during the days when I examined many of the 60 inch searchlights in Las Vegas, I noticed some of the mirror reflectors weren't perfect, and in fact some were quite flawed, maybe even shoddy replacement mirrors, or homemade like mine; yet at night, some of these flawed mirror lights would have the most impressive, brightest, appearing to be well focused beam, even from across town. Generally I'm going for improved performance, quality and economical and environmentally friendly courses to achieve my goal of making some of the funnest and maybe a few impressive lights to have a good night interacting with.
 

guiri

Flashlight Enthusiast
Joined
Feb 18, 2007
Messages
4,136
Location
NC, USA
So, I really wander (don't show your wife this..), how much you really had if your hobby was sitting at home playing chess by yourself :)
 

guiri

Flashlight Enthusiast
Joined
Feb 18, 2007
Messages
4,136
Location
NC, USA
Experimenting with various sized metal reflectors from 6" on up to hopefully 50", mostly aluminum. Excellent results, in fact stunning..! Maybe not yet perfect, but at least now I have a relativity fast, inexpensive, reliable, customization-able and fairly accurate production source of reflectors in a variety of sizes and design configurations, all virtually at my finger tips.

Most of my searchlight reflectors will be smaller, more compact, lighter weight, better light-beam characteristics and all in an affordable yet strong housing for a light fixture that is sure to last for many years. These new reflectors will offer the same performance characteristics as their older, wonderful fiberglass cousins they'll be replacing, yet to get even more, I'm keeping many of these larger sizes now in Aluminum, to improve them all.

In my college years, during the days when I examined many of the 60 inch searchlights in Las Vegas, I noticed some of the mirror reflectors weren't perfect, and in fact some were quite flawed, maybe even shoddy replacement mirrors, or homemade like mine; yet at night, some of these flawed mirror lights would have the most impressive, brightest, appearing to be well focused beam, even from across town. Generally I'm going for improved performance, quality and economical and environmentally friendly courses to achieve my goal of making some of the funnest and maybe a few impressive lights to have a good night interacting with.


...and maybe this can turn out to be a future business for ya :)
 

eVoX

Newly Enlightened
Joined
Oct 2, 2013
Messages
6
How is the parabolic shape of the metal sheet /disc achieved?
Some kind of deep-draw?
 

LightSward

Flashlight Enthusiast
Joined
Feb 1, 2009
Messages
1,164
Location
Portland, Oregon
How is the parabolic shape of the metal sheet /disc achieved?
Some kind of deep-draw?

Great question..! Wish I would have appreciated the "English Wheel", tool earlier. Discounted it's ability to make parabolic shapes until watching a demonstration video and at that point realizing this was the answer for, making metal reflectors; I'd been looking for.
image_19660.jpg

The parabolic shape is made using an English Wheel with homemade templates for precision metal roll shaping. Metal, especially aluminum; forms naturally and easily into these shapes. Fast, easy and simple to make complex, compound curves this way, without the need for molds or expensive set-ups, just a basic "layout", such as 2-D or 3-D templates to check progress. Templates are made from metal, wood or cardboard.

There are various videos to help someone get started, some of them seem to consists of rather opposing methods, yet all can come in handy when making "dramatic changes" in making the parabolic shape. :huh: :duh2: :eek: This is done before I fine tune the surface.:thumbsup:

Harbor Freight recently listened to buyers and made some big changes to it's English Wheel, making it into a great tool for under $300; with seven bottom dies of all the main radius shaping curves, if using the 20% coupon they always have available... As you probably already know, with an English wheel one can make motorcycle gas tanks, fenders, car hoods, doors, aviation components like wing parts, fuselage to wing interface flanges and components, engine cowlings, pylon connectors, hydraulic housings, bowls, sinks, reflectors, etc.,.
 
Last edited:

LightSward

Flashlight Enthusiast
Joined
Feb 1, 2009
Messages
1,164
Location
Portland, Oregon
:)The 50 inch Monster searchlight has taught me a lot about basic searchlights and old fashioned technology still used today. The 50 inch searchlight will eventually be made of aluminum instead of Fiberglas for improved optics and better surface qualities. The 36inch JR. MONSTER will be a temporary stand-in for the giant 50 inch Monster as I figure the logistics for building the replacement.:eek:

:thumbsup:
GOOD NEWS:
THE 36 INCH JR. MONSTER IS NOW BEING MADE OUT OF 1/8th inch thick Aluminum discs at 36 inch diameters on an English Wheel, pictured here in the next few photos.:eek: May try to go as big as 50 inch all metal, but several challenges, mainly supply.

25826408756_3720a3cea9_b.jpg


Starts off as a flat round Aluminum disc on steel frame, then by using an English Wheel, I'm able to create 36 inch diameter searchlight reflectors from flat sheets of Aluminum metal.


Using an awesome English Wheel, the flat aluminum disc is brought to shape of the parabolic :)reflector.

25221944624_f6fc08582c_b.jpg


image_19660.jpg
This piece of equipment is awesome..! Can make so many different things; almost instantly, with little or no setup, just some basic templates.:thumbsup:

How 36 inch Flat parabolic mirror looks in living room.

25757308641_b53049cf38_h.jpg

How it looks sitting in the living room. May work similar to the 50 inch Fiberglass Monster.


Brought the newly polished reflector out for a quick photo shoot.

25826389146_21e8993014_b.jpg

Quick break between rain showers for a photo shoot.


Starts off as a flat piece of Aluminum sheet metal.
25757344781_a2205cee46_b.jpg


Starts off as a flat round disc mounted on a rigid steel tube frame. Using an English Wheel, I'm able to create 36 inch diameter searchlight reflectors from flat sheets of Aluminum metal. Motions similar to rolling Pizza dough are used to "roll" the metal into the parabolic reflector.


25097579349_f858ba5407_b.jpg

Homemade 4,000 watt HMI searchlight ballast made from four 1,000 watt HID grow lights.

25826439486_662cf9e42c_b.jpg


Nearing completion, with plugs, circuit breaker, meter, indicator lights to be added. Homemade 4,000 watt HMI 385,000 lumen bulb is only around $250.00 when finished....real ballast is $5,000 minimum..! Mine works better than real one which often blows breakers but homemade one does NOT..
 

LightSward

Flashlight Enthusiast
Joined
Feb 1, 2009
Messages
1,164
Location
Portland, Oregon
Now have THREE ballasts at Four Thousand watts HMI each..! Two are homemade lightweight units; that don't blow the breakers once in a while like the other real one I have, does. Some treaking and finishing my all metal searchlights added to the ballasts that are looking good. These are going to make this little outfit awesome for shining a bright searchlight beam from the parking lots around town..! Photos to come soon.

I joined four ballasts @ 1,000 watts each for football field lighting or warehousing, grow lights, etc. The ignitor for these units is rated for a 400 watt ballast, yet seems to work. After I combined the four ballast wiring together, I removed all but one of the ignitors from the circuit and joined it to all four ballasts. Works fine for now../.. We'll see. Seems to match the requirements needed.
 

guiri

Flashlight Enthusiast
Joined
Feb 18, 2007
Messages
4,136
Location
NC, USA
I continue to be impressed with what you do. Awesome work you're doing and I AM surprised how nice the finish is.
 

LightSward

Flashlight Enthusiast
Joined
Feb 1, 2009
Messages
1,164
Location
Portland, Oregon
I continue to be impressed with what you do. Awesome work you're doing and I AM surprised how nice the finish is.

It's really turning out nice. The aluminum and English Wheel allows and easy and effective way to quickly and attractively produce so many very different parts with minimal set up and preparations.

New Aluminum 36 inch Searchlight

Basic bulb and reflector configuration is installed. Next the cooling system.


New Aluminum 36 inch Searchlight

Basic bulb and reflector configuration is installed. Next the cooling system.


This is where the 4,000 watt, 385,000 lumen medium arc HMI high efficiency bulb is positioned. A massive air cooling system cools all the surrounding reflector, housing and socket but just barely the bulb itself, per manufacturer's recommendation.

New Aluminum 36 inch Searchlight
Socket will be wired for homemade ignition system, just in case the automatic ignition system doesn't work with all the metal to pull away the "wimpy", acting 20,000 volts. The homemade ballast was made with the four 1,000 watt ballasts I mentioned, but I only used one of the ignitors, (said on ignitor that came with the four; 1,000 watt ballasts, ignitor panel says only for a 400 watt ballast..! I've had success wiring ONE of the ignitors to all the ballast together so everything would work in sinc and the ignitors wouldn't all be fighting each other. Works so far, but after ignition, the heating up voltage dips more than I'd like. It operates within the manufacturer's voltage range.

Here is the basic framed searchlight case. I'll get more photos, much has progressed since these were taken last week.

Cheers..!
 
Last edited:

LightSward

Flashlight Enthusiast
Joined
Feb 1, 2009
Messages
1,164
Location
Portland, Oregon
Hey, happened to see these and thought about you :)

36 inch Telescope mirror searchlight is nearing completion...sort of. Is ready for first lamp test after wires are tightened.


26624109691_2fde3d8202_b.jpg


Cooling fan for bulb's pinch seal, socket and surrounding split back reflector, wiring and housing is finished and additional 2ND cabinet cooling fan now installed after this photo taken.;)
 

guiri

Flashlight Enthusiast
Joined
Feb 18, 2007
Messages
4,136
Location
NC, USA
See? This is the stuff they used to burn down the old ships in another fleet :)
 
Top