kreisl
Flashlight Enthusiast
- Joined
- Jul 5, 2012
- Messages
- 2,241
Re: Review: Raspberry Pi aluminum case assembly, mod & thermal test
Here, in my 3rd post regarding raspi & UT61E, i am finally showing how it's done (Matthew 32:55)! :twothumbs
The other day Raspbian Jessie ("Raspbian 8") got upgraded to Raspbian Stretch ("Raspbian 9") and the recommended procedure is to install the OS from scratch on a blank formatted microSD card, which i did. After some unimportant personal customization of the raspi desktop ("PIXEL") preferences/settings/configuration, such as enabling SSH and VNC Interfaces, the only thing i installed as a must-have was the Hardware Key script from post #18 Part II.
Then i edited the DEX installation text file, because DEX3.3.0 final version was released in the meantime, and used it to install DEX3.3.0. After the installation, i connected the (turned on) UT61E to the raspi through my expensive USB2Serial adapter; much to my astonishment, Raspbian 9 recognized the plugging without a reboot, and so did DEX! After choosing UT61E from the DEX device selection dialog, everything was good to go and logging UT61E on the raspi has been working flawlessly since.
If you are interested in photos/screenshots which i took along the way, here we go:
The (famous) German trading company Logilink has been offering various USB2Serial adapters in the past but only recently decided to release an ultimate hassle-free adapter to replace all previous products in that product category. That ultimate adapter is much more expensive but guaranteed hassle-free because it uses the FTDI chipset series (FT231X, FT232RL).
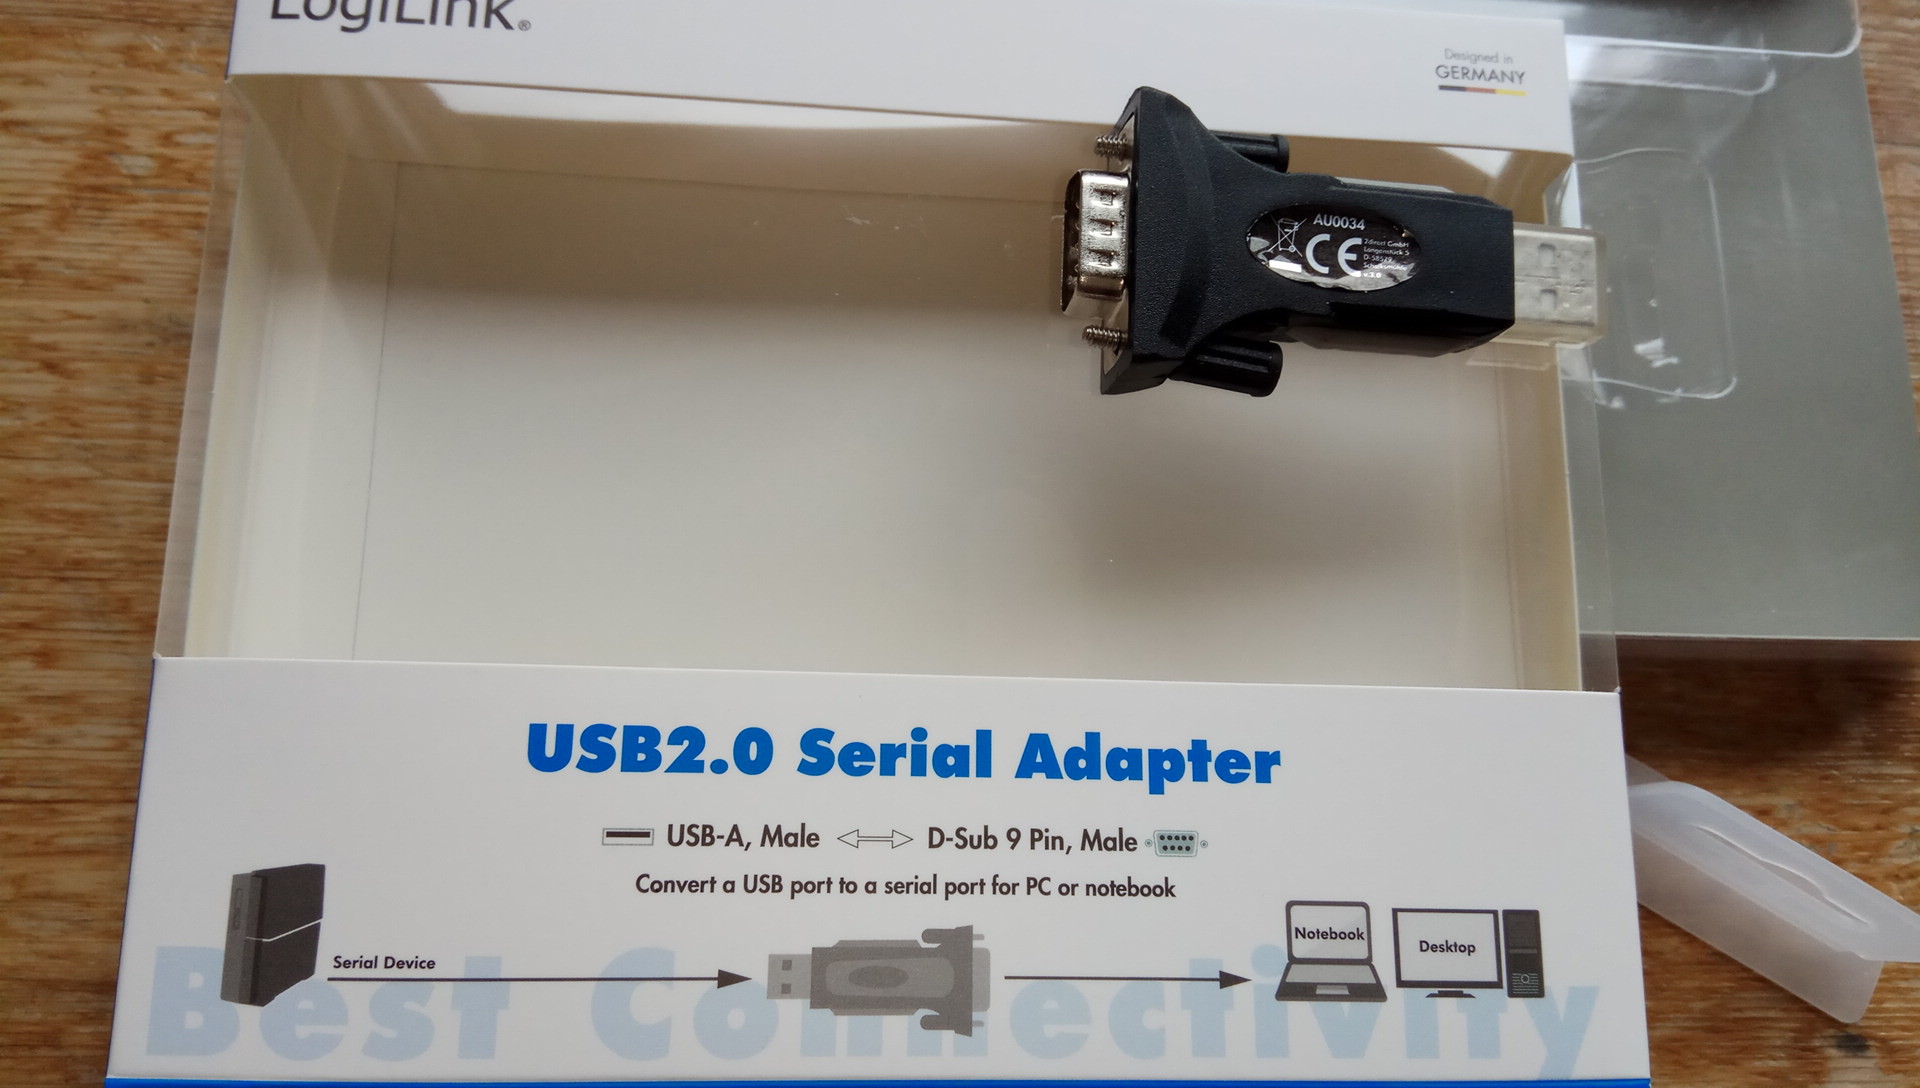
I found an online retailer who offers the product at 9.45EUR shipped, so i pulled the trigger-happy. See what i got for the money, front face of the packaging says "Designed in GERMANY" lol yeah whatever:
The definite manufacturer's model designation is "AU0034" and the stuff was "Manufactured in P.R.C." there we go:

I had looked hard on Aliexpress to find a FTDI-chip USB2Serial adapter as low-priced as possible but they were all between 7-8US$/pc, looked awfully cheap build quality, and with no support whatsoever. I am absolutely pleased with the Logilink build quality and the wealth of package contents:
Note that "Chip FTDI" is the most essential and decisive characteristic of this USB2Serial adapter! You're on your own if you buy a USB2Serial adapter with some other chipset like CH340/341/HL340/PL2303 for your raspi:

The only thing cheap about the Logilink product are the label stickers on the adapter. They hardly stick on the rubber-plastic surface and they don't even fit properly into the recesses. Shame on the geman designers:
Here a photo with the complete contents, nice huh. The printed instruction manual is rather detailed, 8 pages (per language) with lots of screenshots. Both the adapter and the included USB extension cable come with clear plastic protection caps on the USB A plug. The product has a manufacturer's website, a product webpage (with Downloads, Technical Support phone/email), all included in the 9.45€ so to speak:
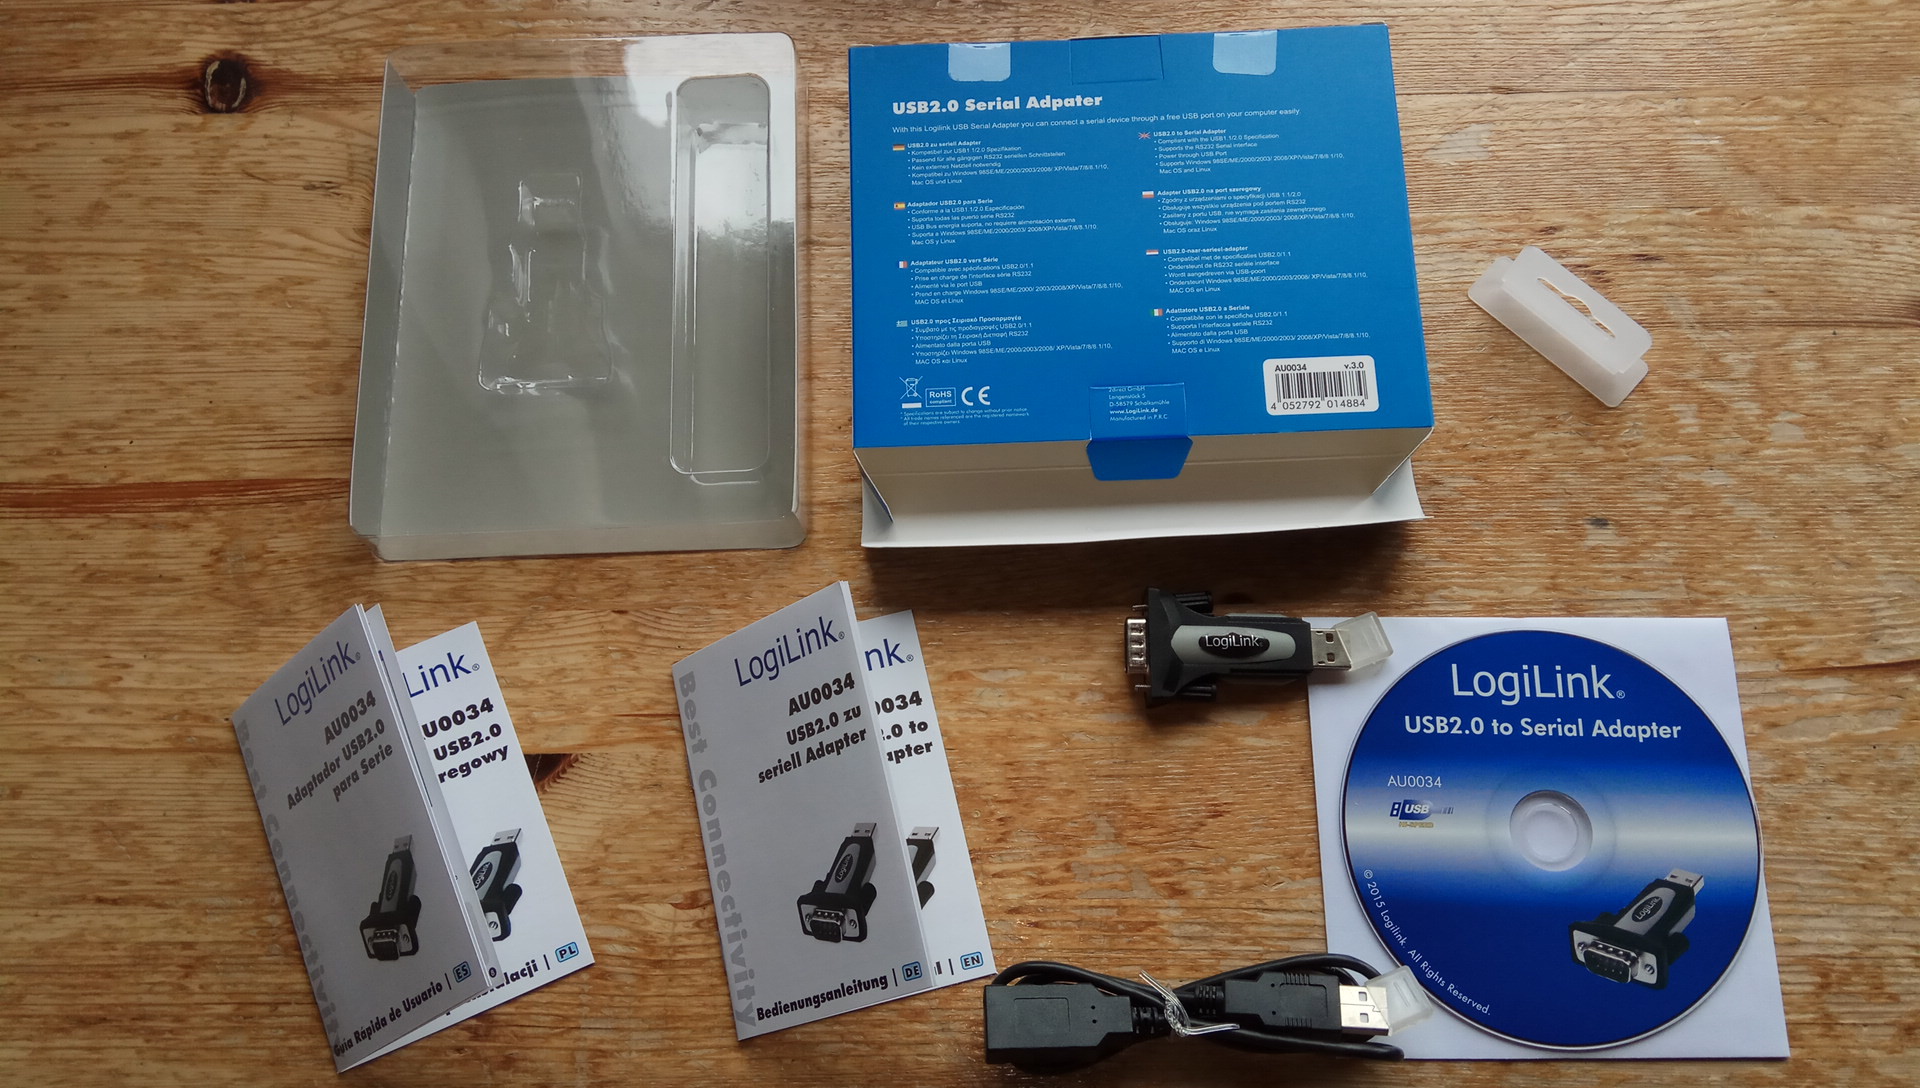
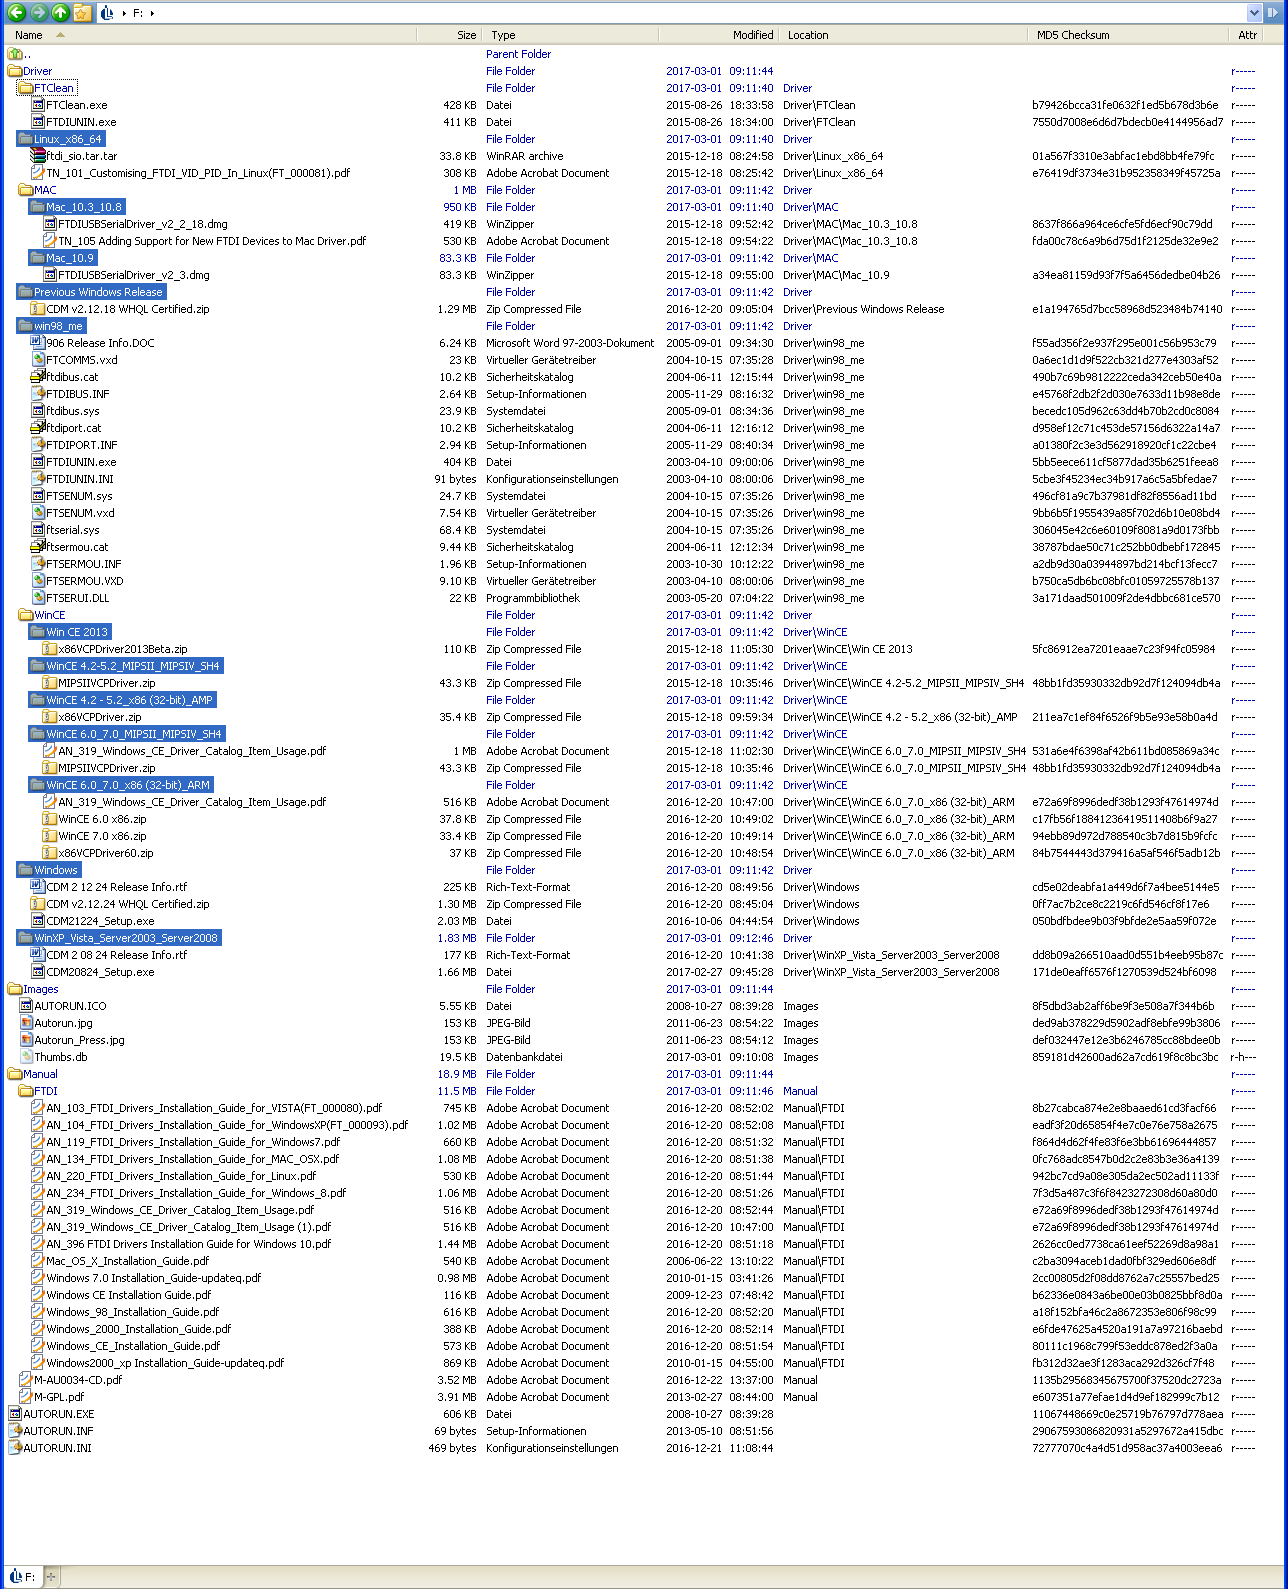
The pressed CD-ROM is labeled "©2015 Logilink", which must be the initial release date of the product as "AU0034 v1.0" because the CD content is much newer than that, March 2017 wow:
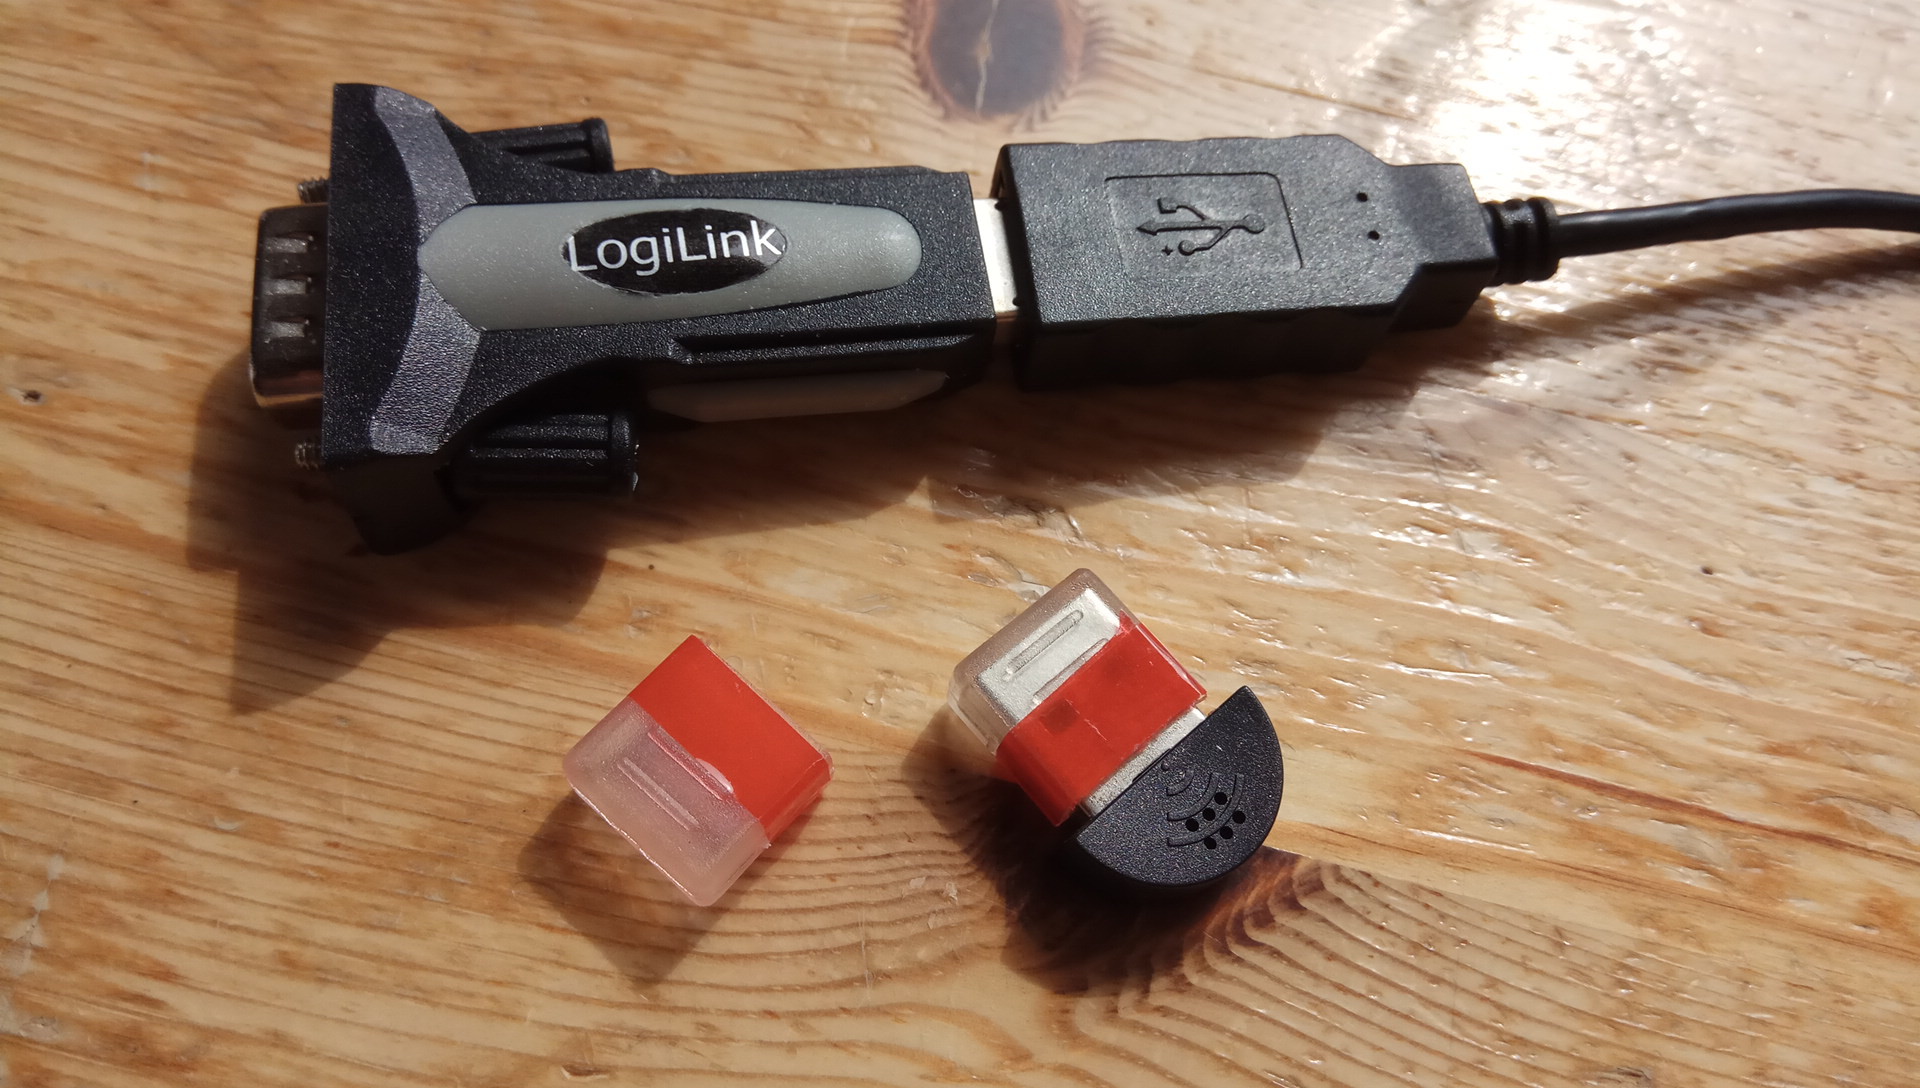
All right, this is what the adapter looks like plugged into the USB extension cable. Clear/transparent stuff is easily lost, so i put some red tape on the caps for improved visibility hh. The caps fit nicely on other USB A male plugs, for example on my USB mini microfone (for the raspi/alexa application):
Do we need the USB extension cable? Why yes because we don't want to strain the raspi's USB female port with unnecessary mechanical load/momentum. Because of the product thinness, the USB male plug rides several millimeters lower than the USB female port. It would need some mechanical support for matching heights:

Instead, we make use of the included USB extension cable, no problem. Also see how massive the UT61E RS232 plug is. All fitments are tight and perfect, and we don't need the opposing integrated pin screws wtf:
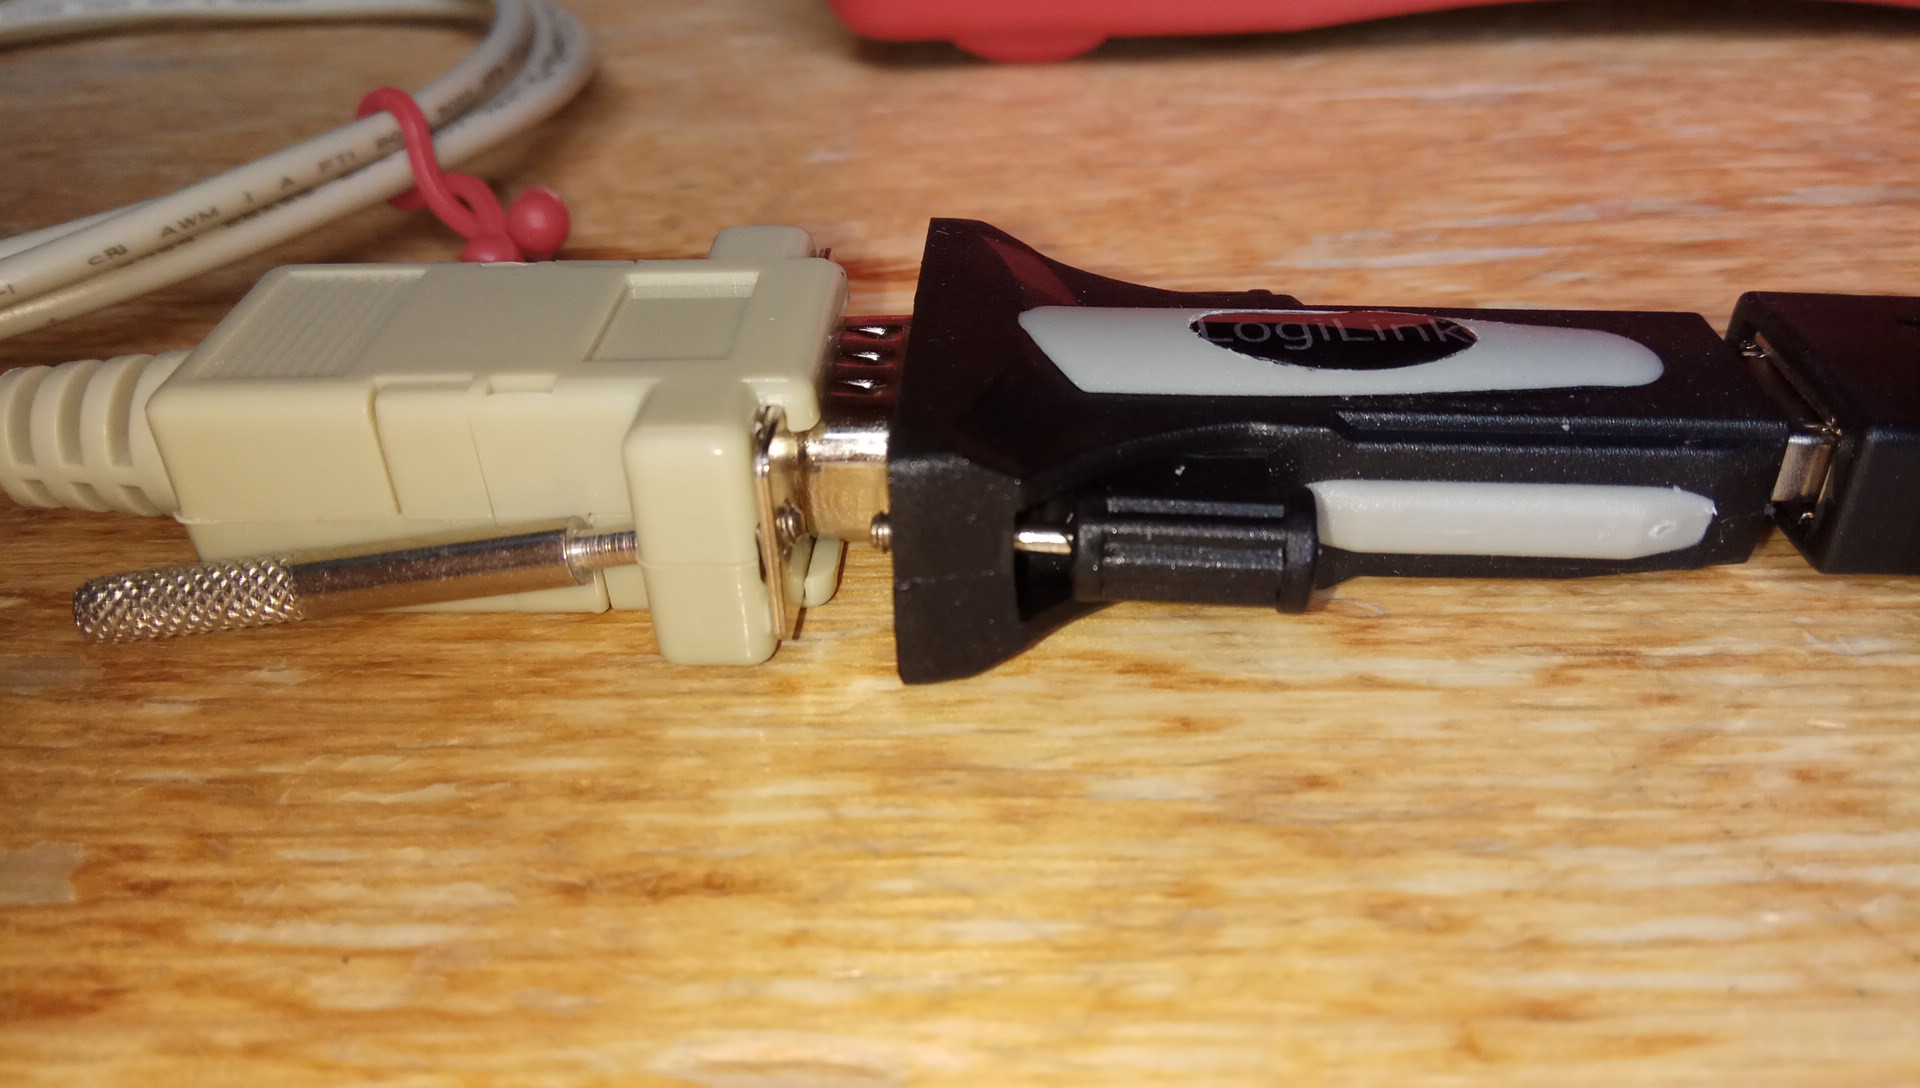
Why would you want to leave out the USB extension cable? When you buy a Chinese USB2Serial adapter from Aliexpress or Ebay, a free USB extension cable might not be included, beware. Because of all the mechanical load/momentum on the USB port, it is imho really not a good idea not to connect the adapter with a USB extension cable to the raspi:
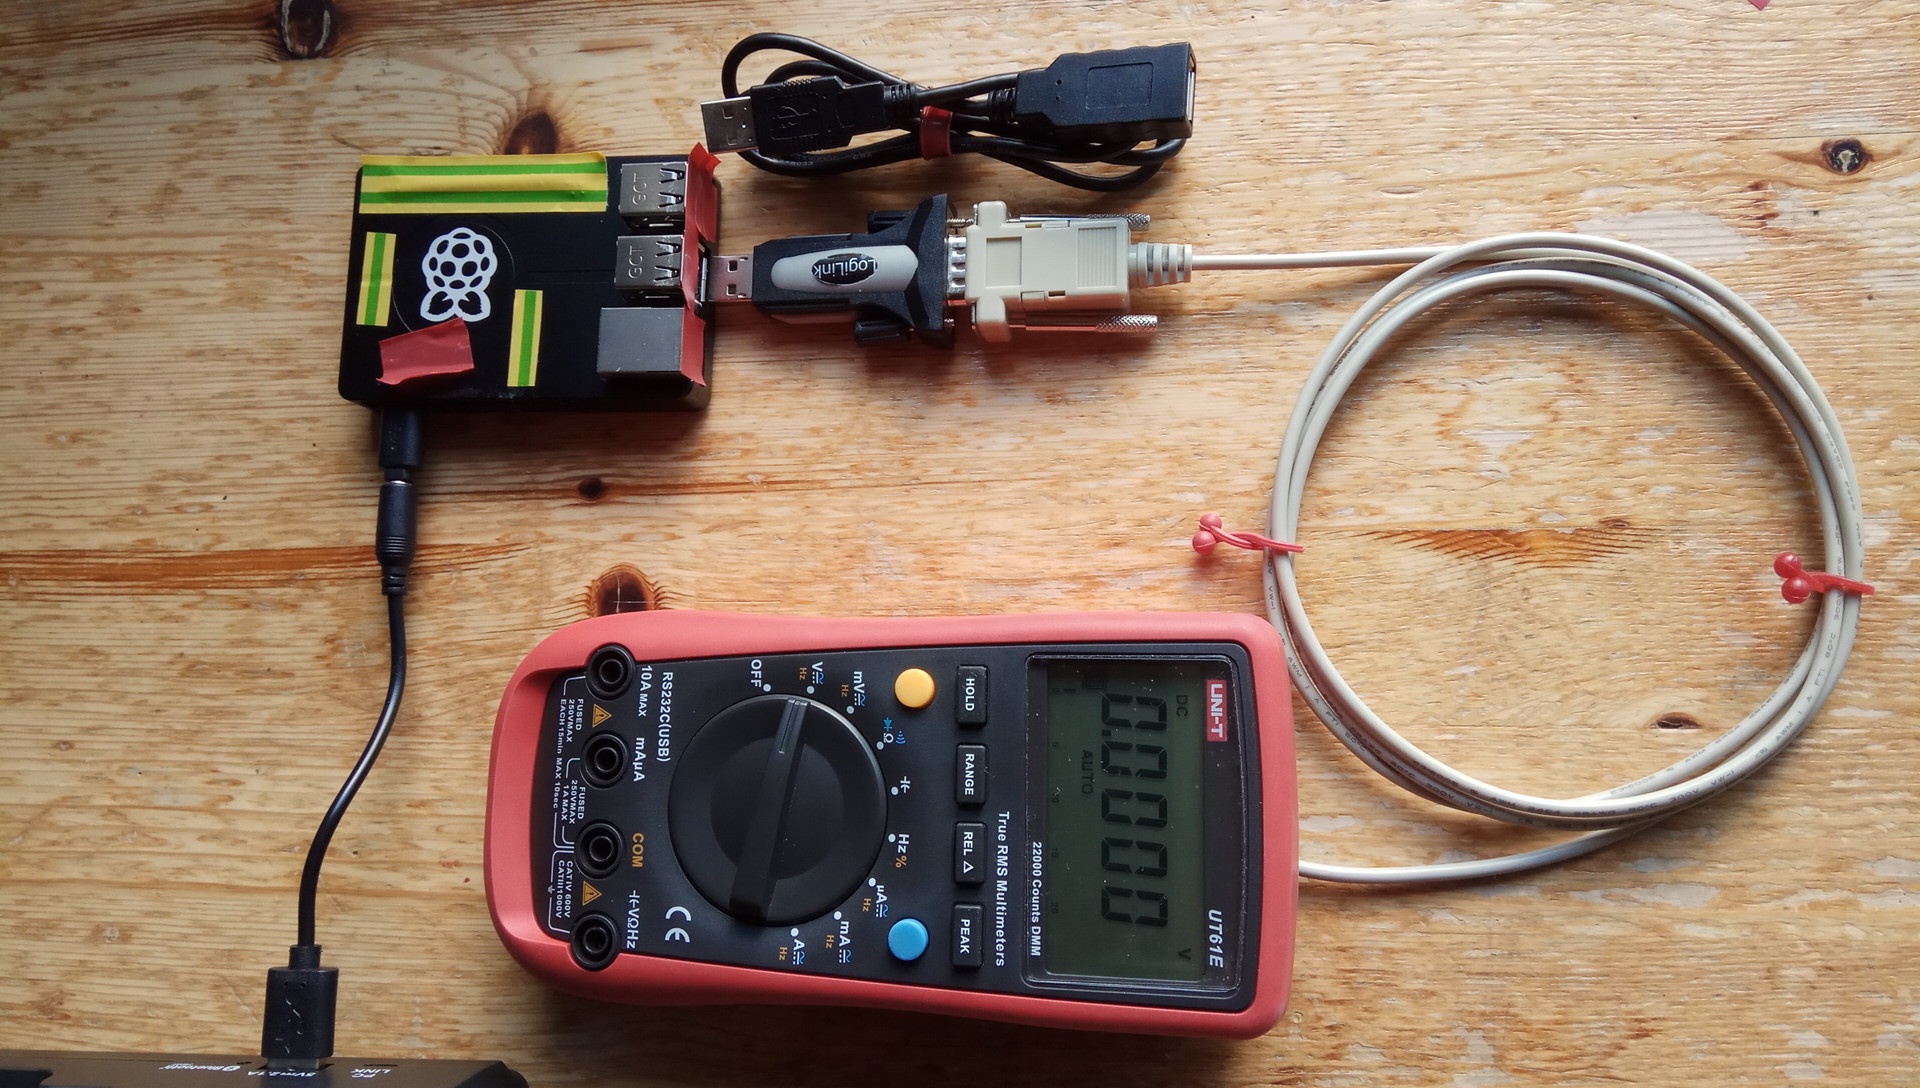
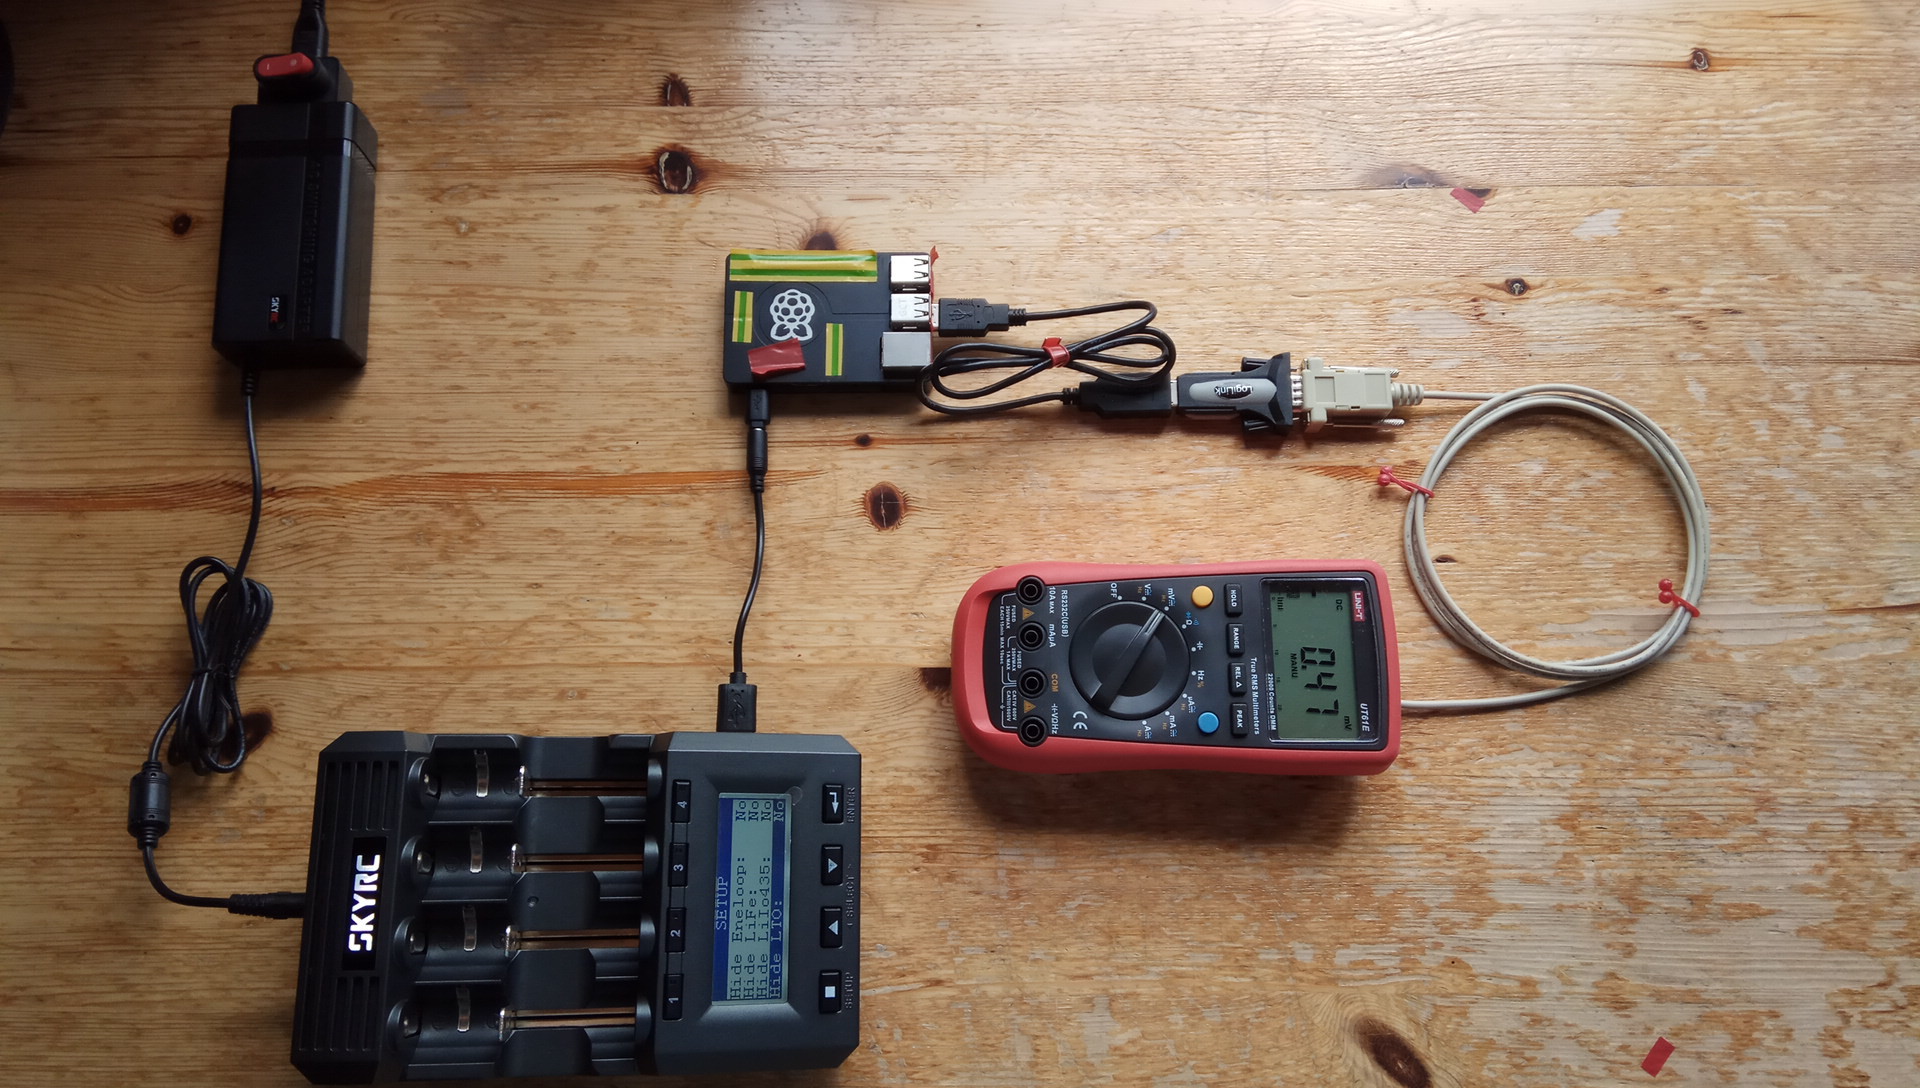
We don't need to power the raspi through the mc3k USB power output port, i know i know. Never mind huh. But i like this configuration with the very short USB power cable. Note that recent UT61E product packaging comes with the (formerly optional!) UNI-T USB data cable instead of the depicted UNI-T RS232 data cable. Don't wait for DEX to support the UNI-T USB data cable but go buy the UNI-T RS232 data cable plus the FTDI USB2Serial adapter, if logging UT61E on raspi is very urgent and important for you, that's my advice. I will assume that most UT61E owners in the world do own the RS232 data cable already, because that's what UNI-T factory had been shipping for most of the time since the UT61E initial release to market 7+ years ago. By the way, i once bought and tested the UNI-T USB data cable and it produced data sets with missing data points; from that experience i don't rely on the USB cable anymore but prefer the original old RS232 data cable. There you have it:
In this thread we already covered how to install DEX on a freshly setup raspi (Jessie), didn't we? I used procedure Alt2 on my freshly installed raspi (Stretch). I edited Ravel's original v0.0001b recipe (which was valid for DEX3.2.9) this way, now being valid for installing DEX3.3.0:

Other than that, nothing has changed, the Linux commands are the same:
As you (might) know from Ravel's recipe, during the DEX installation procedure the program does get launched and you are required to click away/ignore a couple of windows/dialogs and eventually exit the program. By that time you have not connected your mc3k or the UT61E to the raspi.
So you've exited DEX. Basically, DEX has been installed by now. But you still see a black window (terminal) on your desktop which is active. That's because Ravel programmed the installation script this way, very cleverly. Because, when you now plug a powered(?) device into the raspi's USB port, that terminal window will show live, return some feedback, that you have plugged a recognized device! This is fantastic! Usually it is a pita to have Linux recognize new hardware or to even find working third-party drivers (for the different Linux processor architecture: i386, x64, ARM, MIPS), but since we chose a USB2Serial adapter with FTDI chipset, the adapter is recognized by the raspi ARM kernel instantly without the need of installing a driver externally from the Logilink CD-ROM. Genuine Plug'n Play, if you will:
Now you can start DEX manually. When you choose UT61E from the DEX device selection dialog, you'll see that DEX has recognized the existence and availability of your raspi's serial port, too:

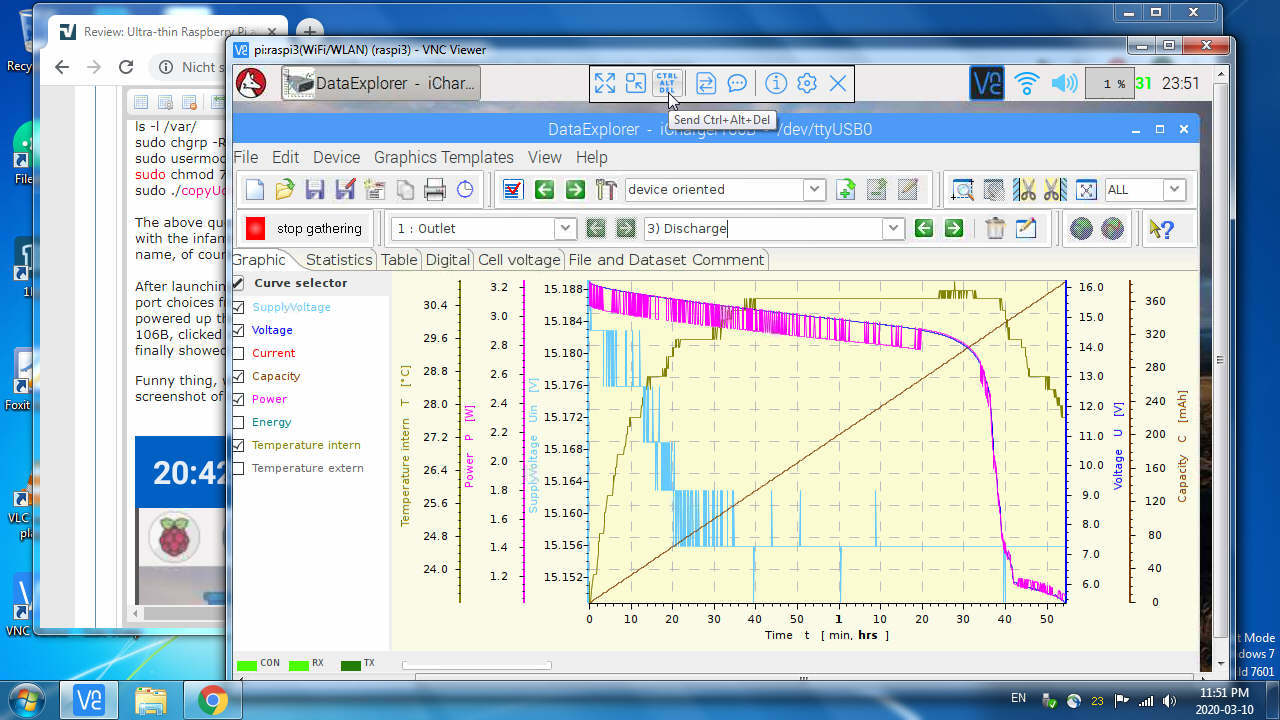
If you're familiar with DEX or DEX+UT61E from your other computer systems (WinXP/7/10, MacOS, Desktop Linux distro), then you'll know how to play. Click on 'Start gathering' and it's your time to play! As we can see, DEX logs the UT61E at the natural 2.0Hz sampling rate and with up to 3 decimals:
Since the UT61E is a so-called "22000 Count" DMM, there are (few) ranges where the DMM can display up to 4 decimals, for example "2.1357 V"; in these instances DEX would log only the first 3 decimals (2.135V). Apart from that minor limitation, i prefer logging UT61E through DEX software to other capable UT61E logging software (ABACOM REALVIEW 3.0, UltraDMM, UT61E Interface Program v4.01, a. o.). For example i like that the graphics tab shows all data points, not just a floating window of fixed time frame; my UT61E with unplugged probes and in the "mV"-setting shows some interesting pattern, maybe it is registering a ghost in the room:
With this post i hopefully managed to show you in sufficient detail what you need and need to do in order to setup your raspi for logging your UT61E through the original UNI-T RS232 cable.
All kudos go to the programming team of DEX, free open-source multi-platform software Made In Germany :kiss:
EDIT: FYI this thread can also be reached under the easy-to-remember URL http://tinyurl.com/mc3k-raspi
Here, in my 3rd post regarding raspi & UT61E, i am finally showing how it's done (Matthew 32:55)! :twothumbs
The other day Raspbian Jessie ("Raspbian 8") got upgraded to Raspbian Stretch ("Raspbian 9") and the recommended procedure is to install the OS from scratch on a blank formatted microSD card, which i did. After some unimportant personal customization of the raspi desktop ("PIXEL") preferences/settings/configuration, such as enabling SSH and VNC Interfaces, the only thing i installed as a must-have was the Hardware Key script from post #18 Part II.
Then i edited the DEX installation text file, because DEX3.3.0 final version was released in the meantime, and used it to install DEX3.3.0. After the installation, i connected the (turned on) UT61E to the raspi through my expensive USB2Serial adapter; much to my astonishment, Raspbian 9 recognized the plugging without a reboot, and so did DEX! After choosing UT61E from the DEX device selection dialog, everything was good to go and logging UT61E on the raspi has been working flawlessly since.
If you are interested in photos/screenshots which i took along the way, here we go:
The (famous) German trading company Logilink has been offering various USB2Serial adapters in the past but only recently decided to release an ultimate hassle-free adapter to replace all previous products in that product category. That ultimate adapter is much more expensive but guaranteed hassle-free because it uses the FTDI chipset series (FT231X, FT232RL).
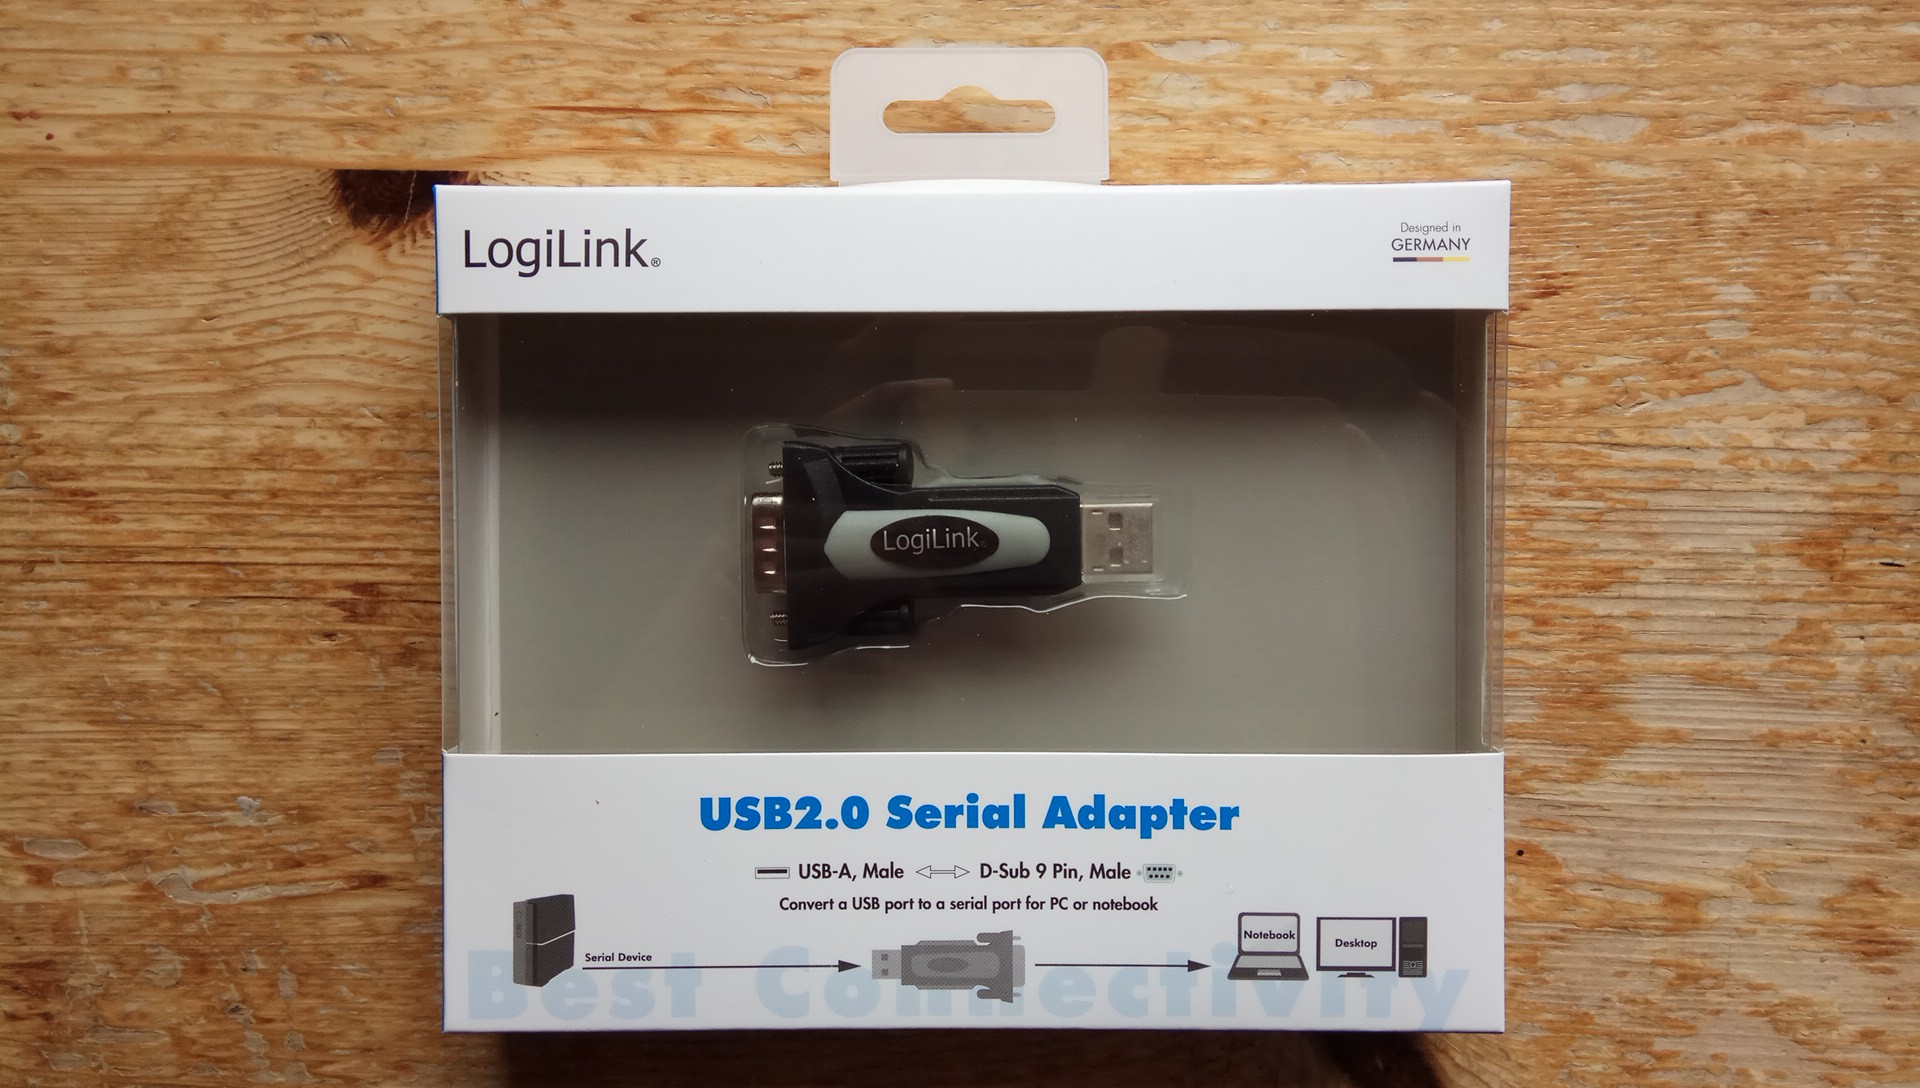
I found an online retailer who offers the product at 9.45EUR shipped, so i pulled the trigger-happy. See what i got for the money, front face of the packaging says "Designed in GERMANY" lol yeah whatever:
The definite manufacturer's model designation is "AU0034" and the stuff was "Manufactured in P.R.C." there we go:
I had looked hard on Aliexpress to find a FTDI-chip USB2Serial adapter as low-priced as possible but they were all between 7-8US$/pc, looked awfully cheap build quality, and with no support whatsoever. I am absolutely pleased with the Logilink build quality and the wealth of package contents:
Note that "Chip FTDI" is the most essential and decisive characteristic of this USB2Serial adapter! You're on your own if you buy a USB2Serial adapter with some other chipset like CH340/341/HL340/PL2303 for your raspi:
The only thing cheap about the Logilink product are the label stickers on the adapter. They hardly stick on the rubber-plastic surface and they don't even fit properly into the recesses. Shame on the geman designers:
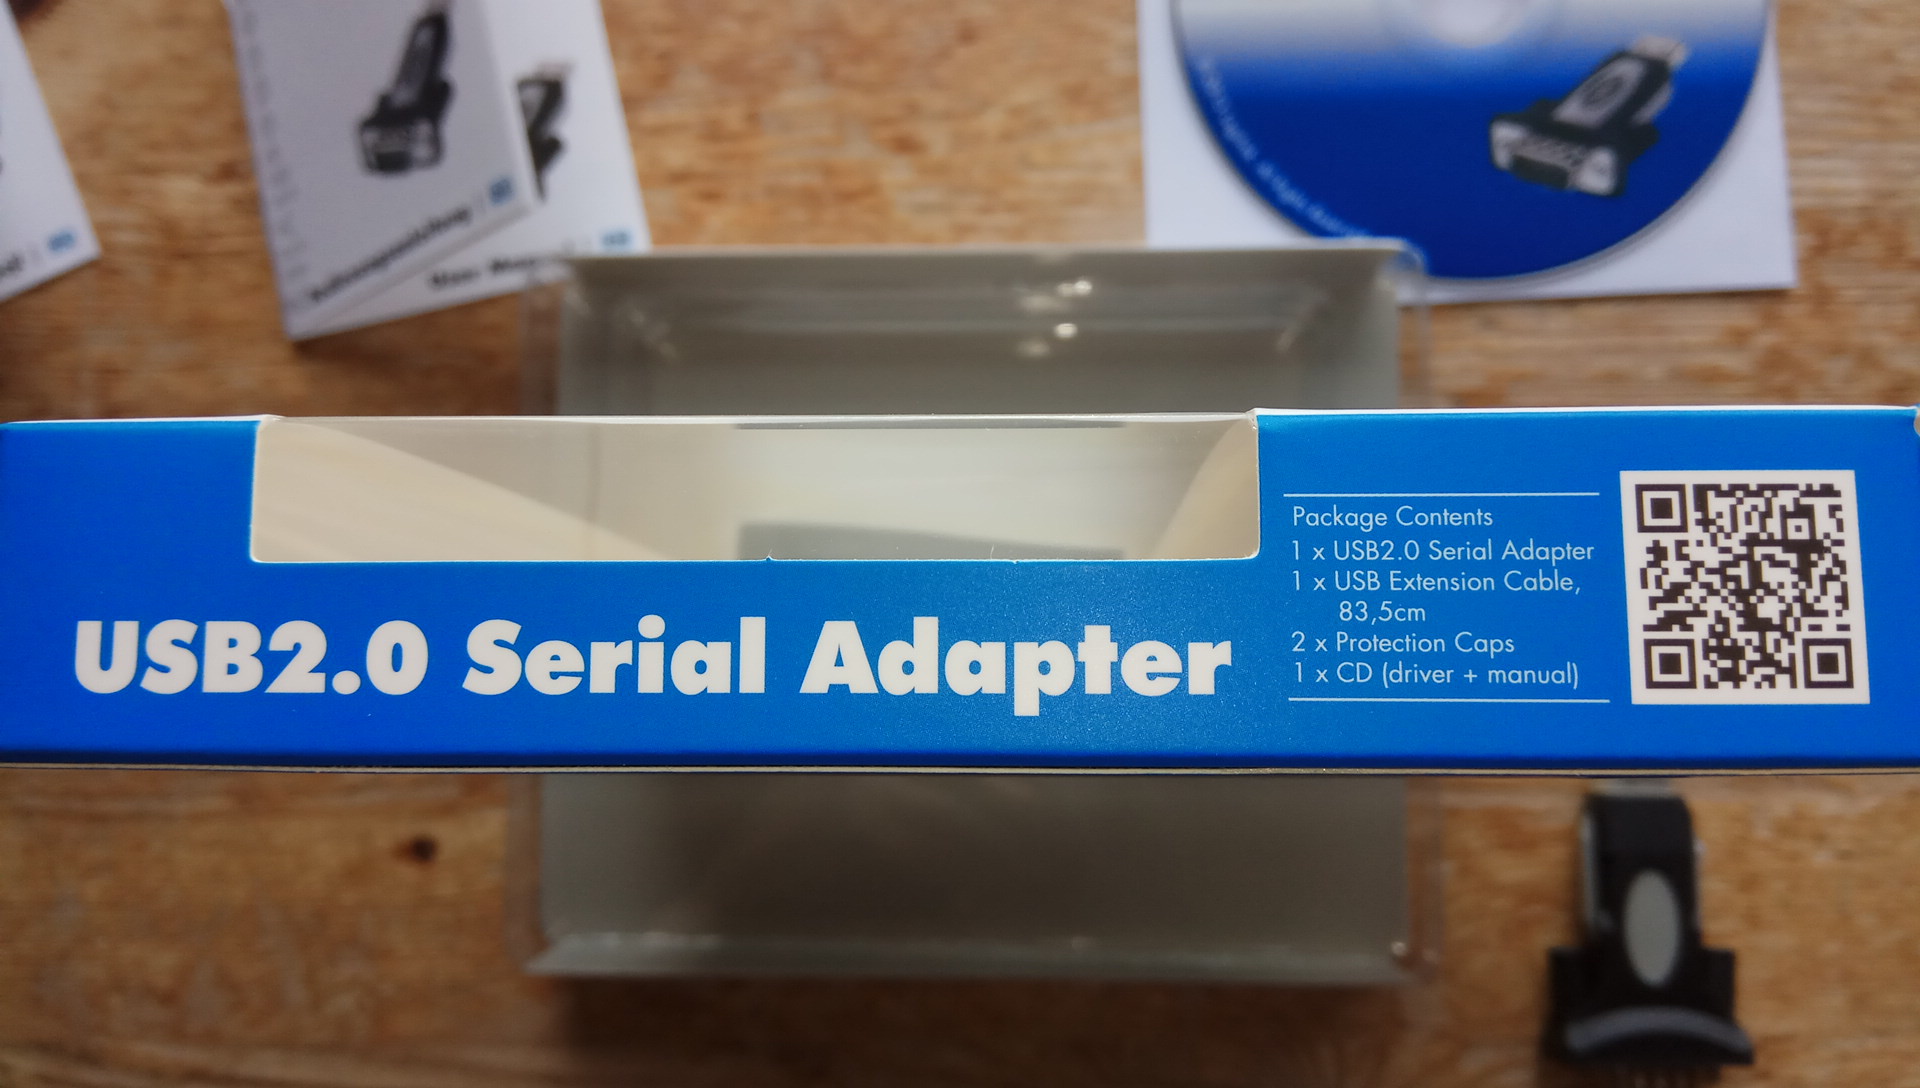
Here a photo with the complete contents, nice huh. The printed instruction manual is rather detailed, 8 pages (per language) with lots of screenshots. Both the adapter and the included USB extension cable come with clear plastic protection caps on the USB A plug. The product has a manufacturer's website, a product webpage (with Downloads, Technical Support phone/email), all included in the 9.45€ so to speak:
The pressed CD-ROM is labeled "©2015 Logilink", which must be the initial release date of the product as "AU0034 v1.0" because the CD content is much newer than that, March 2017 wow:
All right, this is what the adapter looks like plugged into the USB extension cable. Clear/transparent stuff is easily lost, so i put some red tape on the caps for improved visibility hh. The caps fit nicely on other USB A male plugs, for example on my USB mini microfone (for the raspi/alexa application):
Do we need the USB extension cable? Why yes because we don't want to strain the raspi's USB female port with unnecessary mechanical load/momentum. Because of the product thinness, the USB male plug rides several millimeters lower than the USB female port. It would need some mechanical support for matching heights:
Instead, we make use of the included USB extension cable, no problem. Also see how massive the UT61E RS232 plug is. All fitments are tight and perfect, and we don't need the opposing integrated pin screws wtf:
Why would you want to leave out the USB extension cable? When you buy a Chinese USB2Serial adapter from Aliexpress or Ebay, a free USB extension cable might not be included, beware. Because of all the mechanical load/momentum on the USB port, it is imho really not a good idea not to connect the adapter with a USB extension cable to the raspi:
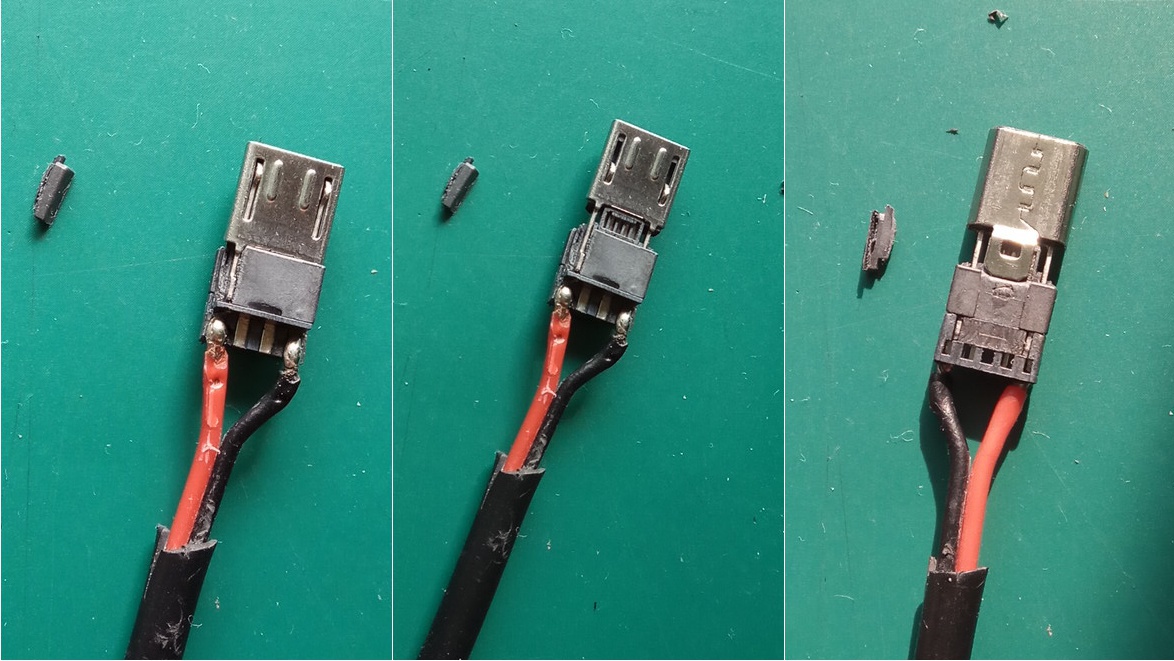
We don't need to power the raspi through the mc3k USB power output port, i know i know. Never mind huh. But i like this configuration with the very short USB power cable. Note that recent UT61E product packaging comes with the (formerly optional!) UNI-T USB data cable instead of the depicted UNI-T RS232 data cable. Don't wait for DEX to support the UNI-T USB data cable but go buy the UNI-T RS232 data cable plus the FTDI USB2Serial adapter, if logging UT61E on raspi is very urgent and important for you, that's my advice. I will assume that most UT61E owners in the world do own the RS232 data cable already, because that's what UNI-T factory had been shipping for most of the time since the UT61E initial release to market 7+ years ago. By the way, i once bought and tested the UNI-T USB data cable and it produced data sets with missing data points; from that experience i don't rely on the USB cable anymore but prefer the original old RS232 data cable. There you have it:
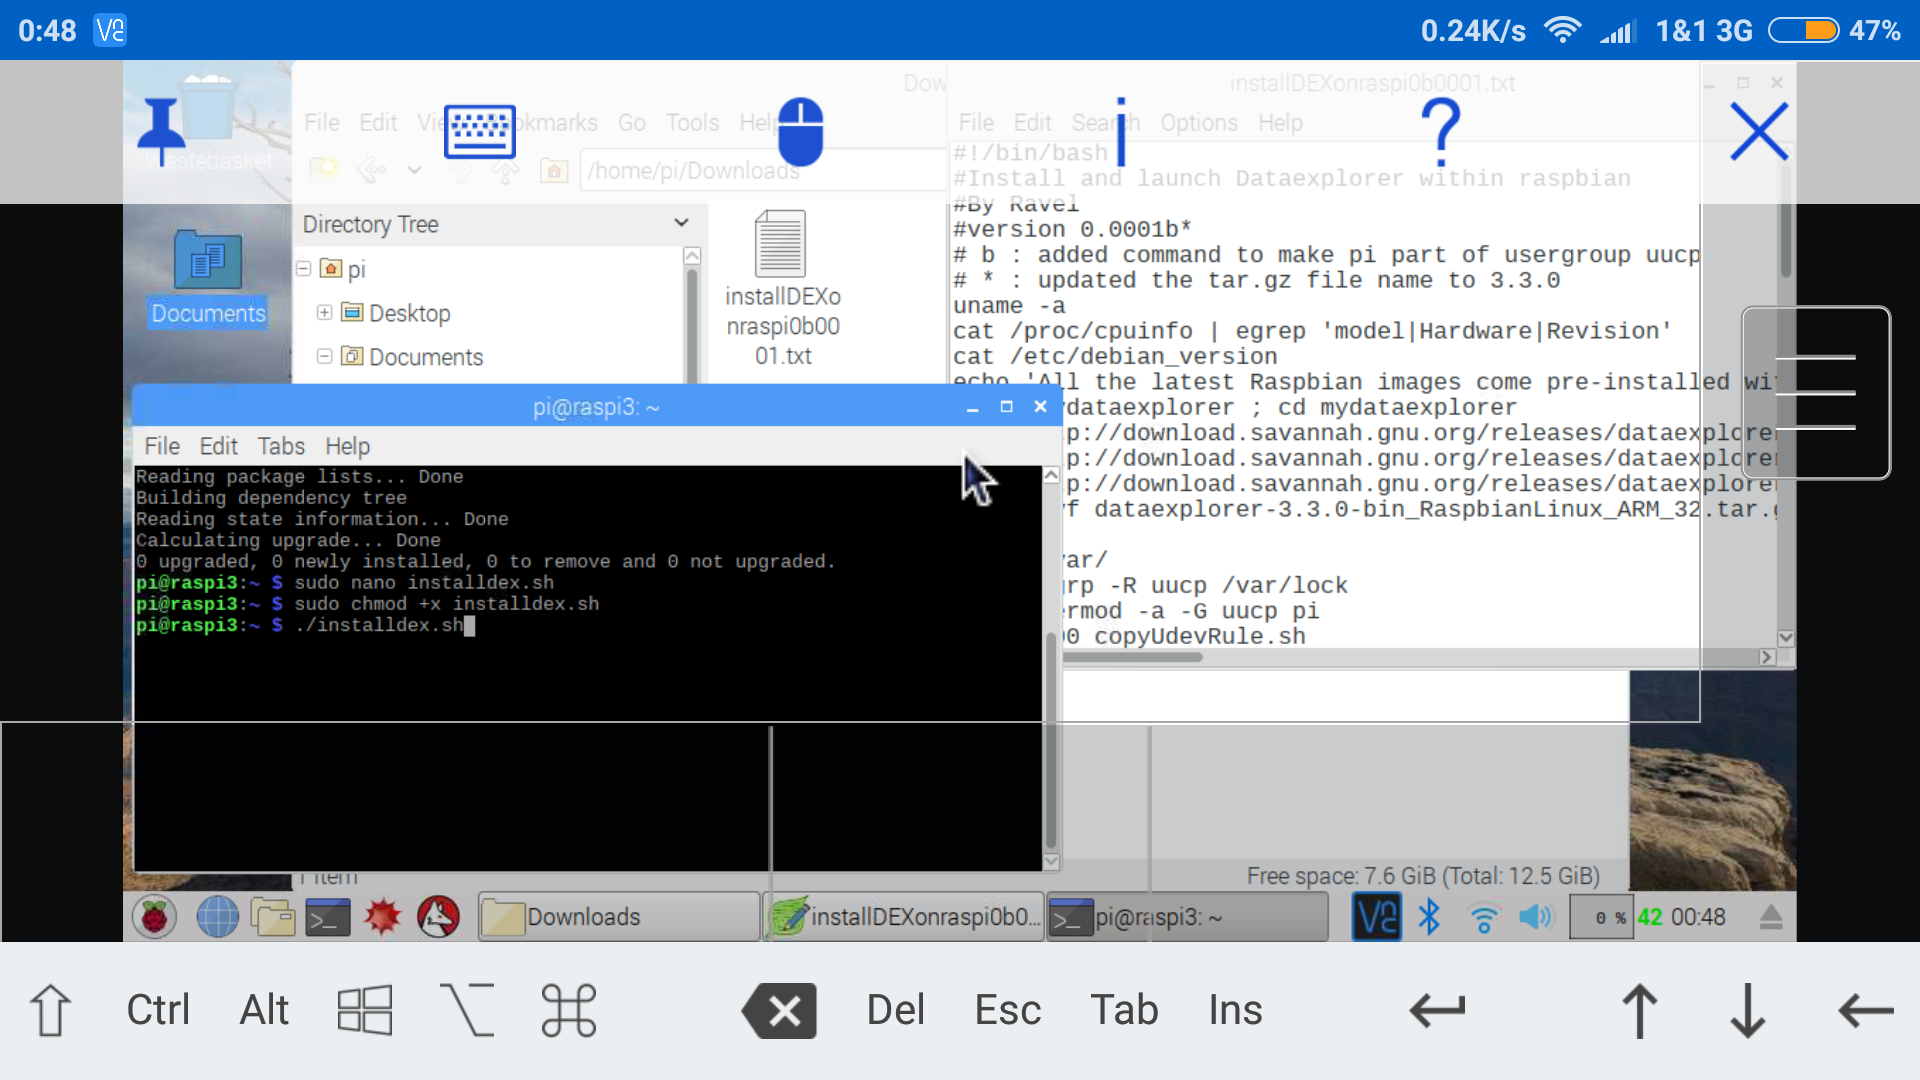
In this thread we already covered how to install DEX on a freshly setup raspi (Jessie), didn't we? I used procedure Alt2 on my freshly installed raspi (Stretch). I edited Ravel's original v0.0001b recipe (which was valid for DEX3.2.9) this way, now being valid for installing DEX3.3.0:
Other than that, nothing has changed, the Linux commands are the same:
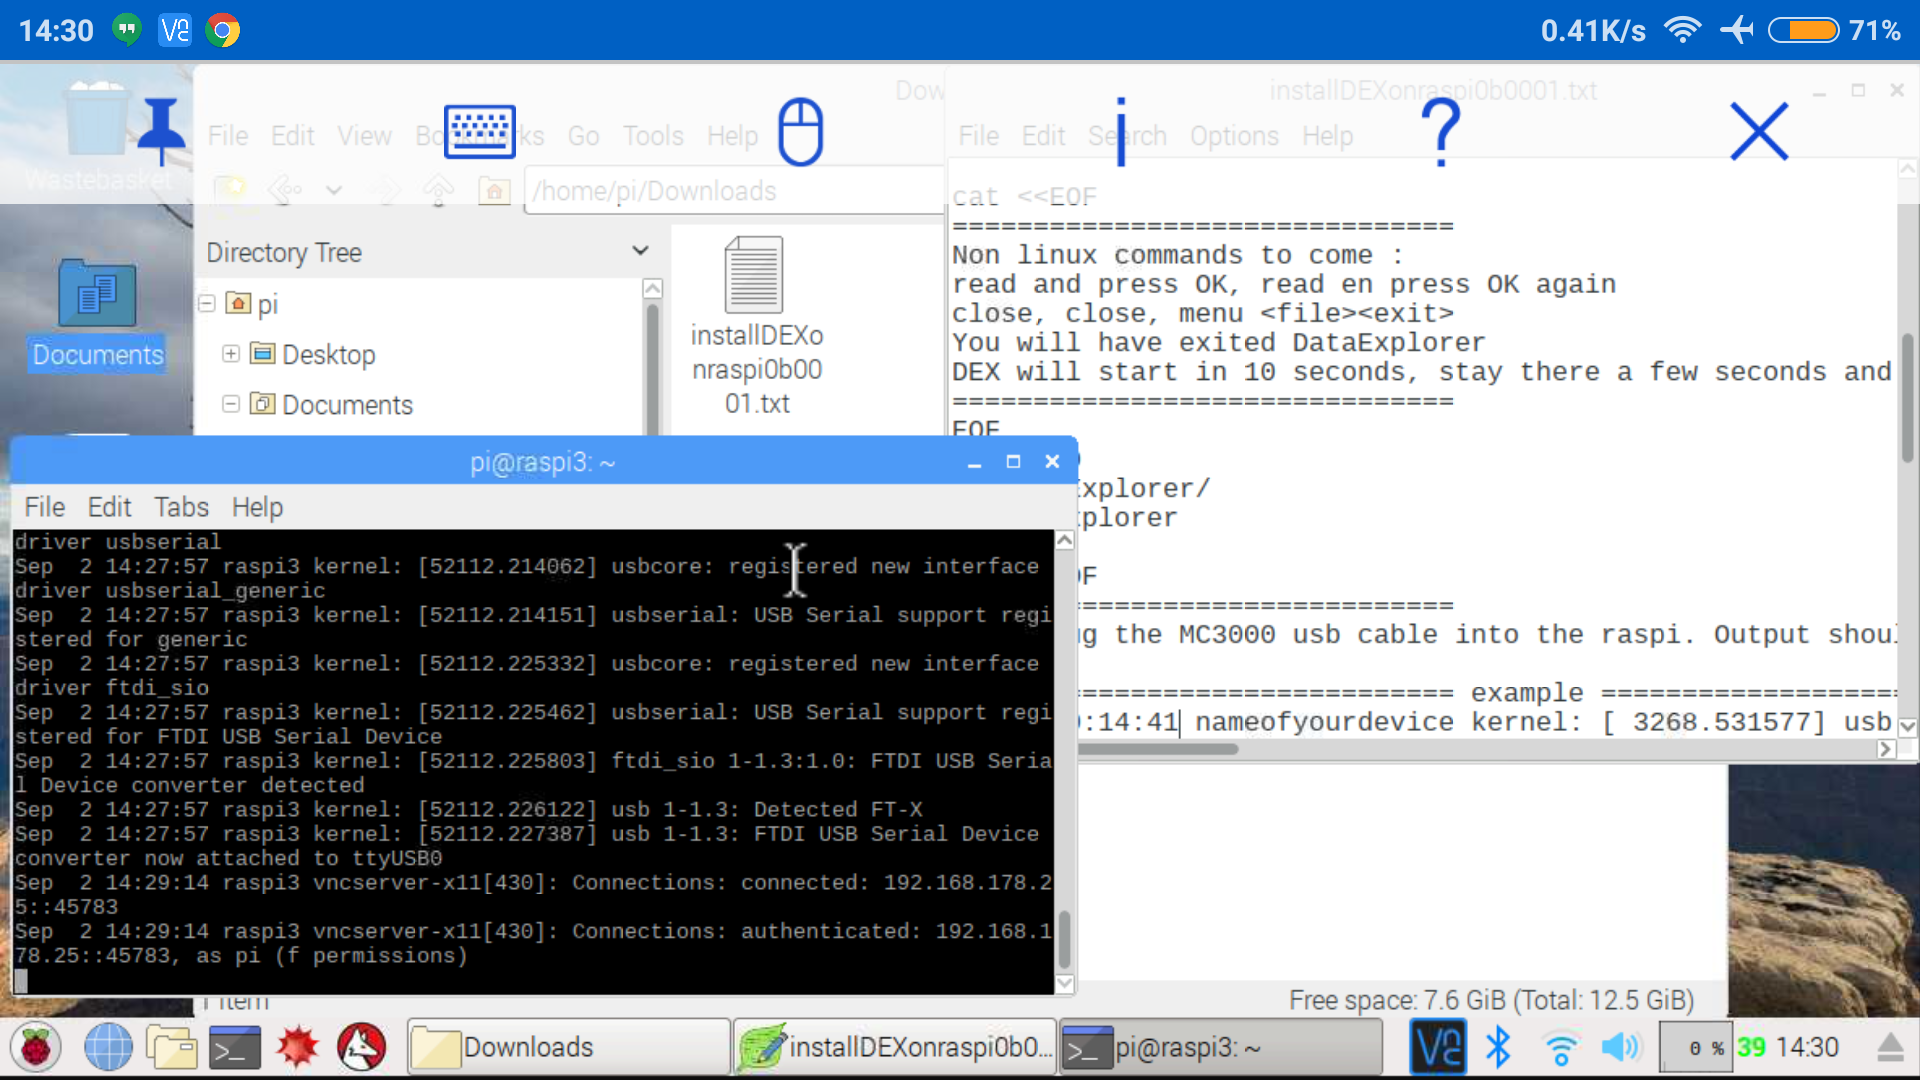
As you (might) know from Ravel's recipe, during the DEX installation procedure the program does get launched and you are required to click away/ignore a couple of windows/dialogs and eventually exit the program. By that time you have not connected your mc3k or the UT61E to the raspi.
So you've exited DEX. Basically, DEX has been installed by now. But you still see a black window (terminal) on your desktop which is active. That's because Ravel programmed the installation script this way, very cleverly. Because, when you now plug a powered(?) device into the raspi's USB port, that terminal window will show live, return some feedback, that you have plugged a recognized device! This is fantastic! Usually it is a pita to have Linux recognize new hardware or to even find working third-party drivers (for the different Linux processor architecture: i386, x64, ARM, MIPS), but since we chose a USB2Serial adapter with FTDI chipset, the adapter is recognized by the raspi ARM kernel instantly without the need of installing a driver externally from the Logilink CD-ROM. Genuine Plug'n Play, if you will:
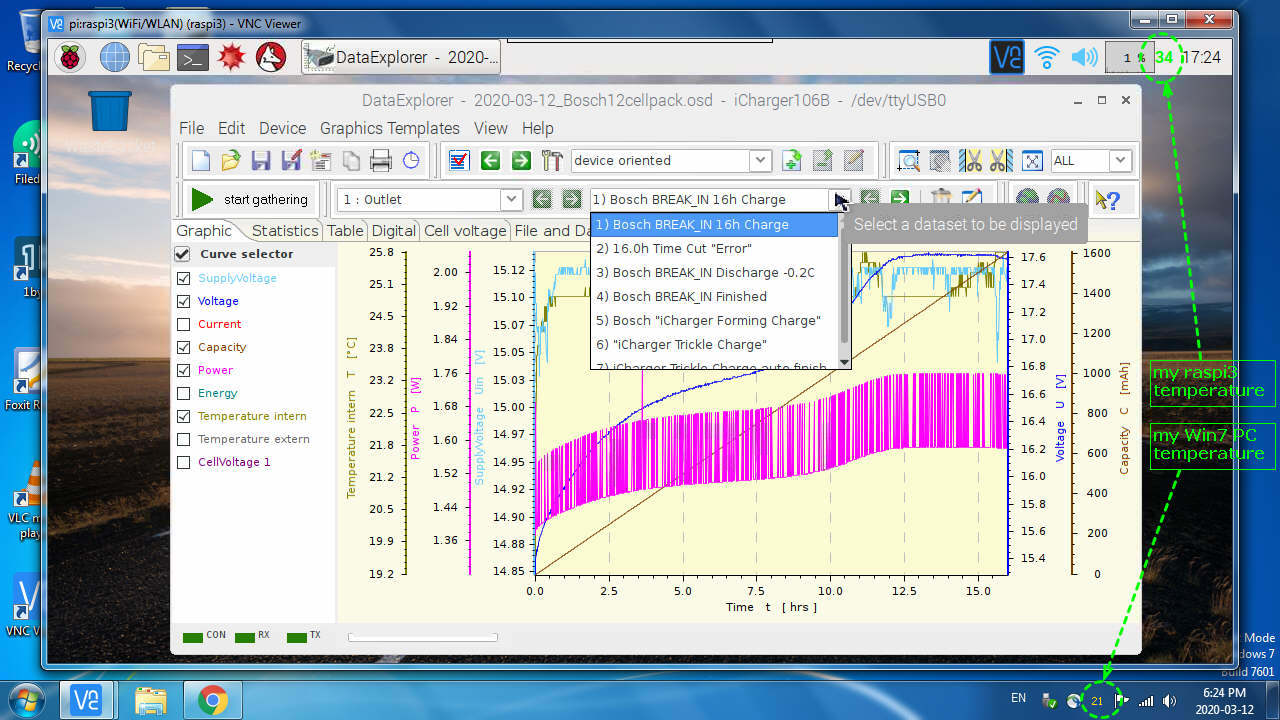
Now you can start DEX manually. When you choose UT61E from the DEX device selection dialog, you'll see that DEX has recognized the existence and availability of your raspi's serial port, too:
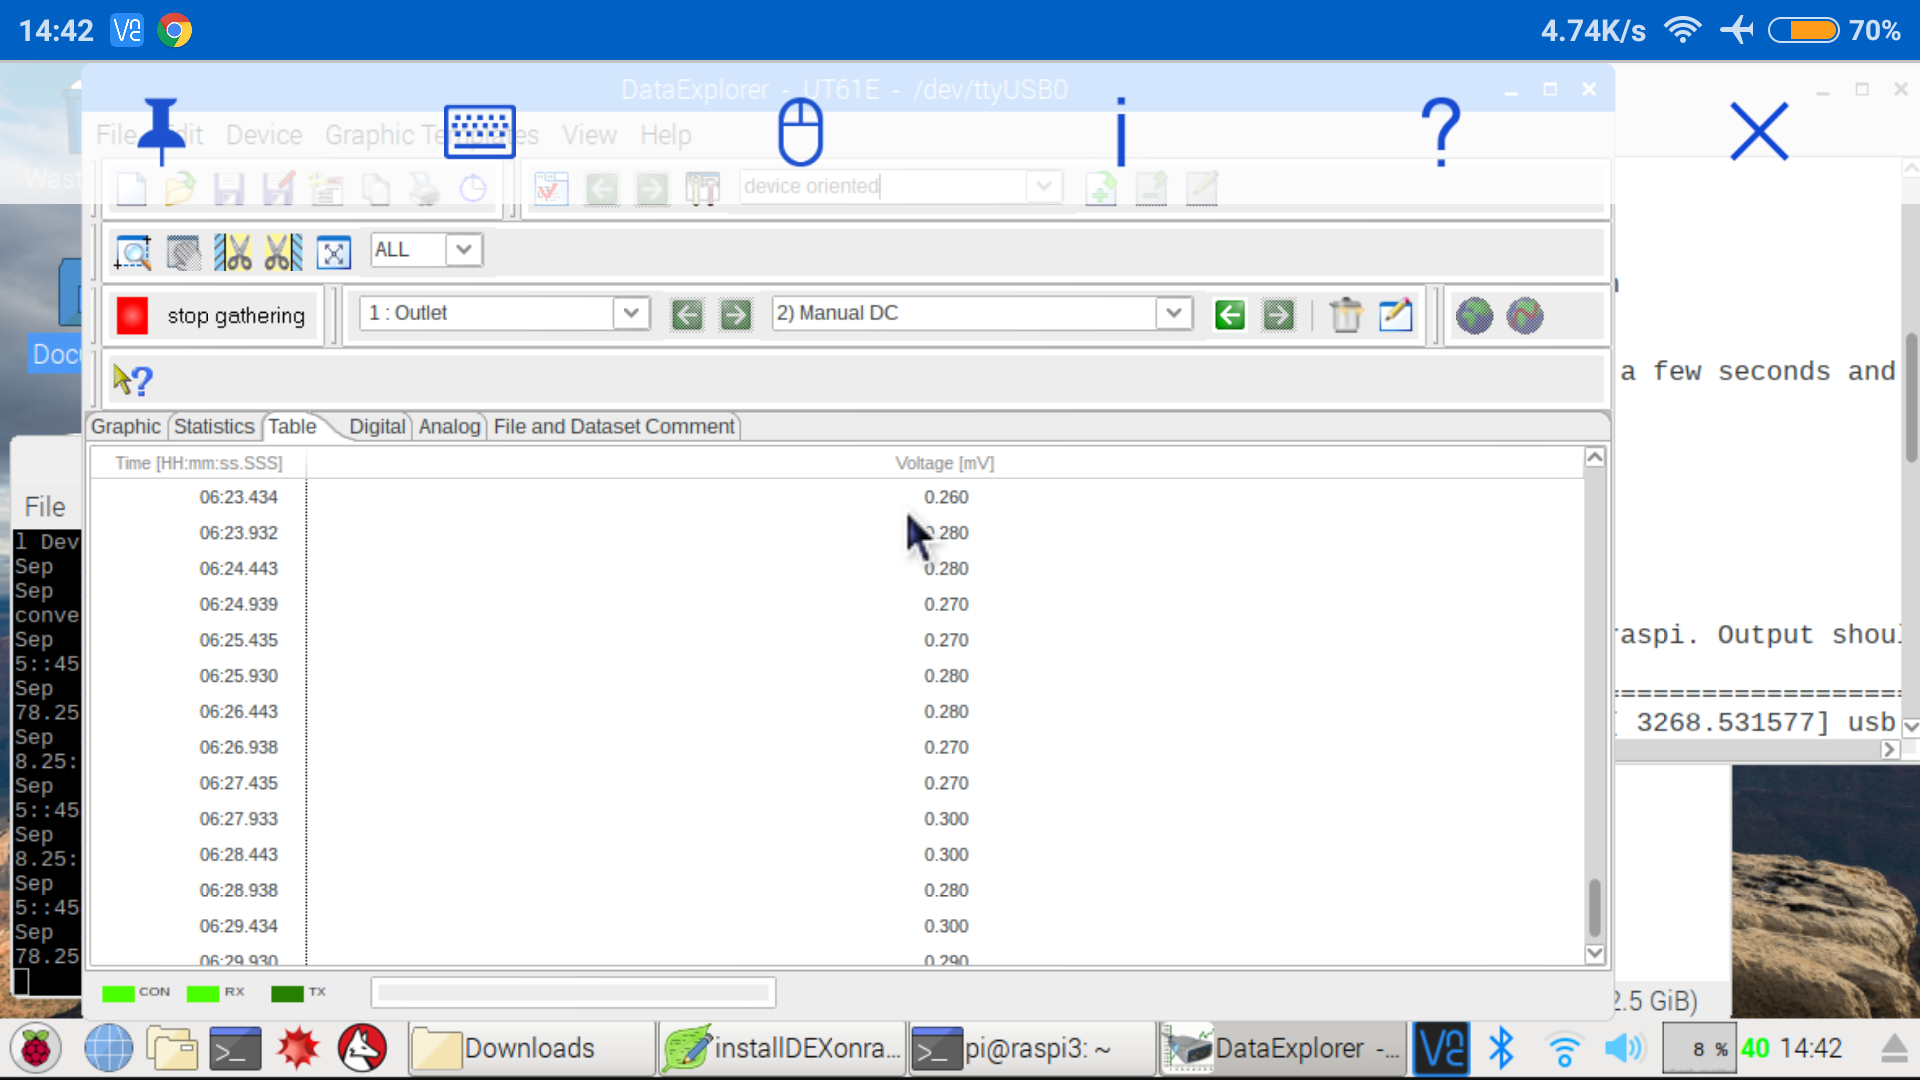
If you're familiar with DEX or DEX+UT61E from your other computer systems (WinXP/7/10, MacOS, Desktop Linux distro), then you'll know how to play. Click on 'Start gathering' and it's your time to play! As we can see, DEX logs the UT61E at the natural 2.0Hz sampling rate and with up to 3 decimals:
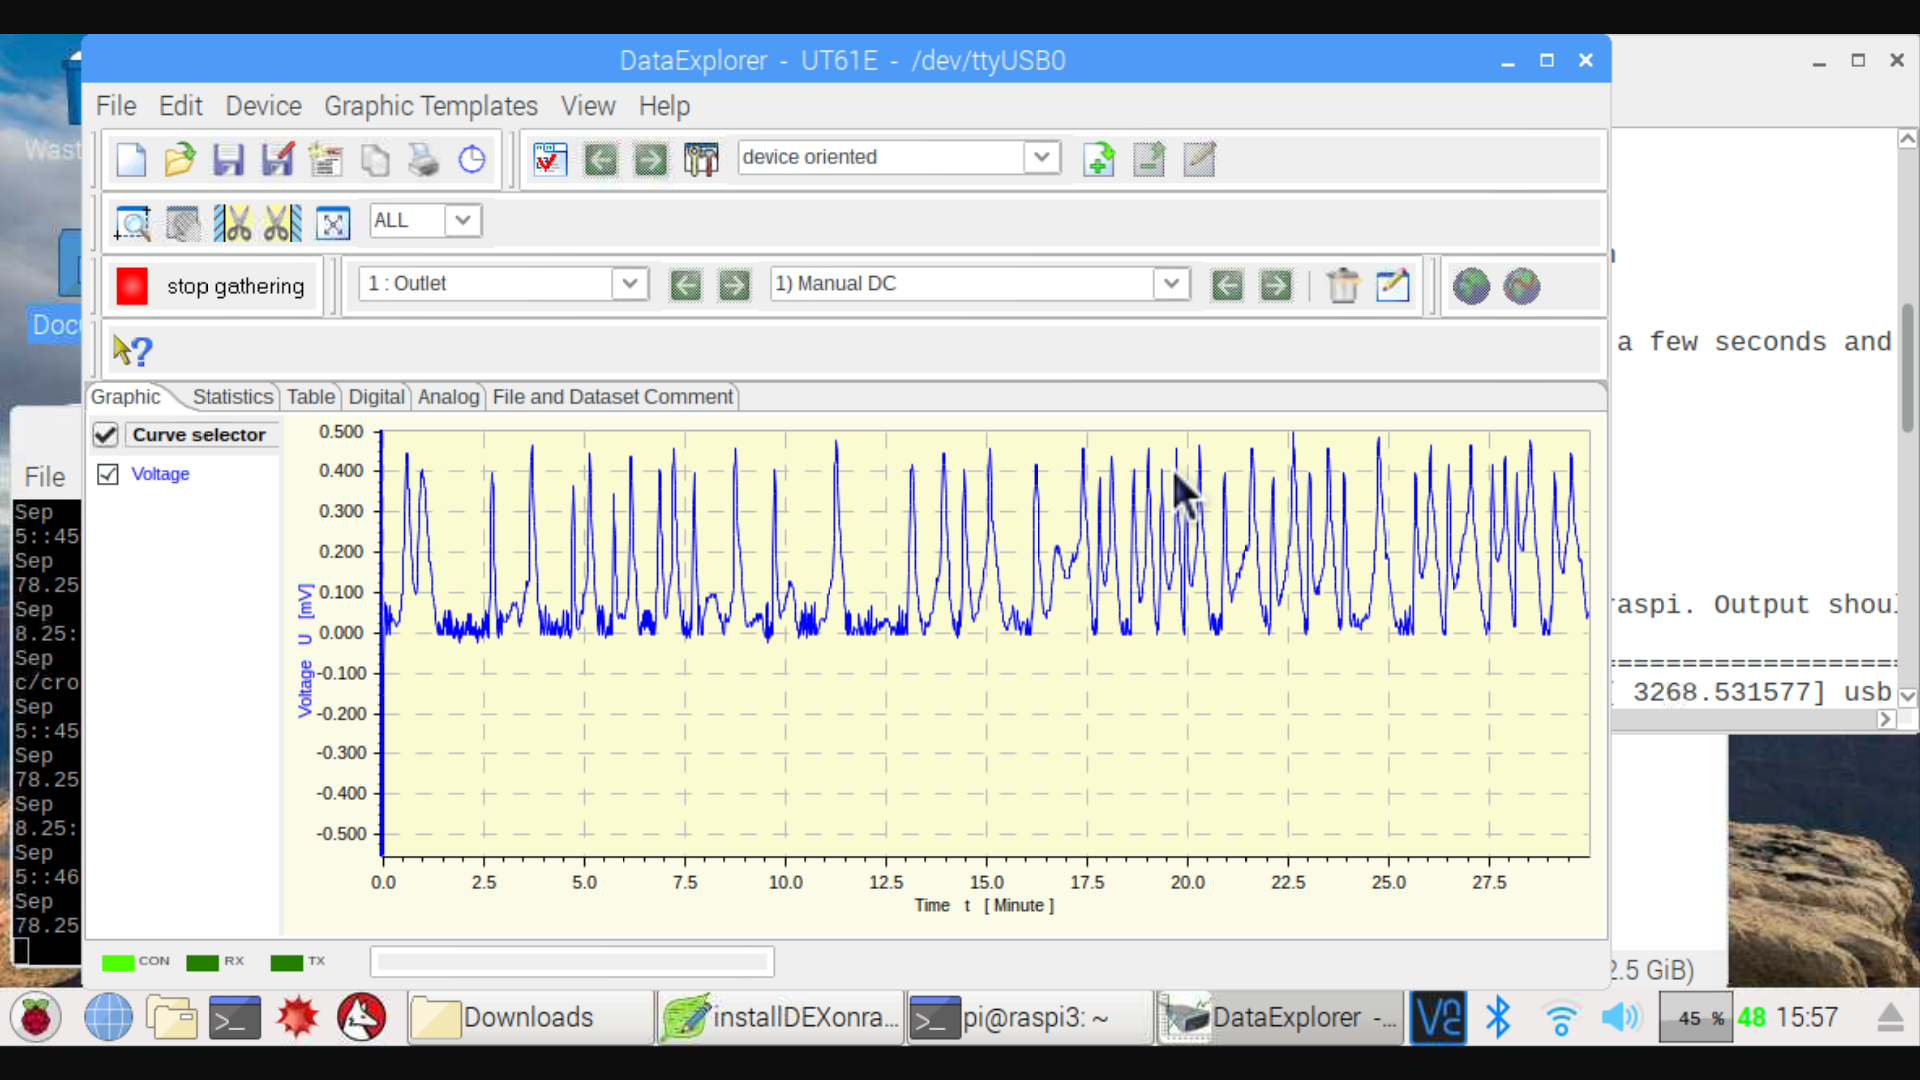
Since the UT61E is a so-called "22000 Count" DMM, there are (few) ranges where the DMM can display up to 4 decimals, for example "2.1357 V"; in these instances DEX would log only the first 3 decimals (2.135V). Apart from that minor limitation, i prefer logging UT61E through DEX software to other capable UT61E logging software (ABACOM REALVIEW 3.0, UltraDMM, UT61E Interface Program v4.01, a. o.). For example i like that the graphics tab shows all data points, not just a floating window of fixed time frame; my UT61E with unplugged probes and in the "mV"-setting shows some interesting pattern, maybe it is registering a ghost in the room:
With this post i hopefully managed to show you in sufficient detail what you need and need to do in order to setup your raspi for logging your UT61E through the original UNI-T RS232 cable.
All kudos go to the programming team of DEX, free open-source multi-platform software Made In Germany :kiss:
EDIT: FYI this thread can also be reached under the easy-to-remember URL http://tinyurl.com/mc3k-raspi
Last edited:


 , thru the VNC Viewer app. Here a screenshot of my Android smartphone (held horizontally):