
Derek Dean
Flashlight Enthusiast
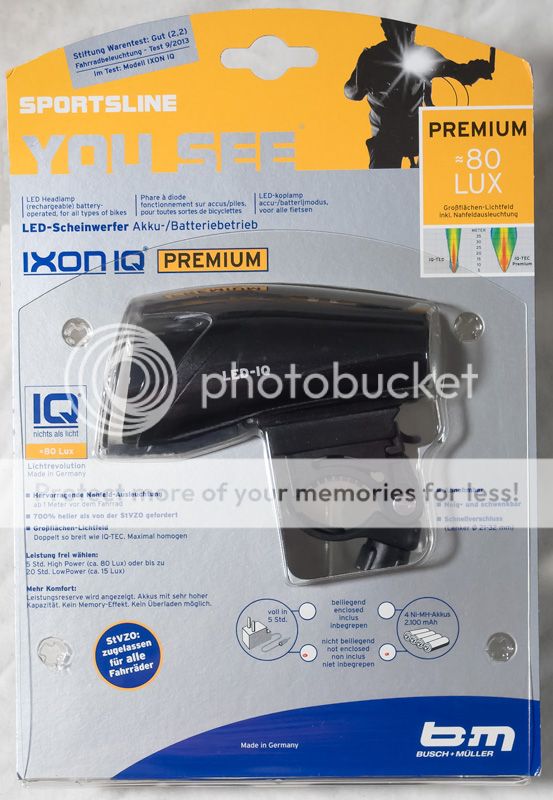
This is just a quick impression/review of a bicycle light I received today, the Busch & Muller Ixon IQ Premium bicycle headlight.
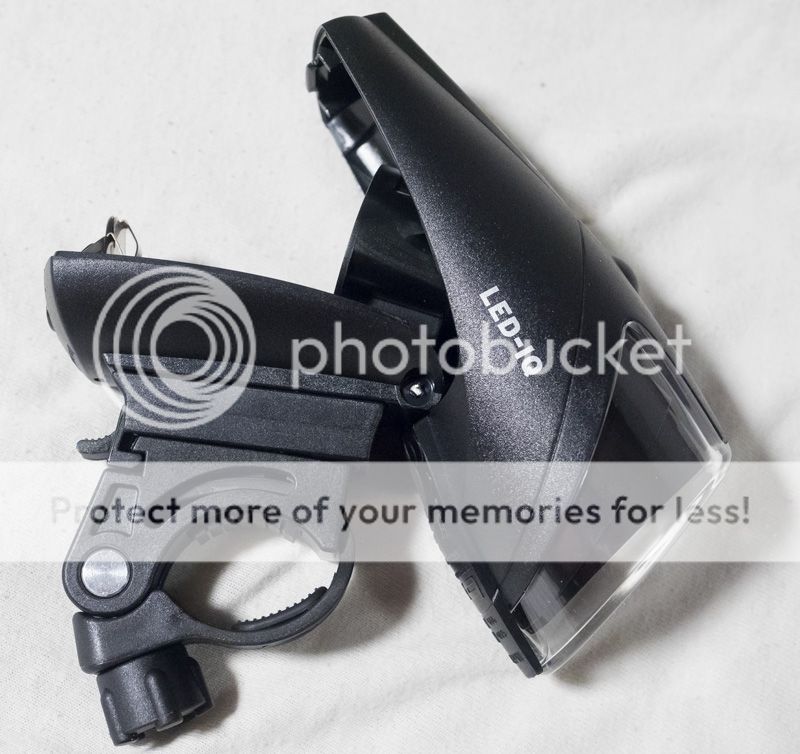
The light comes in an easily opened/re-closed plastic package, which contains the light, the handlebar mount, an anti-dazzle glare shield (more on this in a moment), and the instructions.
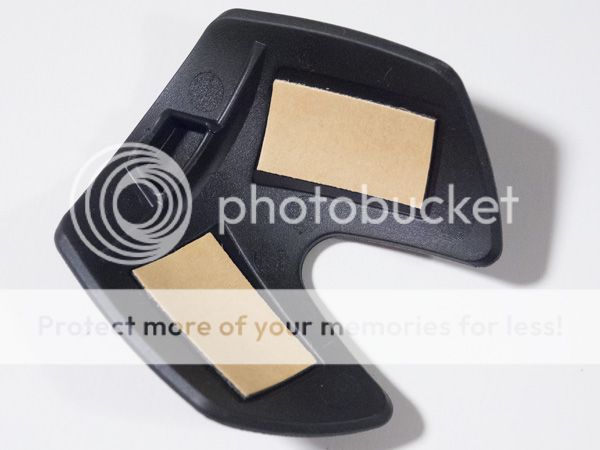
The inclusion of the anti-dazzle glare shield was a nice surprise for me. In the few reviews I've seen of this light, it was always mentioned that it really was necessary to have the glare shield in place, but that it was optional, and most felt that it should have been included. It seems that B&M listened to their customers and now include it with the light. It attaches to the light via two adhesive strips on the back.

By the way, I ordered my light from RoseBikes in Germany, so it may be that the anti-dazzle glare shield is not included in the US version found at Peter Whites Bicycles.
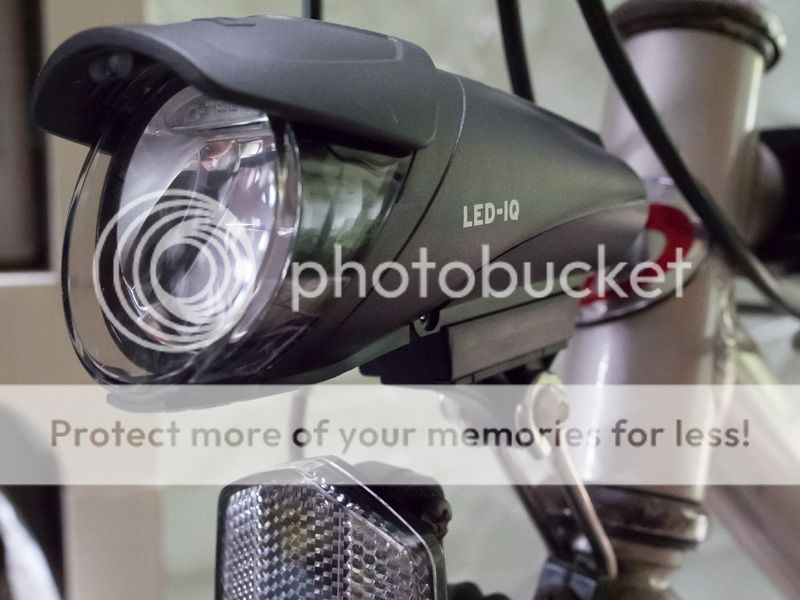
Since I can't mount this on the handlebars (because of the bag), I bought the optional Fork Crown mount (approx. $13). It's very sturdy and has the same clip-on piece that mates to the light, making it easy to mount and unmount the light. You will need your own nut and bolt to attach the fork crown mount to the bicycle, as they aren't included.

The IXON IQ Premium is primarily made of plastic (including the clear front cover) and is very light, 90 grams without batteries, 200 grams with 4 Eneloops installed. It's approx. 4 3/4" long by 2" in diameter.

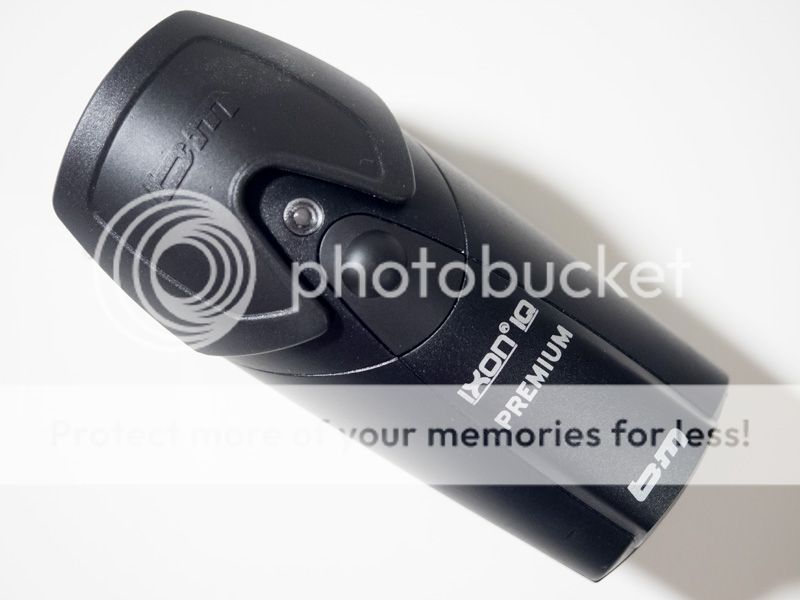
On top is the main switch, which has a good, solid, and firm feel. It seems to be made from hard rubber. It won't accidentally turn on. To turn ON/OFF, you hold the button for 1 second. To change from low to high or high to low you simply click the button. The light appears to have a memory, as it will come on in the last selected mode. This memory carries over when changing batteries.
Above the button is an LED indicator light.
Solid Green = Full Batteries, High Mode
Flashing Green = Batteries getting low, light will shift to low/eco mode soon.
Flashing Red/Green = Low/Economy Mode
Solid Red = Recharge batteries.
It's not a real bright LED indicator, and shouldn't be a distraction, but does provide at least basic information, which, although not very specific as far as battery strength goes, at least gives you something to keep from being left in the dark.
On the bottom of the light is the Charge Port, covered with a rubber stopper which fits securely into place when the port is not in use. The light is designed to be used with an optional charger (approx. $35), which plugs into the port to charge the batteries in the light. Since I've got a Maha/PowerEx C9000 AA battery charger, there was no need for me to buy the optional in-light charger.
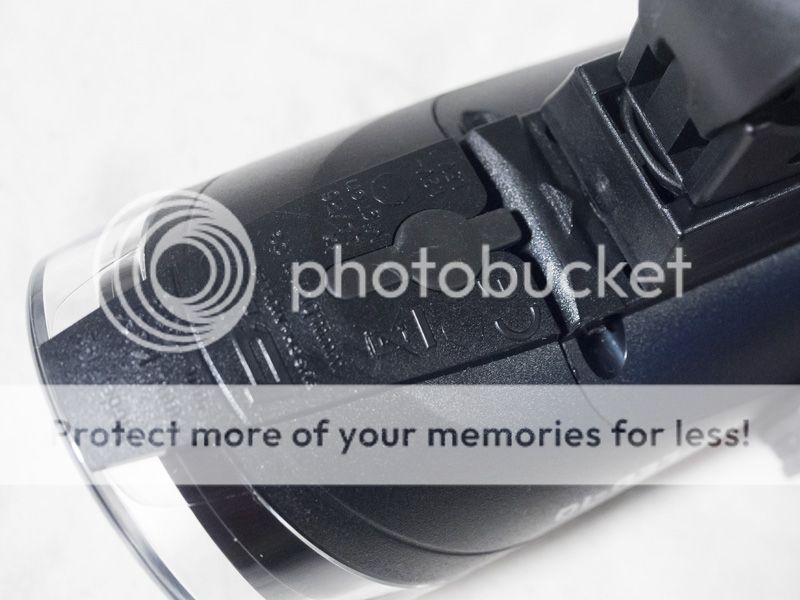
Also on the bottom is the mount connector piece which fits in either the included handlebar mount or the option fork crown mount.
On the back of the light is the battery compartment OPEN button. It's quite possible this could prove to be the weak link of this light. There have been several reports of the button breaking, rendering the light basically unusable, and if you look at my closeup, you can see why it might break so easily. The button itself is pressing again a plastic spring. Hmmmmm.
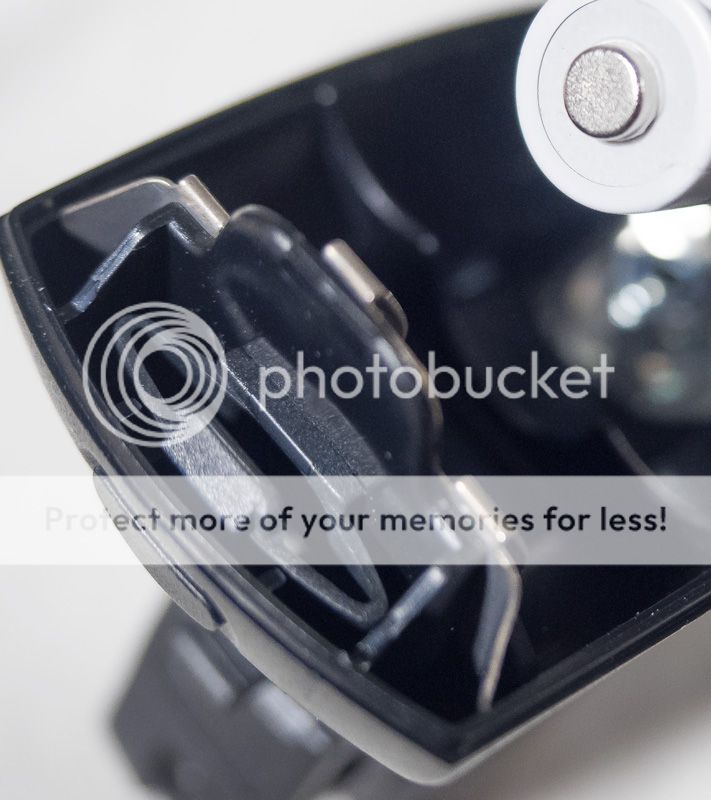
If you use the optional charger and charge the batteries inside the light, this might not be a problem, but for folks like me who prefer to charge their batteries in an external charger, this could be an issue. Time will tell. At least the light comes with a 3 year warranty.
My other concern is that there are no o-rings around the battery compartment, which uses only a tongue and groove system in the plastic to keep moisture out. I might consider using tape to seal it up between battery charges.
By the way, some folks mentioned that they felt putting the batteries in was a bit "fiddly". I see what they mean, but it's not that bad, and only requires doing it once or twice to understand how it's done.

Ok, that's enough with the physical specs, let's get down to the meat of the matter. The reason I bought this light was it's beam pattern. I spent quite awhile reading reviews, watching u-tube videos, and scouring the web for lights that would provide the kind of beam pattern I wanted.
I bicycle primarily on a bike path between work and home (some lit, some not), usually coming home at night. For the last 6 years I've used a Fenix L2D, which worked for helping to me visible to other folks, but tended to blind anybody coming toward me, so I decided to search for a light that was actually designed for bicycle use, more specifically, one designed for use in urban areas.
To me, that would be a light that would give me not only a superior beam pattern for lighting up the bike path, both near AND far, but also one that would NOT blind oncoming traffic, whether it's other bicycles, pedestrians, or when I'm out on the street, cars.
The other requirement, since I'm kind of "frugal", is that it be affordable (around $100, less would be better).
I've been happy to see some new lights becoming available recently that are close to fitting my requirements. The Fenix BC30 looks quite promising, but I'm not sure the beam pattern fits my needs. The new Specialized lights look great, with both low and high beams, but are out of my price range.
I came close to getting the Philips Saferide, but after comparing many beam shots on-line, I finally decided on the B&M IQ Premium.
The IXON IQ has been available for a few years, and is known for it's even illumination from the front of the bike to 50 yards or more in the distance, along with it's hard horizontal cutoff to keep from blinding on-coming traffic.
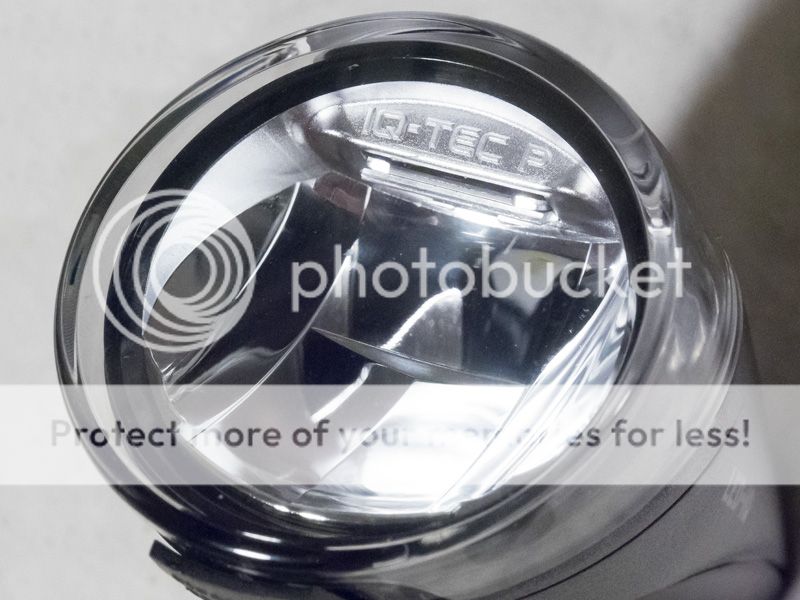
The new "Premium" version refers to a new reflector that not only provides even illumination both near and far (more even than the old IQ with less hotspots), but has a beam that is wider than the older IQ non-premium version, giving more illumination to the sides, but still providing that hard horizontal cutoff.
The IQ Premium is a 2 level light, providing approx. 17 lux for 20 hours or 80 lux for 5 hours. In my bathroom bounce test, the 17 lux low was a bit brighter than my ZL SC52w's 50 lumen setting (M1), while the 80 lux high was approx. equal to the SC52w's 280 lumen setting (H1 using an Eneloop AA).
The LED tint is a bit cool, but not bad (I did end up filtering it, see below). I checked visually for PWM and couldn't detect it on either level.
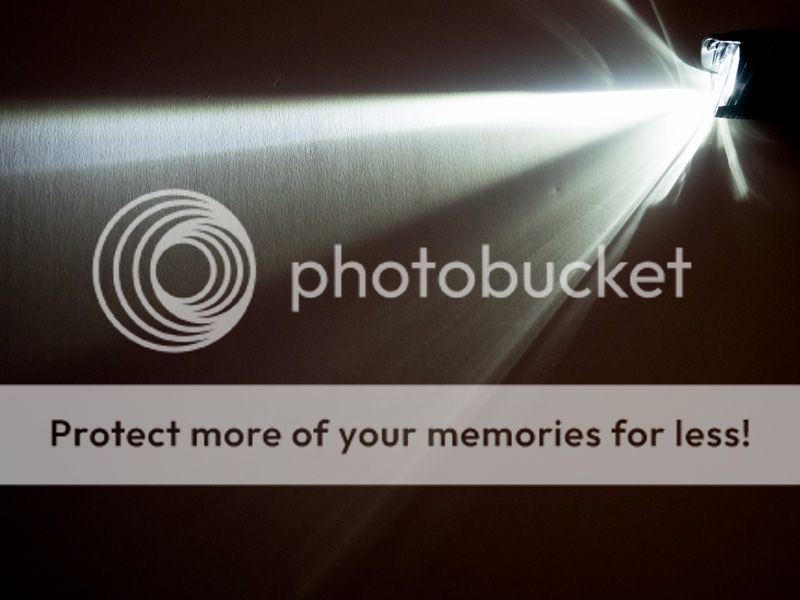
Ok, on to some beam shots. White balance set to auto and no filter on the light, these are just to show the beam profile. This first one has the beam directed to the left along a white wall, showing the sharp horizontal cutoff and how they've directed light down in front of the bike, but not too bright.
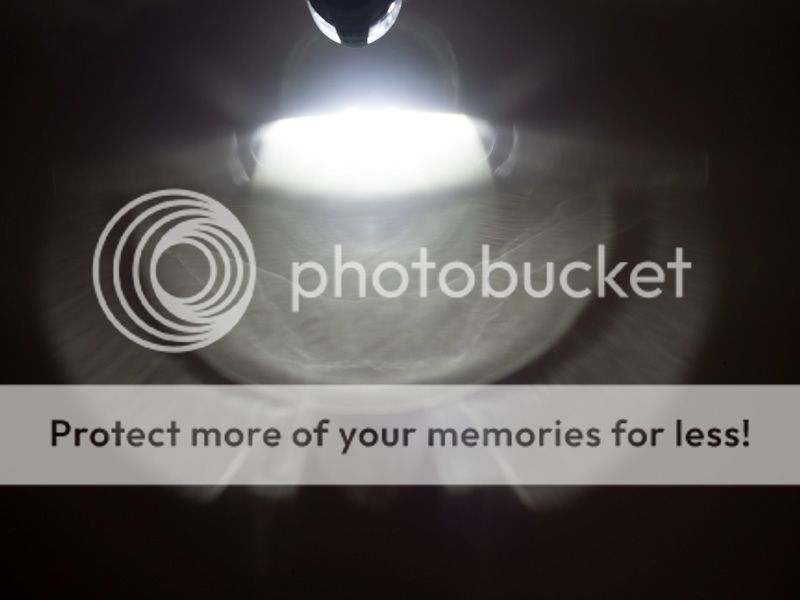
This second one was shot with the light about 2 feet away from, and directly facing the wall. It shows how odd a shaped-beam is, when seen like this. The beam is meant to be spread out in front of the bike, not shown on a white wall, so in reality, this is a good sign of things to come.
Now, on to a couple of quick outdoor beam shots. This first one was taken with the light in the HIGH 80 lux position (about 120 feet to the white step in the distance). This was shot with white balance to set to DAYLIGHT. The red bricks show the decidedly cyan cast, but it's not quite that bad in real life.
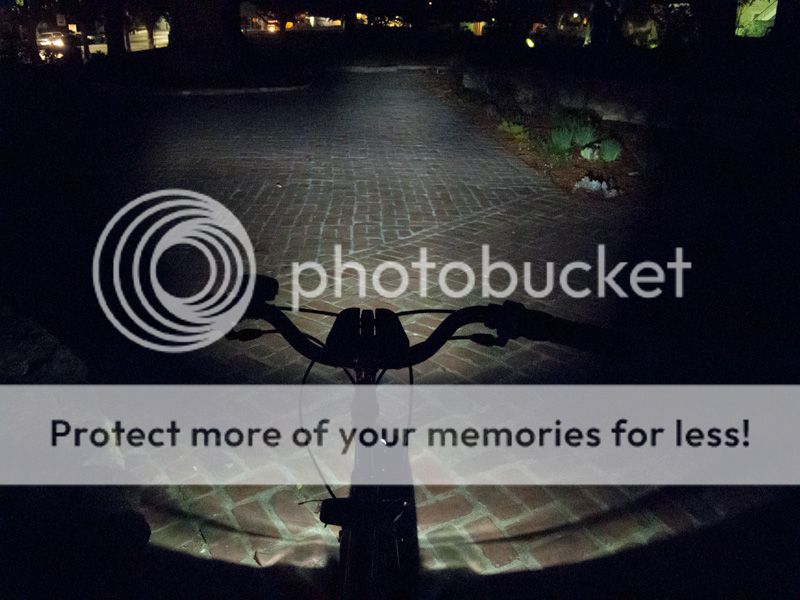
I'm VERY pleased with this beam profile. Exactly what I was hoping for, with an extremely even beam pattern from the front of the bike to over 100 feet away. By having the light in front of the bike the same intensity as the light in the distance, it really makes it easy to see clearly. And, when I went down to the end and looked back at the bike, it wasn't blinding at all. Just a light that was on, not particularly bright, just on.
However, after seeing that real life test, when I got home I did add a LIGHT ROSE FILTER to the light and took this second beamshot (HIGH 80 Lux, white balance to DAYLIGHT). Much better color rendition. By the way, it's about 110 feet to that white step at the end of the beam, and notice that hard horizontal cutoff. Nice.
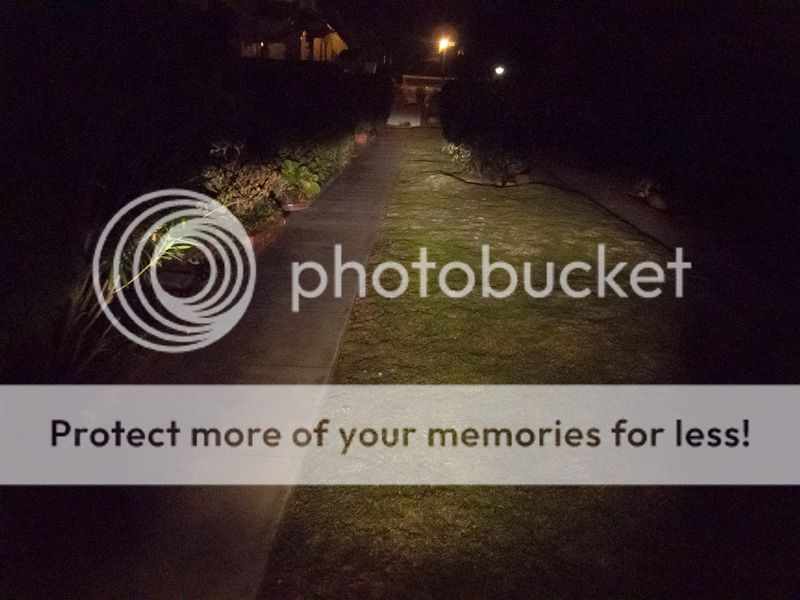
Both beams were a bit brighter in real life than shown in these shots, but this does give a good idea of the beam pattern, with that even lighting from front to back, and the hard horizontal cutoff that I was after.
I guess my biggest question is how well will it hold up to the rigors of every day bicycle commuting? Plastic body, no o-rings in the battery compartment, plastic front cover. Well, that's something I'll just have to find out.
Is this a good light for everybody. Probably not. Mountain bikers will need MUCH more light, and don't need the shaped beam. I knew all of it's foibles going in, but for me, the beam pattern trumped all those, and I'm quite pleased with how the beam looks. I'd love it if it used 18650 cells instead of AA NiMh, and if it had an aluminum body, and a glass front cover, and o-rings in the battery compartment, and had another one or two brighter levels, but then it might cost more than the $70 I payed for it, and honestly, this fits MY requirements to a T.
Anyway, I hope you found something in here that was useful. I think I'll go out for a midnight bike ride on the bike trail by the ocean") .
.
The light comes in an easily opened/re-closed plastic package, which contains the light, the handlebar mount, an anti-dazzle glare shield (more on this in a moment), and the instructions.
The inclusion of the anti-dazzle glare shield was a nice surprise for me. In the few reviews I've seen of this light, it was always mentioned that it really was necessary to have the glare shield in place, but that it was optional, and most felt that it should have been included. It seems that B&M listened to their customers and now include it with the light. It attaches to the light via two adhesive strips on the back.
By the way, I ordered my light from RoseBikes in Germany, so it may be that the anti-dazzle glare shield is not included in the US version found at Peter Whites Bicycles.
Since I can't mount this on the handlebars (because of the bag), I bought the optional Fork Crown mount (approx. $13). It's very sturdy and has the same clip-on piece that mates to the light, making it easy to mount and unmount the light. You will need your own nut and bolt to attach the fork crown mount to the bicycle, as they aren't included.
The IXON IQ Premium is primarily made of plastic (including the clear front cover) and is very light, 90 grams without batteries, 200 grams with 4 Eneloops installed. It's approx. 4 3/4" long by 2" in diameter.
On top is the main switch, which has a good, solid, and firm feel. It seems to be made from hard rubber. It won't accidentally turn on. To turn ON/OFF, you hold the button for 1 second. To change from low to high or high to low you simply click the button. The light appears to have a memory, as it will come on in the last selected mode. This memory carries over when changing batteries.
Above the button is an LED indicator light.
Solid Green = Full Batteries, High Mode
Flashing Green = Batteries getting low, light will shift to low/eco mode soon.
Flashing Red/Green = Low/Economy Mode
Solid Red = Recharge batteries.
It's not a real bright LED indicator, and shouldn't be a distraction, but does provide at least basic information, which, although not very specific as far as battery strength goes, at least gives you something to keep from being left in the dark.
On the bottom of the light is the Charge Port, covered with a rubber stopper which fits securely into place when the port is not in use. The light is designed to be used with an optional charger (approx. $35), which plugs into the port to charge the batteries in the light. Since I've got a Maha/PowerEx C9000 AA battery charger, there was no need for me to buy the optional in-light charger.
Also on the bottom is the mount connector piece which fits in either the included handlebar mount or the option fork crown mount.
On the back of the light is the battery compartment OPEN button. It's quite possible this could prove to be the weak link of this light. There have been several reports of the button breaking, rendering the light basically unusable, and if you look at my closeup, you can see why it might break so easily. The button itself is pressing again a plastic spring. Hmmmmm.
If you use the optional charger and charge the batteries inside the light, this might not be a problem, but for folks like me who prefer to charge their batteries in an external charger, this could be an issue. Time will tell. At least the light comes with a 3 year warranty.
My other concern is that there are no o-rings around the battery compartment, which uses only a tongue and groove system in the plastic to keep moisture out. I might consider using tape to seal it up between battery charges.
By the way, some folks mentioned that they felt putting the batteries in was a bit "fiddly". I see what they mean, but it's not that bad, and only requires doing it once or twice to understand how it's done.
Ok, that's enough with the physical specs, let's get down to the meat of the matter. The reason I bought this light was it's beam pattern. I spent quite awhile reading reviews, watching u-tube videos, and scouring the web for lights that would provide the kind of beam pattern I wanted.
I bicycle primarily on a bike path between work and home (some lit, some not), usually coming home at night. For the last 6 years I've used a Fenix L2D, which worked for helping to me visible to other folks, but tended to blind anybody coming toward me, so I decided to search for a light that was actually designed for bicycle use, more specifically, one designed for use in urban areas.
To me, that would be a light that would give me not only a superior beam pattern for lighting up the bike path, both near AND far, but also one that would NOT blind oncoming traffic, whether it's other bicycles, pedestrians, or when I'm out on the street, cars.
The other requirement, since I'm kind of "frugal", is that it be affordable (around $100, less would be better).
I've been happy to see some new lights becoming available recently that are close to fitting my requirements. The Fenix BC30 looks quite promising, but I'm not sure the beam pattern fits my needs. The new Specialized lights look great, with both low and high beams, but are out of my price range.
I came close to getting the Philips Saferide, but after comparing many beam shots on-line, I finally decided on the B&M IQ Premium.
The IXON IQ has been available for a few years, and is known for it's even illumination from the front of the bike to 50 yards or more in the distance, along with it's hard horizontal cutoff to keep from blinding on-coming traffic.
The new "Premium" version refers to a new reflector that not only provides even illumination both near and far (more even than the old IQ with less hotspots), but has a beam that is wider than the older IQ non-premium version, giving more illumination to the sides, but still providing that hard horizontal cutoff.
The IQ Premium is a 2 level light, providing approx. 17 lux for 20 hours or 80 lux for 5 hours. In my bathroom bounce test, the 17 lux low was a bit brighter than my ZL SC52w's 50 lumen setting (M1), while the 80 lux high was approx. equal to the SC52w's 280 lumen setting (H1 using an Eneloop AA).
The LED tint is a bit cool, but not bad (I did end up filtering it, see below). I checked visually for PWM and couldn't detect it on either level.
Ok, on to some beam shots. White balance set to auto and no filter on the light, these are just to show the beam profile. This first one has the beam directed to the left along a white wall, showing the sharp horizontal cutoff and how they've directed light down in front of the bike, but not too bright.
This second one was shot with the light about 2 feet away from, and directly facing the wall. It shows how odd a shaped-beam is, when seen like this. The beam is meant to be spread out in front of the bike, not shown on a white wall, so in reality, this is a good sign of things to come.
Now, on to a couple of quick outdoor beam shots. This first one was taken with the light in the HIGH 80 lux position (about 120 feet to the white step in the distance). This was shot with white balance to set to DAYLIGHT. The red bricks show the decidedly cyan cast, but it's not quite that bad in real life.
I'm VERY pleased with this beam profile. Exactly what I was hoping for, with an extremely even beam pattern from the front of the bike to over 100 feet away. By having the light in front of the bike the same intensity as the light in the distance, it really makes it easy to see clearly. And, when I went down to the end and looked back at the bike, it wasn't blinding at all. Just a light that was on, not particularly bright, just on.
However, after seeing that real life test, when I got home I did add a LIGHT ROSE FILTER to the light and took this second beamshot (HIGH 80 Lux, white balance to DAYLIGHT). Much better color rendition. By the way, it's about 110 feet to that white step at the end of the beam, and notice that hard horizontal cutoff. Nice.
Both beams were a bit brighter in real life than shown in these shots, but this does give a good idea of the beam pattern, with that even lighting from front to back, and the hard horizontal cutoff that I was after.
I guess my biggest question is how well will it hold up to the rigors of every day bicycle commuting? Plastic body, no o-rings in the battery compartment, plastic front cover. Well, that's something I'll just have to find out.
Is this a good light for everybody. Probably not. Mountain bikers will need MUCH more light, and don't need the shaped beam. I knew all of it's foibles going in, but for me, the beam pattern trumped all those, and I'm quite pleased with how the beam looks. I'd love it if it used 18650 cells instead of AA NiMh, and if it had an aluminum body, and a glass front cover, and o-rings in the battery compartment, and had another one or two brighter levels, but then it might cost more than the $70 I payed for it, and honestly, this fits MY requirements to a T.
Anyway, I hope you found something in here that was useful. I think I'll go out for a midnight bike ride on the bike trail by the ocean
. , and when I do ride, it's only 20 minutes home, so hopefully, this light duty won't push the envelope to much for this light.

