Steve K
Flashlight Enthusiast
I just completed work on a Supernova Triple headlight, and thought the CPF crowd (or at least this little corner of CPF) might find it interesting. I've got a number of photos and am working on writing up the story of what happened. Here's Chapter 1 for your entertainment.
chapter 1. disassembly
a fellow on a bike forum asked for help with a Supernova Triple
dynamo light. I'd been curious about these lights, so I offered to try
to fix it if he would cover the cost of the parts and the shipping. He
had gotten the light for free (someone else had damaged it), so he
agreed. My assumption was that the failure was probably a broken
wire or some other obvious damage, so it shouldn't be too hard to
repair. I did mention to the owner that it could be damage that just
couldn't be repaired by anyone but the factory, though.
I've finished working on the light and thought that this group might
enjoy seeing how the light is built and some of the troubleshooting
and repair(?) process. For the sake of drama and interest, I don't
want to tell you how the story ends, but would prefer to let the story
unfold.
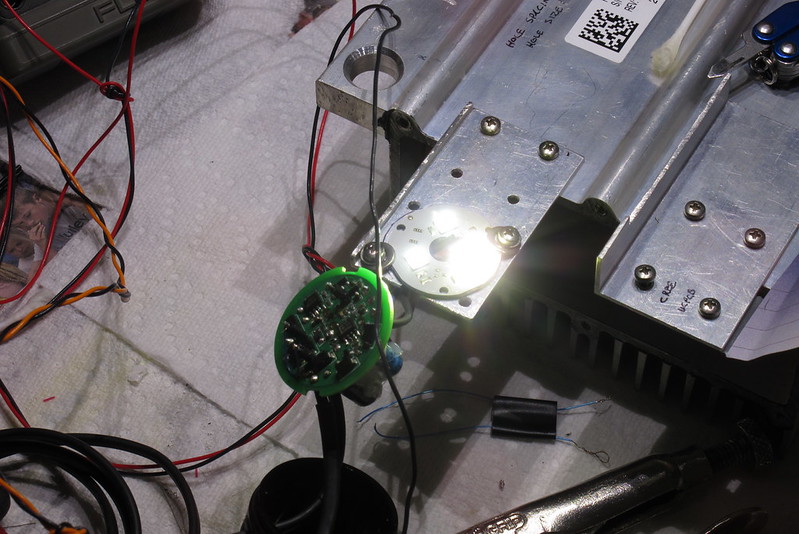
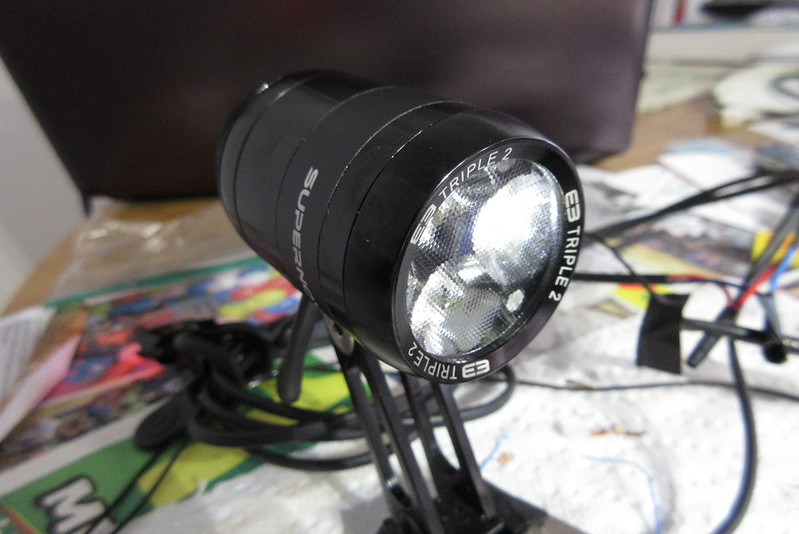
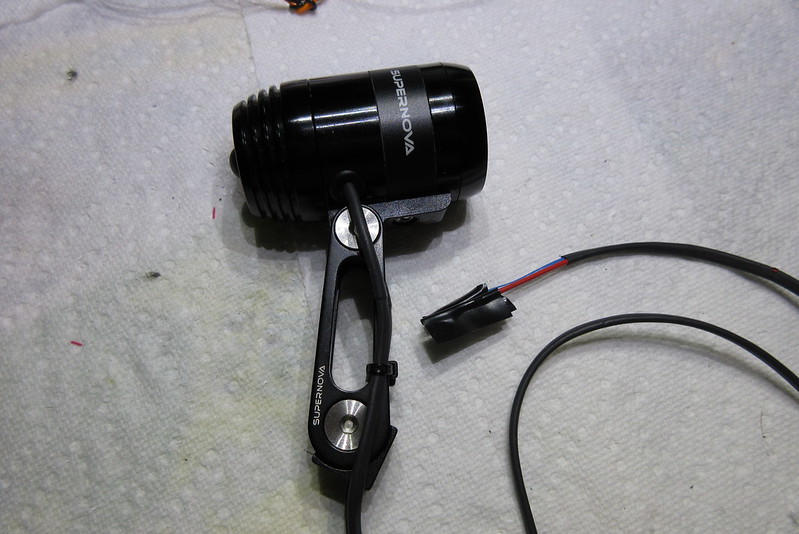
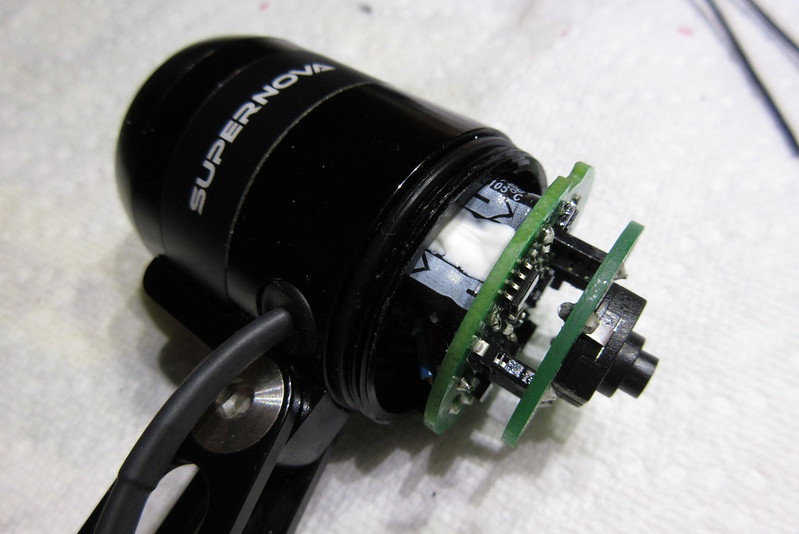
The light is housed in a very nice aluminum body with a bracket of
similar quality. Even if all of the electronics was dead, it would
make a nice host for a design of one's own.

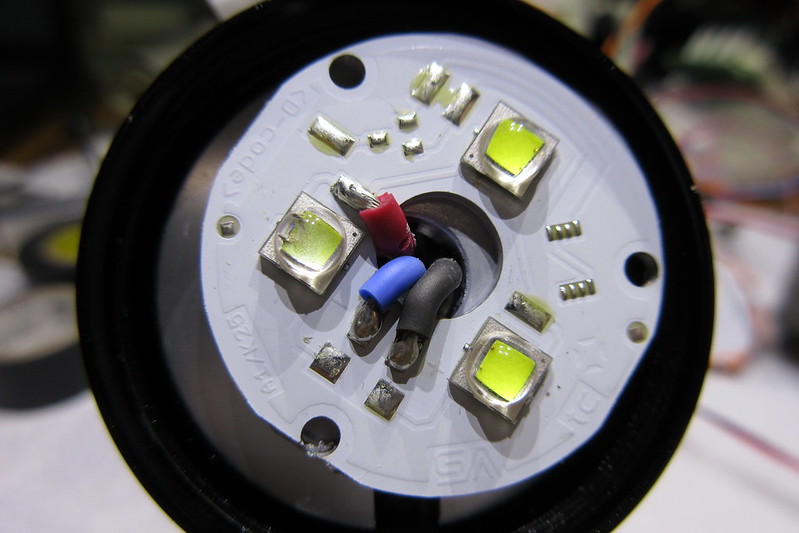
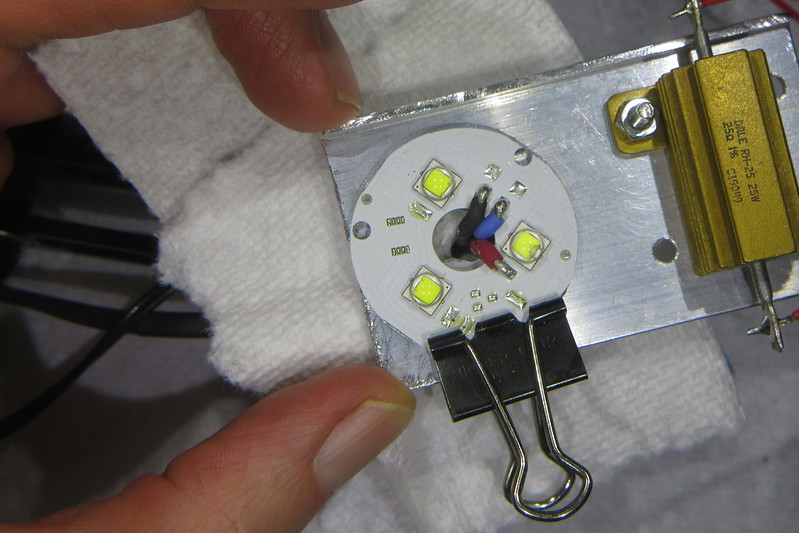
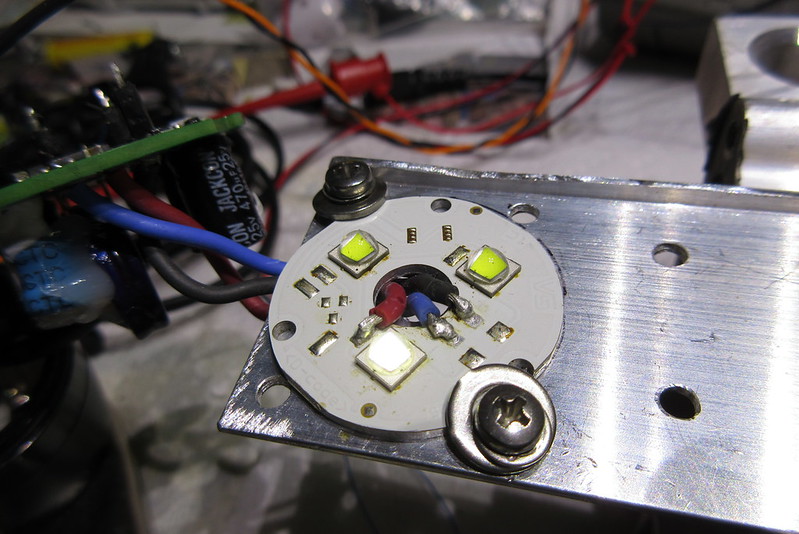
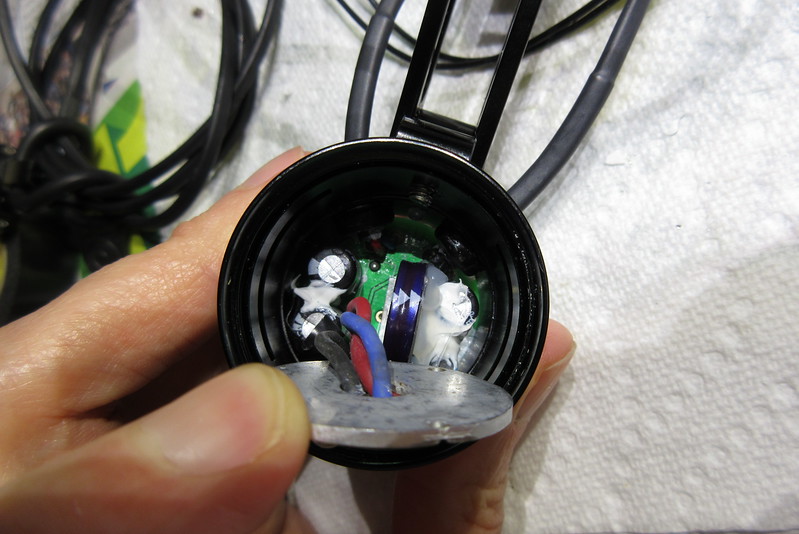
The light has a front bezel that unscrews, revealing the triple optics
and the LED MCPCB (Metal Core Printed Circuit Board). At the
rear of the light is a screw-on cap, which has a boot for the push
switch, and which covers the circuit boards.
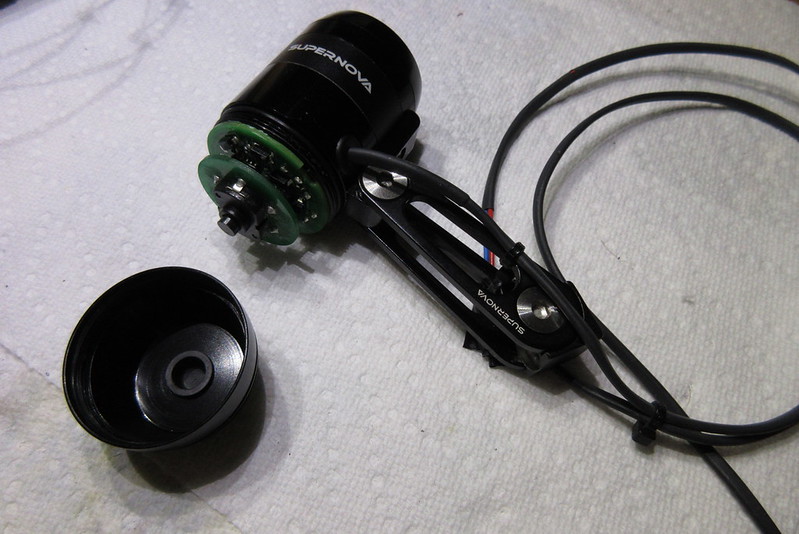
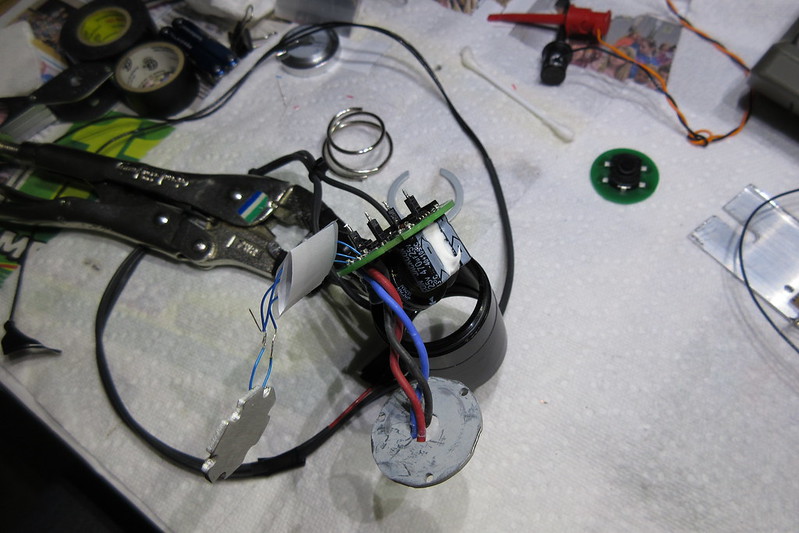
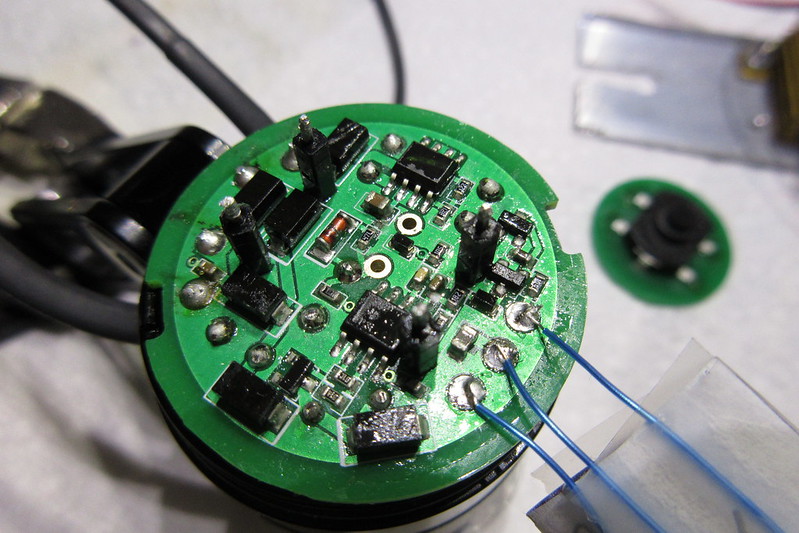
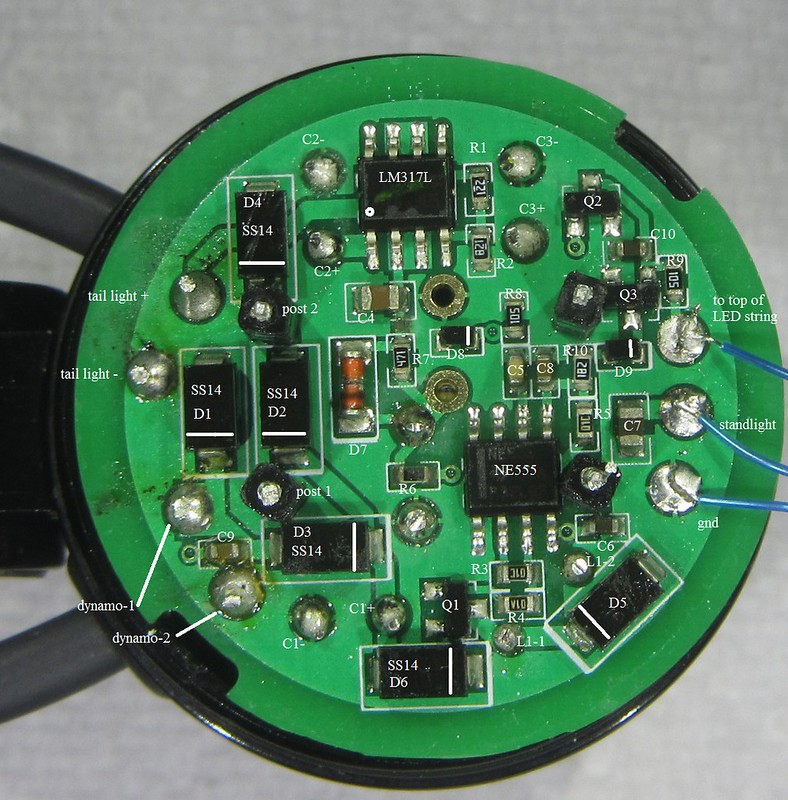
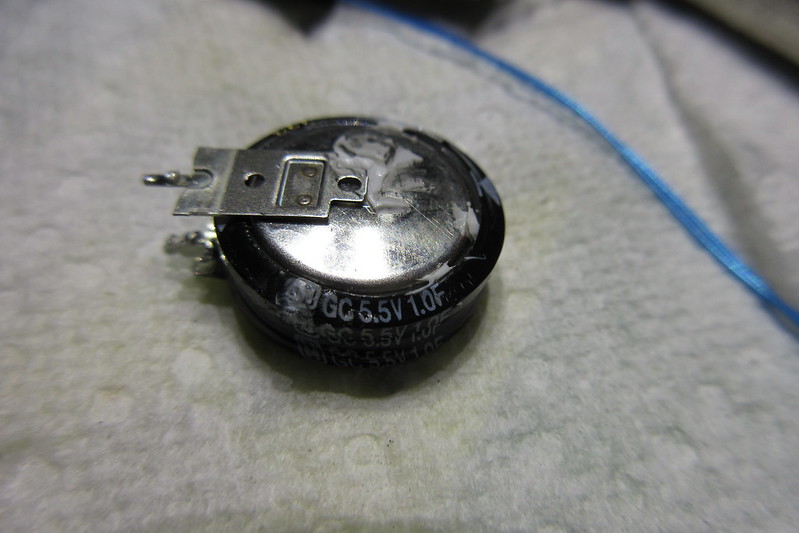
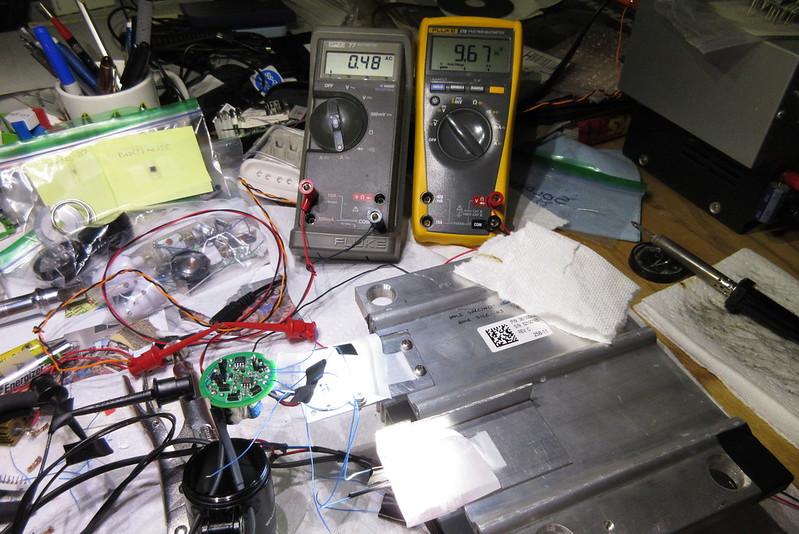
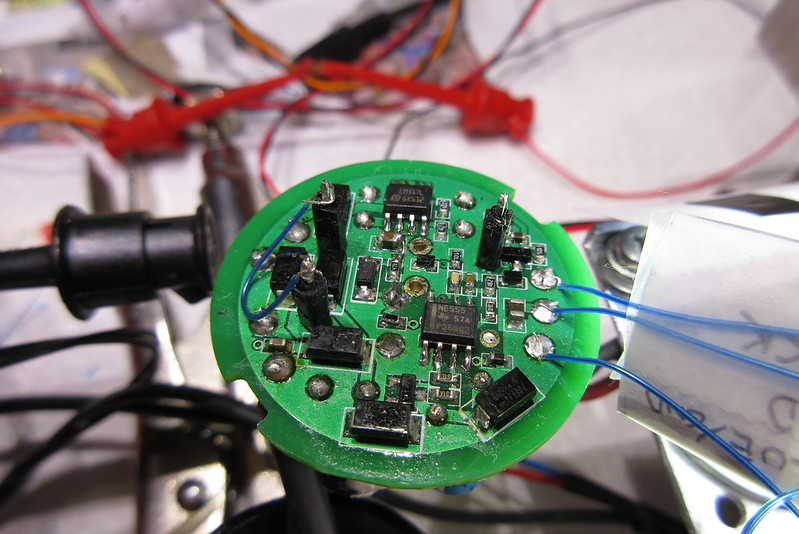
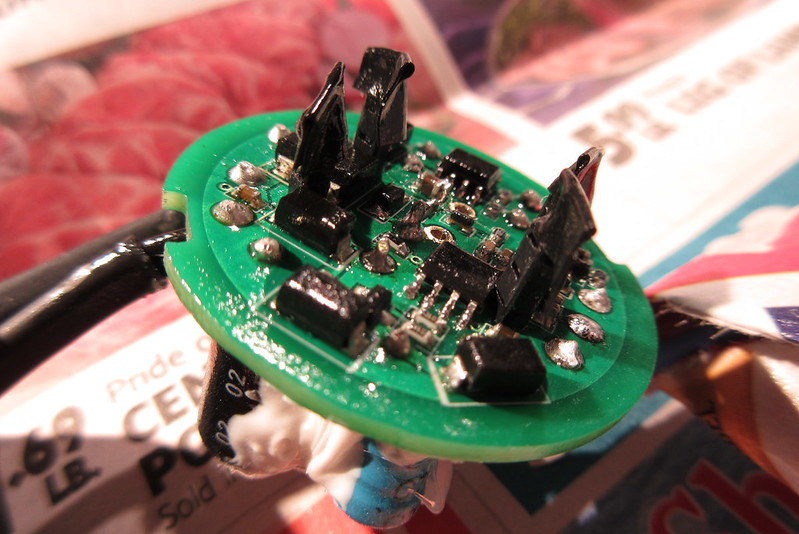
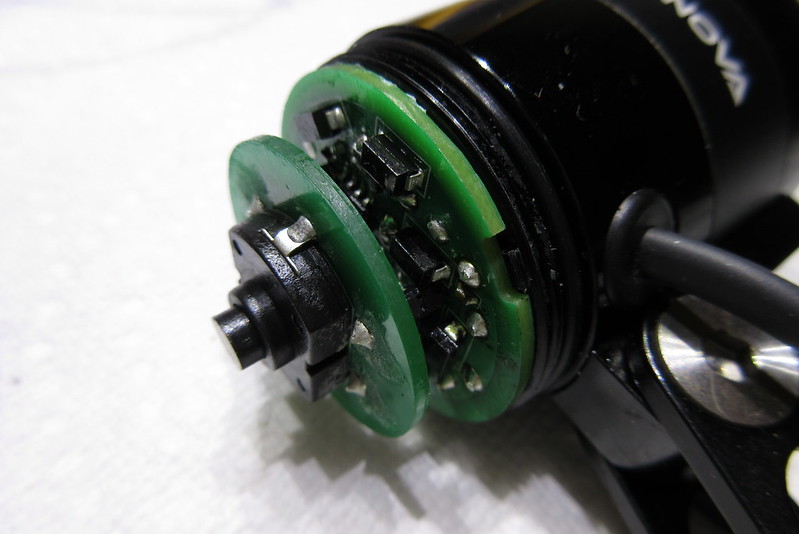
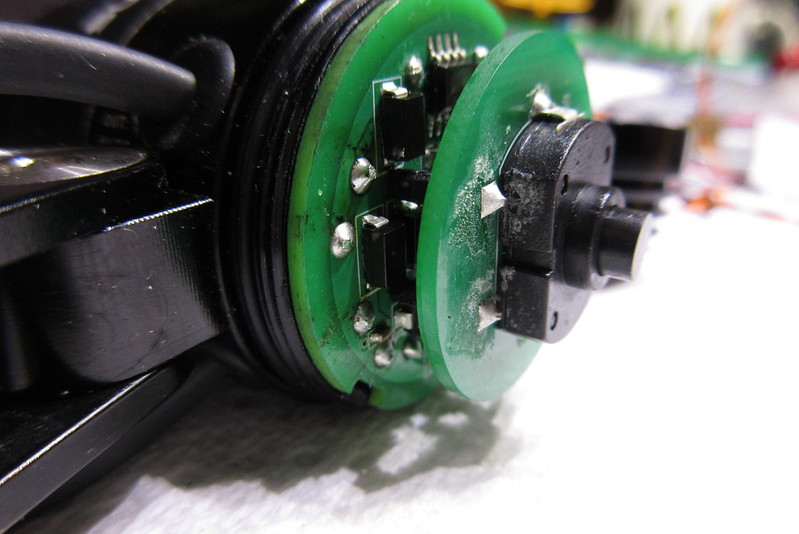
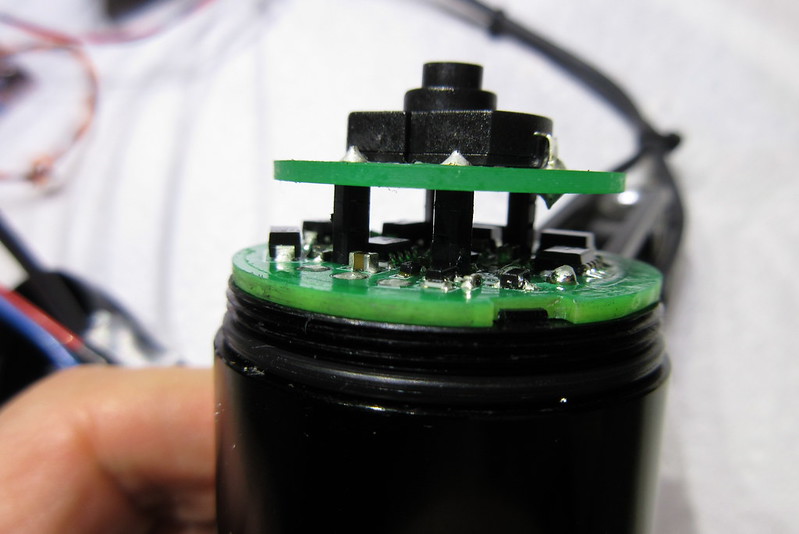
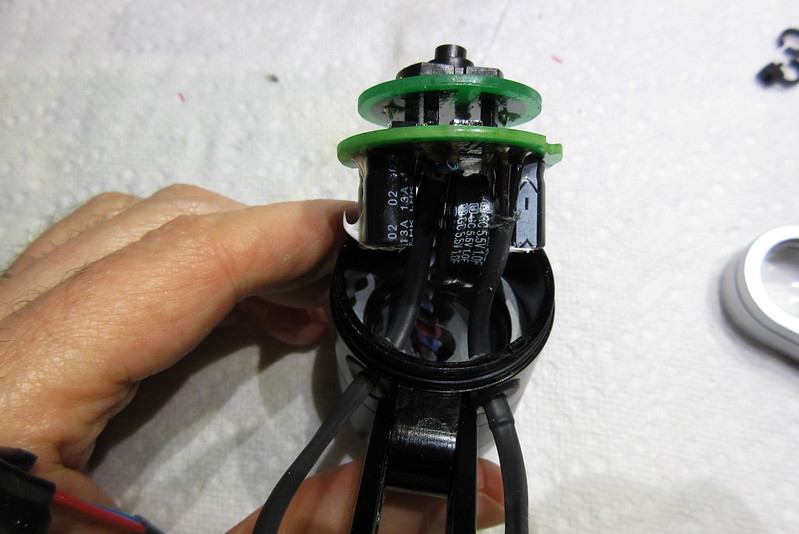
There are two circuit boards. The small board has just one
component.... the push switch. The large board has the rest of the
components. The boards are both built well... fairly thick, to
handle the force of actuating the push switch.
The lower board has conformal coating to resist moisture. Overall, they looked like they
were high quality, which matches the rest of the light.
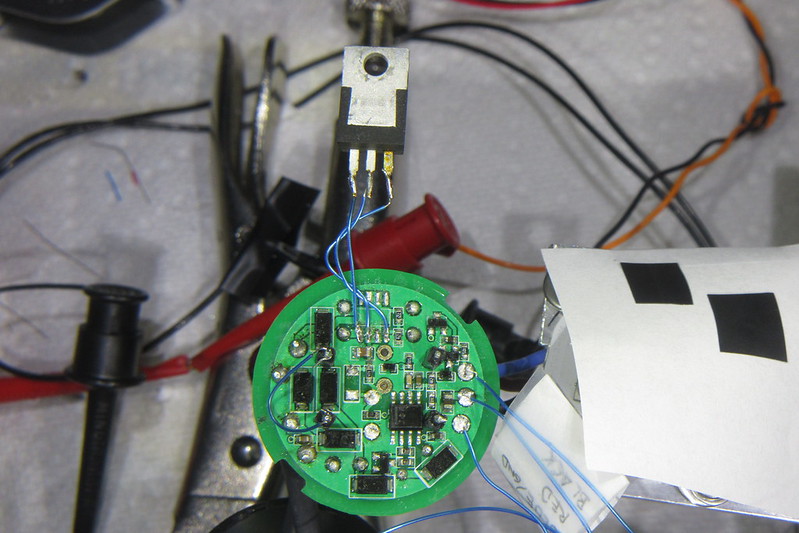
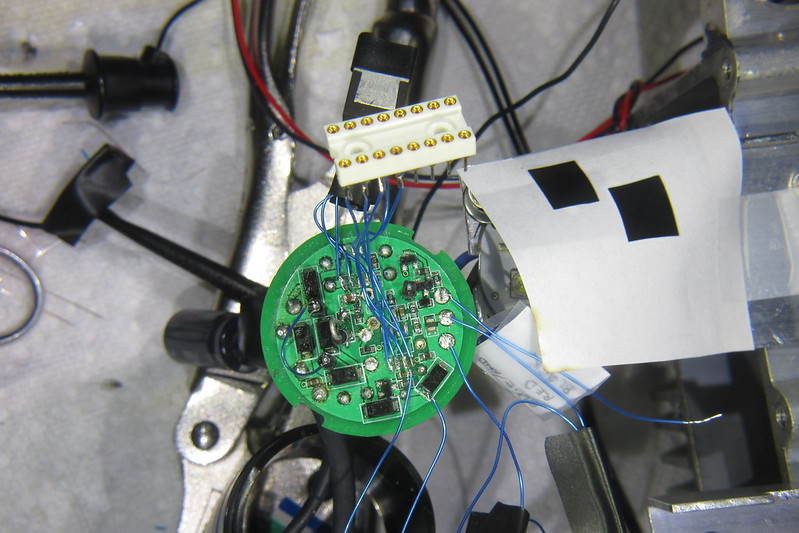
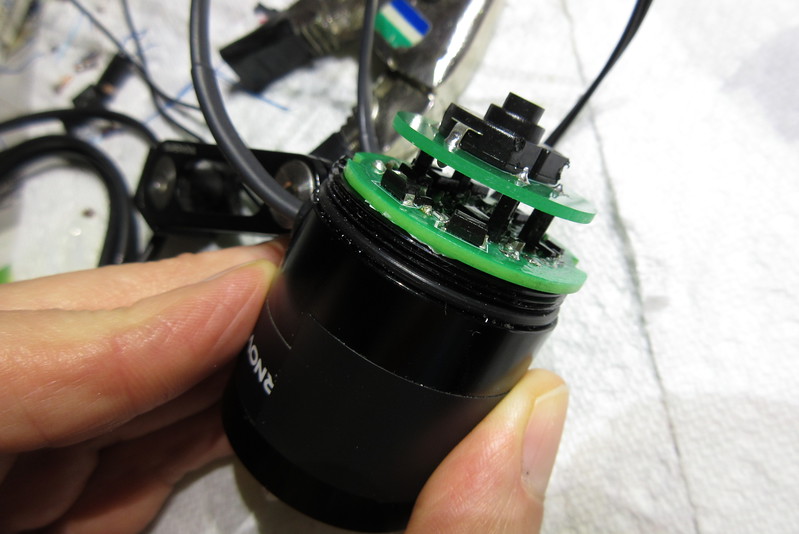
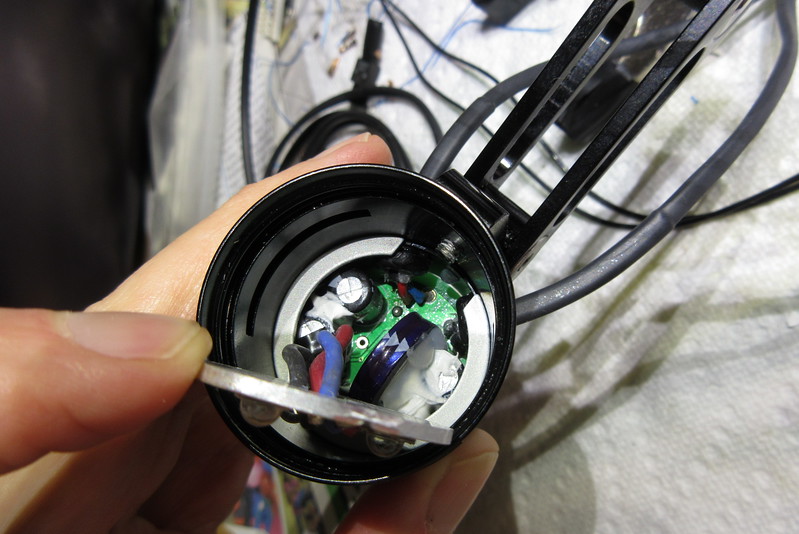
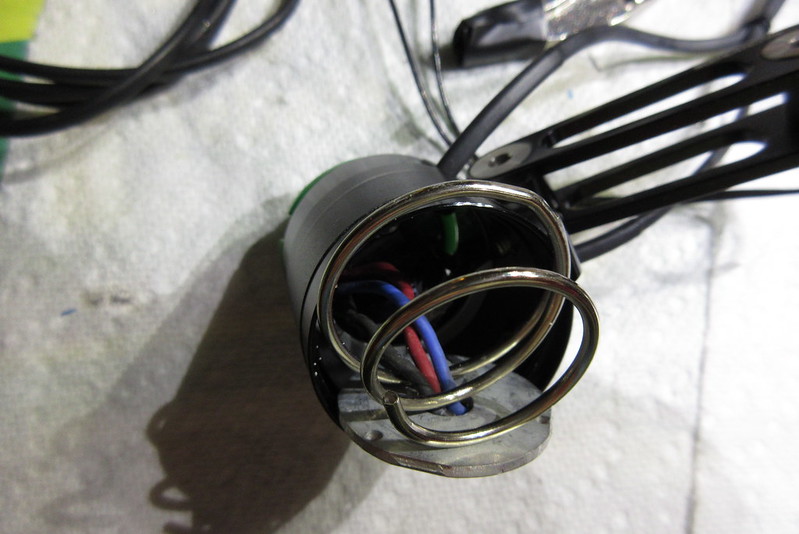
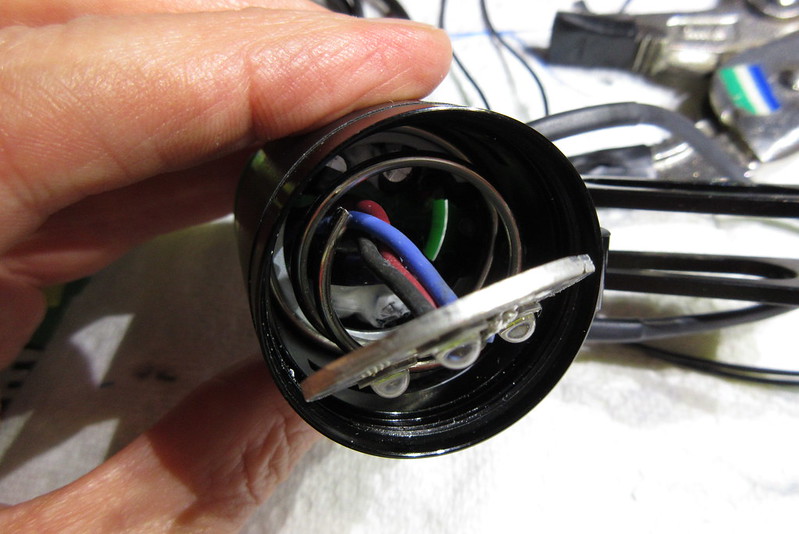
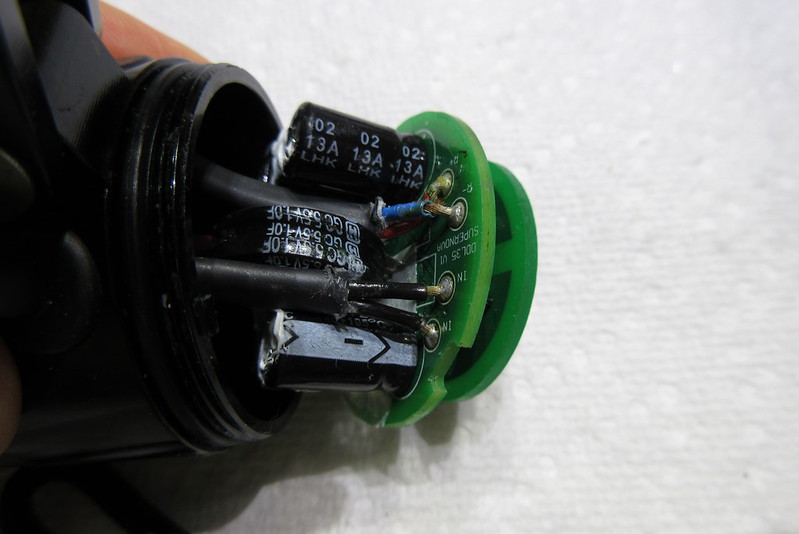
It took a bit of head scratching before I figured out how to get
access to the bottom of the lower circuit board. There is one wire
pair that goes to the dynamo, and one wire pair that goes to the
taillight. By sliding these wires through their grommets and into the
housing, there was enough slack in the wires to slide the circuit
board partly out of the housing. The board was still restrained by
the three wires going to the LED MCPCB.
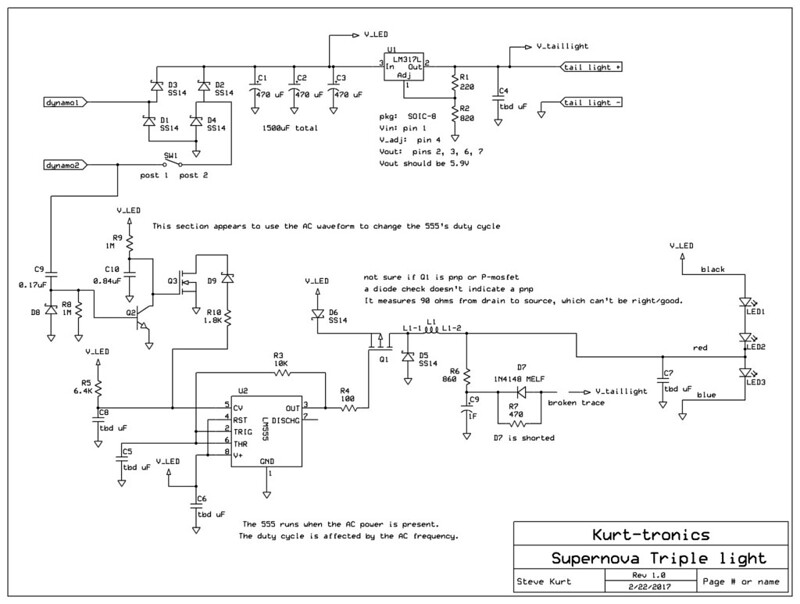
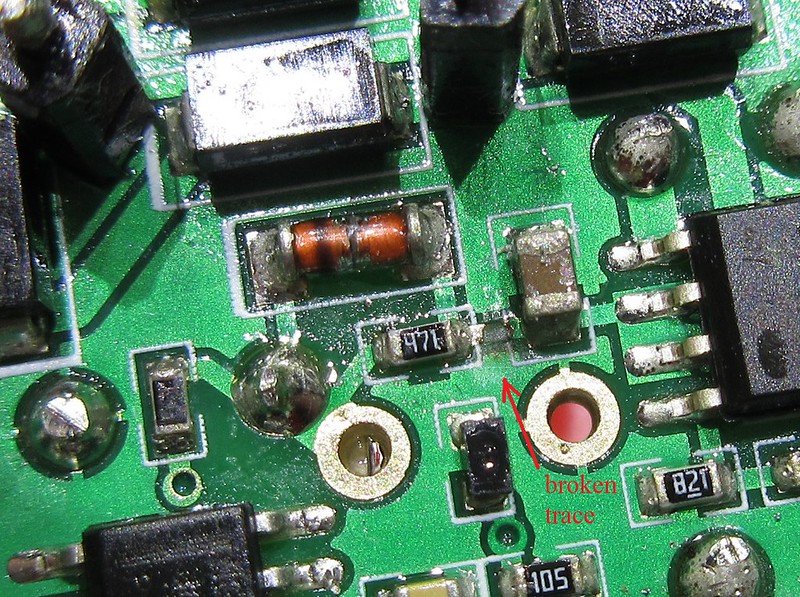
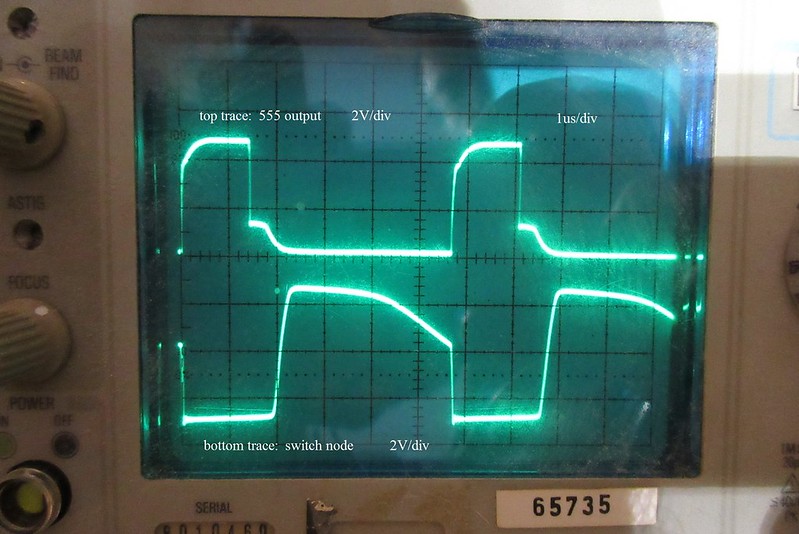
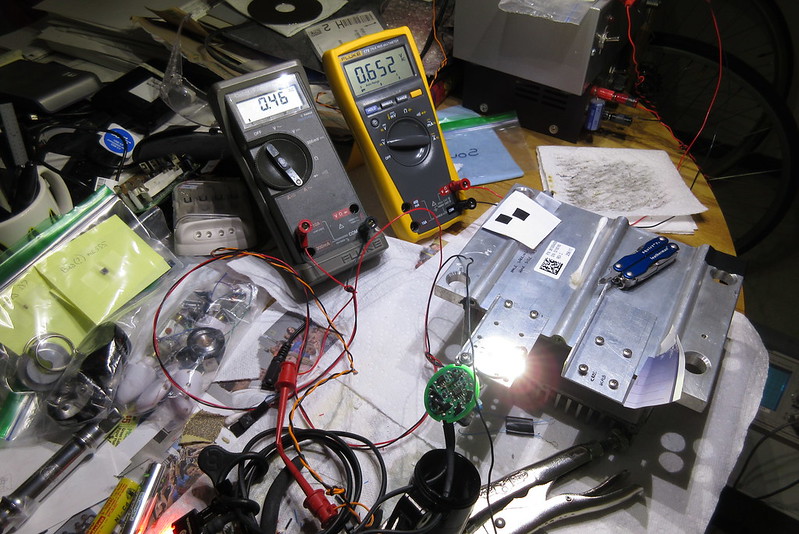
My hopes of finding a simple broken wire were ruined, so now I
had to actually do some work and figure out what was wrong with
the light.
.... to be continued.... (in next post)
chapter 1. disassembly
a fellow on a bike forum asked for help with a Supernova Triple
dynamo light. I'd been curious about these lights, so I offered to try
to fix it if he would cover the cost of the parts and the shipping. He
had gotten the light for free (someone else had damaged it), so he
agreed. My assumption was that the failure was probably a broken
wire or some other obvious damage, so it shouldn't be too hard to
repair. I did mention to the owner that it could be damage that just
couldn't be repaired by anyone but the factory, though.
I've finished working on the light and thought that this group might
enjoy seeing how the light is built and some of the troubleshooting
and repair(?) process. For the sake of drama and interest, I don't
want to tell you how the story ends, but would prefer to let the story
unfold.
The light is housed in a very nice aluminum body with a bracket of
similar quality. Even if all of the electronics was dead, it would
make a nice host for a design of one's own.
The light has a front bezel that unscrews, revealing the triple optics
and the LED MCPCB (Metal Core Printed Circuit Board). At the
rear of the light is a screw-on cap, which has a boot for the push
switch, and which covers the circuit boards.
There are two circuit boards. The small board has just one
component.... the push switch. The large board has the rest of the
components. The boards are both built well... fairly thick, to
handle the force of actuating the push switch.
The lower board has conformal coating to resist moisture. Overall, they looked like they
were high quality, which matches the rest of the light.
It took a bit of head scratching before I figured out how to get
access to the bottom of the lower circuit board. There is one wire
pair that goes to the dynamo, and one wire pair that goes to the
taillight. By sliding these wires through their grommets and into the
housing, there was enough slack in the wires to slide the circuit
board partly out of the housing. The board was still restrained by
the three wires going to the LED MCPCB.
My hopes of finding a simple broken wire were ruined, so now I
had to actually do some work and figure out what was wrong with
the light.
.... to be continued.... (in next post)
")