
kj75
Enlightened
The big Nitecore-family missed a bicycle light until now. The launch of the first Nitecore bike-light, the BR35, was a surprise to me. This micro-usb rechargeable light has about the output of cars' headlight and is equipped with a lot of interesting features. For example: The light can be adjusted to the actual situation in traffic; and the built-in OLED-screen informs about remaining power. Thanks to its compact size, and the way that it can be simple attached and detached from the holder, it can be used as flashlight too. Recently, this powerhouse for cycling arrived, and I will show you the ins en outs of this interesting light. In this review we will have a closer look at the BR35. I'll tell you about the interface that has special modes, give you my personal feelings, and show a couple of (outdoor) beamshots. Here we go!
this is the first bike-light made by Nitecore:

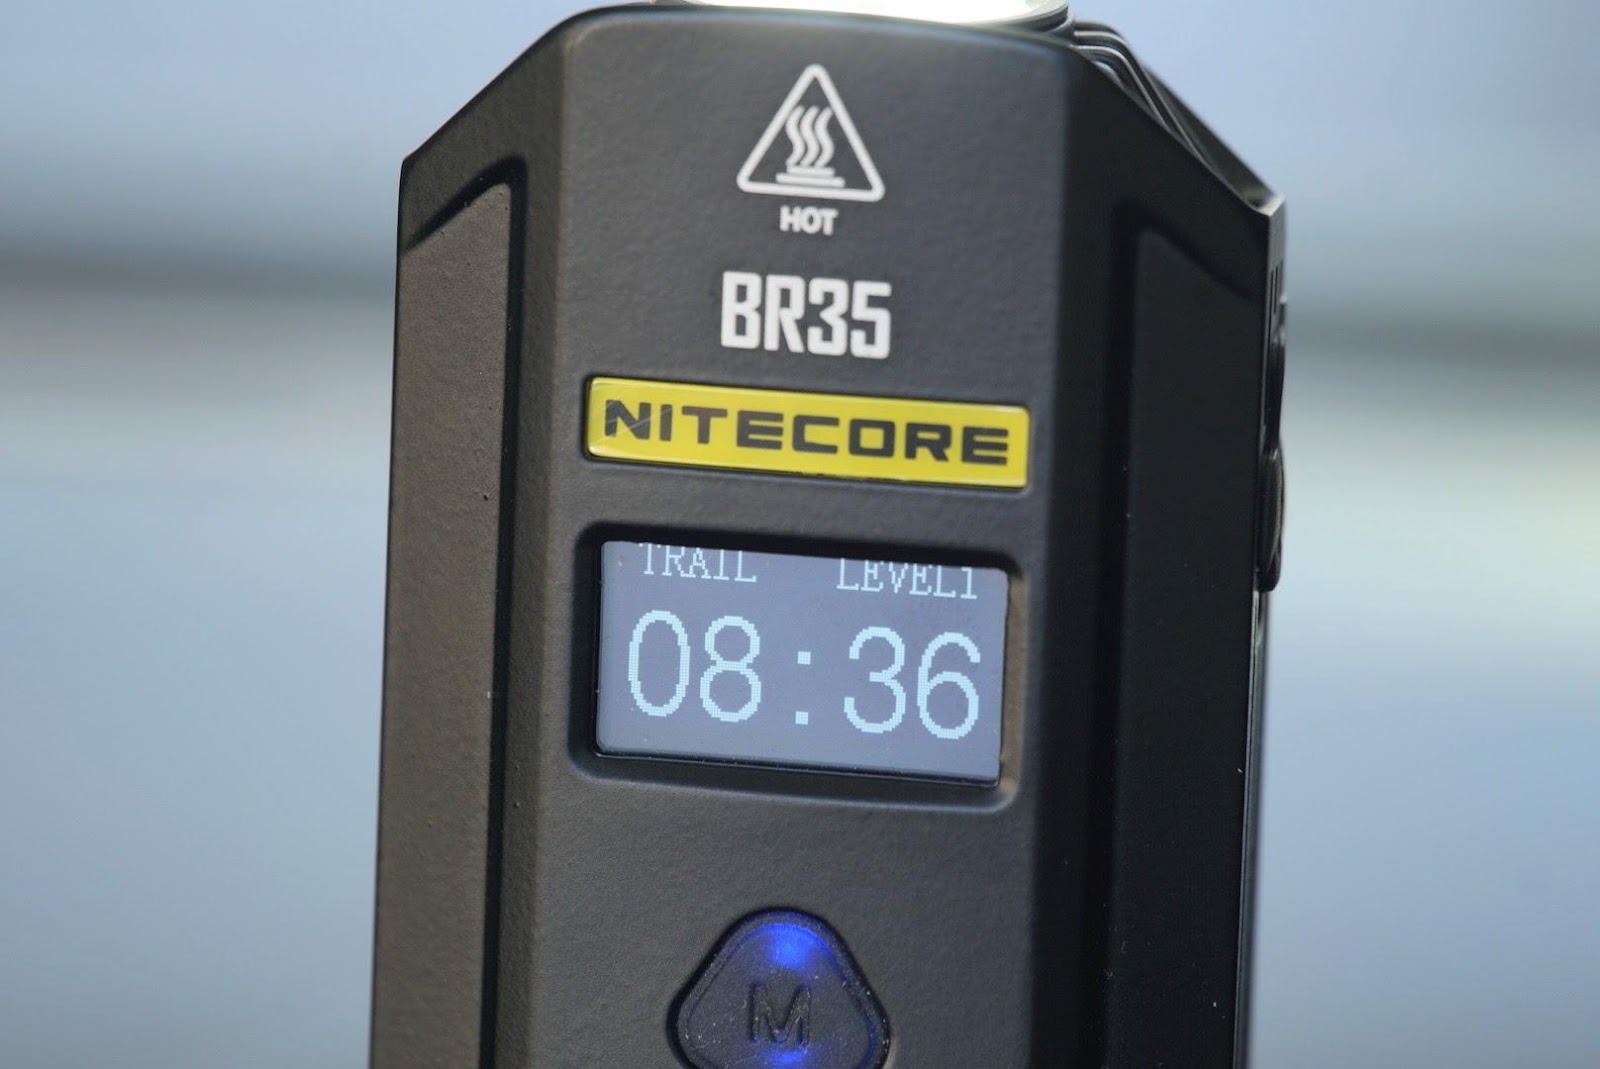
the BR35
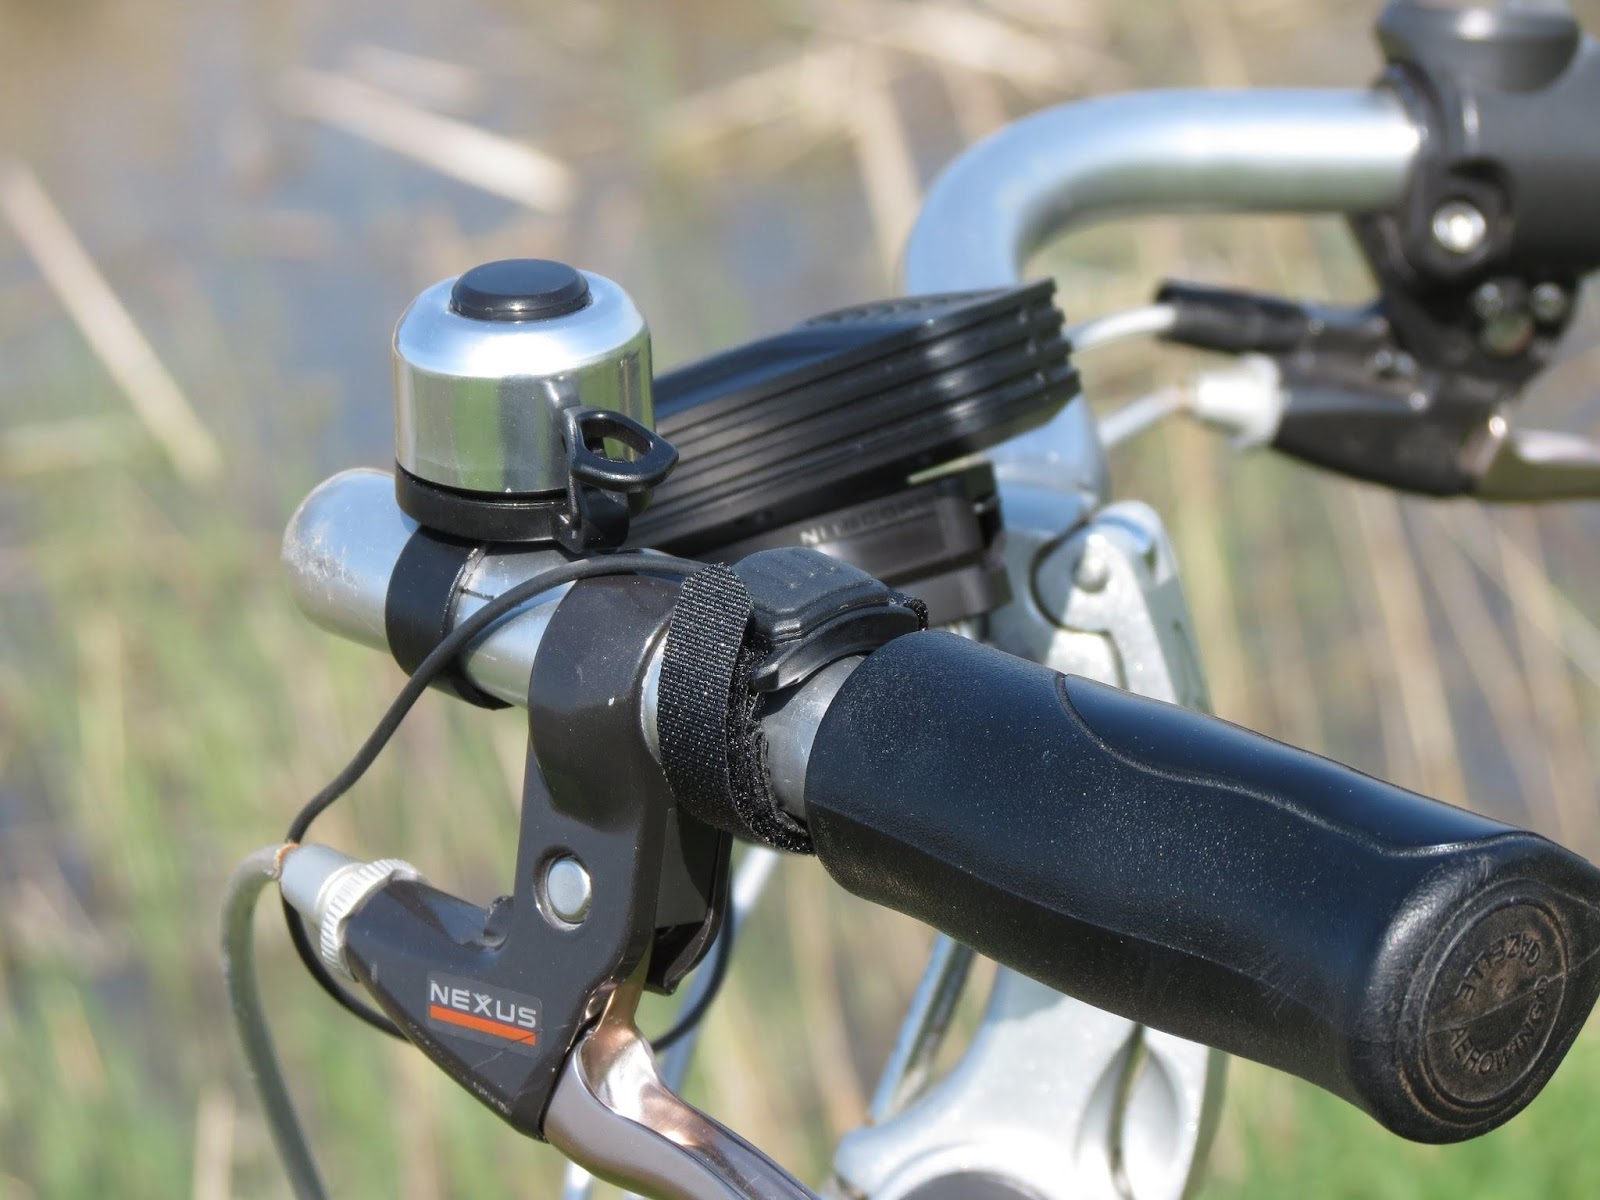
can be easily attached and released
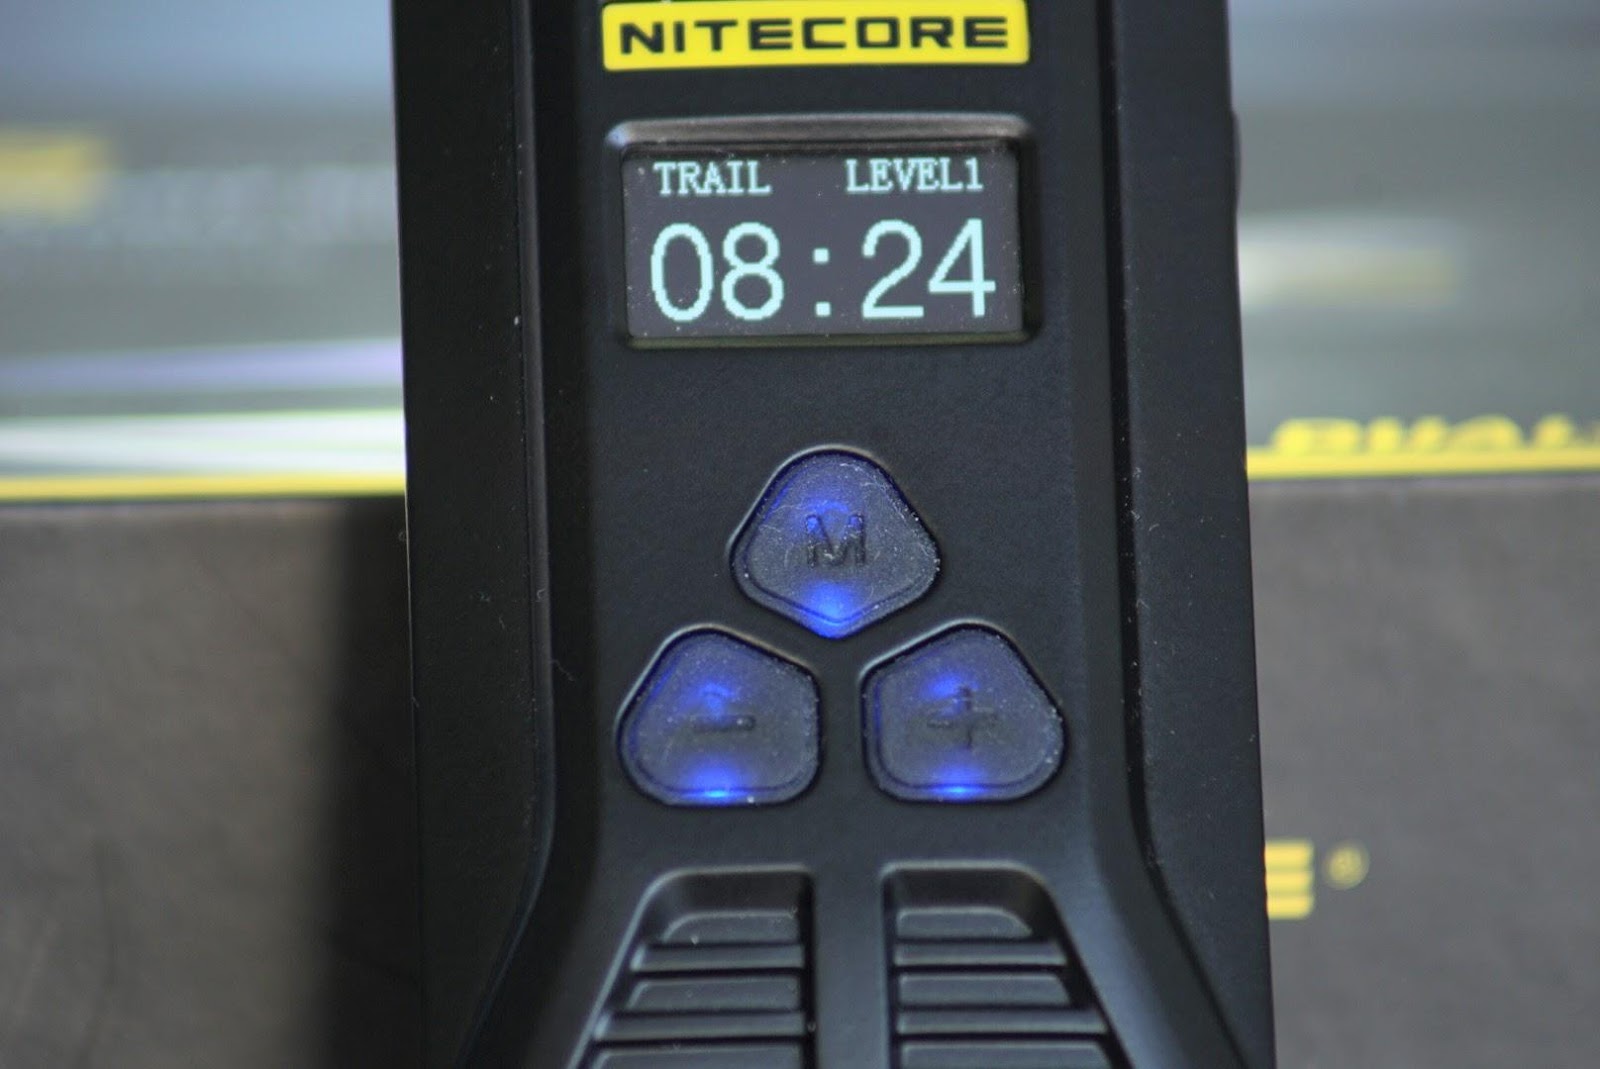
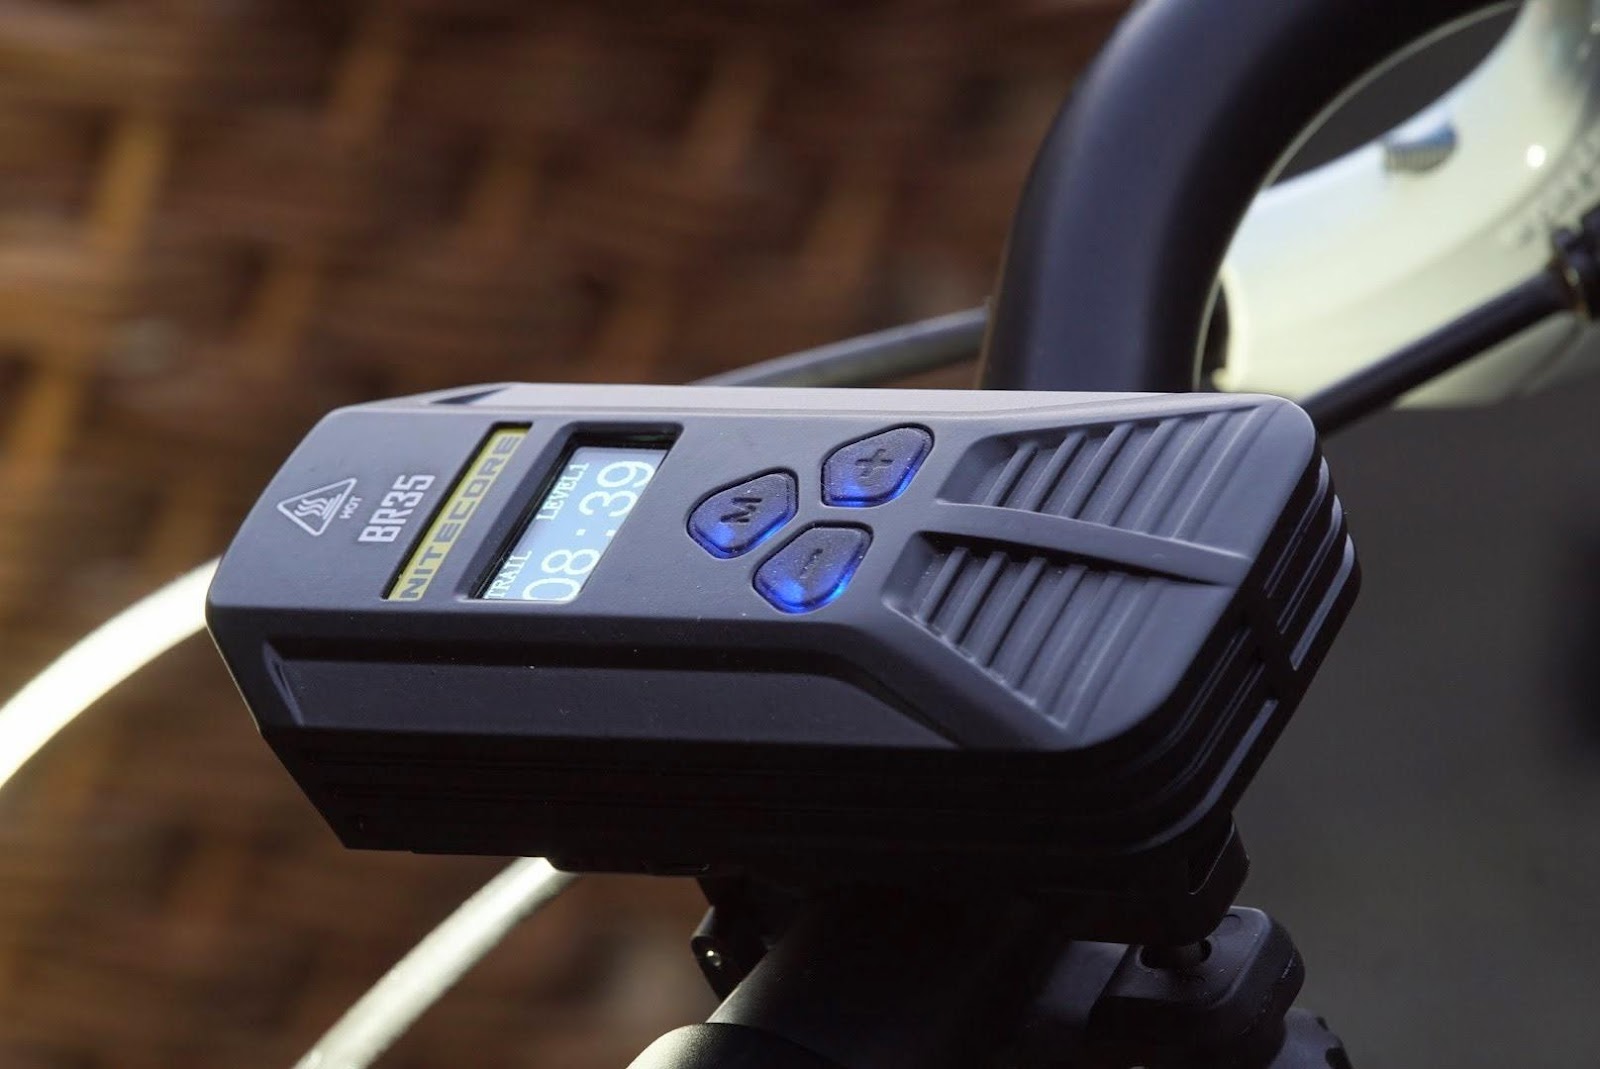
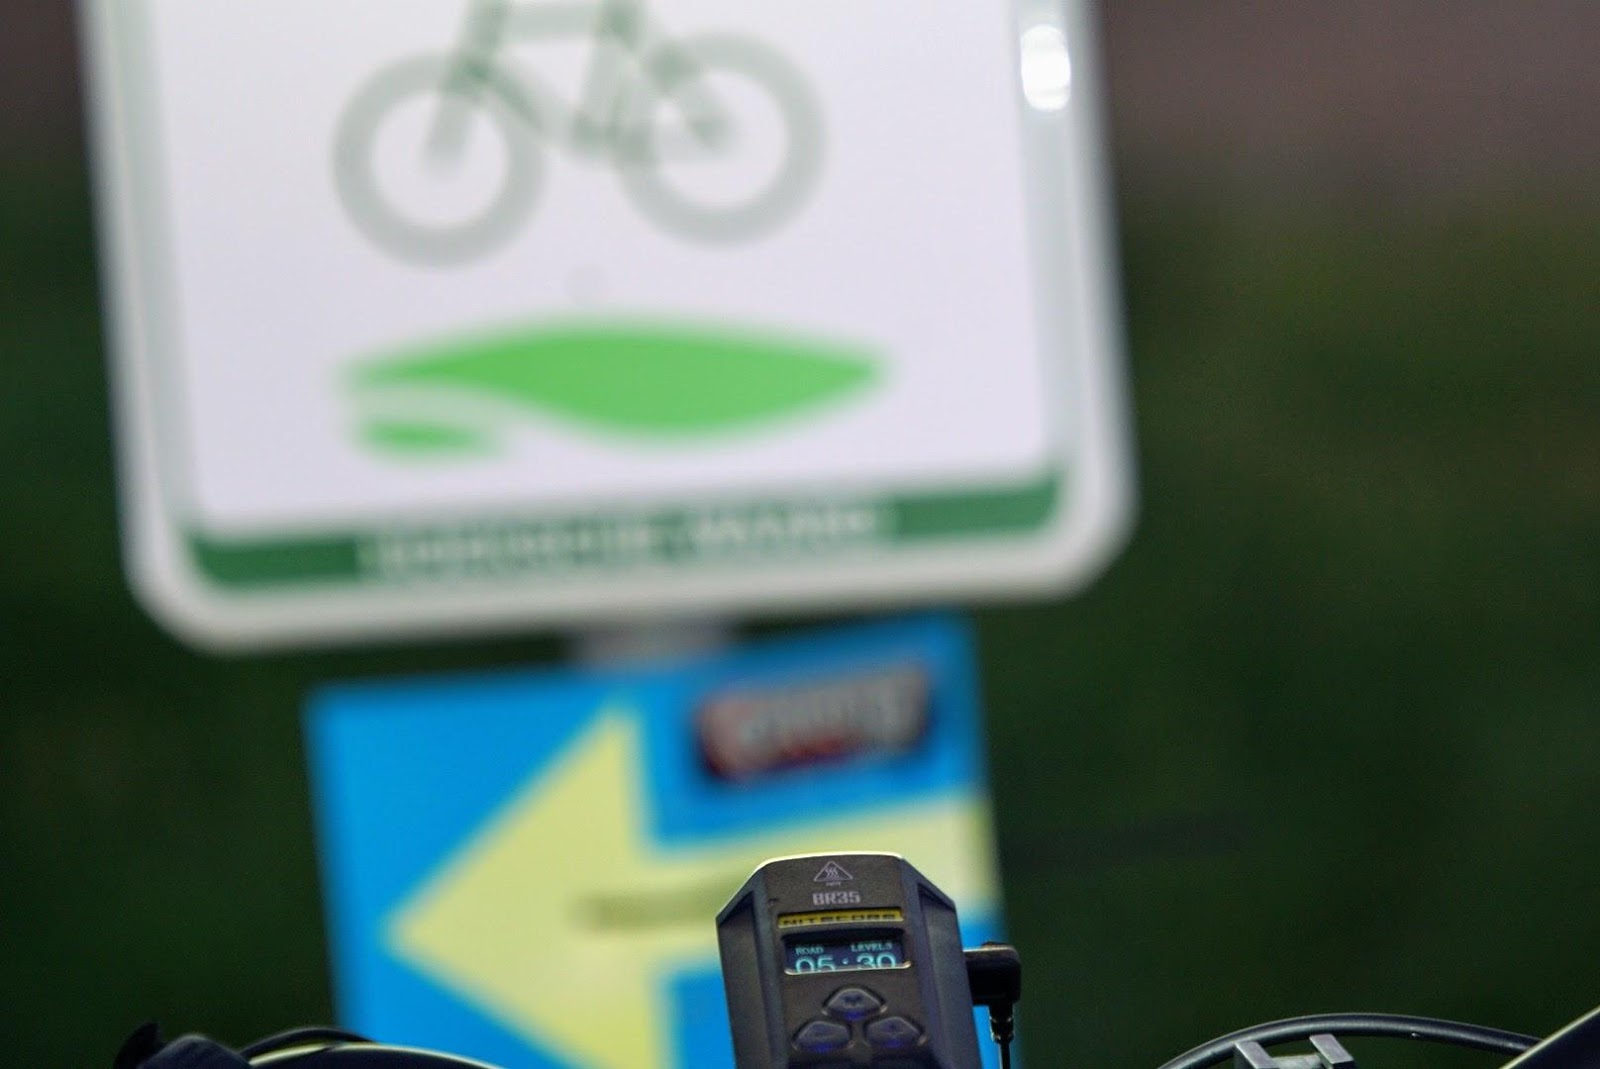
has an OLED-screen that gives information about level and battery status
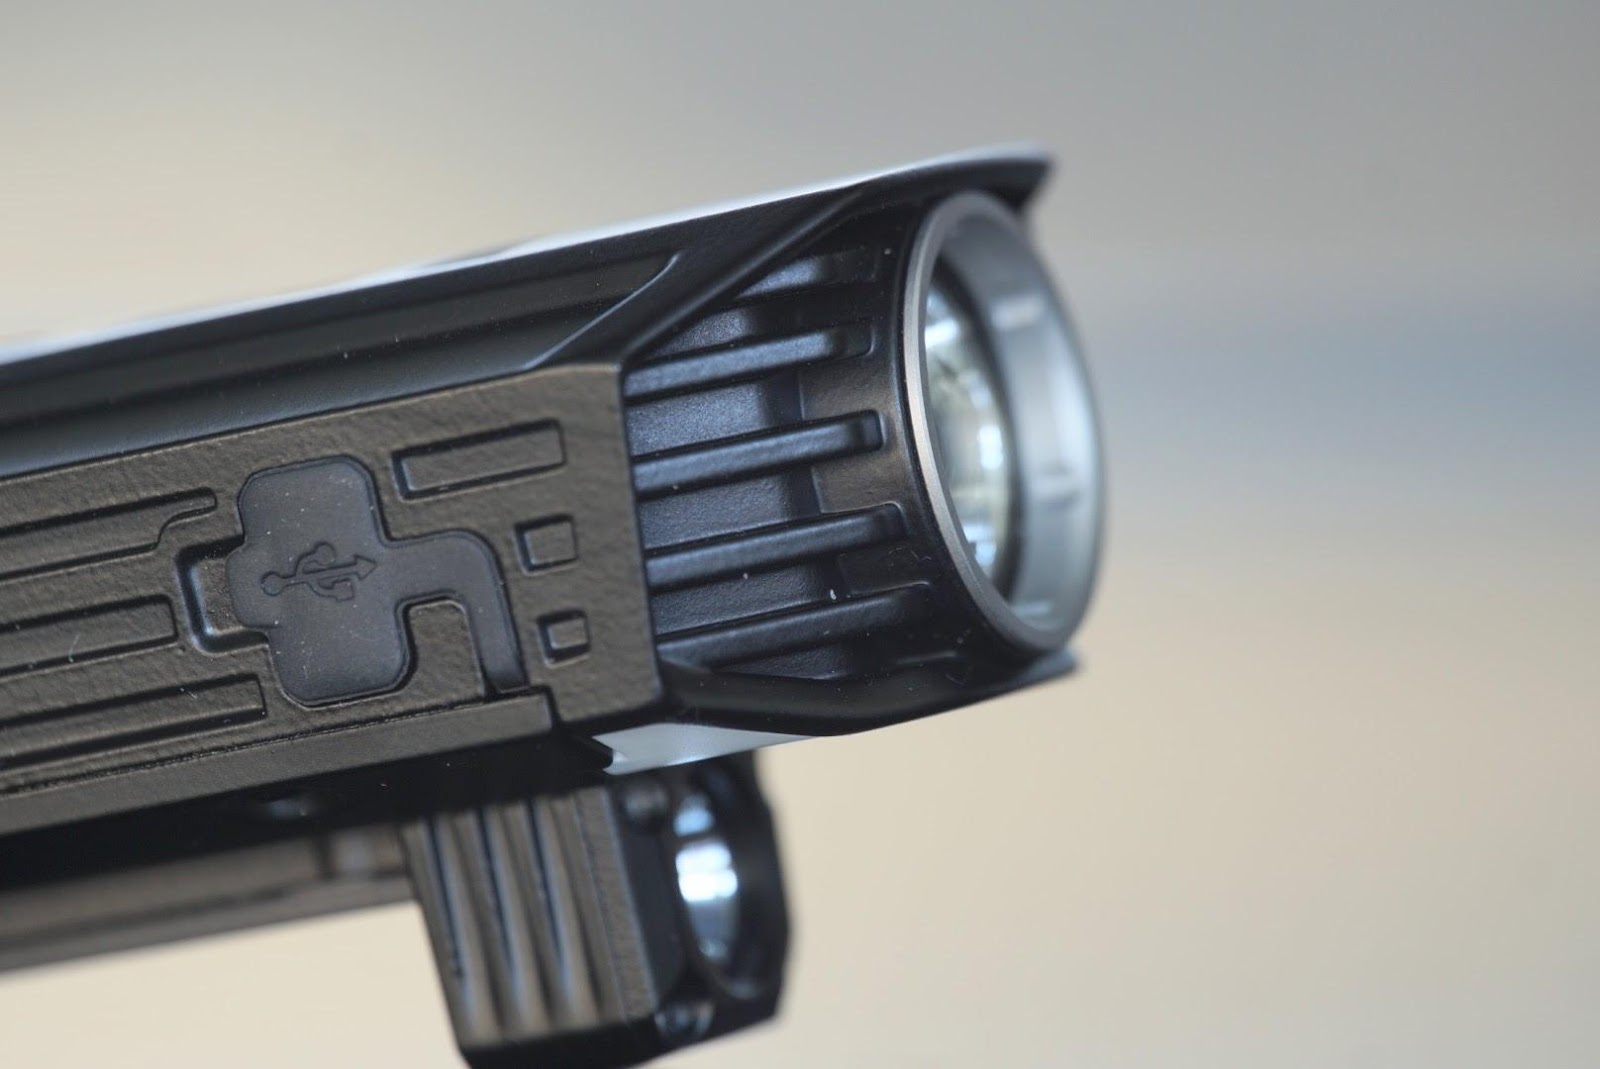
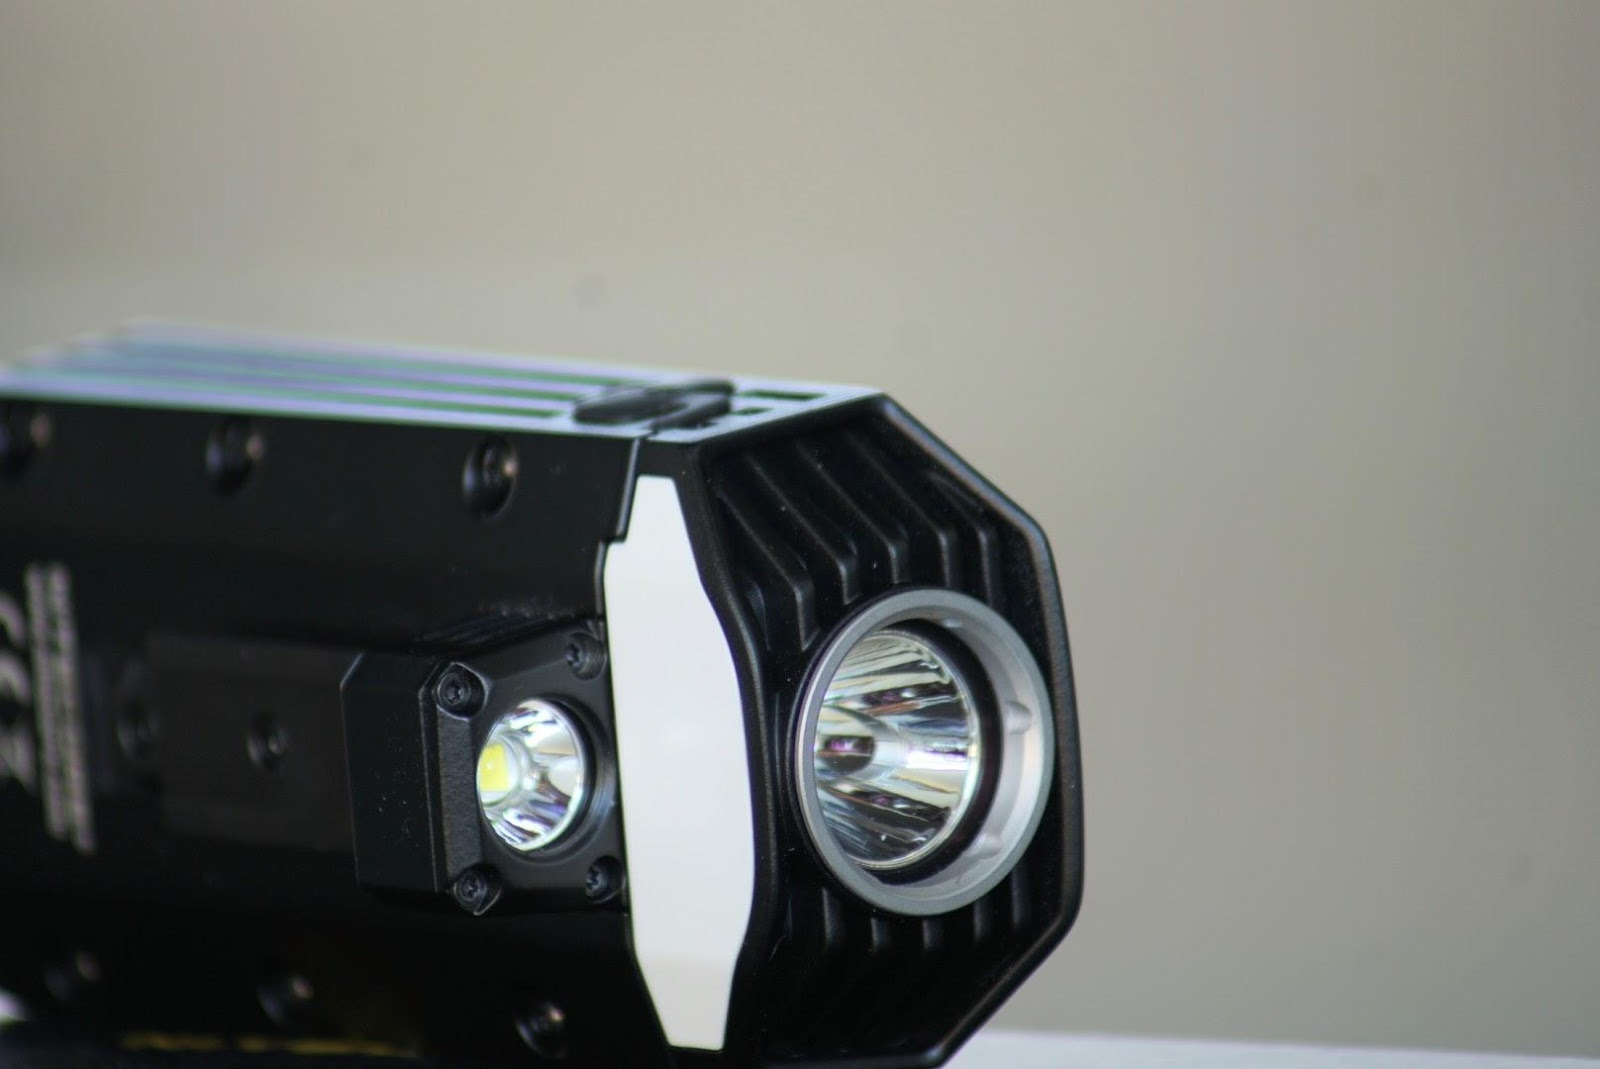
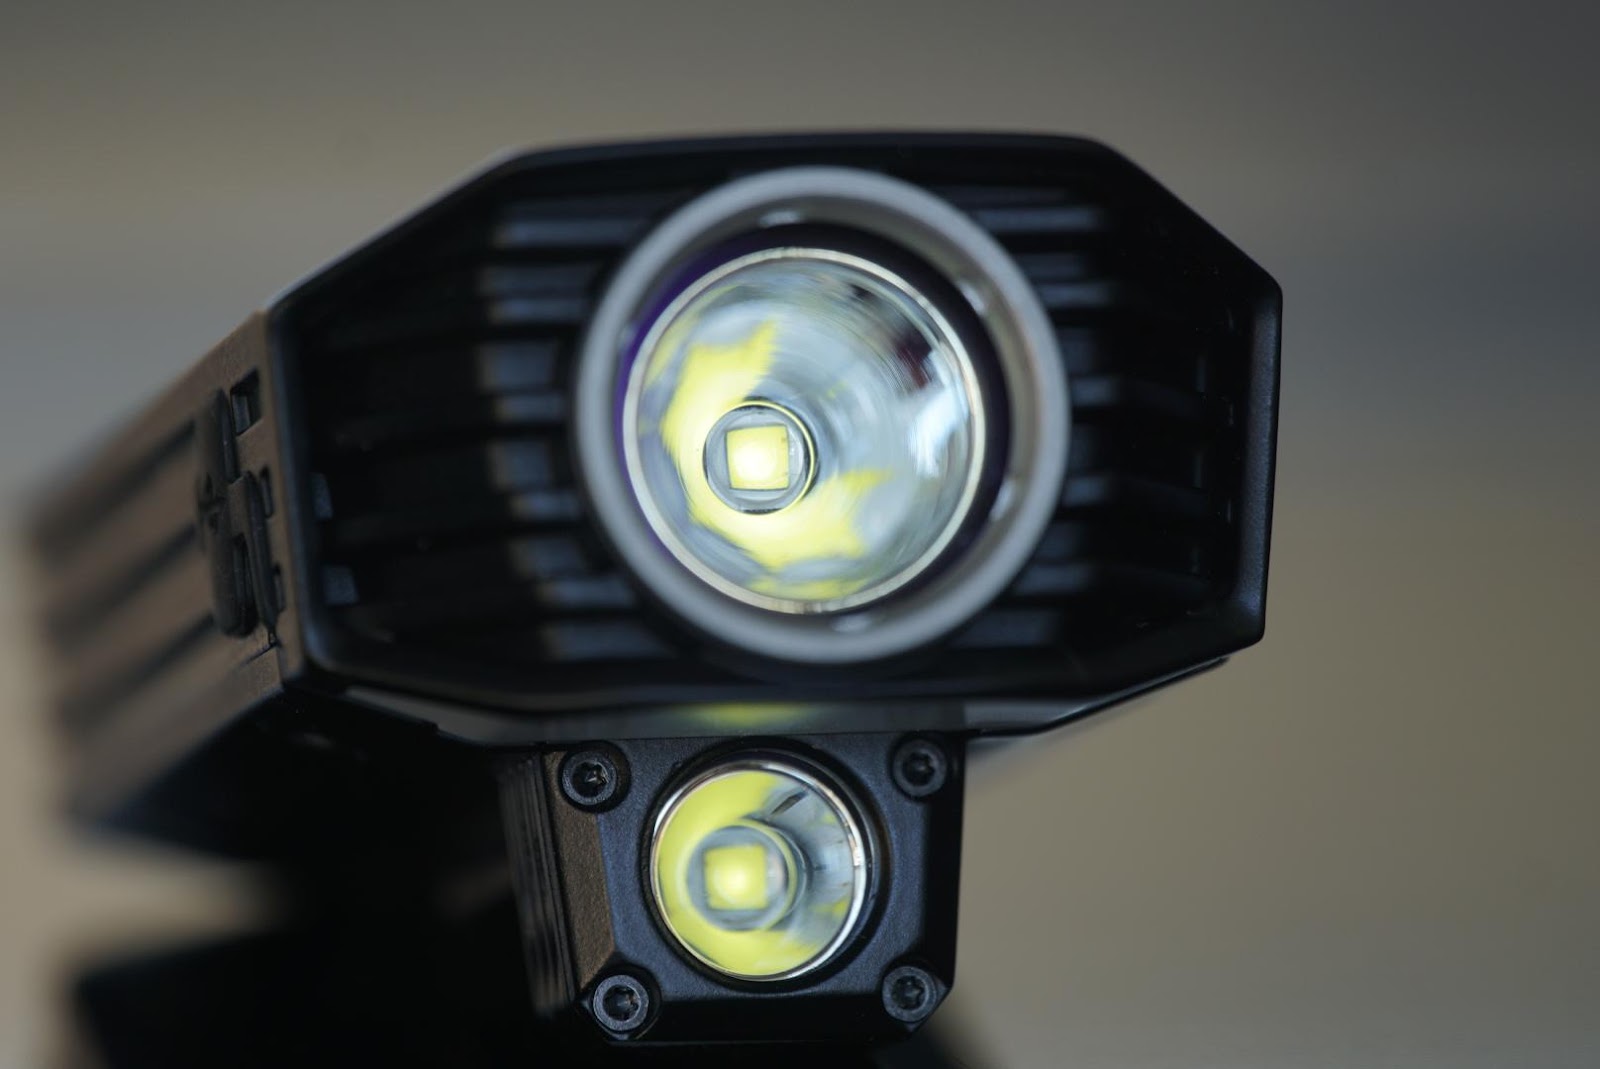
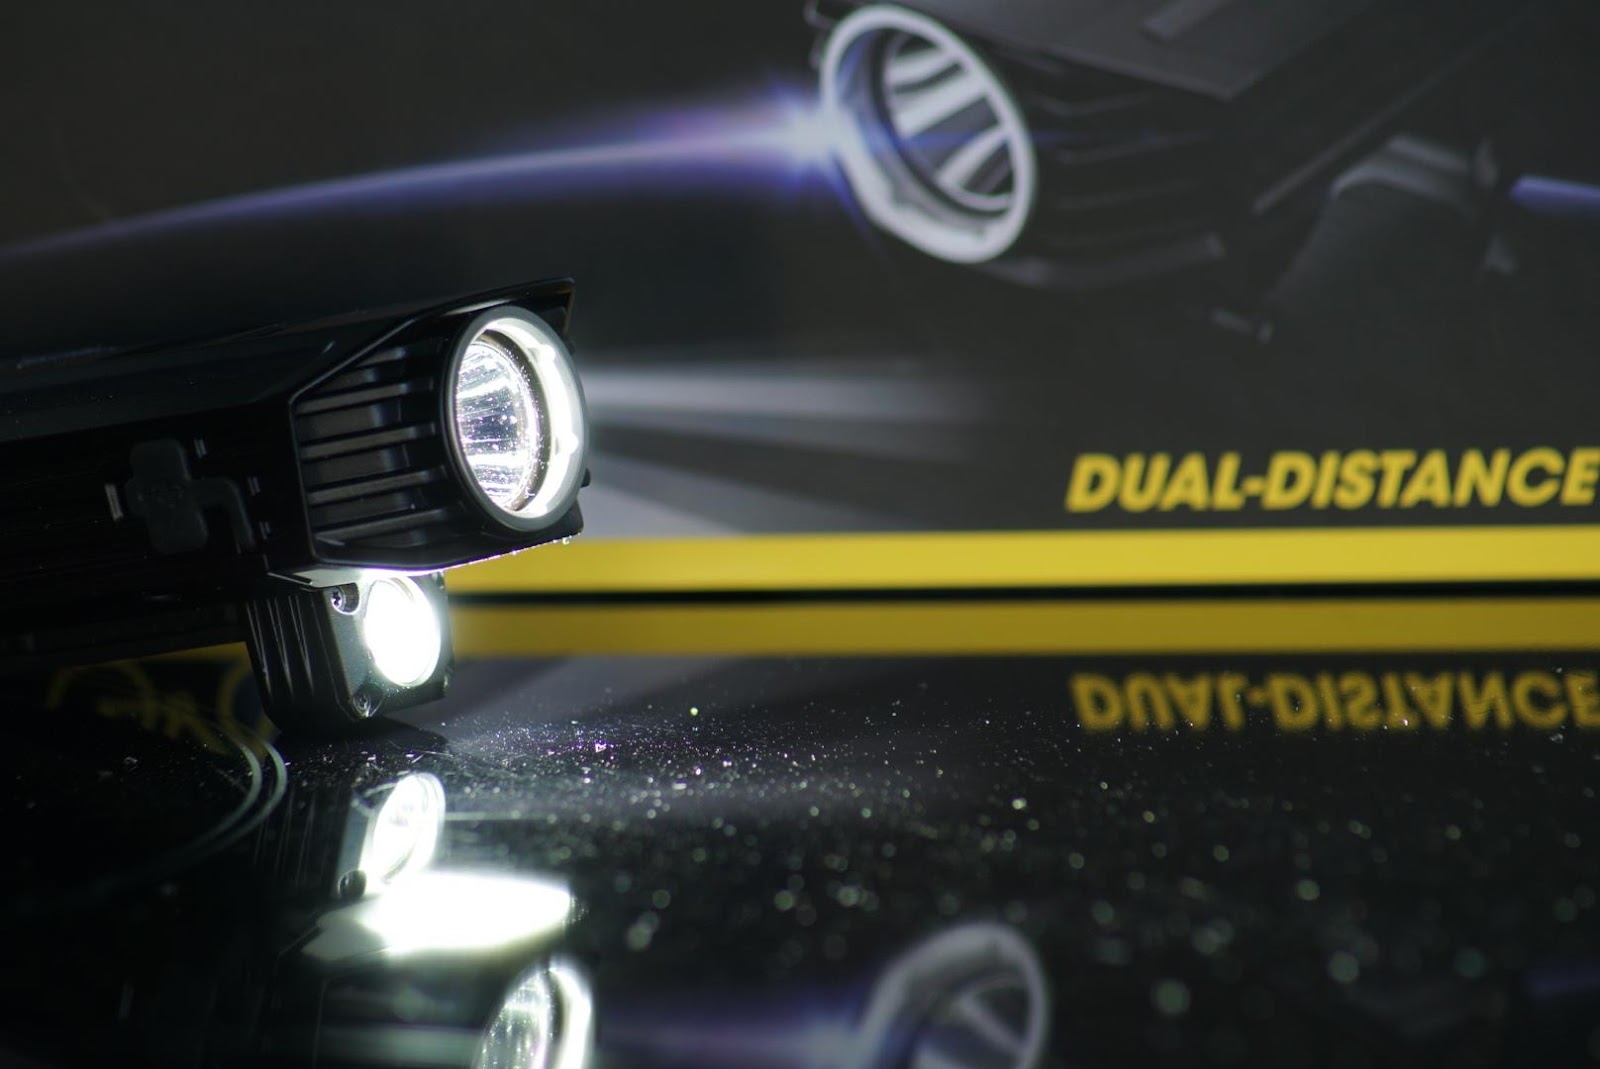
double-headed: one head for long and one for short-range beam

To start with, I'll give you the (manufacturer) specifications of the BR35:
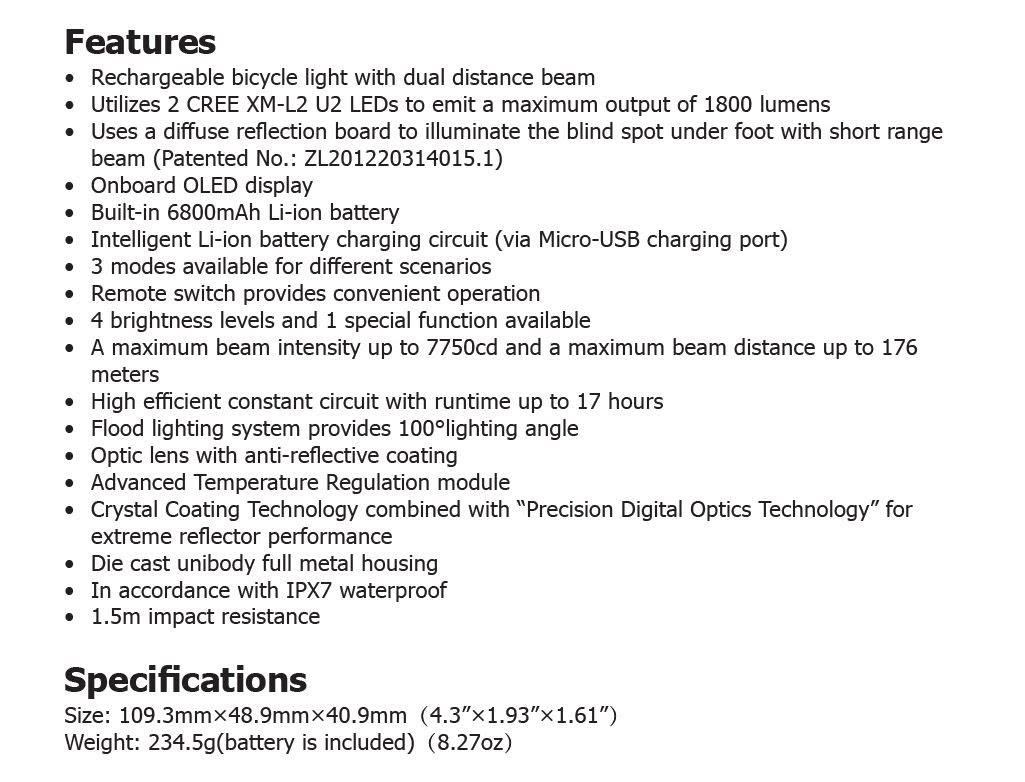
And here's a chart of the output and runtime specs:

Unboxing:
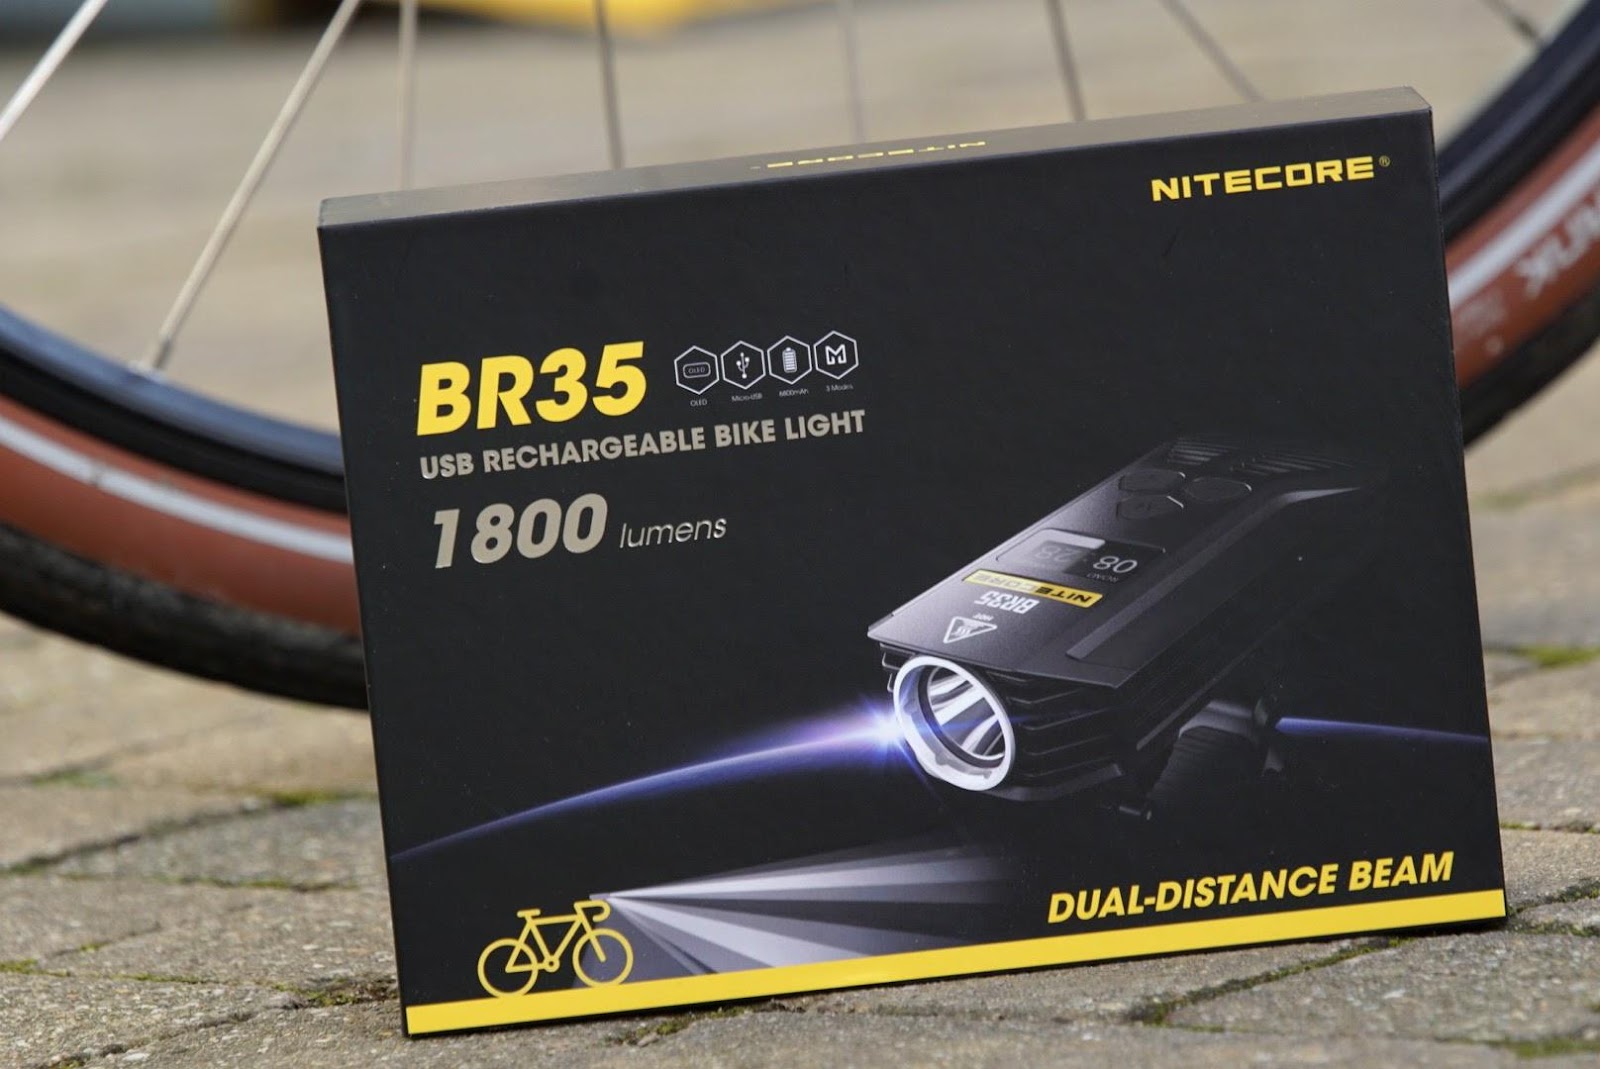
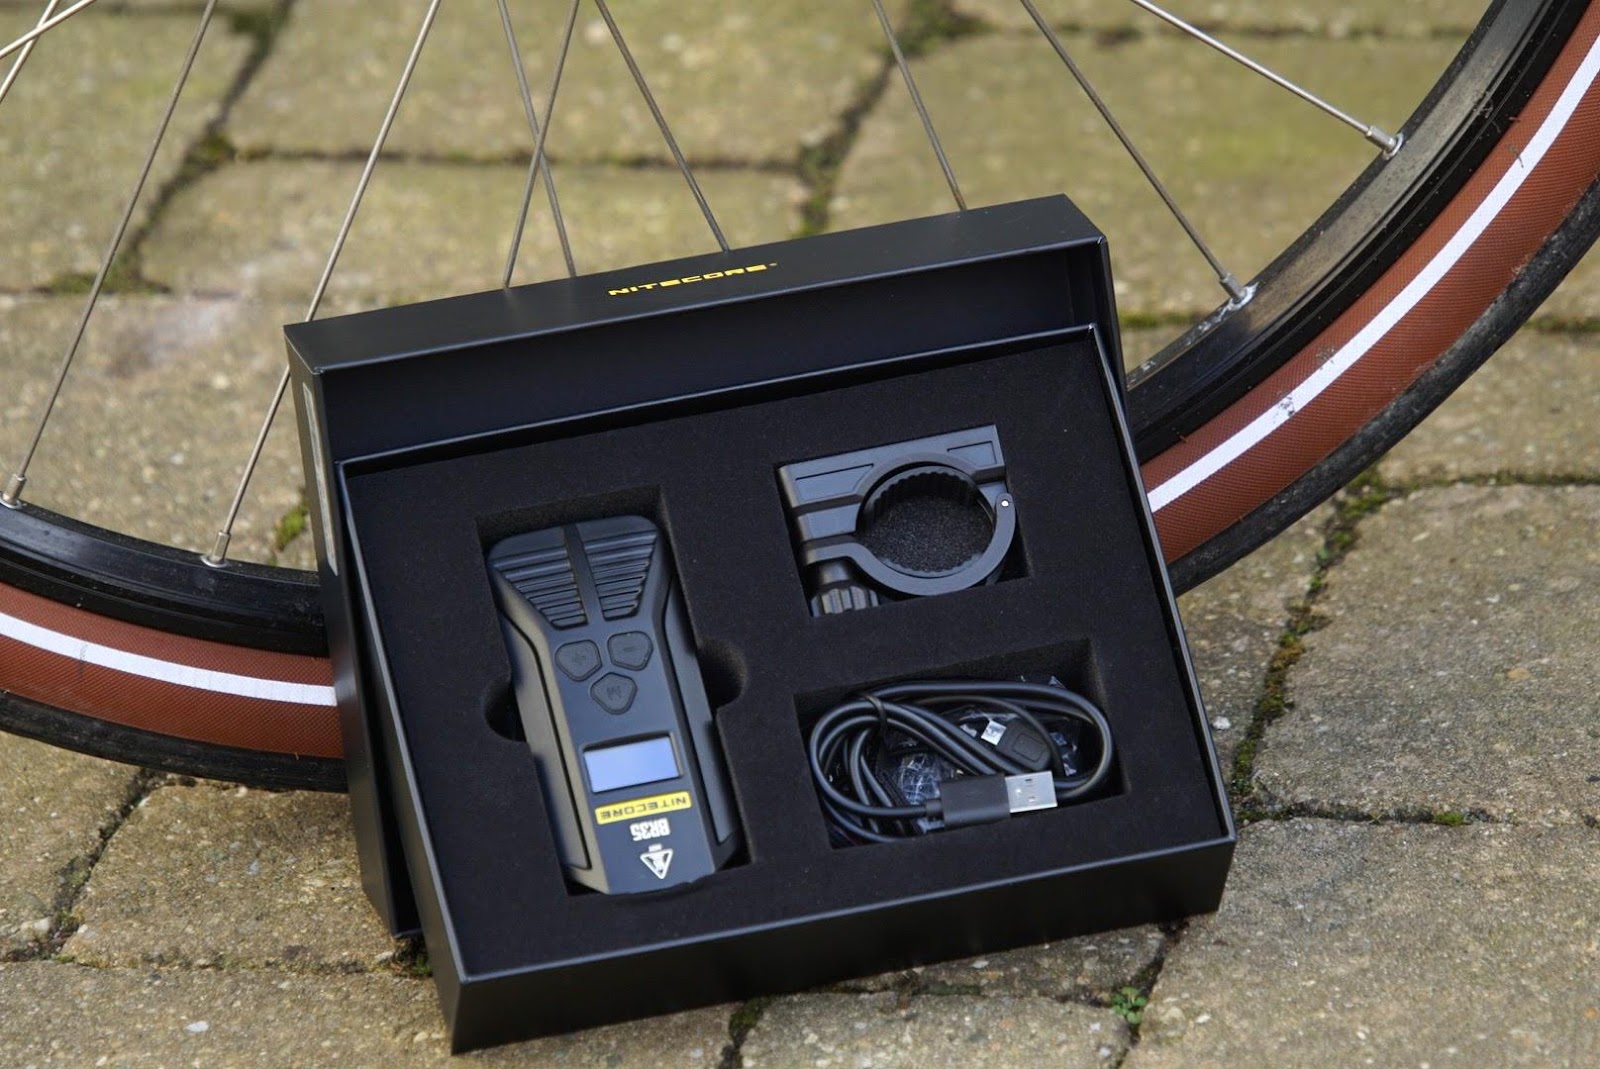
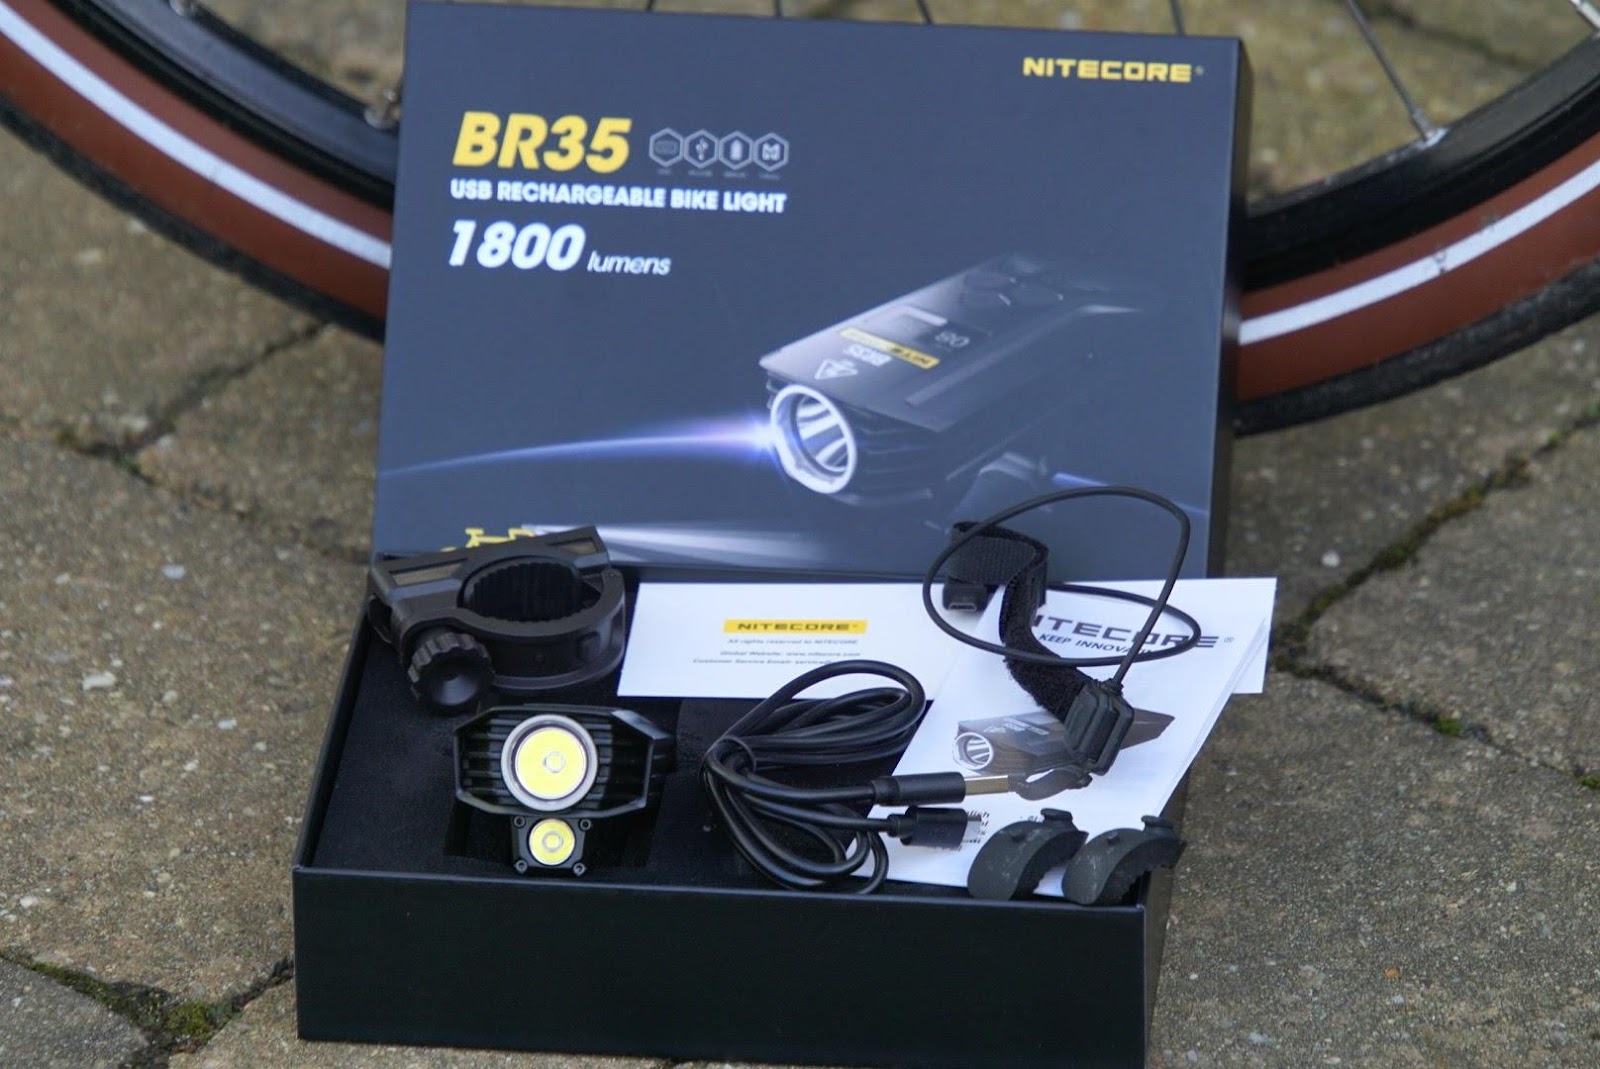
A new box here that I never saw earlier by Nitecore. A "closed-top" carton that comes in main black color with yellow and silver letters. I like the looks of this luxury package! The light keeps its secrets this time, only the double output and the lumens are mentioned on it. Protecting-from inside that has three cut-outs in which you can restore the light and the parts. A very neat box that I really like! Inside we find the main things we need like (of course) the BR35, a charging-cable, adaptor for you bike, remote-cable, manual and thick and thin rubbers for the adaptor. Only tool you need here is a power-source, that, (in my case) I new saw supplied by Nitecore until now. For the rest this nice box is ready-to-go. No negatives here, this is a nice and complete package. Have a look at a couple of pictures that show the box and the BR35 and its accessories.
a closed-top box for the Nitecore BR35
this looks neat: it's easy to (re)store the light and the parts
the contents: ready-to-go!
Impressions:
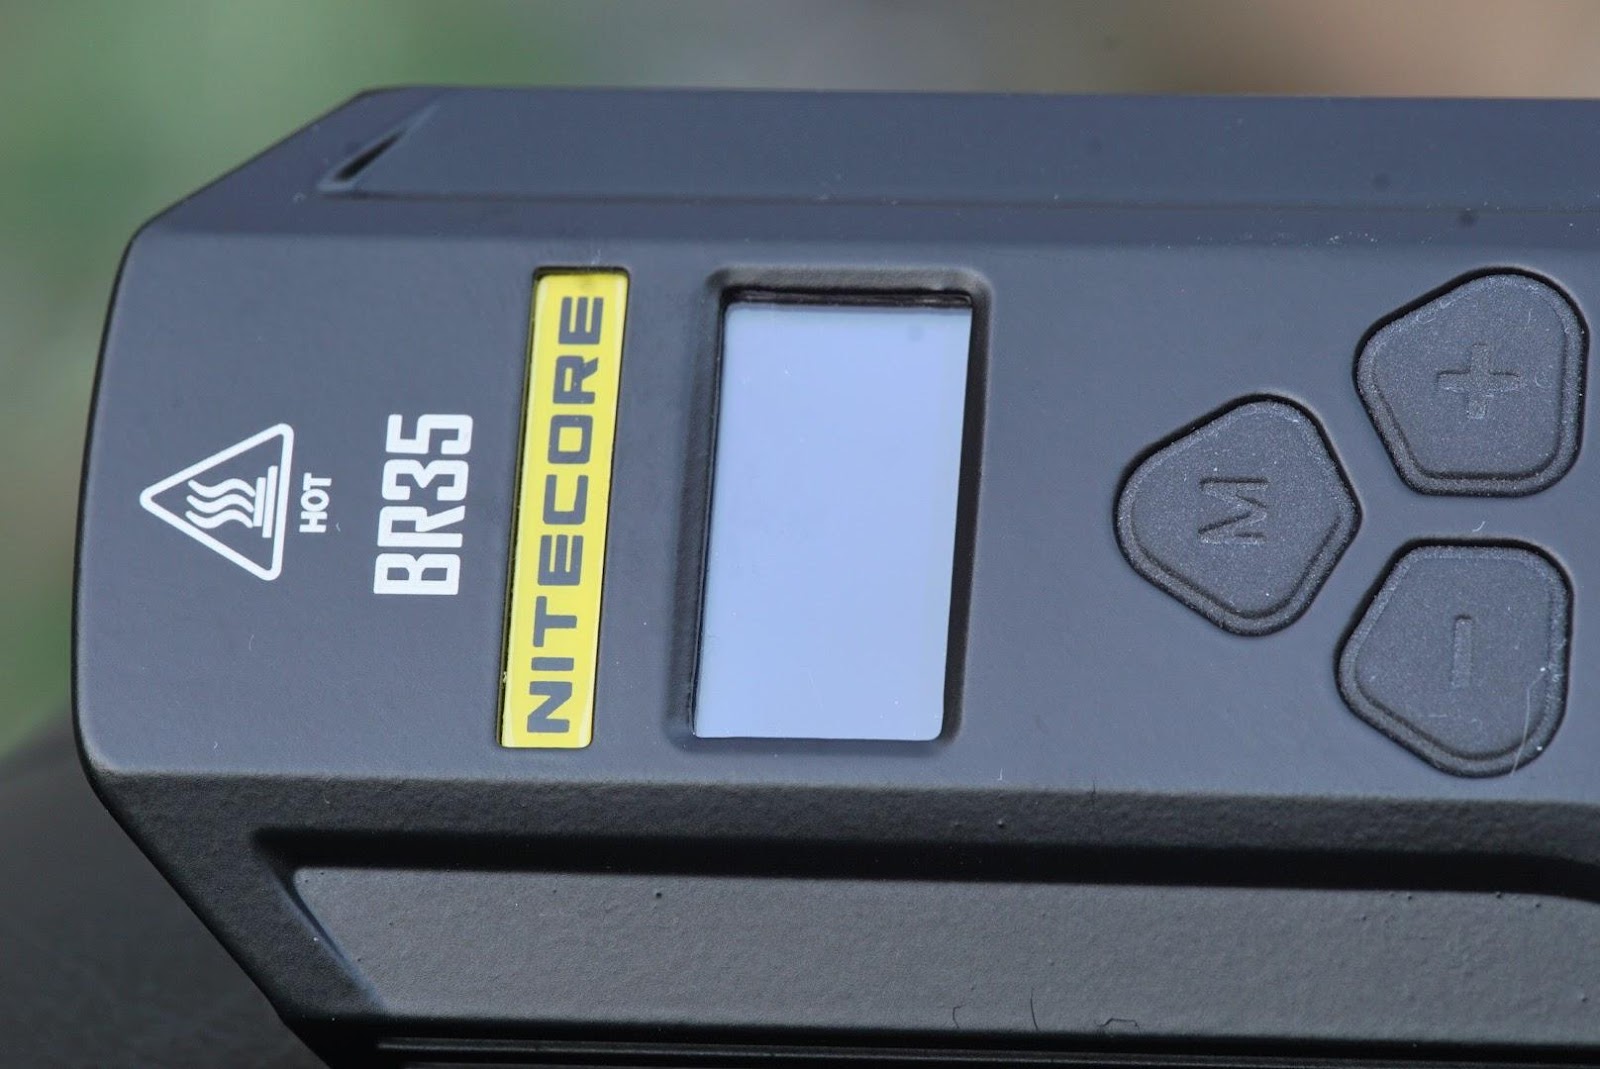
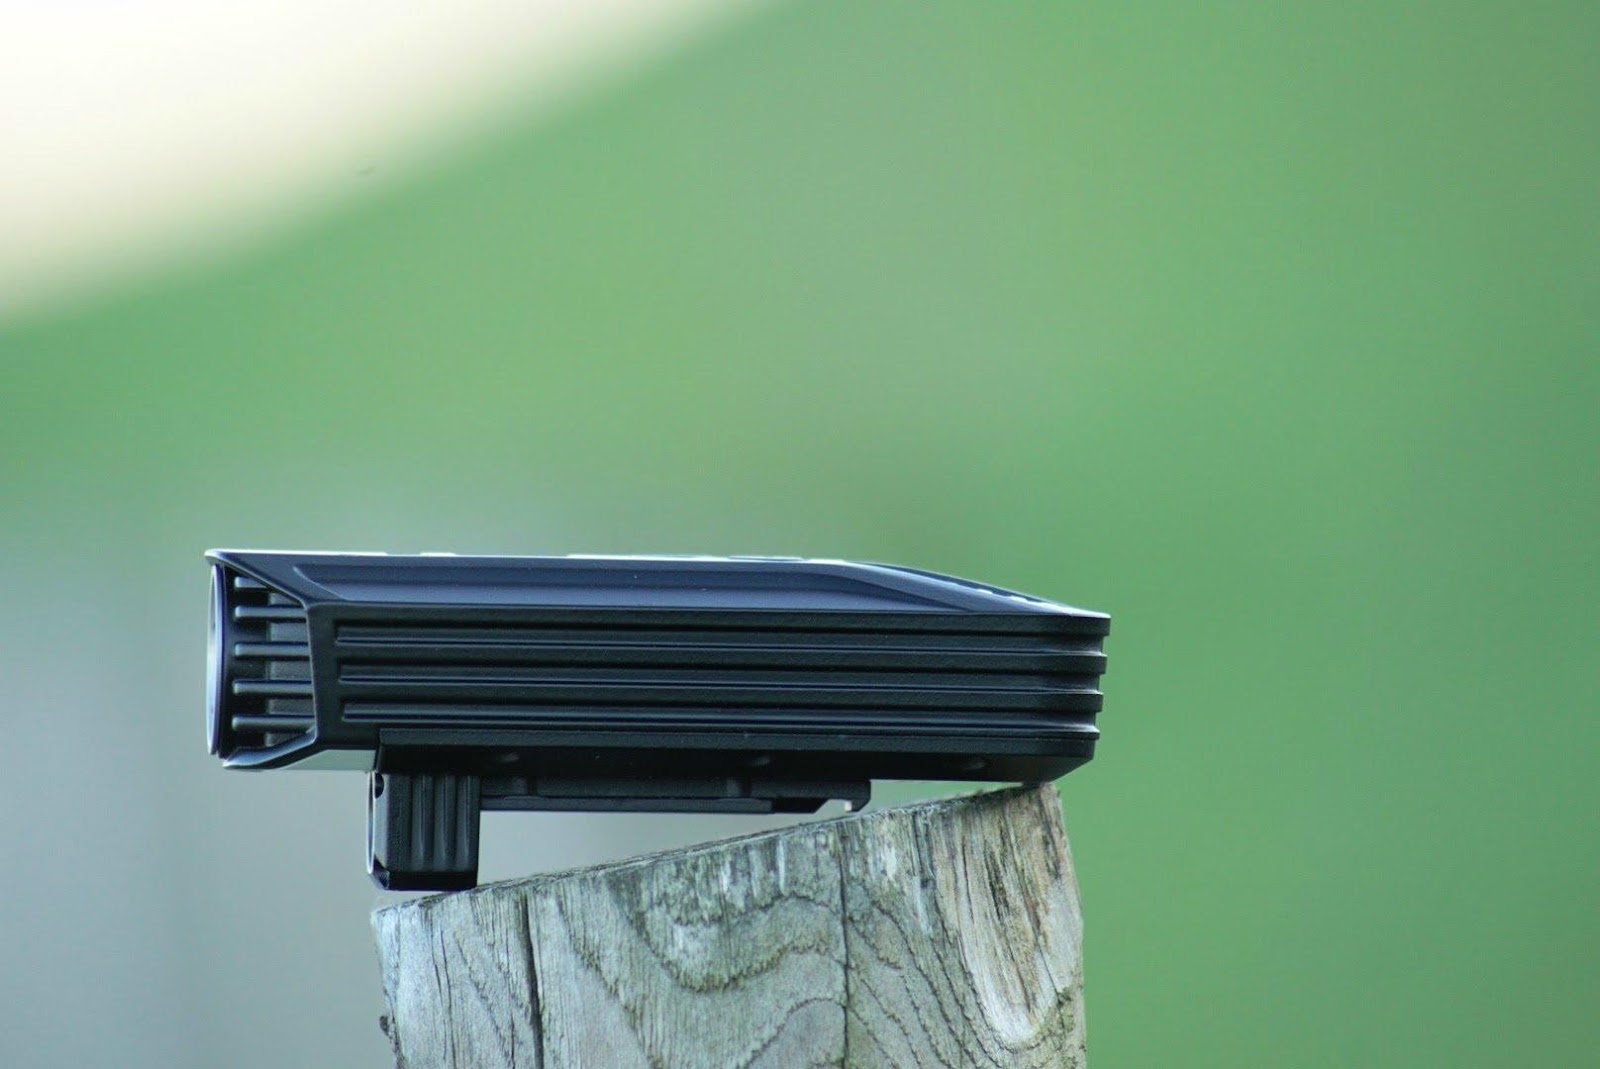
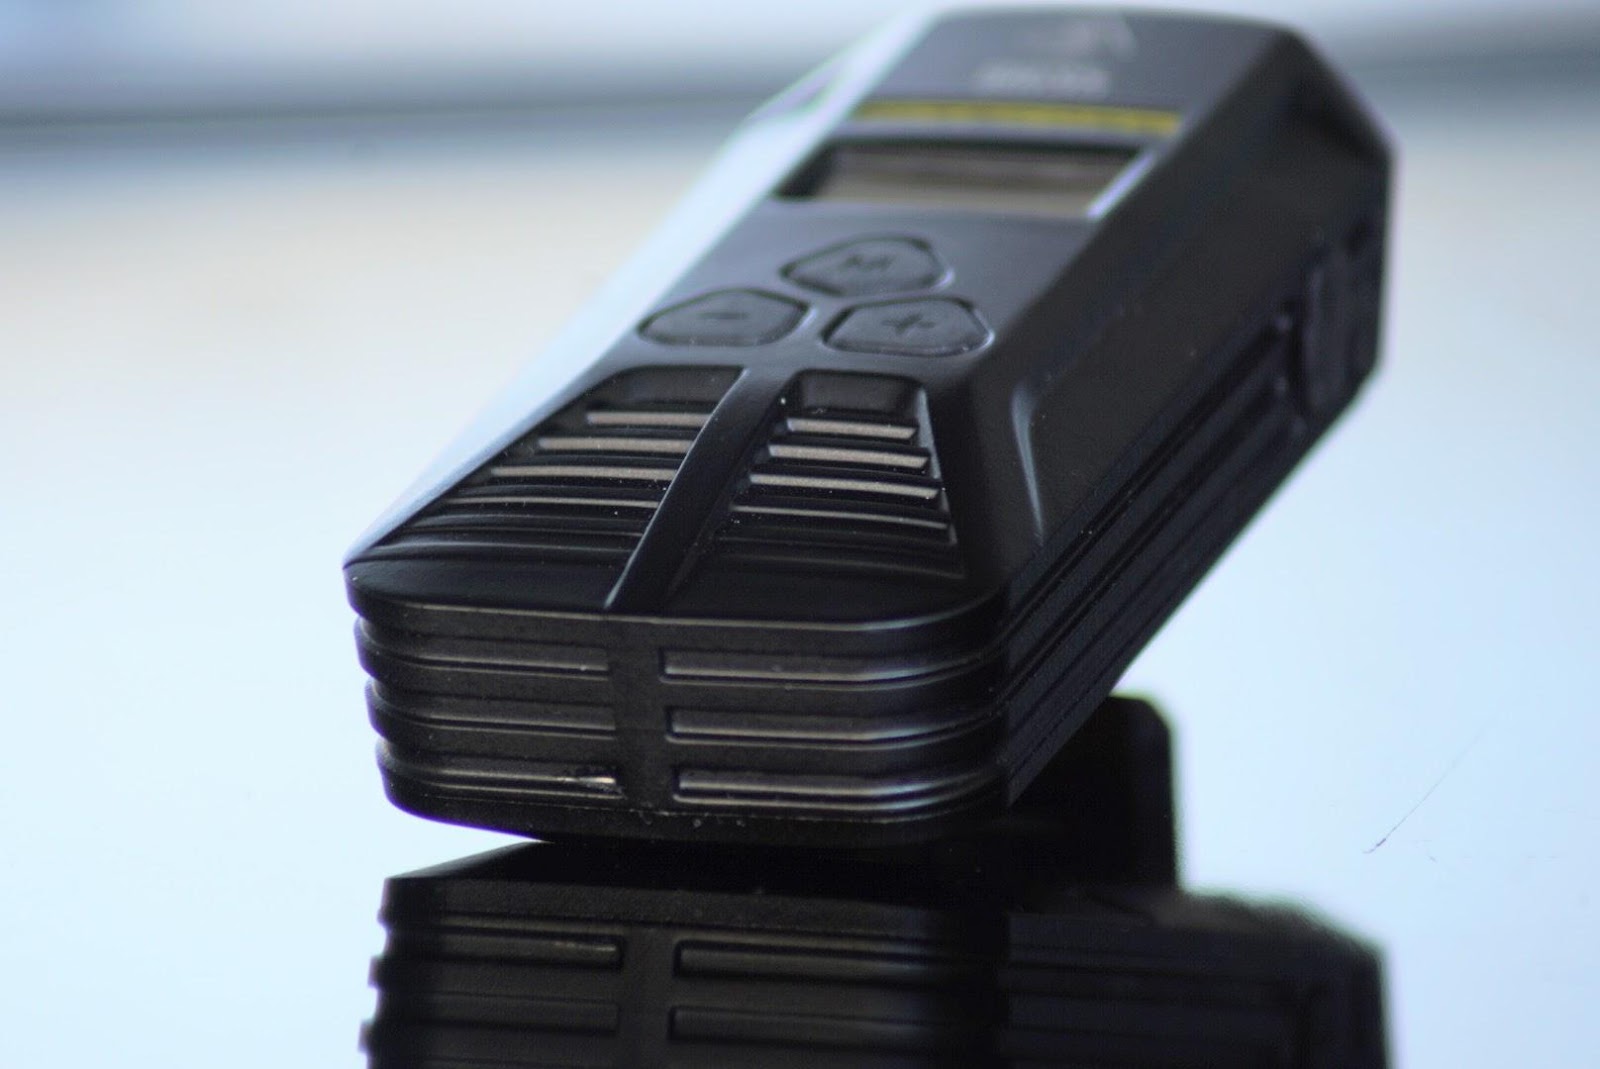
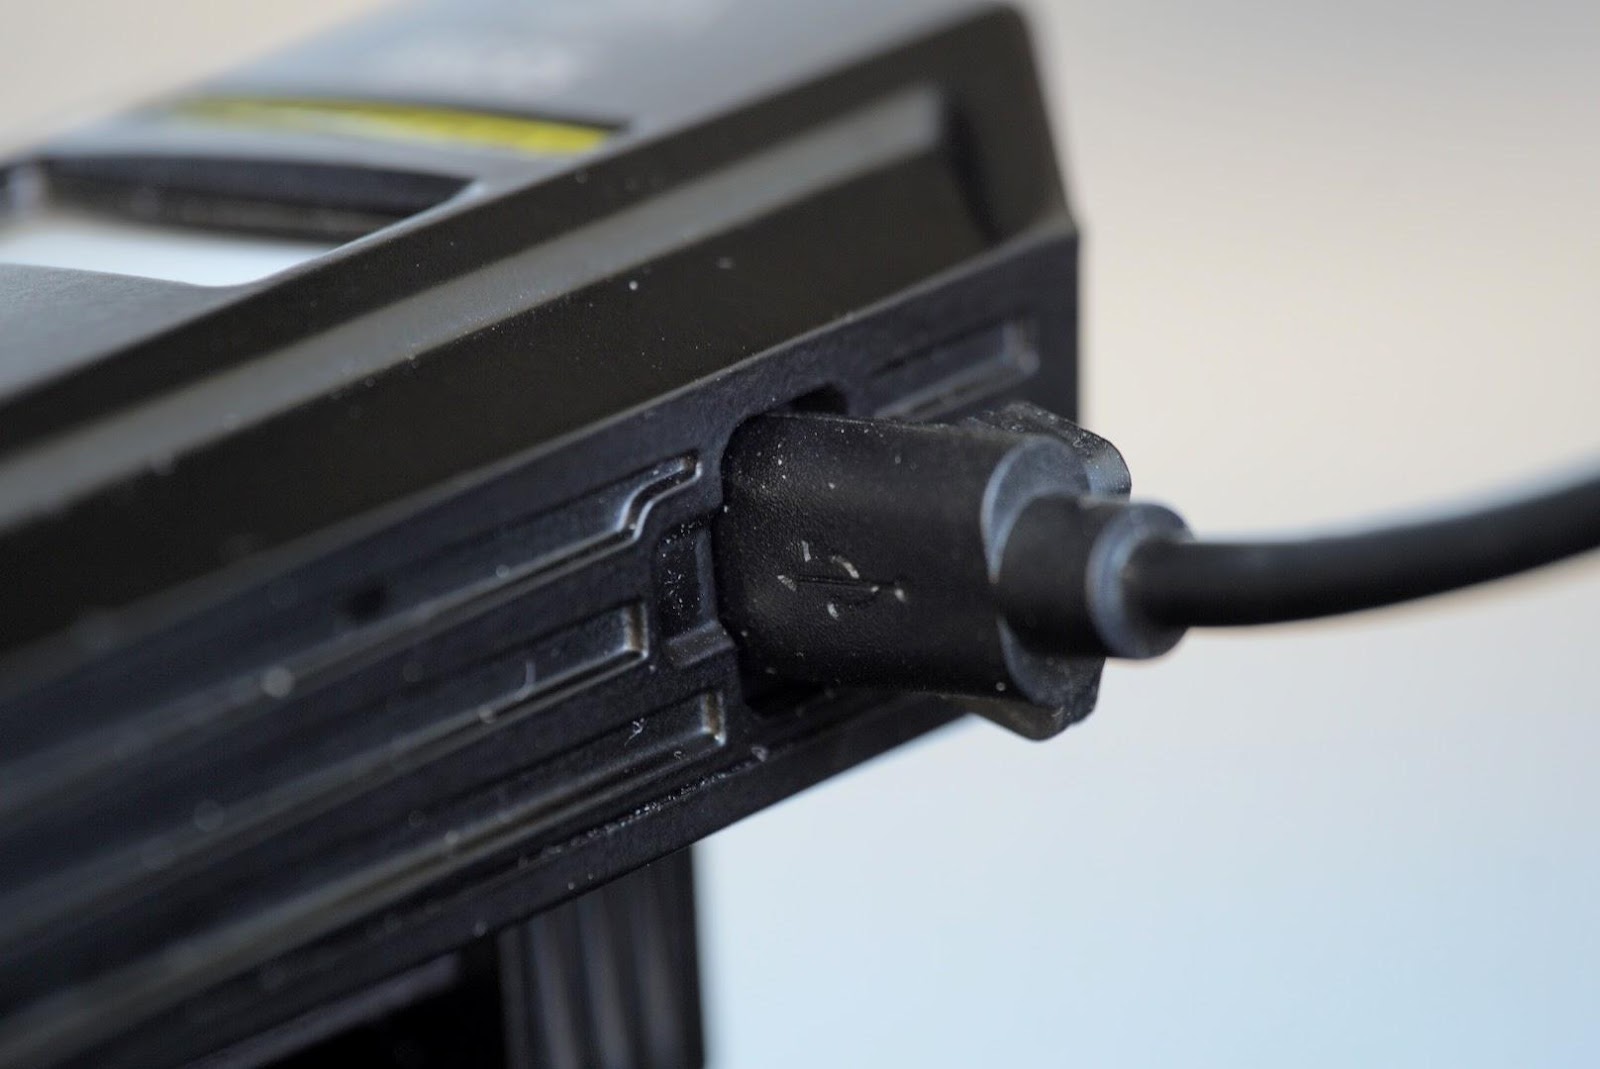
I was really impressed by the BR35 when I held it for first time. Although it is a bit heavy, the overall build-quality is excellent! This diecast light, that is made of one piece, feels good. The body is fully made of metal, the light comes in matte black color with some nice accents. Striking are the "built-in" brand name above the OLED-screen and the white diffuser reflection board under the main head. Although the design of the BR35 reminds to some earlier released bike-lights, Nitecore has given the BR35 its own looks and appearance. Unique detail is the separate and tiny secondary head that is "pasted" on the body. Deep fins around the main head must prevent against overheating. We see these fins back also at both side and at the tail of the BR35. Personally, I like the design. About the anodizing: After some weeks use, I detected that the layer can release quite easily after a drop. This can be a disadvantage of a die-cast light. On top of the design, we see the OLED-screen and the control panel with three rubber buttons. The engraving is clear and well-aligned, like we're used of Nitecore. If you want, the light can be put on its tail, but it isn't stable. To me, this isn't a must on a bike-light. At the right side there's a micro-usb port, that is covered by a rubber cover. This port has two functions: It is needed to recharge the light and you can plug in the remote control there. In front of the BR35, we see two heads: A big and a small one. Both have smooth and shallow reflectors and a XM-L2 U2 emitter it, created to give the light a floody beam. The leds are well-centered, the lenses are clean, the reflectors without defects. An striking detail (and a nice find) is the white diffuse board that reflects the beam of the little head. Advantage is that it won't blind oncoming traffic and it gives also a wide-angled beam to the light. The BR35 has a fixed accupack, so the the only way to open it is to unscrew the nine torx-screws. When I summarize this I have to say that the fit and finish of the BR35 is excellent, very well done by the manufacturer! Have a look at a couple of pictures below that show the details of the light!
zoomed-in to the Nitecore BR35

a bike-light that has its own design
fitted with two XM-L2 U2 leds

with this "dual distance-beam" you can adjust the BR35 to current conditions

1800 lumens is quite a lot for a bike-light

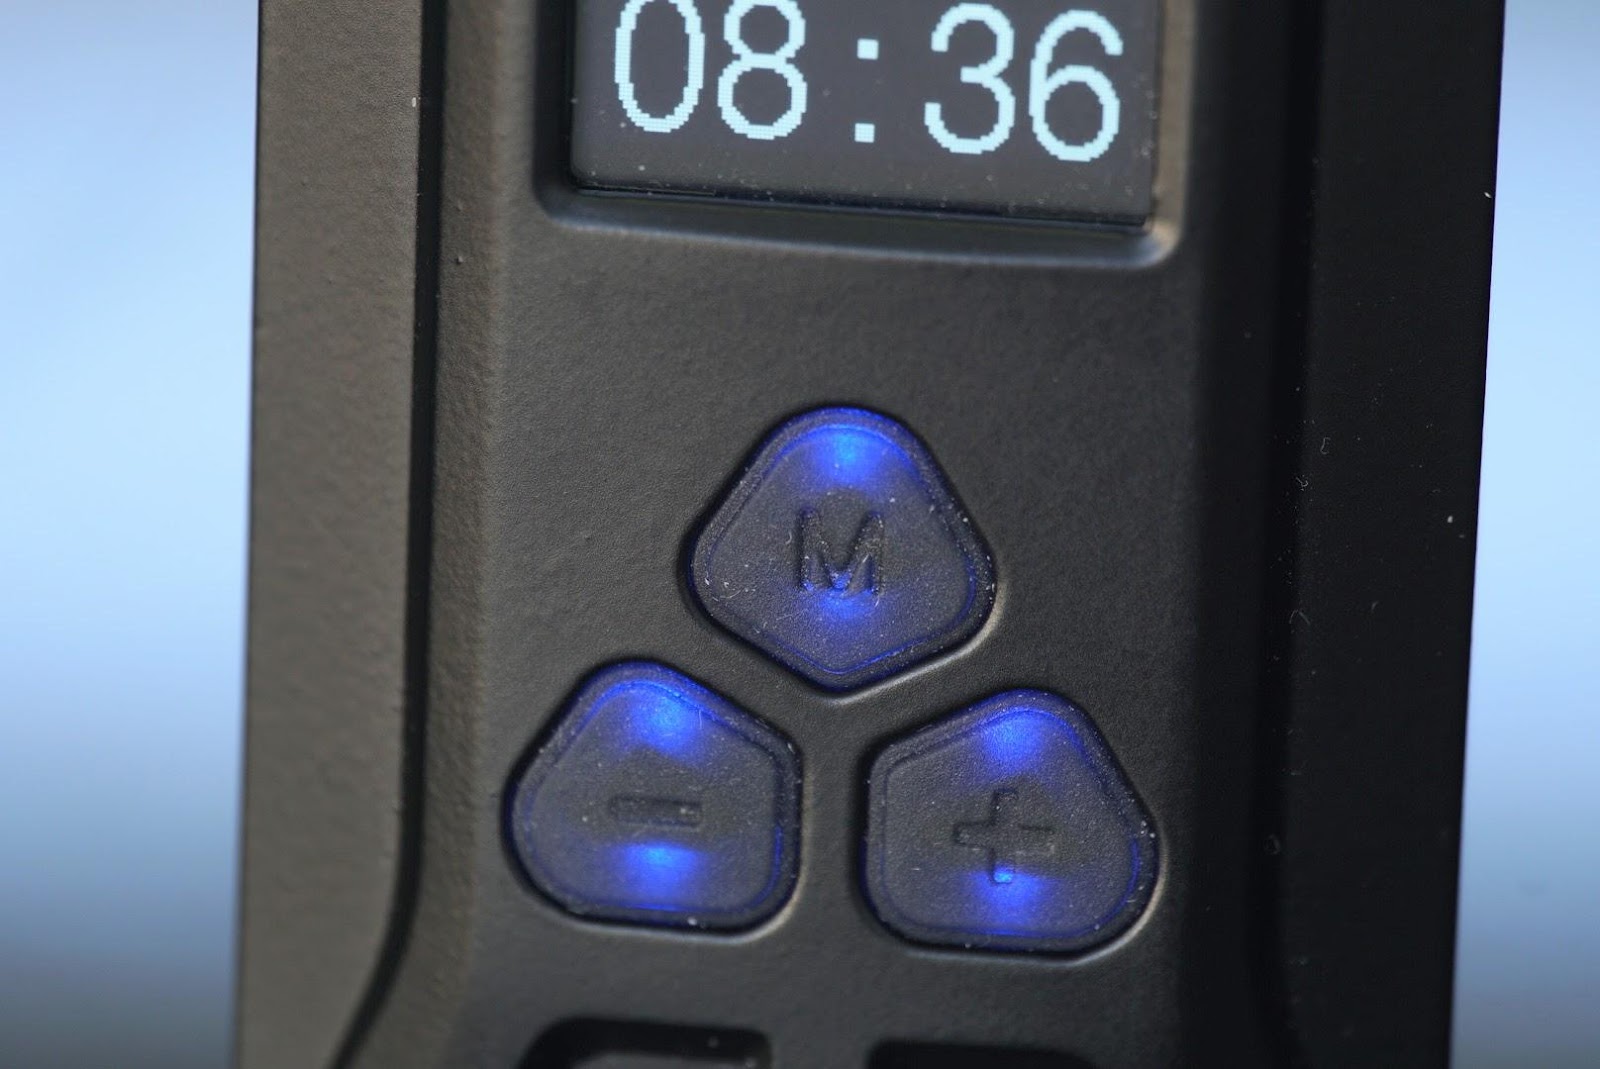
a close-up at the control-panel
a look at the head and the covered charging port
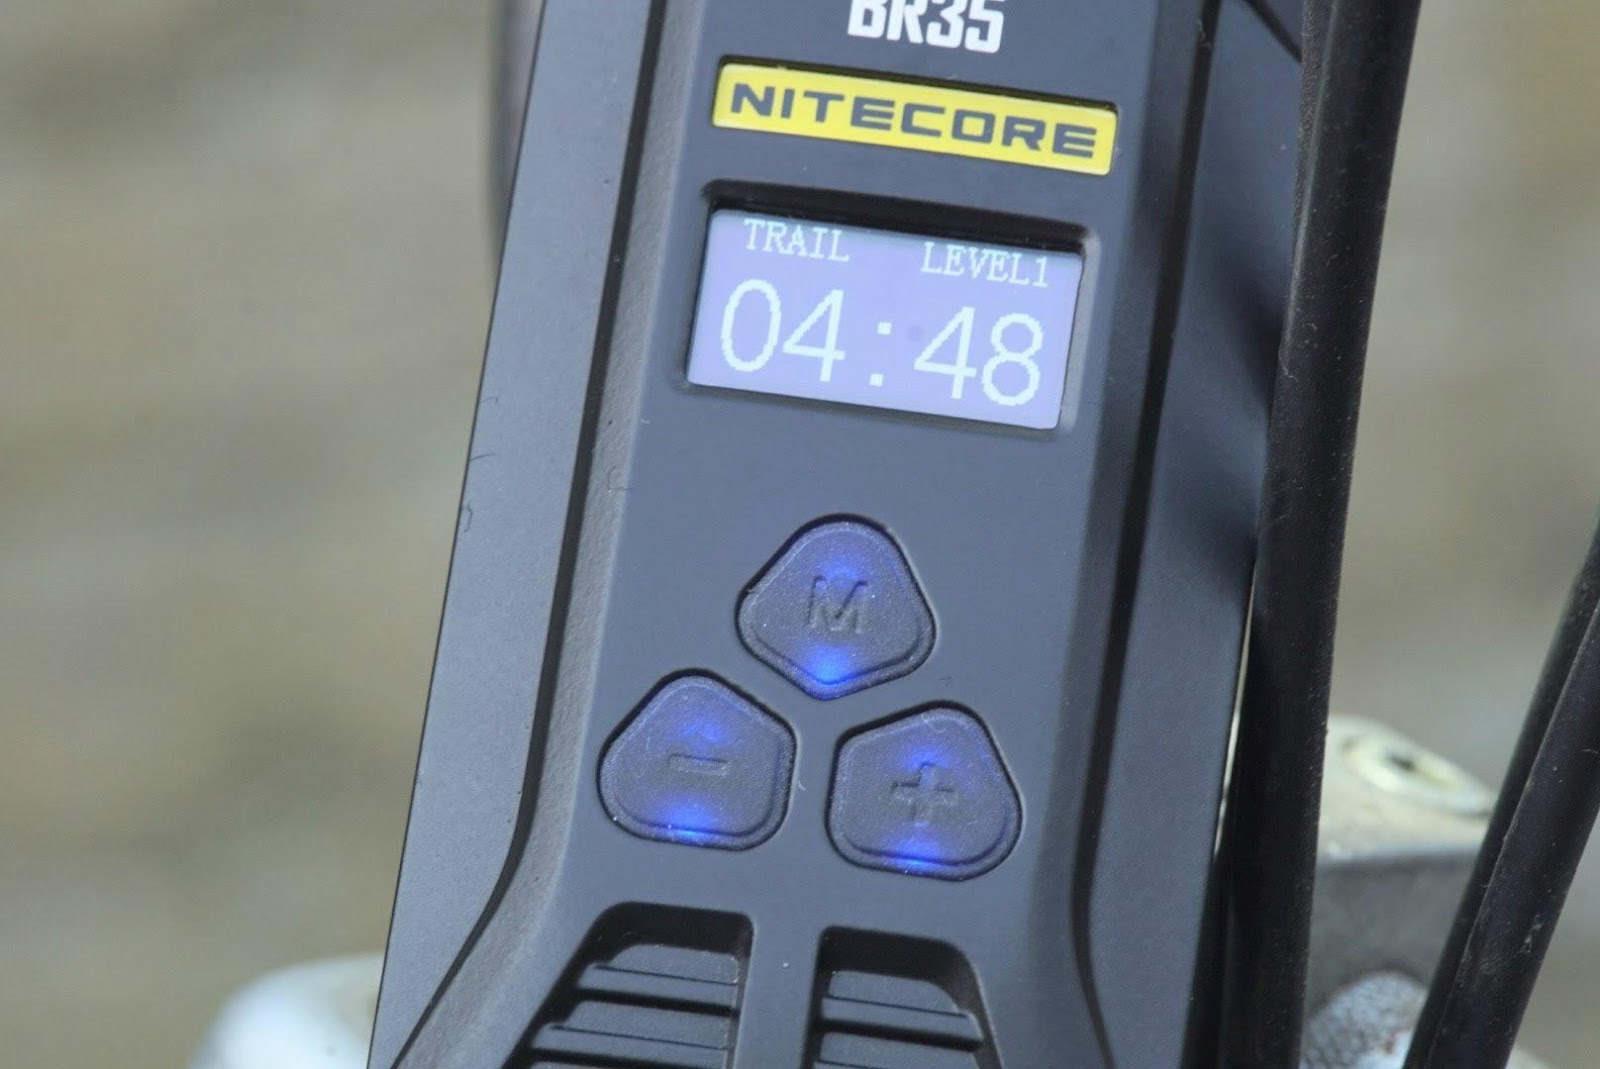
thanks to the illumination you will always find the right button
at the display you see the main mode, the level and the remaining time of the battery
everywhere fins to dissipate the heat
a close up at the white reflection board: a nice find!
well-constructed!

an easy job: charging the BR35
nice design and accents
both XM-L2 U2 are well-centered in smooth reflectors
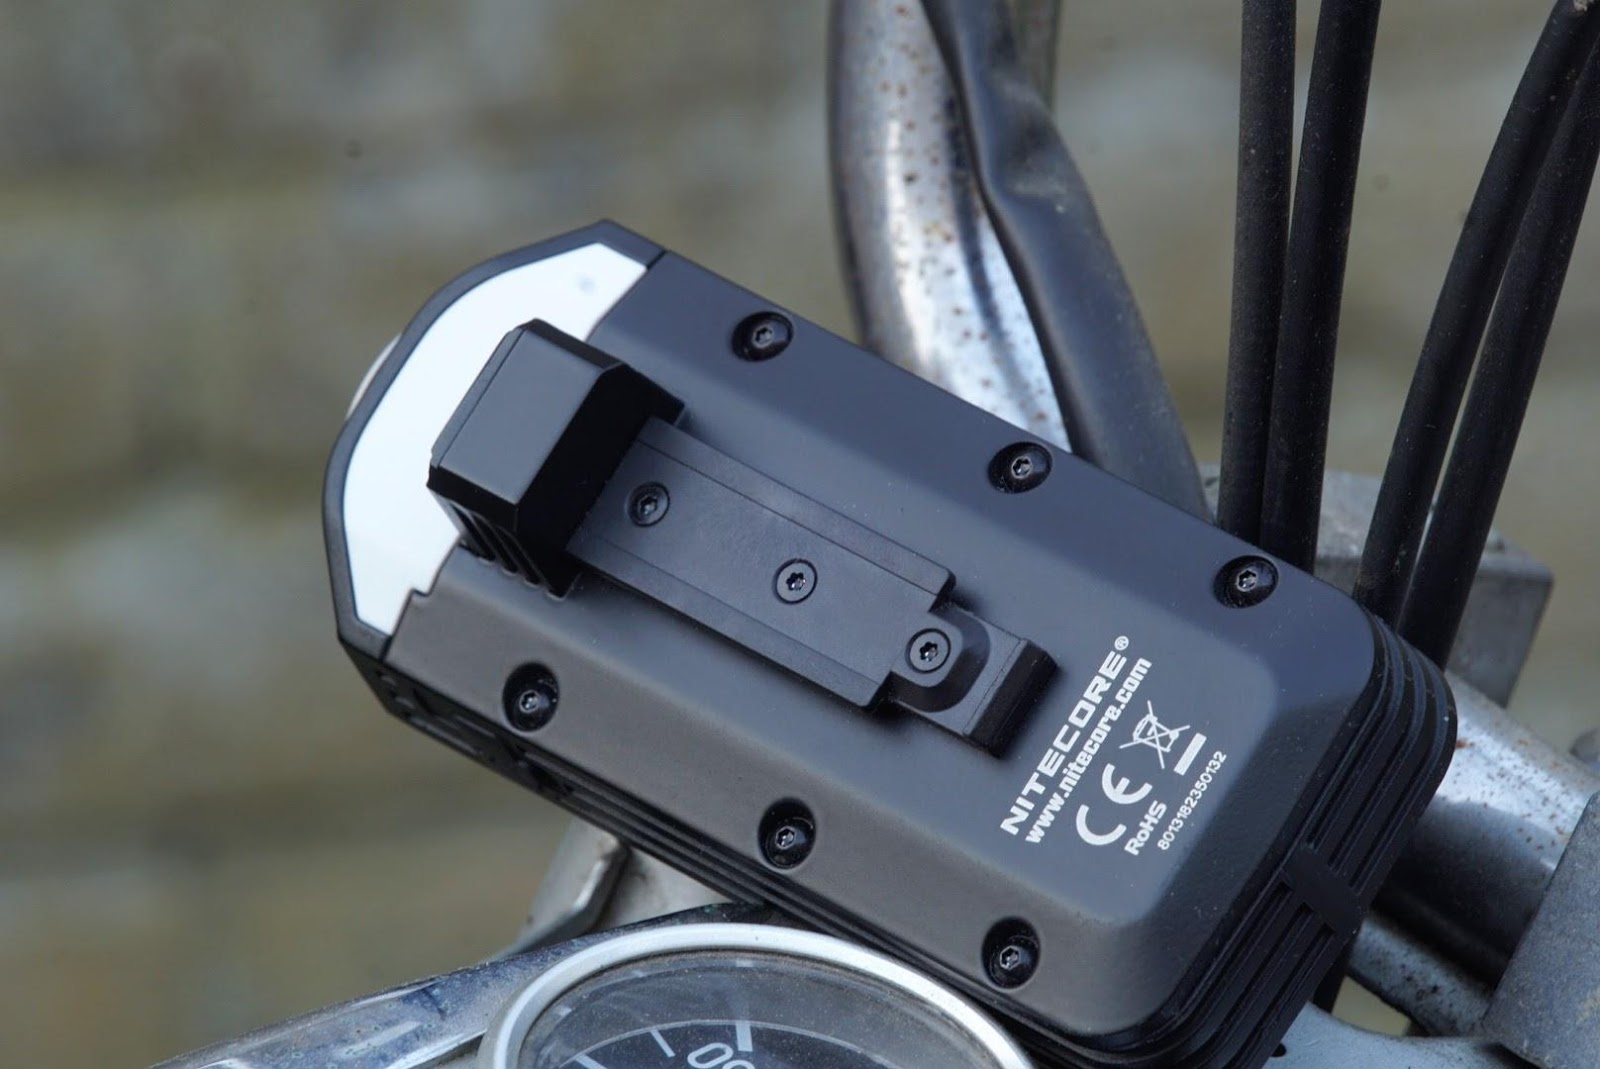
fits on almost every bike

the remote control can be fixed next to the handlebar
looking for the way; five and a half hours left with the battery..
the lower head is for short range
stable construction, nice design

shown on a classic bike on a sunny day; the BR35 isn't needed at the moment..
the dual-beam shown by a snapshot with a cell phone

heads work separate or together

User interface:
Thanks to the "flat" design of the BR35 it can be transported in you coat of pants pocket without problems. But keep in mind that it's a rather heavy device. Thanks of the shape and the good grip, you can use it as flashlight too; nice fact to have bike- and flashlight in one. Just take it off the handle if you've parked your bike and use it as a flashlight.
For charging, you need a power-source with a maximum of 2A. It's not that difficult to (re)charge to BR35: simply connect the cable and the charging will start automatically. On the screen a big battery bar icon is showed (that has totally four parts) and the three buttons will slowly flash in blue. If the battery is full, the buttons will light up steadily and the bar is full. Charging took in my case (with 2A) about 4 hours with an almost depleted accu.
Fixing the handle bar mount to a bike works easy and fast; in the manual you can find info about which rubbers are needed for your bike. Adding the mount takes only a few seconds, just fix it and use the screw to tighten it. After that, just slide the BR35 into the mount, beware that a soft click must be heard. If you want, add the remote control close to a handle and you're ready to go! No issues here, works all smooth.
The BR35 has three main-modes, so you can "tune" the light to the current conditions in which you are. The options are: CITY (for riding in urban area), ROAD (on the road) and TRAIL (for outdoor, forest). The difference between the modes is which one of the two heads (or both) will turn on. So, when you're in CITY-mode, only the lower head (designed for short range) will turn on. In ROAD, you can cycle between the upper (designed for long range) and the lower head and in TRAIL both are on. In any mode, if the light is on, you have the option to (temporarily) edit the actual mode to your wishes. A good point here! The interface for all modes works the same. Press and hold the power switch for about 1,5 seconds to turn on the BR35. It will start than in last used main mode and level. On the display you see "Nitecore" for short time and after that you see info about actual main mode, output level and remaining hours and minutes. If the light is on, you can only change the output level, not the main-mode you're in. To change your level, simply press the + or - button to cycle between the four levels. Press and hold the plus or minus button to go directly to the instant-low and instant-turbo. Works easy and good. If you tap the M-button when the BR35 is on, you can change the beam without turning the light off and on again. For example: If you're are in TRAIL-mode, you can turn off the long-range beam by tapping the M-button when you have an oncoming vehicle, and turn it turn again by a tap if your path is free again. Like I mentioned earlier, the default on CITY-mode is the short-range beam, but if you tap the M-button, you can both beam for three seconds. This option is made for signaling and to alert a oncoming vehicle. In ROAD-mode the light will start also start in the short-range beam. Tapping the M-button will ad the long-range beam to it; this gives the opportunity to have the maximum beam when it's very dark. In TRAIL, the BR35 starts with both heads, with the M-button you can switch off the short range beam. So, the BR35 has a thought-out interface, this bike-light can be adjusted to everyone's desire. The remote switch can be used to turn on and off, for selecting the main output mode and to cycle between the first and secondary output mode; but you can't set the output-levels with it. So, this remote is meant for main-functions when you're on the way: to give an alert or to adapt your profile to actual conditions. In short: it has the same function as the M-button on the BR35. The light has a special mode: Flashing / Caution-light. In CITY or ROAD-mode, the lower (short-range) head will be used, in TRAIL both heads will flash. You can activate this mode only from off by pressing and holding the + and - button for some seconds. You can control the brightness too: Caution-light will start in the last used output level. When you short-click any button if the BR35 is in stand-by, the buttons will light up for a few seconds, this will help you to find the right button in the dark. At same time you can check the actual battery-status, displayed by the bar on the screen. The bar shows four parts if the battery is above 90%, three means above 50, two parts means between 10 and 50 and one grid means level lower than 10%.
The interface of the BR35 works well, and doesn't take effort to control it. For a bike light, it has a lot of interesting options, the double head that has a short and a long range beam is a nice find.
Modes:
The output of the BR35 can be adapted to different scenarios. The three, CITY, ROAD and TRAIL all have four normal output levels, in order of: LOW - MID - HIGH -TURBO. The spacing is good between the four, but I really miss a good low on this light. I would like to see a mode between 5 and 20 lumens. Two direct modes, that only work when the light is turned on: instant-LOW and instant-TURBO. The only special mode on this bikelight is the CAUTION-light. Unique is that it can flash on every output mode. There's no lock-out on the BR35; the actual VOLTAGE is continuously displayed at the screen. The status of the battery can be checked in stand-by too. To a bike-light, the BR35 has a bunch of modes and options, so this will be sufficient to most users.
Size comparison:
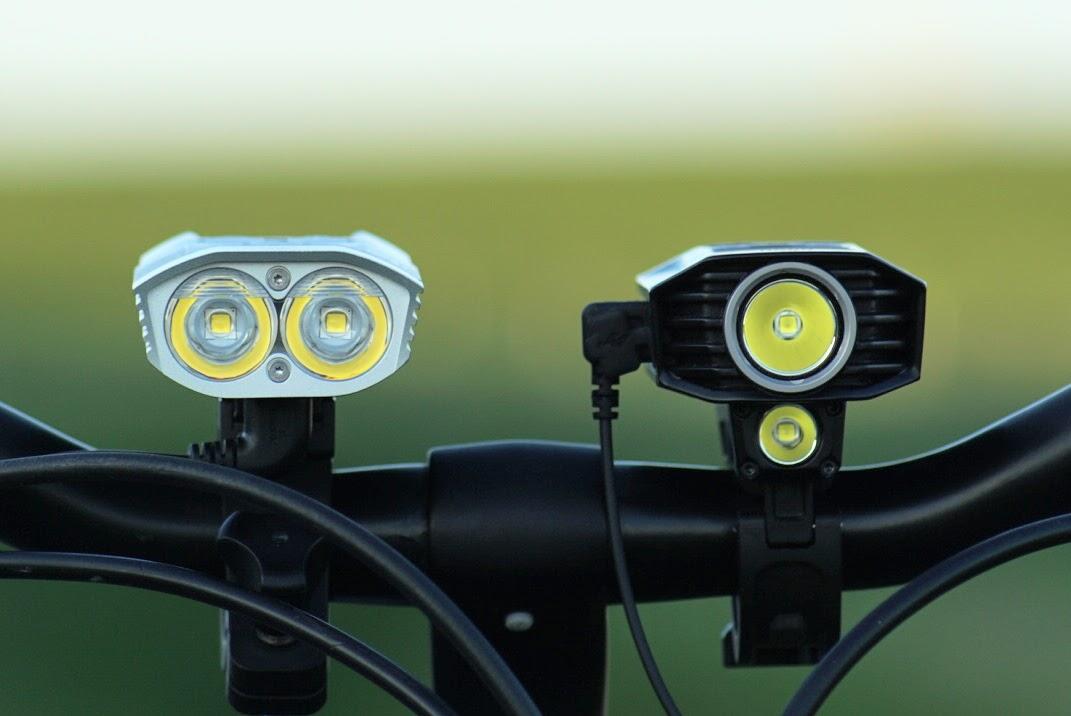
To show the size of this light, a picture next to a 18650 and to another bike-light in this class, the Fenix BC30R. For the beamshots, that I will show you later in this review, I'll pick those two again.
Fenix BC30R and Nitecore BR35
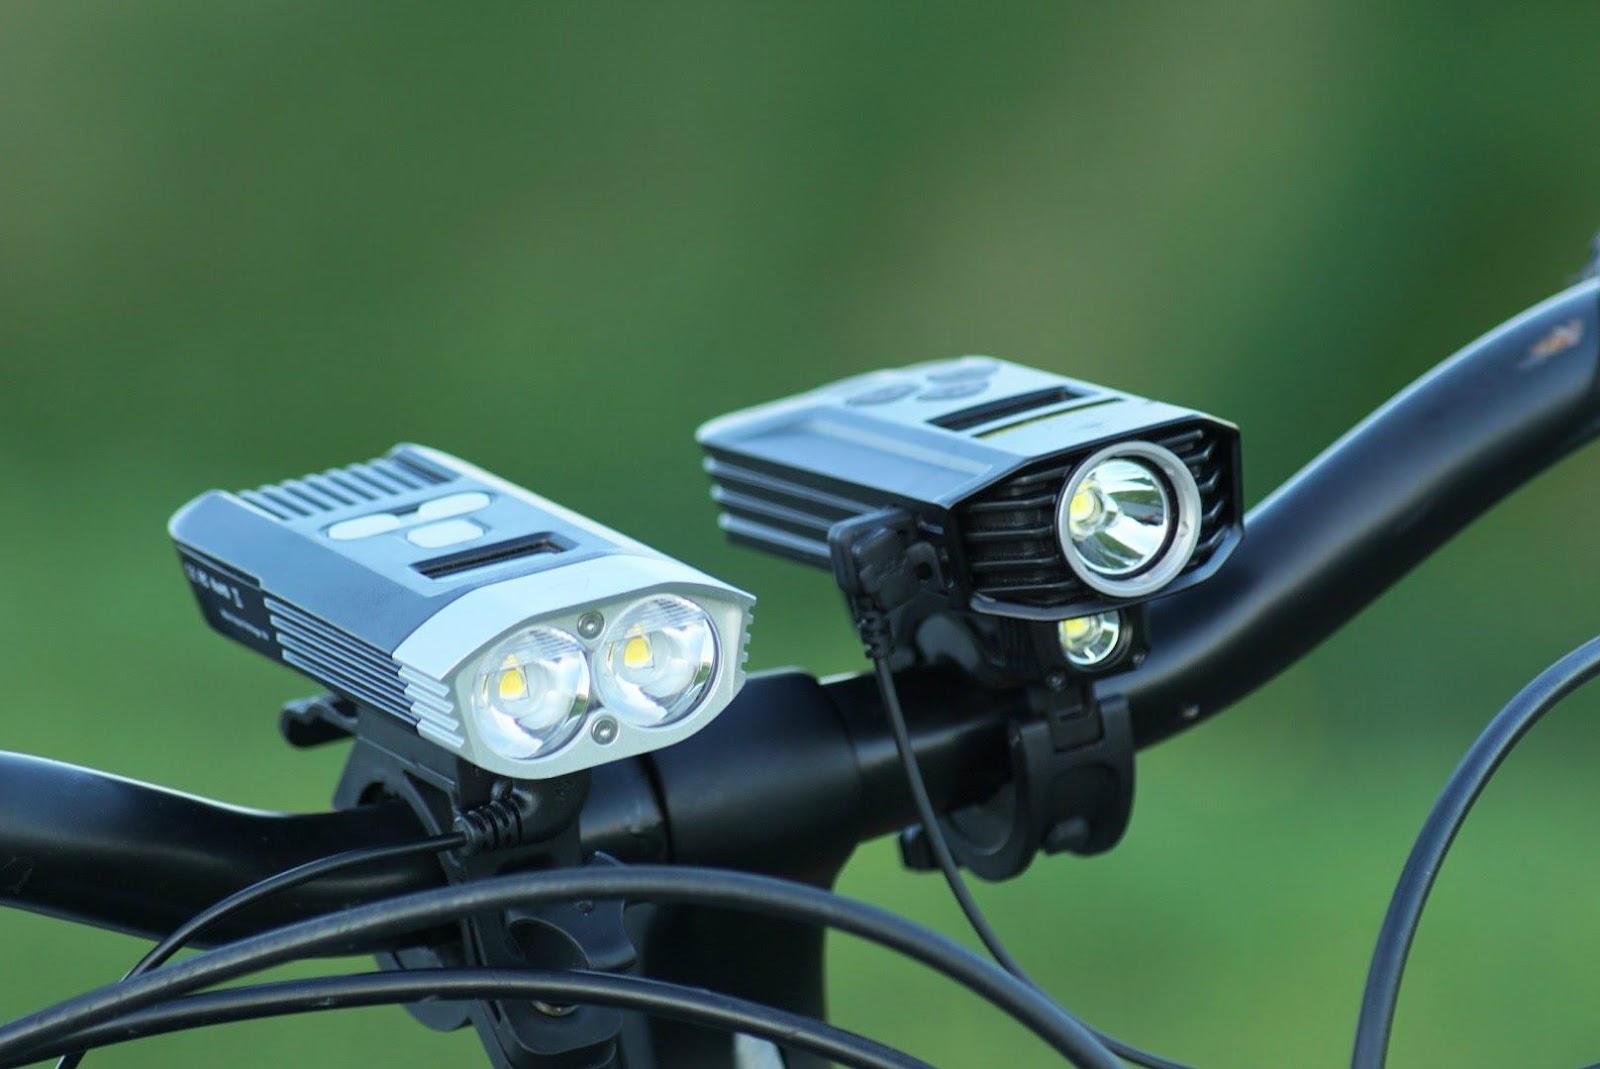
Nitecore BR35 and Fenix BC30R
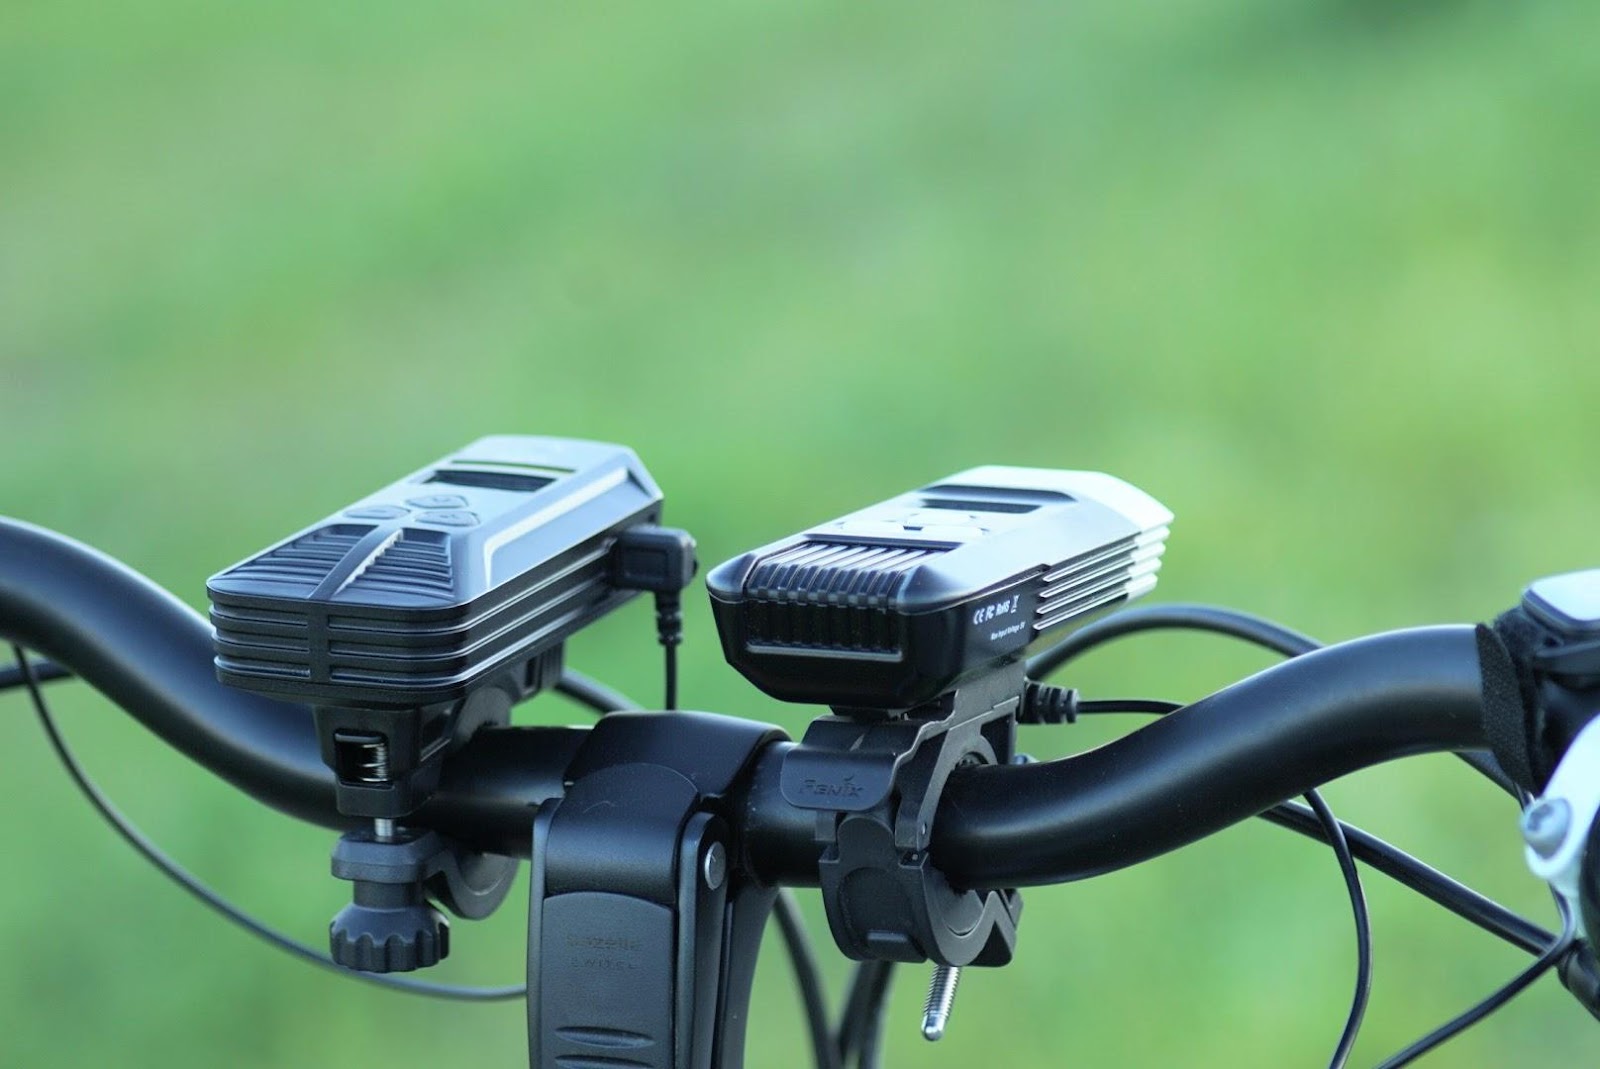
Nitecore BR35 and Fenix BC30R

Fenix BC30R and Nitecore BR35

Fenix BC30R and Nitecore BR35
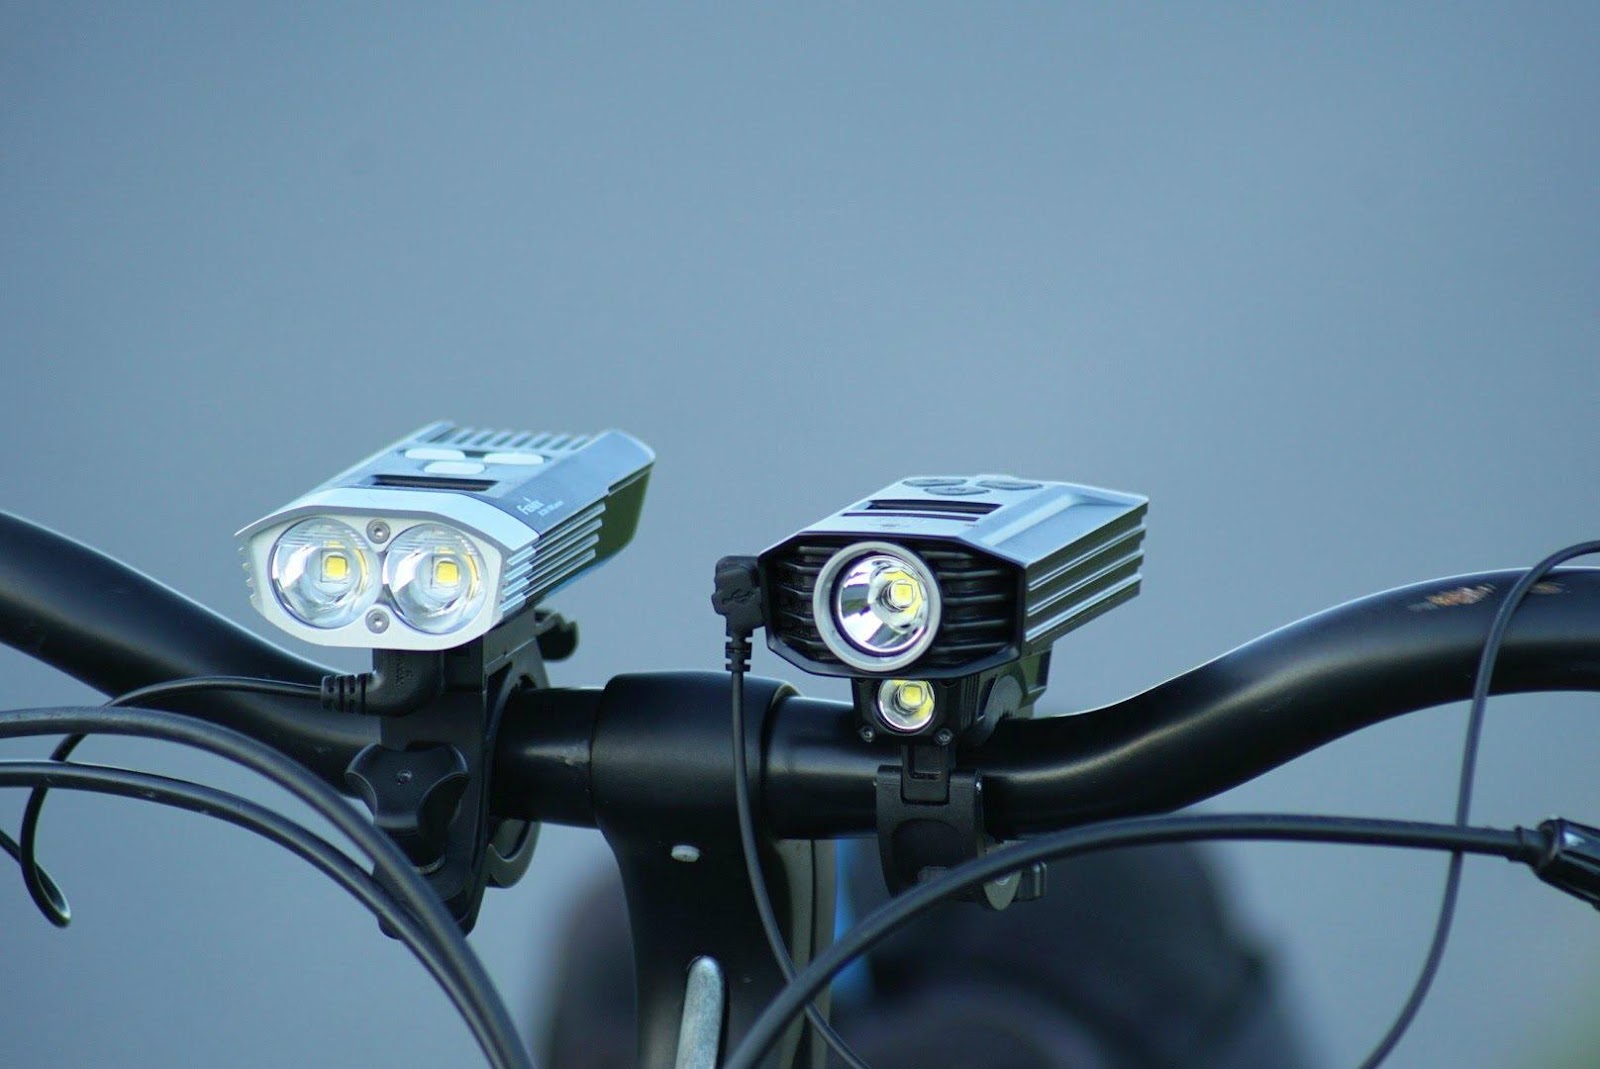
the heads: XM-L2 (T6) and XM-L2 U2
Tint:
The tint of the BR35 is cool white. A good tint here to both leds (that are the same); typical to this kind of led is the slightly blue tinge in the spill. Below a picture of the tint next to the Fenix BC30R, that uses neutral white leds.

Beamprofile:
Although both head use the same leds, the profiles are different because of the used reflectors. A shallow reflector for the floodlight, a deeper one for the upper head. As expected, the deep reflector gives a more narrow spot, and a clearer transition from spot to corona and corona to spill. The reflection-board gives a "flat-top" to the beamprofile of the short-range head. The main head is rather "throwy" so it can blind oncoming traffic. During testing, I got some comments about this and solved this by adjusting the head a little. I couldn't see any defect in both beam, and they are free of PWM.
Beamshots:
Time to have a look at the beamshots now! Starting indoors by shining on a white wall. You can see clearly here what the reflector and the reflection board do to the beam. By shining at the wall you can see the difference in profile, I'll show you the three modes now. Only GIFs here, otherwise it will take a lot of space. Distance from the bike to the wall about one meter.
Camera settings: ISO100, WB daylight, F/2.7, 1/125 sec, 35mm
short range

long range

dual range

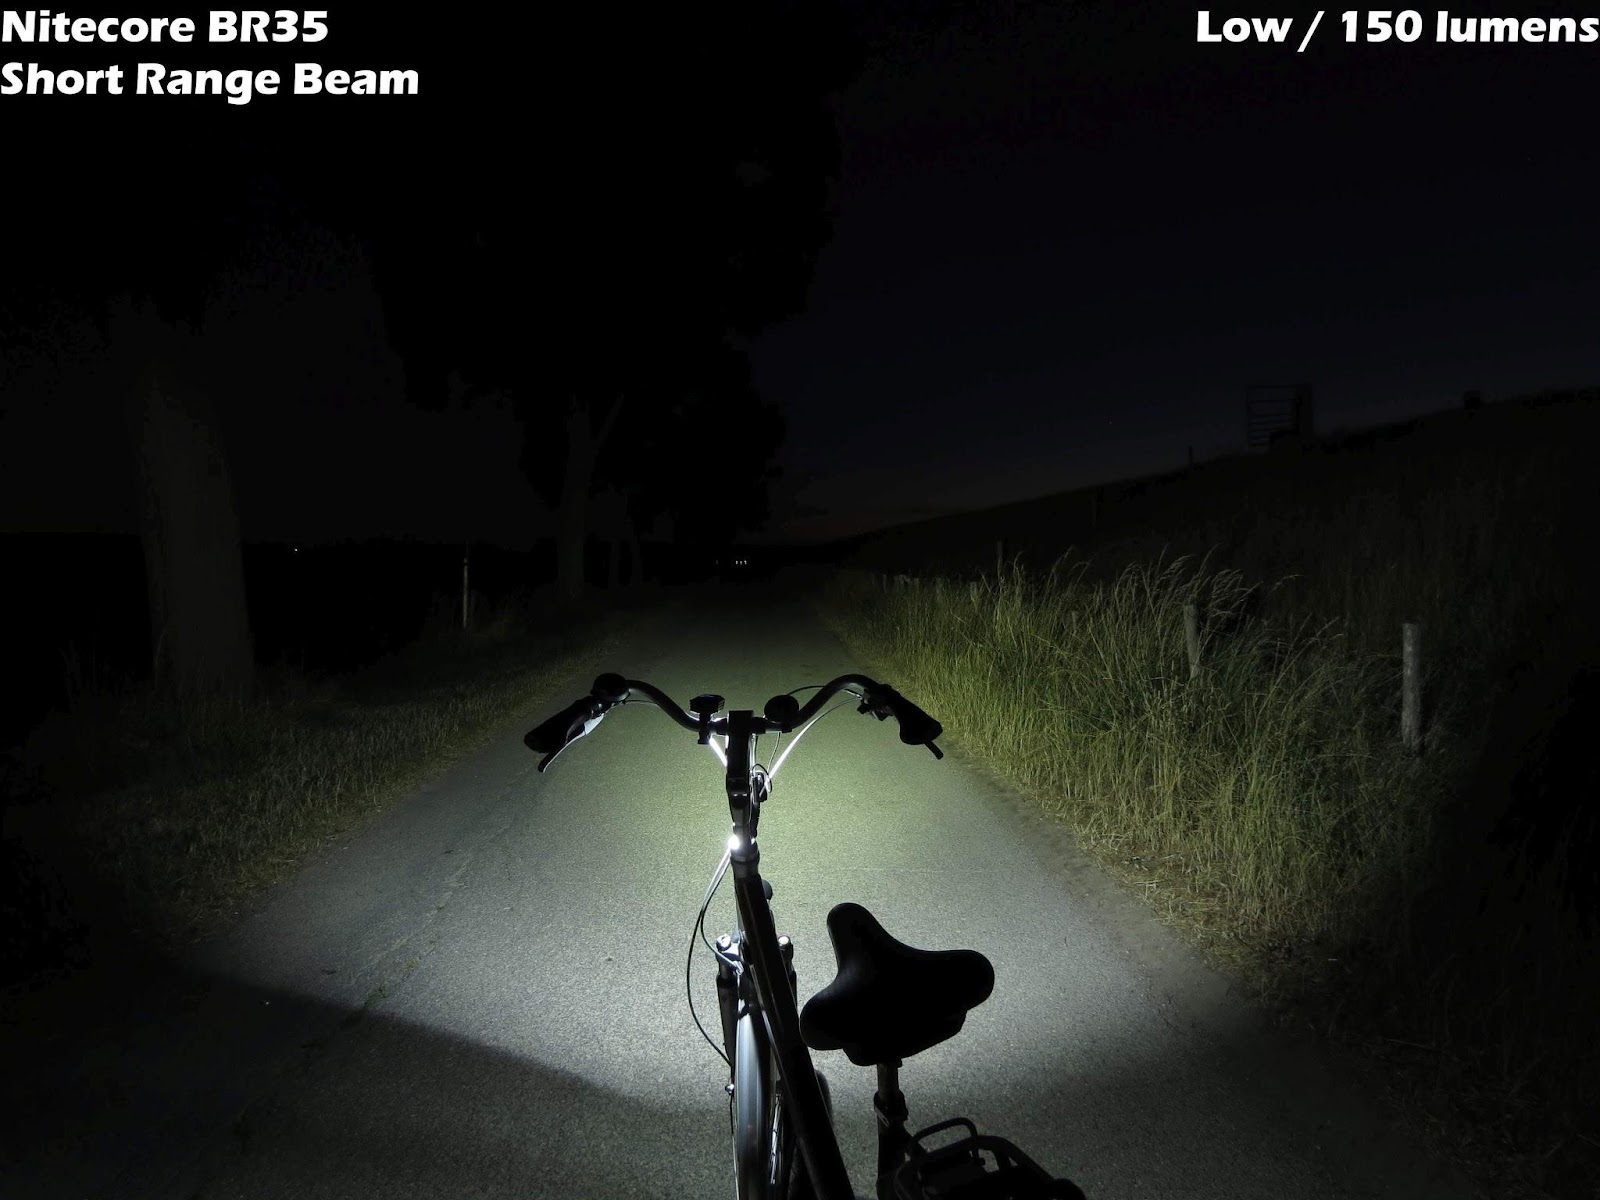
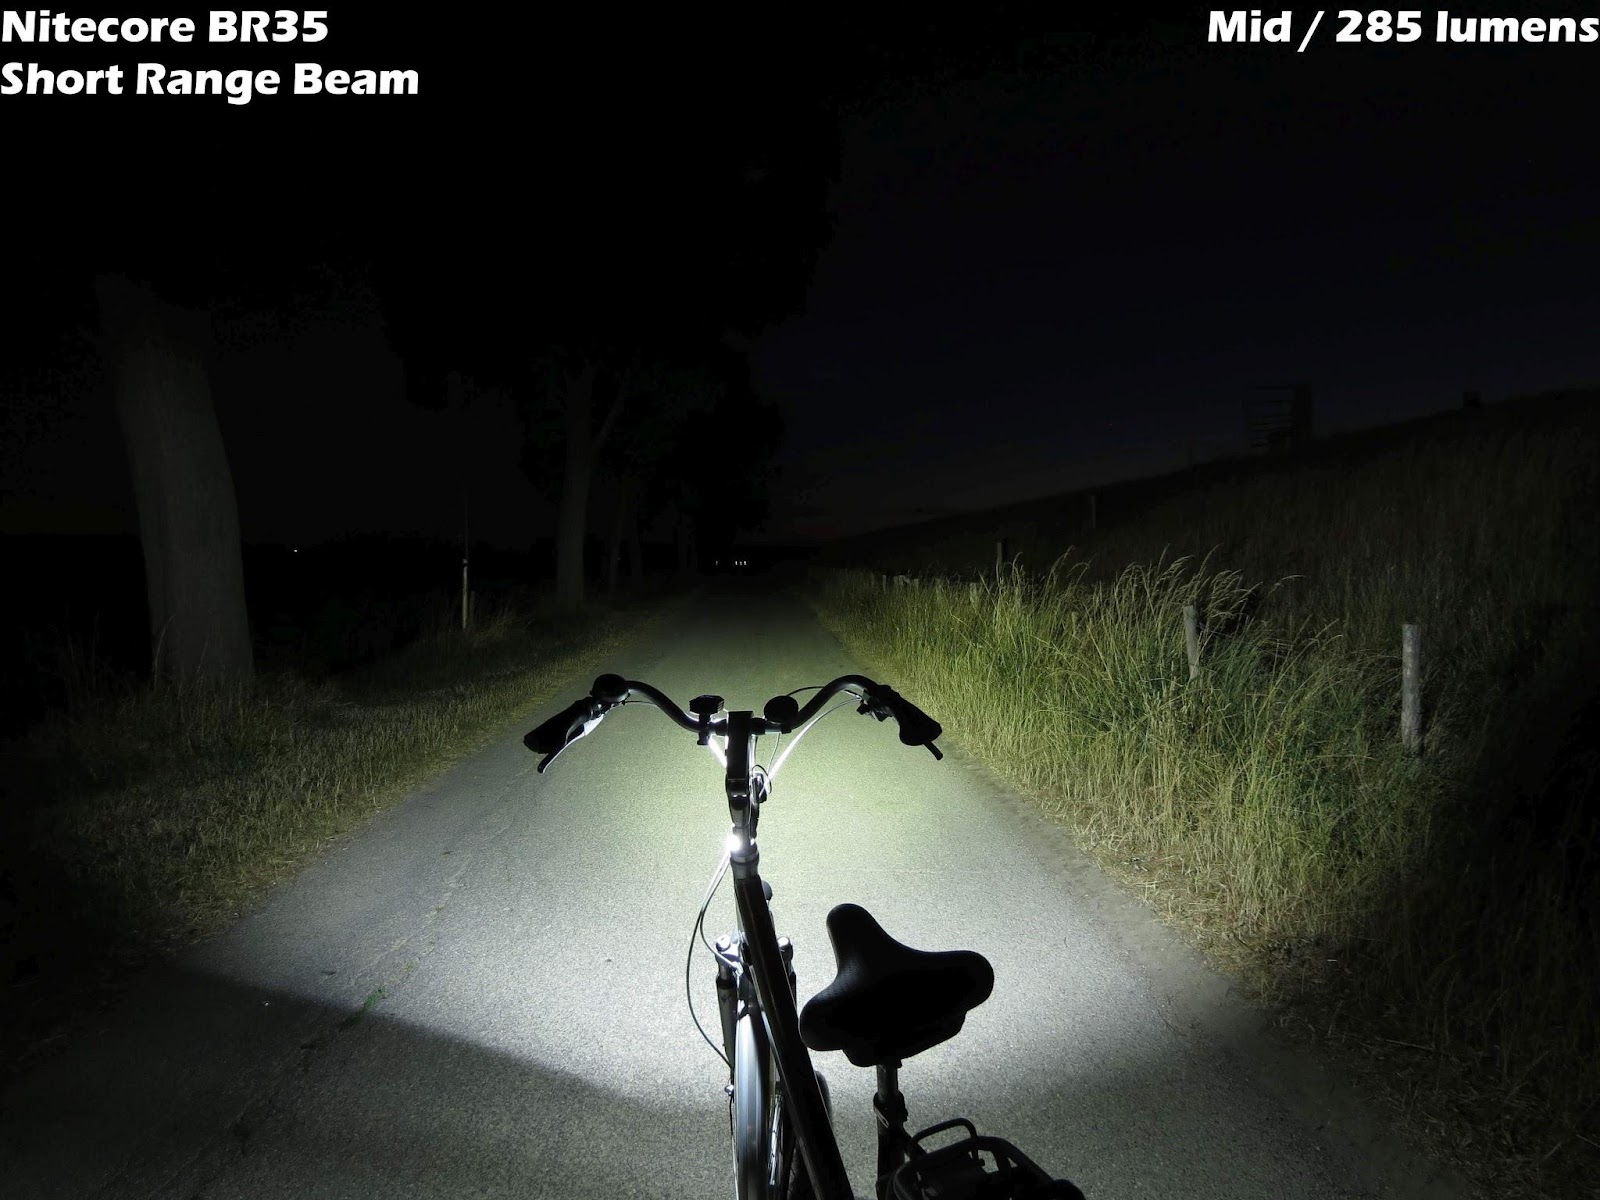
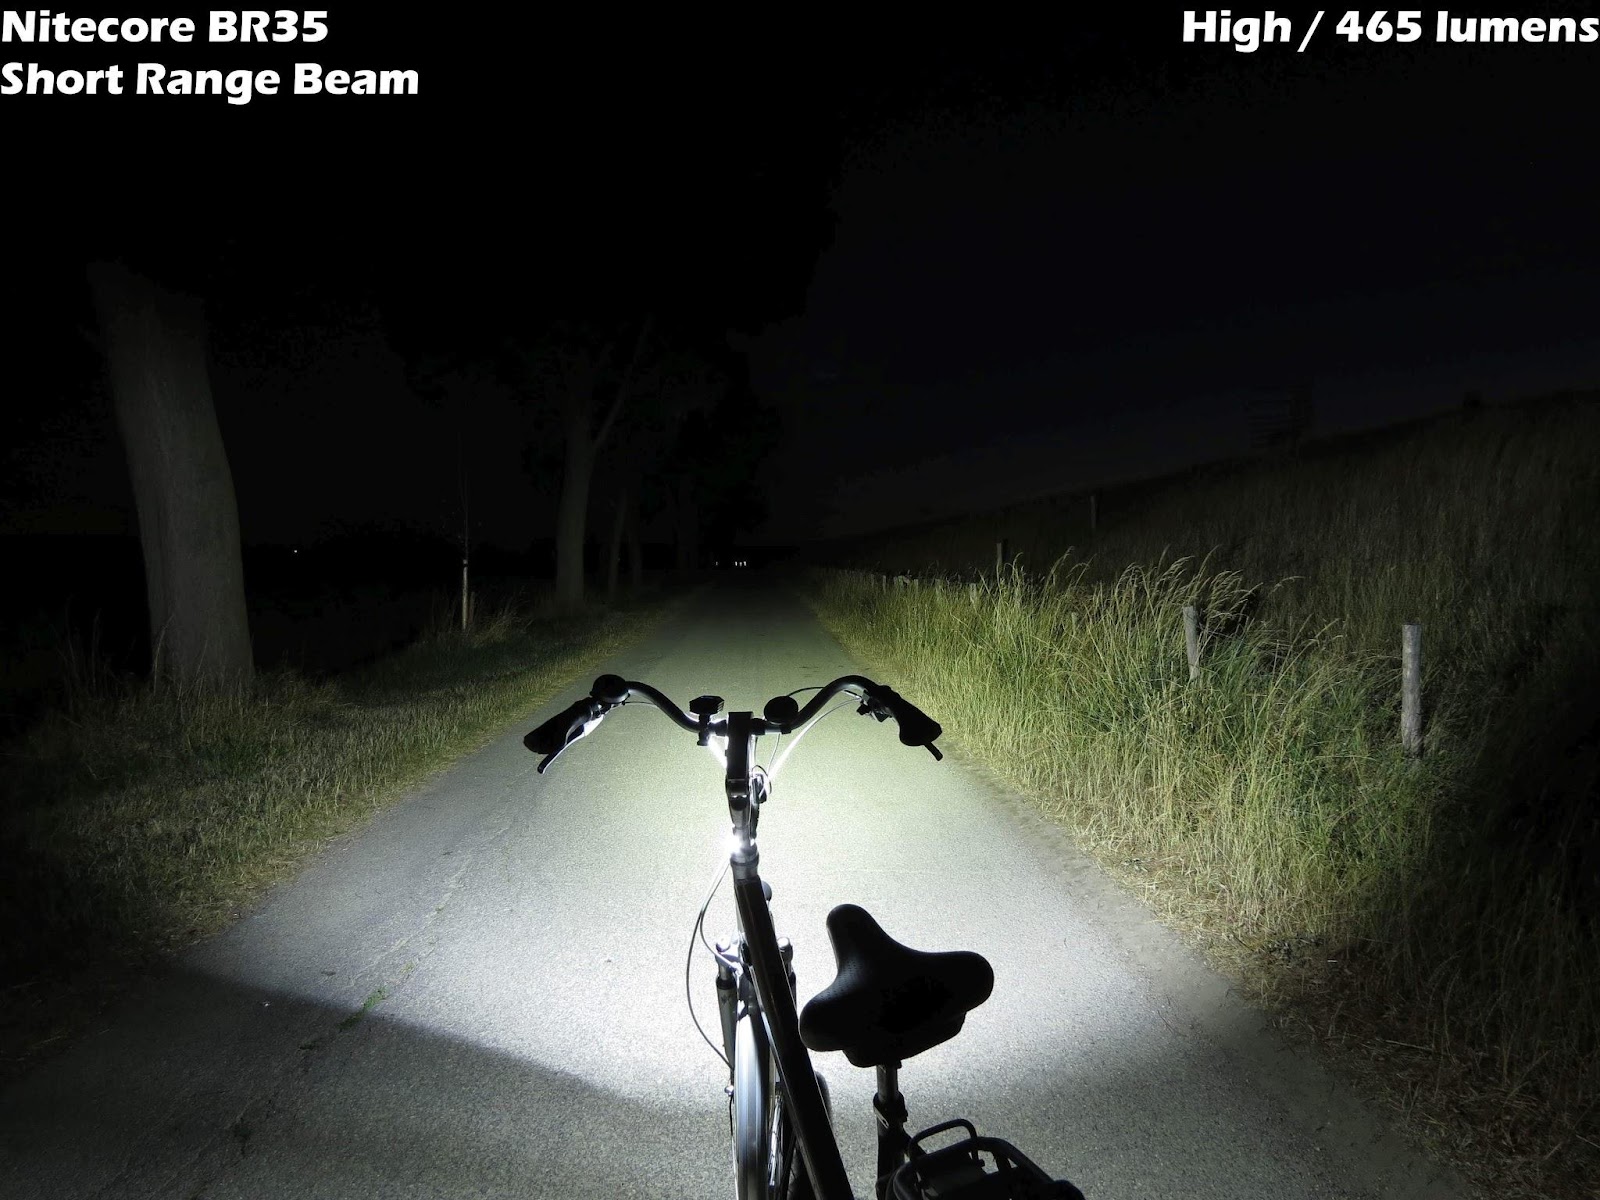
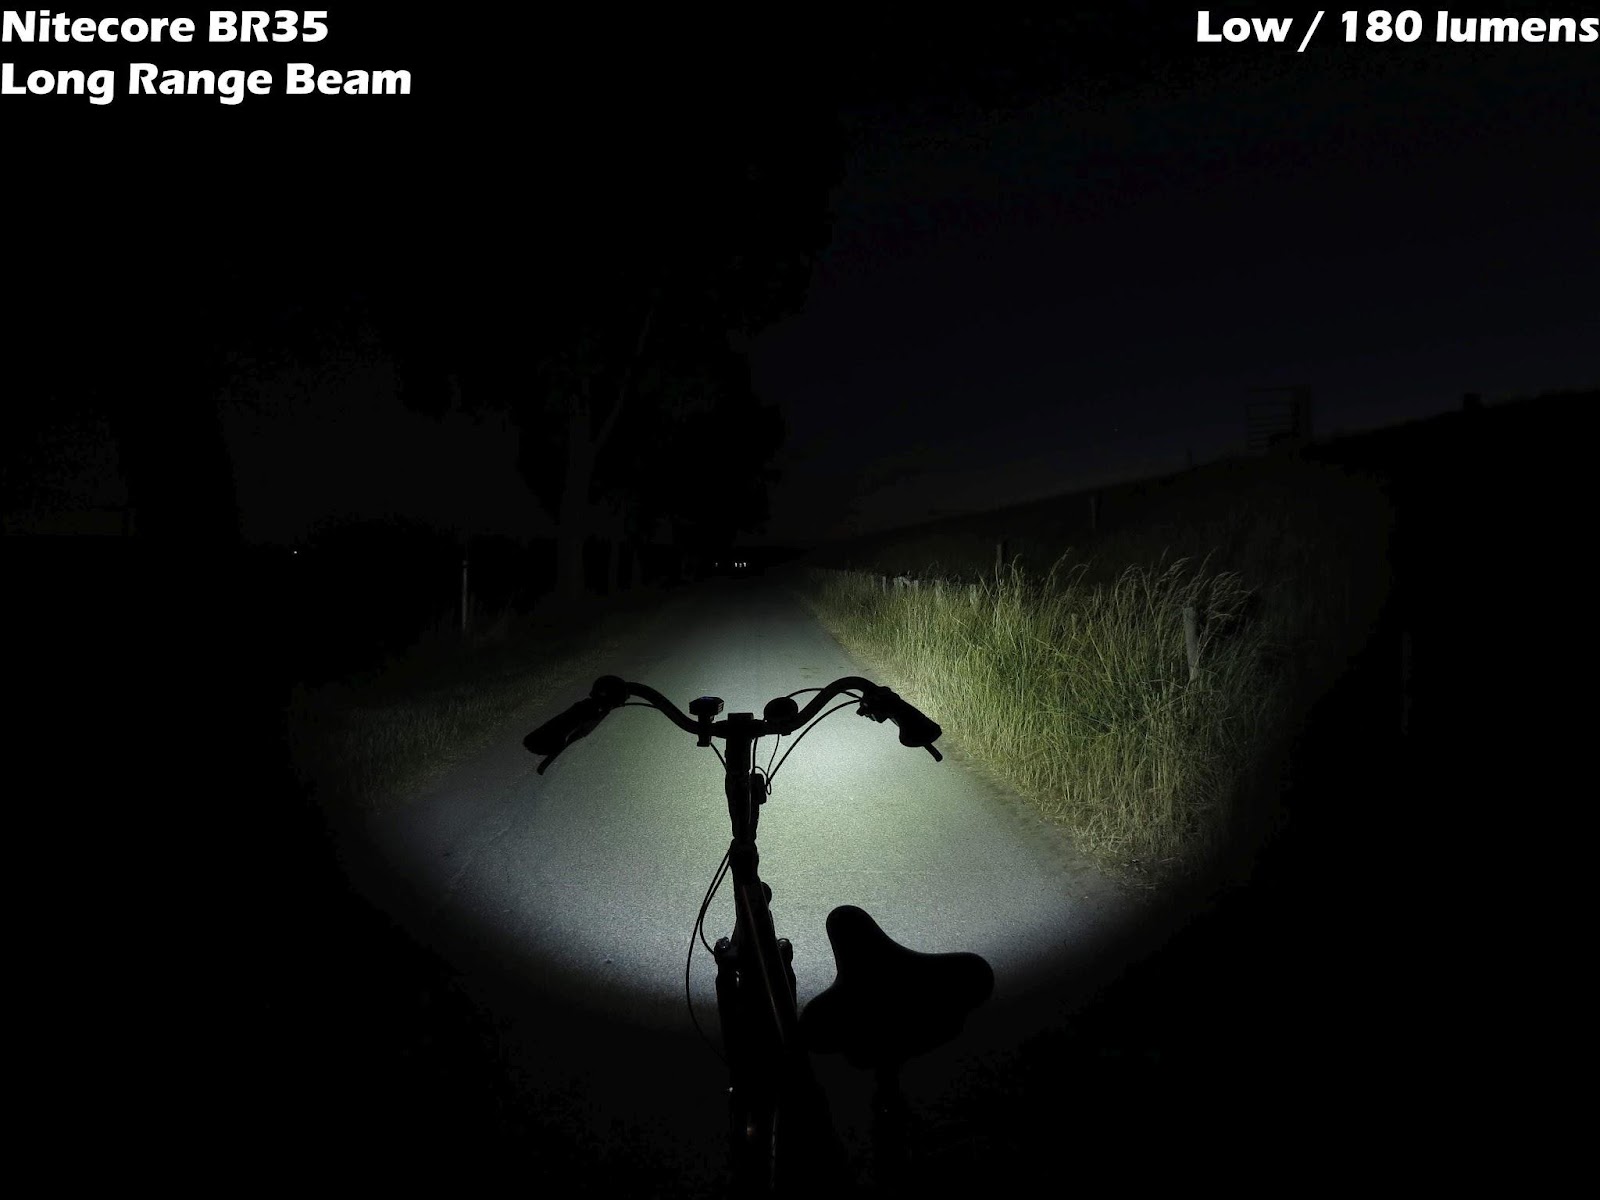
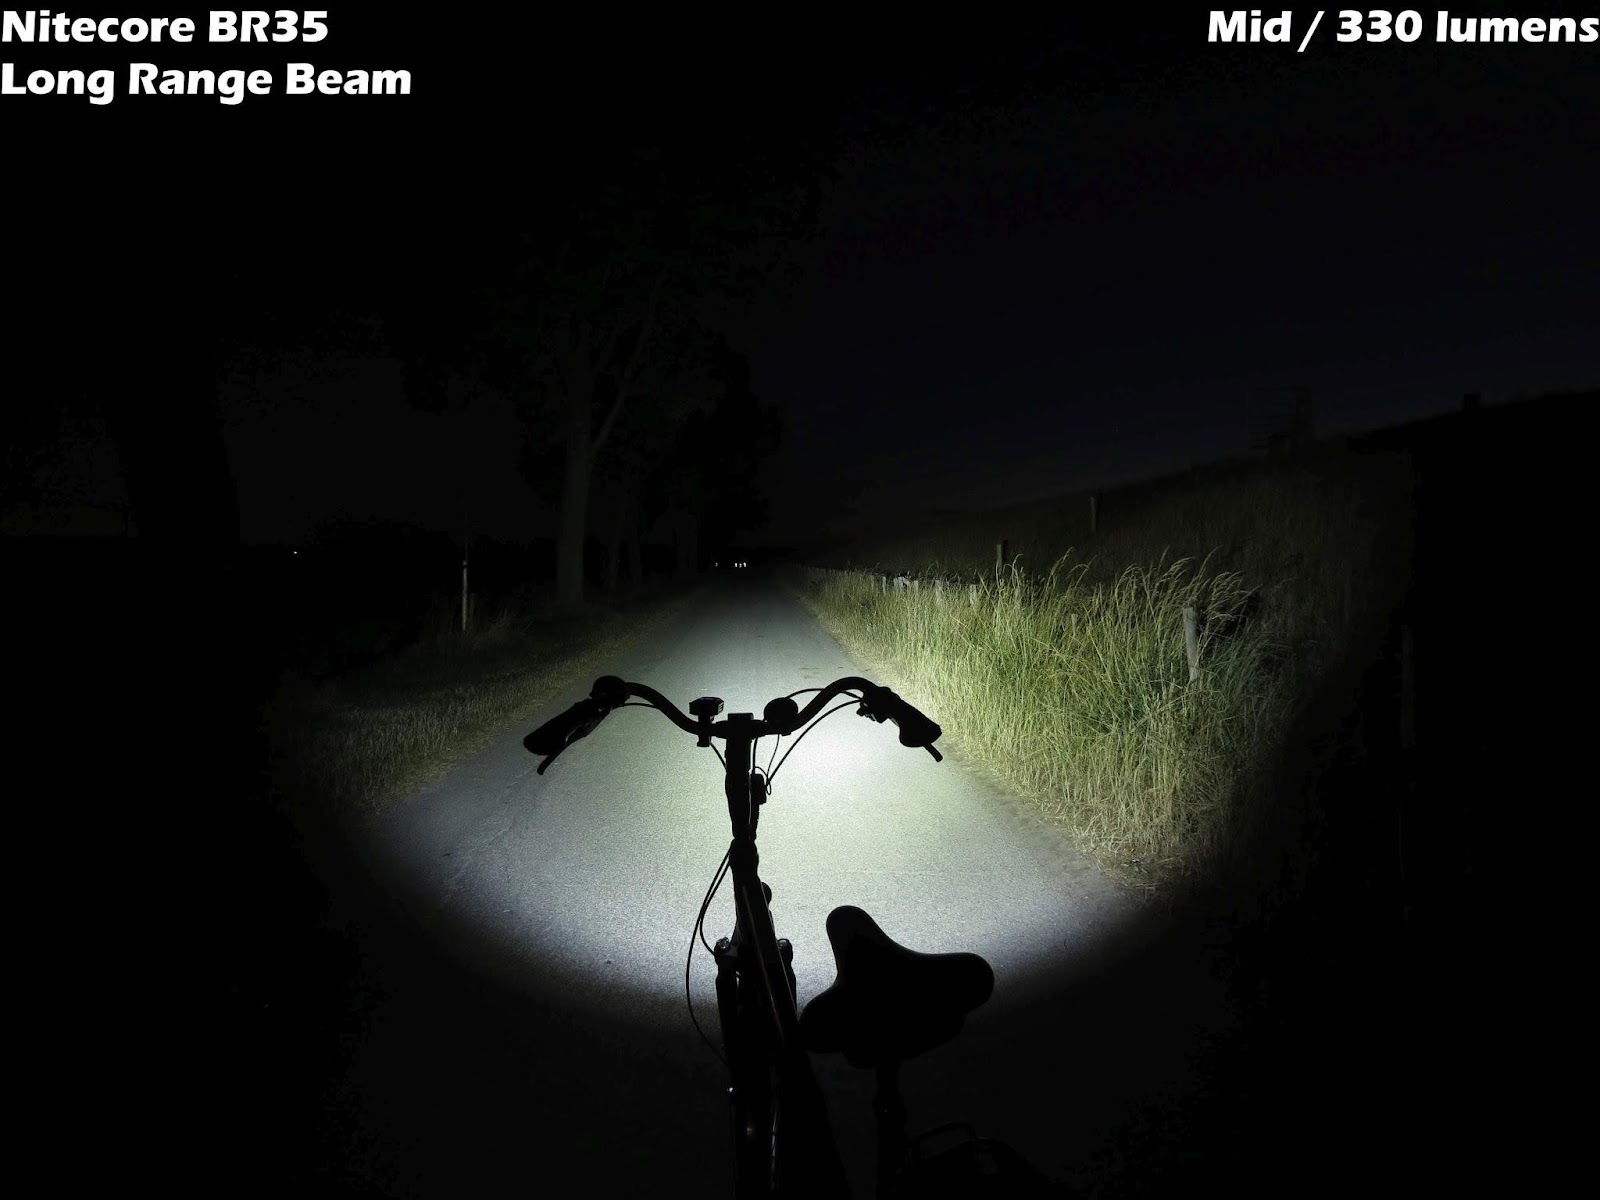
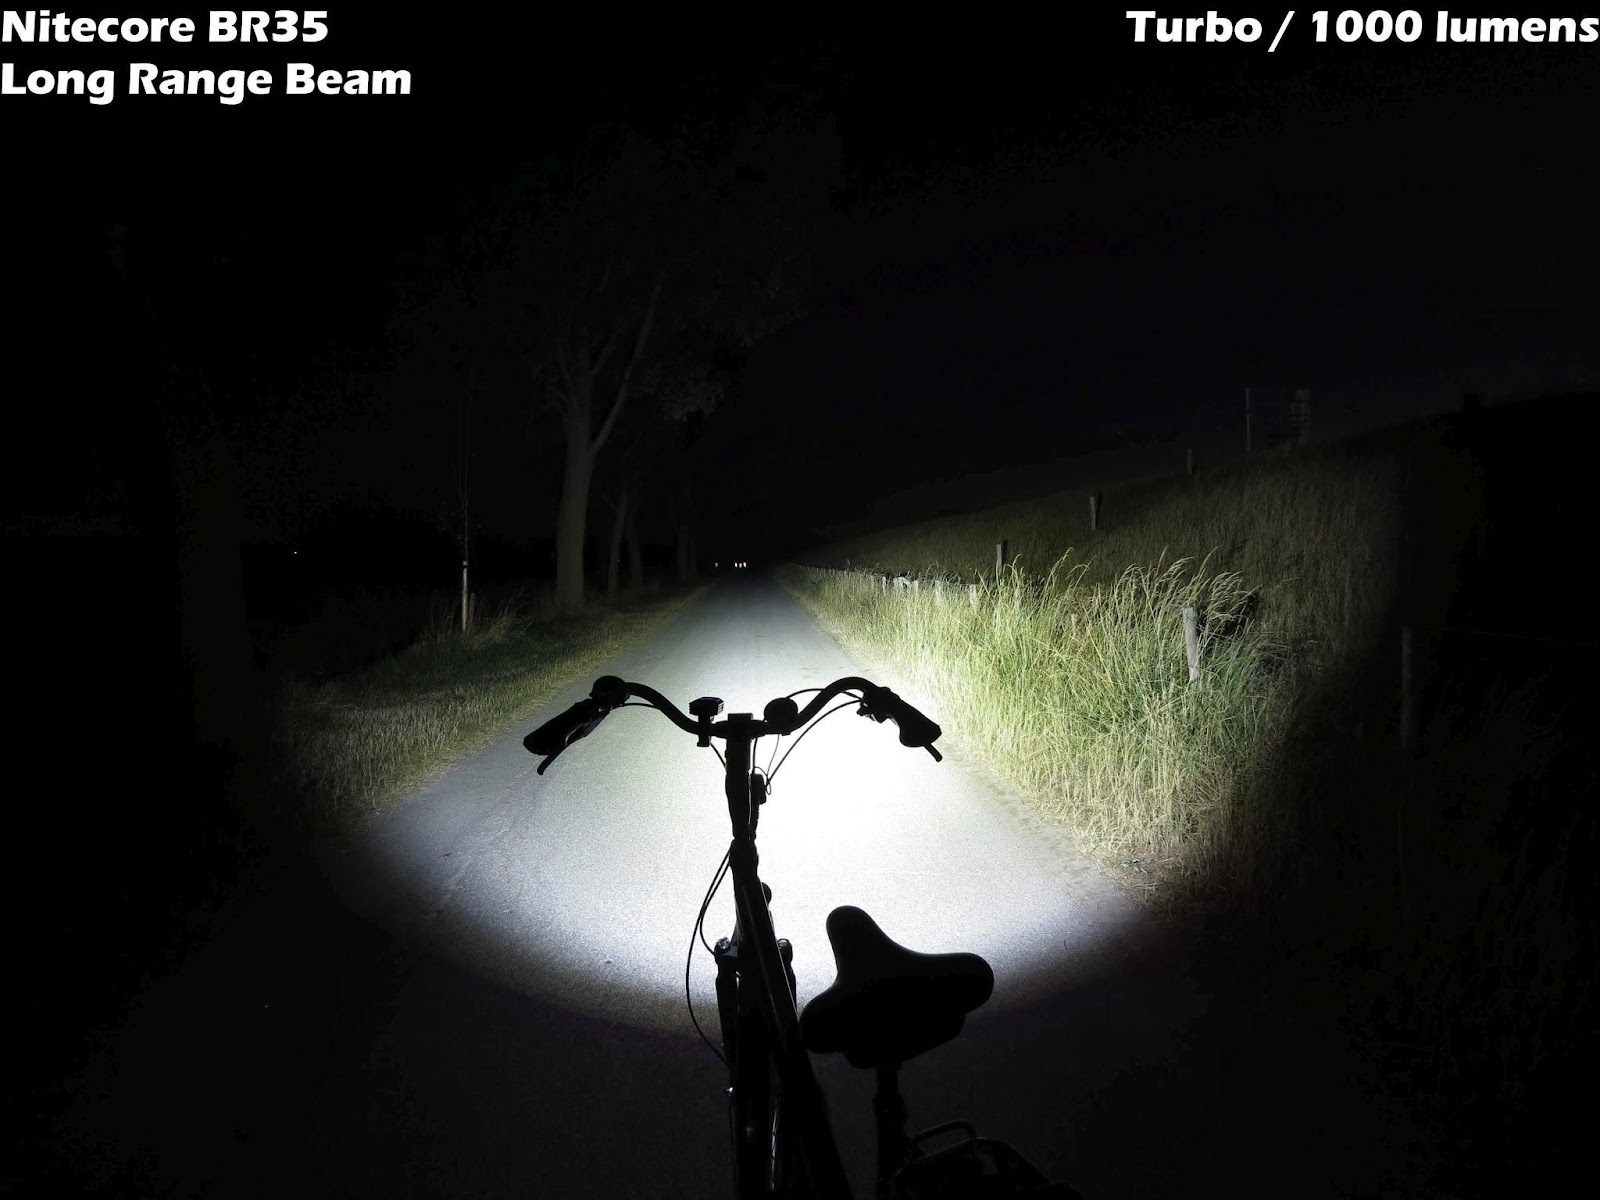
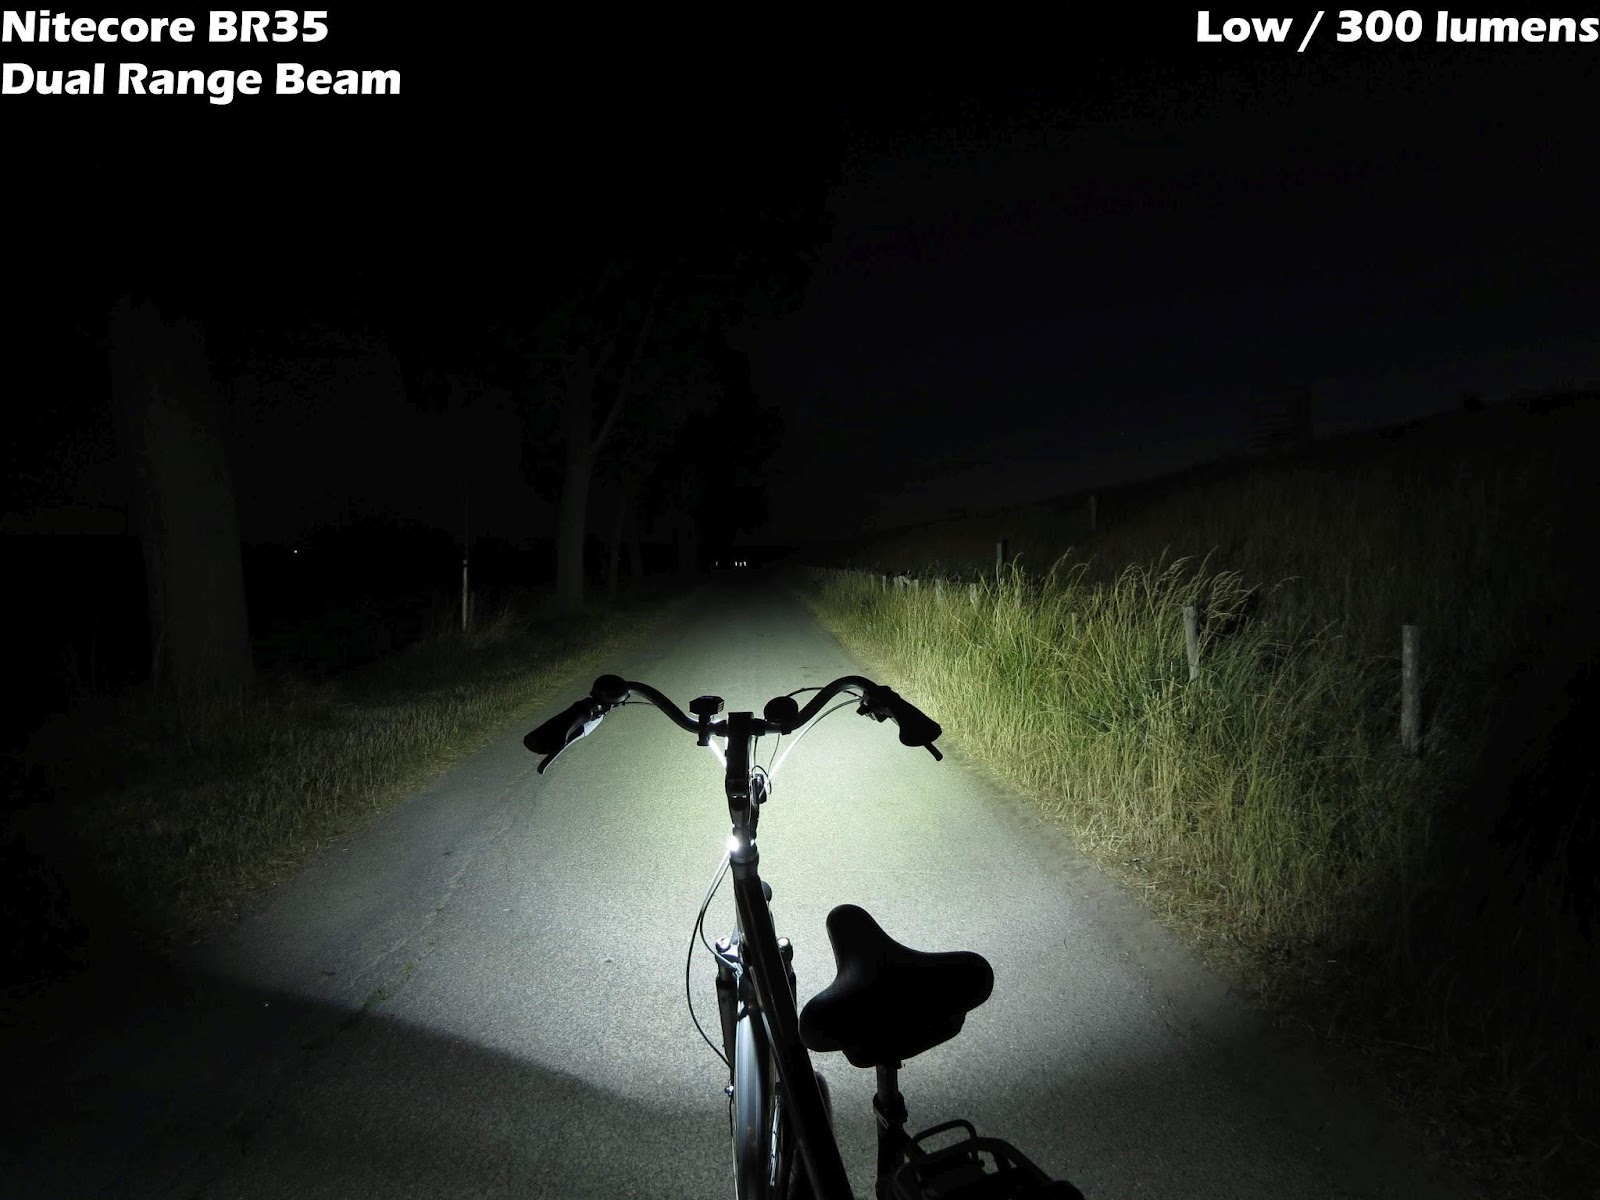
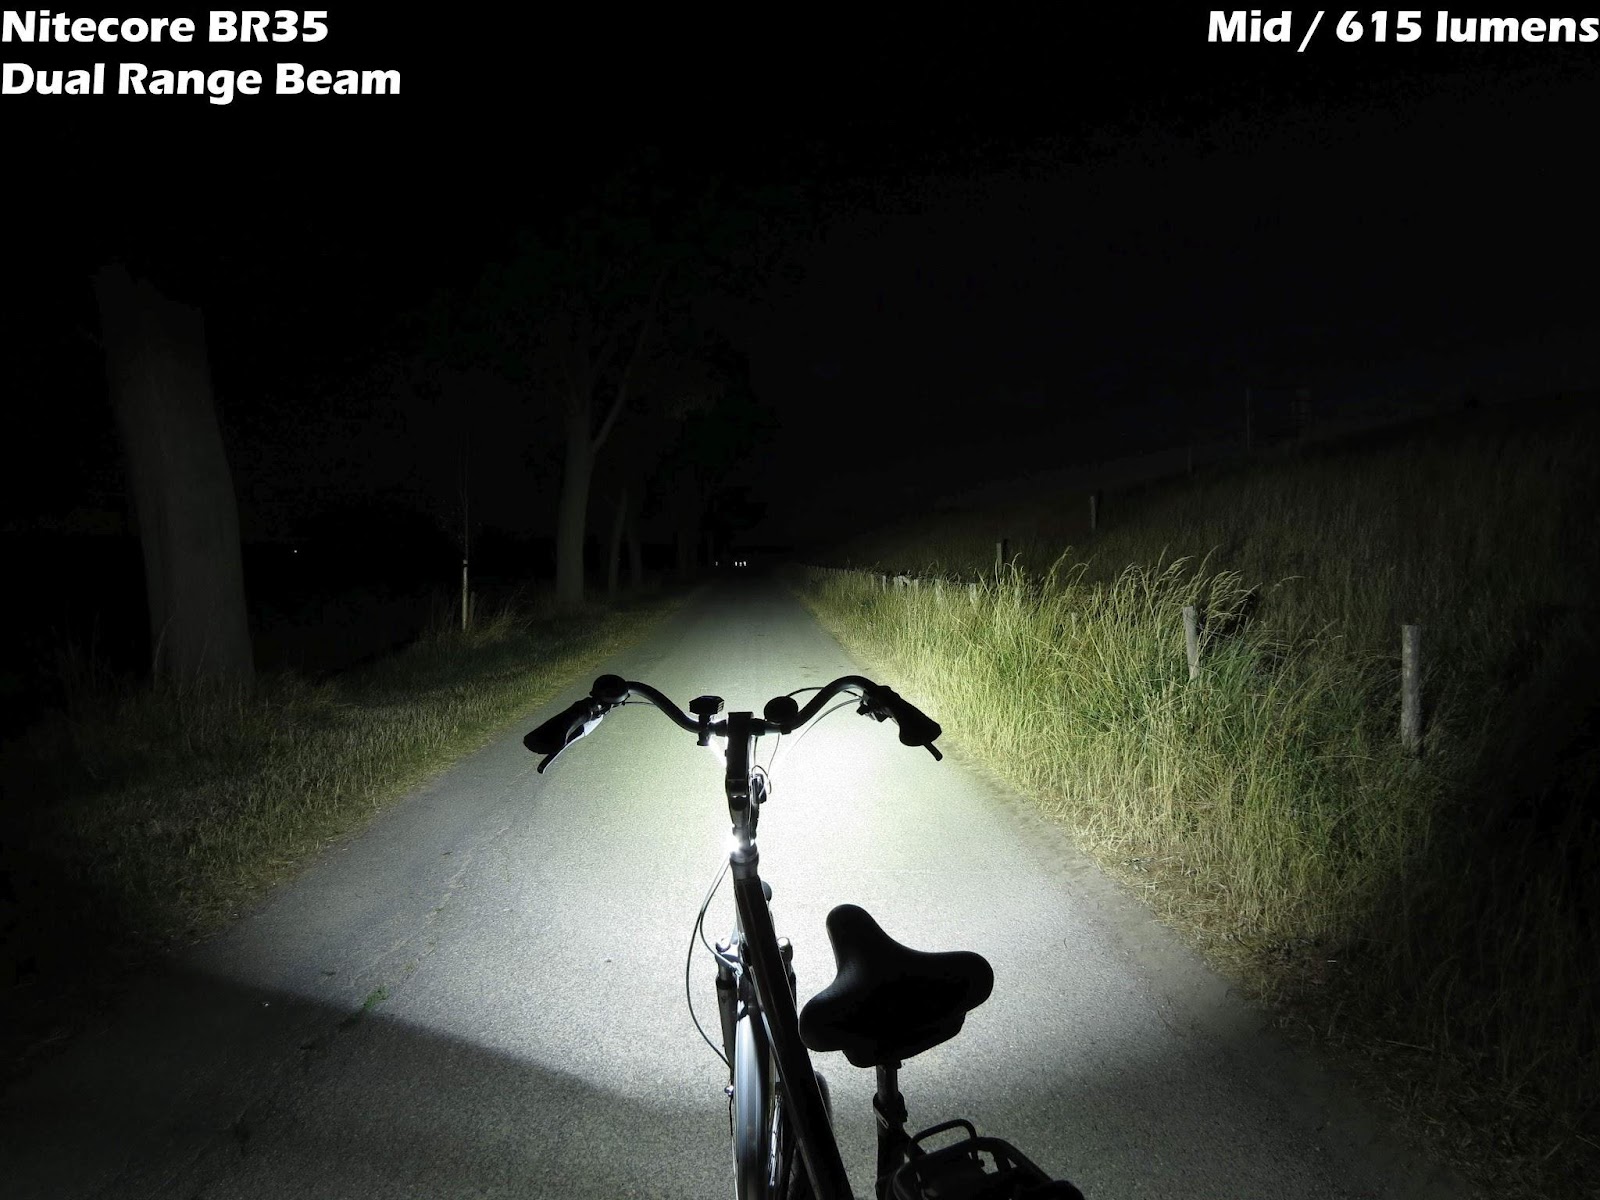
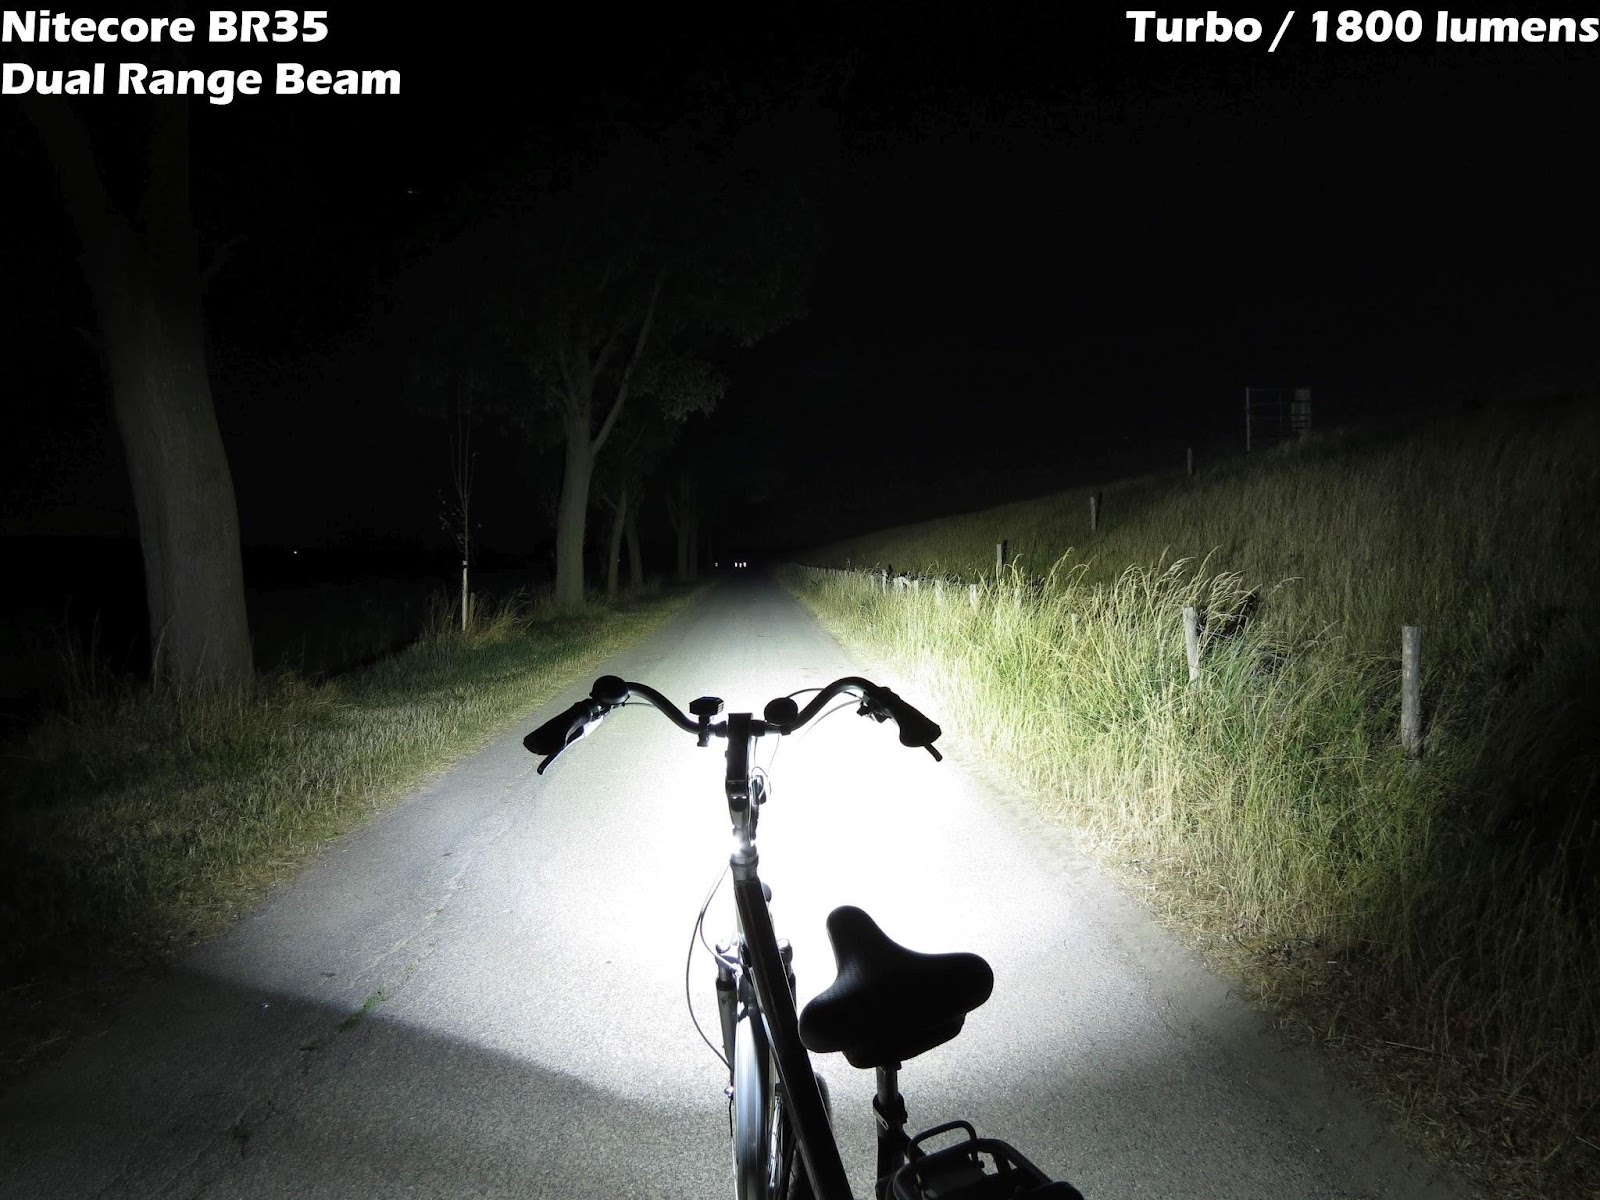
Time to take the BR35 outside. Location is a road with some trees at left and a dike at right side. I'll show you all modes and levels here; after that I'll compare the BR35 to the Fenix.
Camera settings: ISO100, WB daylight, F/2.7, 4 sec, 35mm
Short range:

GIF:

Long range:

GIF:

Dual range:

GIF:

Here's a picture that shows the difference between short, long and dual range. All modes show at maximum output-level.
long versus short versus dual beam

A shoot-out now with the Nitecore BR35 and the Fenix BC30R. The BR35 has better throw, the Fenix a wide, floody beam. Sorry for disturbing the picture with my arm, this is because the turbo of the BC30R is a burst-mode, and I had to keep the remote controller pressed during the shot...
the BR35 versus the BC30R, both on highest level

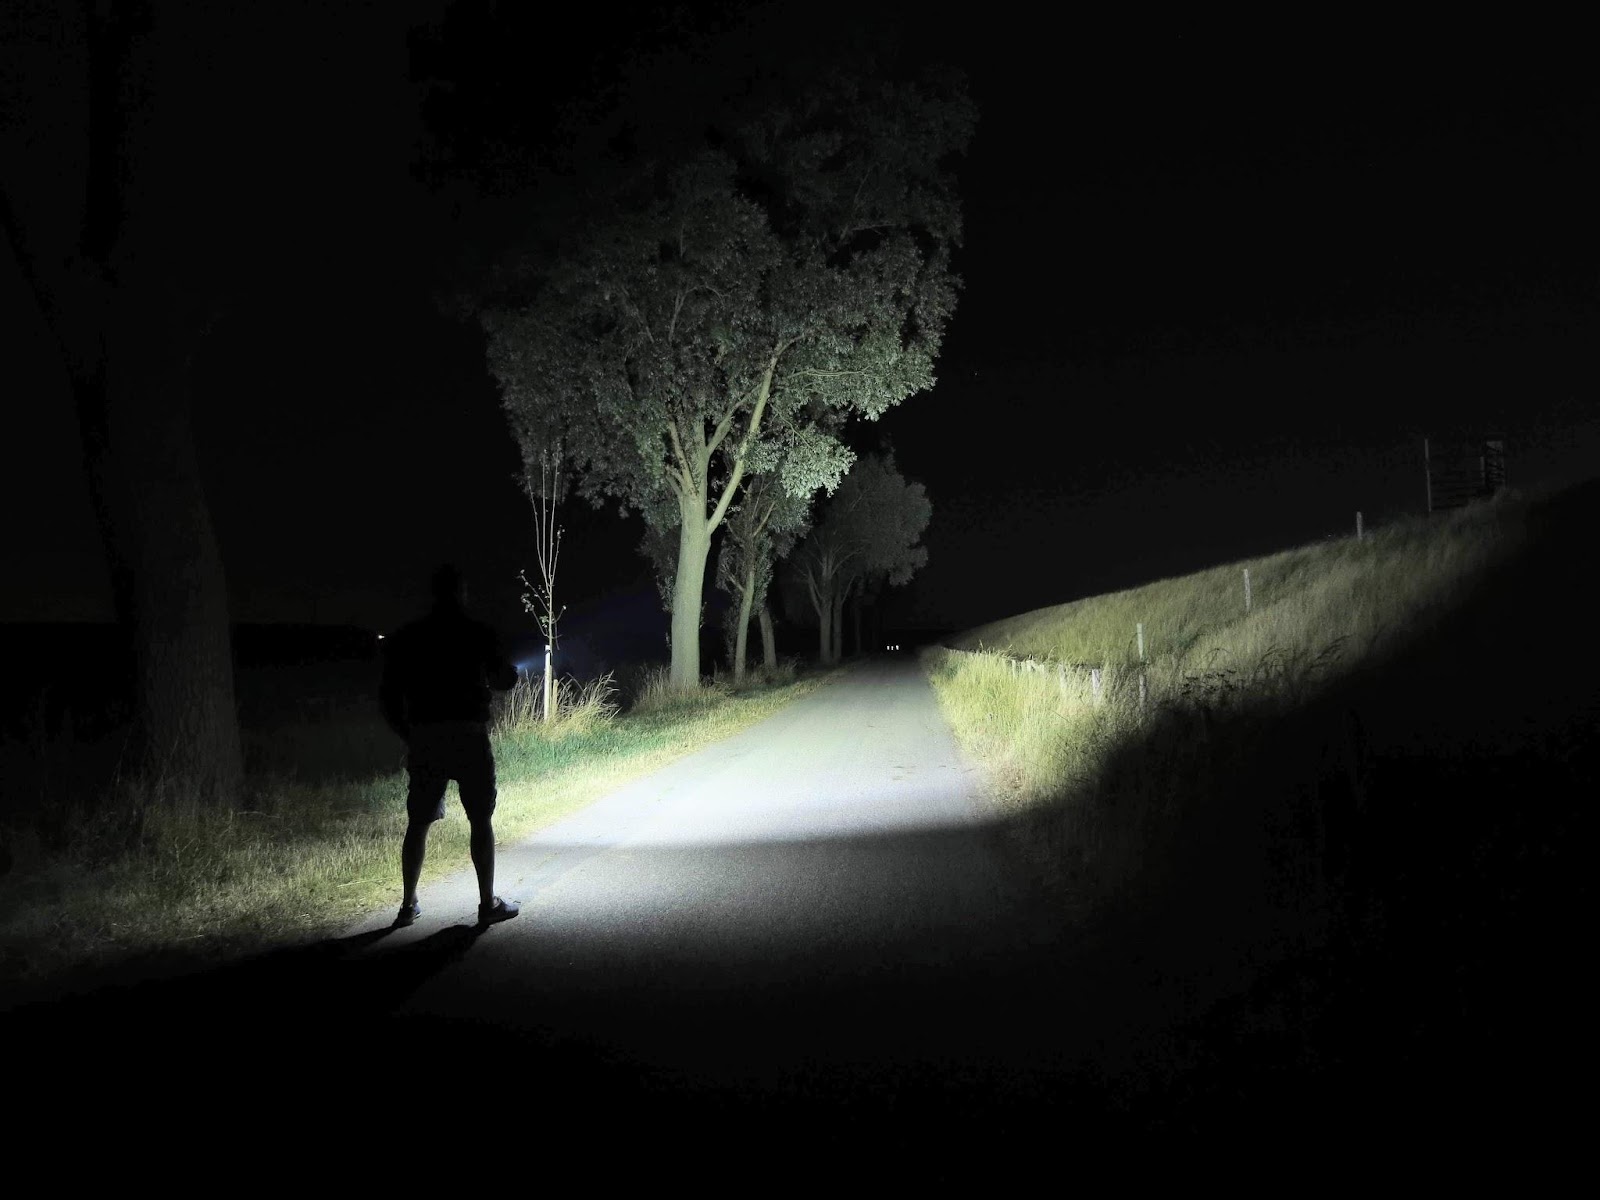
The other way to use the BR35: As a flashlight! Beware that the lower emitter will get very hot soon if used on turbo. On both photos the BR35 on dual range mode and with maximum output.
the BR35 on maximum output

the BR35 on maximum output
Conclusion:
The first bike-light made by Nitecore is a rather heavy, but solid product. Fitted with a lot of interesting options like the informative screen, a remote control and the opportunity to set the light to actual traffic-situation. I like like these options. The output is impressive, but I would like to see a lower mode that is less blinding to oncoming traffic and also can be used if you park your bike somewhere. The interface works fine for me. The opportunity to use the BR35 as a bright flashlight is a big plus. I look forward to some new members in the bike-light-series! A lightweight brother and a red backlight are welcome!
Thanks to Nitecore for providing me the BR35 for testing!
this is the first bike-light made by Nitecore:
the BR35
can be easily attached and released
has an OLED-screen that gives information about level and battery status
double-headed: one head for long and one for short-range beam
To start with, I'll give you the (manufacturer) specifications of the BR35:
And here's a chart of the output and runtime specs:
Unboxing:
A new box here that I never saw earlier by Nitecore. A "closed-top" carton that comes in main black color with yellow and silver letters. I like the looks of this luxury package! The light keeps its secrets this time, only the double output and the lumens are mentioned on it. Protecting-from inside that has three cut-outs in which you can restore the light and the parts. A very neat box that I really like! Inside we find the main things we need like (of course) the BR35, a charging-cable, adaptor for you bike, remote-cable, manual and thick and thin rubbers for the adaptor. Only tool you need here is a power-source, that, (in my case) I new saw supplied by Nitecore until now. For the rest this nice box is ready-to-go. No negatives here, this is a nice and complete package. Have a look at a couple of pictures that show the box and the BR35 and its accessories.
a closed-top box for the Nitecore BR35
this looks neat: it's easy to (re)store the light and the parts
the contents: ready-to-go!
Impressions:
I was really impressed by the BR35 when I held it for first time. Although it is a bit heavy, the overall build-quality is excellent! This diecast light, that is made of one piece, feels good. The body is fully made of metal, the light comes in matte black color with some nice accents. Striking are the "built-in" brand name above the OLED-screen and the white diffuser reflection board under the main head. Although the design of the BR35 reminds to some earlier released bike-lights, Nitecore has given the BR35 its own looks and appearance. Unique detail is the separate and tiny secondary head that is "pasted" on the body. Deep fins around the main head must prevent against overheating. We see these fins back also at both side and at the tail of the BR35. Personally, I like the design. About the anodizing: After some weeks use, I detected that the layer can release quite easily after a drop. This can be a disadvantage of a die-cast light. On top of the design, we see the OLED-screen and the control panel with three rubber buttons. The engraving is clear and well-aligned, like we're used of Nitecore. If you want, the light can be put on its tail, but it isn't stable. To me, this isn't a must on a bike-light. At the right side there's a micro-usb port, that is covered by a rubber cover. This port has two functions: It is needed to recharge the light and you can plug in the remote control there. In front of the BR35, we see two heads: A big and a small one. Both have smooth and shallow reflectors and a XM-L2 U2 emitter it, created to give the light a floody beam. The leds are well-centered, the lenses are clean, the reflectors without defects. An striking detail (and a nice find) is the white diffuse board that reflects the beam of the little head. Advantage is that it won't blind oncoming traffic and it gives also a wide-angled beam to the light. The BR35 has a fixed accupack, so the the only way to open it is to unscrew the nine torx-screws. When I summarize this I have to say that the fit and finish of the BR35 is excellent, very well done by the manufacturer! Have a look at a couple of pictures below that show the details of the light!
zoomed-in to the Nitecore BR35
a bike-light that has its own design
fitted with two XM-L2 U2 leds
with this "dual distance-beam" you can adjust the BR35 to current conditions
1800 lumens is quite a lot for a bike-light
a close-up at the control-panel
a look at the head and the covered charging port
thanks to the illumination you will always find the right button
at the display you see the main mode, the level and the remaining time of the battery
everywhere fins to dissipate the heat
a close up at the white reflection board: a nice find!
well-constructed!
an easy job: charging the BR35
nice design and accents
both XM-L2 U2 are well-centered in smooth reflectors
fits on almost every bike
the remote control can be fixed next to the handlebar
looking for the way; five and a half hours left with the battery..
the lower head is for short range
stable construction, nice design
shown on a classic bike on a sunny day; the BR35 isn't needed at the moment..
the dual-beam shown by a snapshot with a cell phone
heads work separate or together
User interface:
Thanks to the "flat" design of the BR35 it can be transported in you coat of pants pocket without problems. But keep in mind that it's a rather heavy device. Thanks of the shape and the good grip, you can use it as flashlight too; nice fact to have bike- and flashlight in one. Just take it off the handle if you've parked your bike and use it as a flashlight.
For charging, you need a power-source with a maximum of 2A. It's not that difficult to (re)charge to BR35: simply connect the cable and the charging will start automatically. On the screen a big battery bar icon is showed (that has totally four parts) and the three buttons will slowly flash in blue. If the battery is full, the buttons will light up steadily and the bar is full. Charging took in my case (with 2A) about 4 hours with an almost depleted accu.
Fixing the handle bar mount to a bike works easy and fast; in the manual you can find info about which rubbers are needed for your bike. Adding the mount takes only a few seconds, just fix it and use the screw to tighten it. After that, just slide the BR35 into the mount, beware that a soft click must be heard. If you want, add the remote control close to a handle and you're ready to go! No issues here, works all smooth.
The BR35 has three main-modes, so you can "tune" the light to the current conditions in which you are. The options are: CITY (for riding in urban area), ROAD (on the road) and TRAIL (for outdoor, forest). The difference between the modes is which one of the two heads (or both) will turn on. So, when you're in CITY-mode, only the lower head (designed for short range) will turn on. In ROAD, you can cycle between the upper (designed for long range) and the lower head and in TRAIL both are on. In any mode, if the light is on, you have the option to (temporarily) edit the actual mode to your wishes. A good point here! The interface for all modes works the same. Press and hold the power switch for about 1,5 seconds to turn on the BR35. It will start than in last used main mode and level. On the display you see "Nitecore" for short time and after that you see info about actual main mode, output level and remaining hours and minutes. If the light is on, you can only change the output level, not the main-mode you're in. To change your level, simply press the + or - button to cycle between the four levels. Press and hold the plus or minus button to go directly to the instant-low and instant-turbo. Works easy and good. If you tap the M-button when the BR35 is on, you can change the beam without turning the light off and on again. For example: If you're are in TRAIL-mode, you can turn off the long-range beam by tapping the M-button when you have an oncoming vehicle, and turn it turn again by a tap if your path is free again. Like I mentioned earlier, the default on CITY-mode is the short-range beam, but if you tap the M-button, you can both beam for three seconds. This option is made for signaling and to alert a oncoming vehicle. In ROAD-mode the light will start also start in the short-range beam. Tapping the M-button will ad the long-range beam to it; this gives the opportunity to have the maximum beam when it's very dark. In TRAIL, the BR35 starts with both heads, with the M-button you can switch off the short range beam. So, the BR35 has a thought-out interface, this bike-light can be adjusted to everyone's desire. The remote switch can be used to turn on and off, for selecting the main output mode and to cycle between the first and secondary output mode; but you can't set the output-levels with it. So, this remote is meant for main-functions when you're on the way: to give an alert or to adapt your profile to actual conditions. In short: it has the same function as the M-button on the BR35. The light has a special mode: Flashing / Caution-light. In CITY or ROAD-mode, the lower (short-range) head will be used, in TRAIL both heads will flash. You can activate this mode only from off by pressing and holding the + and - button for some seconds. You can control the brightness too: Caution-light will start in the last used output level. When you short-click any button if the BR35 is in stand-by, the buttons will light up for a few seconds, this will help you to find the right button in the dark. At same time you can check the actual battery-status, displayed by the bar on the screen. The bar shows four parts if the battery is above 90%, three means above 50, two parts means between 10 and 50 and one grid means level lower than 10%.
The interface of the BR35 works well, and doesn't take effort to control it. For a bike light, it has a lot of interesting options, the double head that has a short and a long range beam is a nice find.
Modes:
The output of the BR35 can be adapted to different scenarios. The three, CITY, ROAD and TRAIL all have four normal output levels, in order of: LOW - MID - HIGH -TURBO. The spacing is good between the four, but I really miss a good low on this light. I would like to see a mode between 5 and 20 lumens. Two direct modes, that only work when the light is turned on: instant-LOW and instant-TURBO. The only special mode on this bikelight is the CAUTION-light. Unique is that it can flash on every output mode. There's no lock-out on the BR35; the actual VOLTAGE is continuously displayed at the screen. The status of the battery can be checked in stand-by too. To a bike-light, the BR35 has a bunch of modes and options, so this will be sufficient to most users.
Size comparison:
To show the size of this light, a picture next to a 18650 and to another bike-light in this class, the Fenix BC30R. For the beamshots, that I will show you later in this review, I'll pick those two again.
Fenix BC30R and Nitecore BR35
Nitecore BR35 and Fenix BC30R
Nitecore BR35 and Fenix BC30R
Fenix BC30R and Nitecore BR35
Fenix BC30R and Nitecore BR35
the heads: XM-L2 (T6) and XM-L2 U2
Tint:
The tint of the BR35 is cool white. A good tint here to both leds (that are the same); typical to this kind of led is the slightly blue tinge in the spill. Below a picture of the tint next to the Fenix BC30R, that uses neutral white leds.
Beamprofile:
Although both head use the same leds, the profiles are different because of the used reflectors. A shallow reflector for the floodlight, a deeper one for the upper head. As expected, the deep reflector gives a more narrow spot, and a clearer transition from spot to corona and corona to spill. The reflection-board gives a "flat-top" to the beamprofile of the short-range head. The main head is rather "throwy" so it can blind oncoming traffic. During testing, I got some comments about this and solved this by adjusting the head a little. I couldn't see any defect in both beam, and they are free of PWM.
Beamshots:
Time to have a look at the beamshots now! Starting indoors by shining on a white wall. You can see clearly here what the reflector and the reflection board do to the beam. By shining at the wall you can see the difference in profile, I'll show you the three modes now. Only GIFs here, otherwise it will take a lot of space. Distance from the bike to the wall about one meter.
Camera settings: ISO100, WB daylight, F/2.7, 1/125 sec, 35mm
short range
long range
dual range
Time to take the BR35 outside. Location is a road with some trees at left and a dike at right side. I'll show you all modes and levels here; after that I'll compare the BR35 to the Fenix.
Camera settings: ISO100, WB daylight, F/2.7, 4 sec, 35mm
Short range:
GIF:
Long range:
GIF:
Dual range:
GIF:
Here's a picture that shows the difference between short, long and dual range. All modes show at maximum output-level.
long versus short versus dual beam
A shoot-out now with the Nitecore BR35 and the Fenix BC30R. The BR35 has better throw, the Fenix a wide, floody beam. Sorry for disturbing the picture with my arm, this is because the turbo of the BC30R is a burst-mode, and I had to keep the remote controller pressed during the shot...
the BR35 versus the BC30R, both on highest level
The other way to use the BR35: As a flashlight! Beware that the lower emitter will get very hot soon if used on turbo. On both photos the BR35 on dual range mode and with maximum output.
the BR35 on maximum output
the BR35 on maximum output
Conclusion:
The first bike-light made by Nitecore is a rather heavy, but solid product. Fitted with a lot of interesting options like the informative screen, a remote control and the opportunity to set the light to actual traffic-situation. I like like these options. The output is impressive, but I would like to see a lower mode that is less blinding to oncoming traffic and also can be used if you park your bike somewhere. The interface works fine for me. The opportunity to use the BR35 as a bright flashlight is a big plus. I look forward to some new members in the bike-light-series! A lightweight brother and a red backlight are welcome!
Thanks to Nitecore for providing me the BR35 for testing!
Last edited:
") Thanks for the comparison review, very useful!
Thanks for the comparison review, very useful!