HDS Systems #23

Candle Power Forums

Help Support Candle Power:

The original Neolumen site looks gone, ...
Nope it is still there, but they stopped selling HDS stuff years ago, definately before corona. They have some remaining parts still in Stock, but no lights:

I ordered there once, 5+ years ago, the shipping was fast and everything was fine...
 
I meant yes it's there, as domain and website still in activity, but business address is different and website itself too. Also catalog is a shadow of what it was.
I know there was already some ownership change and legal entities change somewhere around 2013, can only guess that it happened again. I think at some point there was also a physical boutique too...or maybe it's just a side activity for the owner now.
 
I’ll be taking the tailcap off later today, apart from some sort of tutorial and pictures of the rust, does anyone have any requests? I’d rather not do this more times than necessary.
If you could provide some description of the removal and replacement of the circuit board inside the tail cap, that would be great.
 
As an Amazon Associate we earn from qualifying purchases. Product prices and availability are accurate as of the date/time indicated and are subject to change.
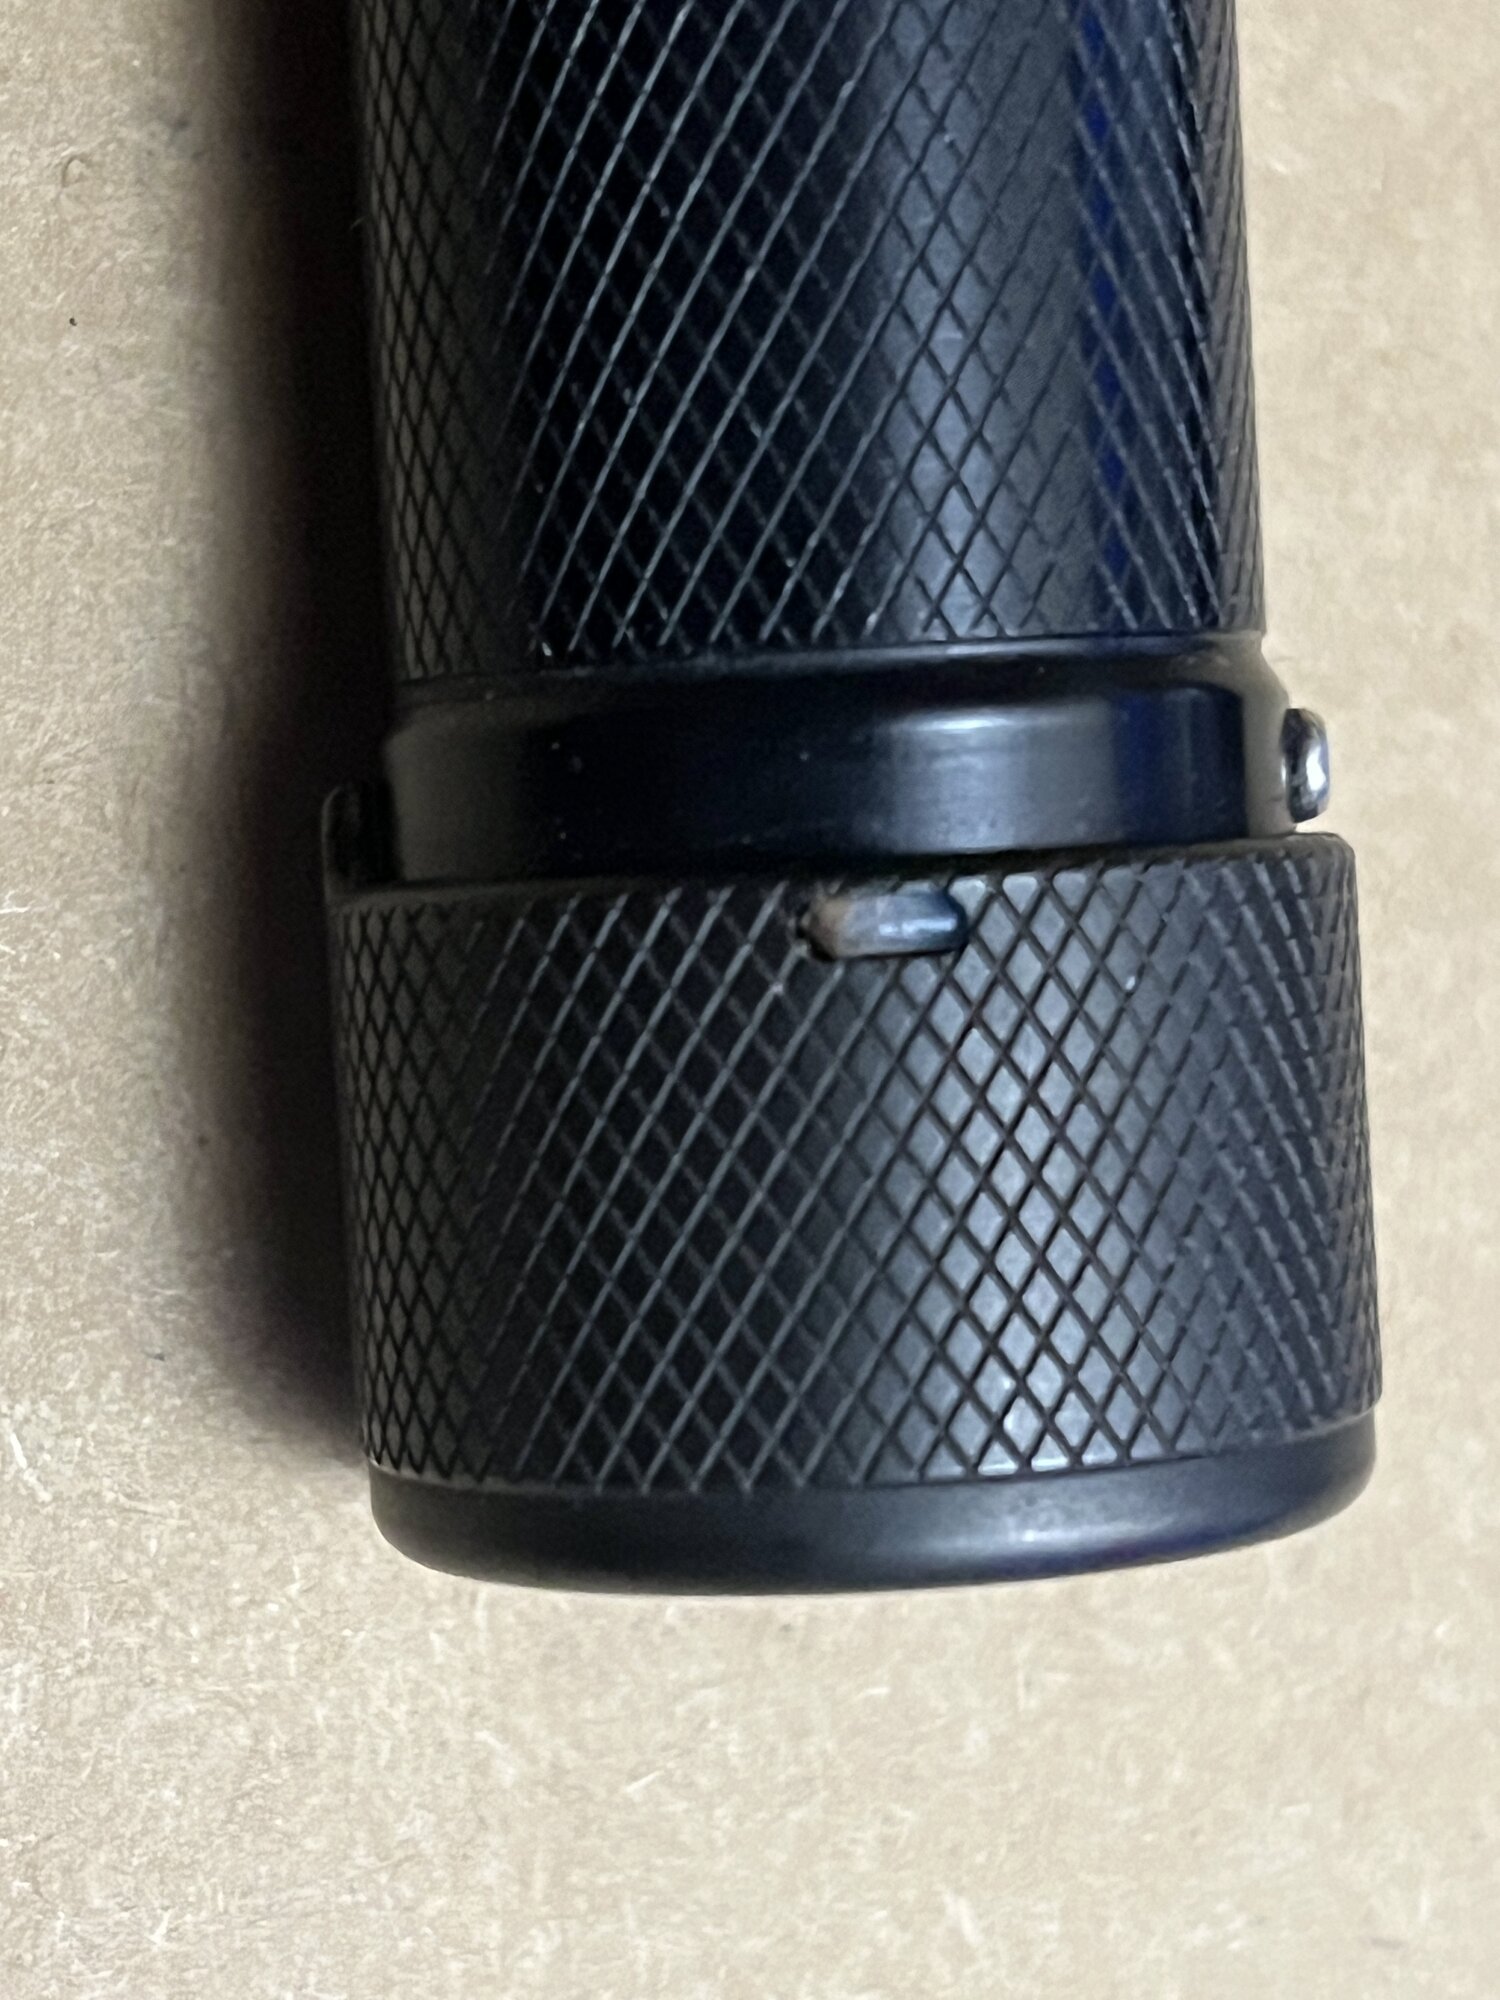
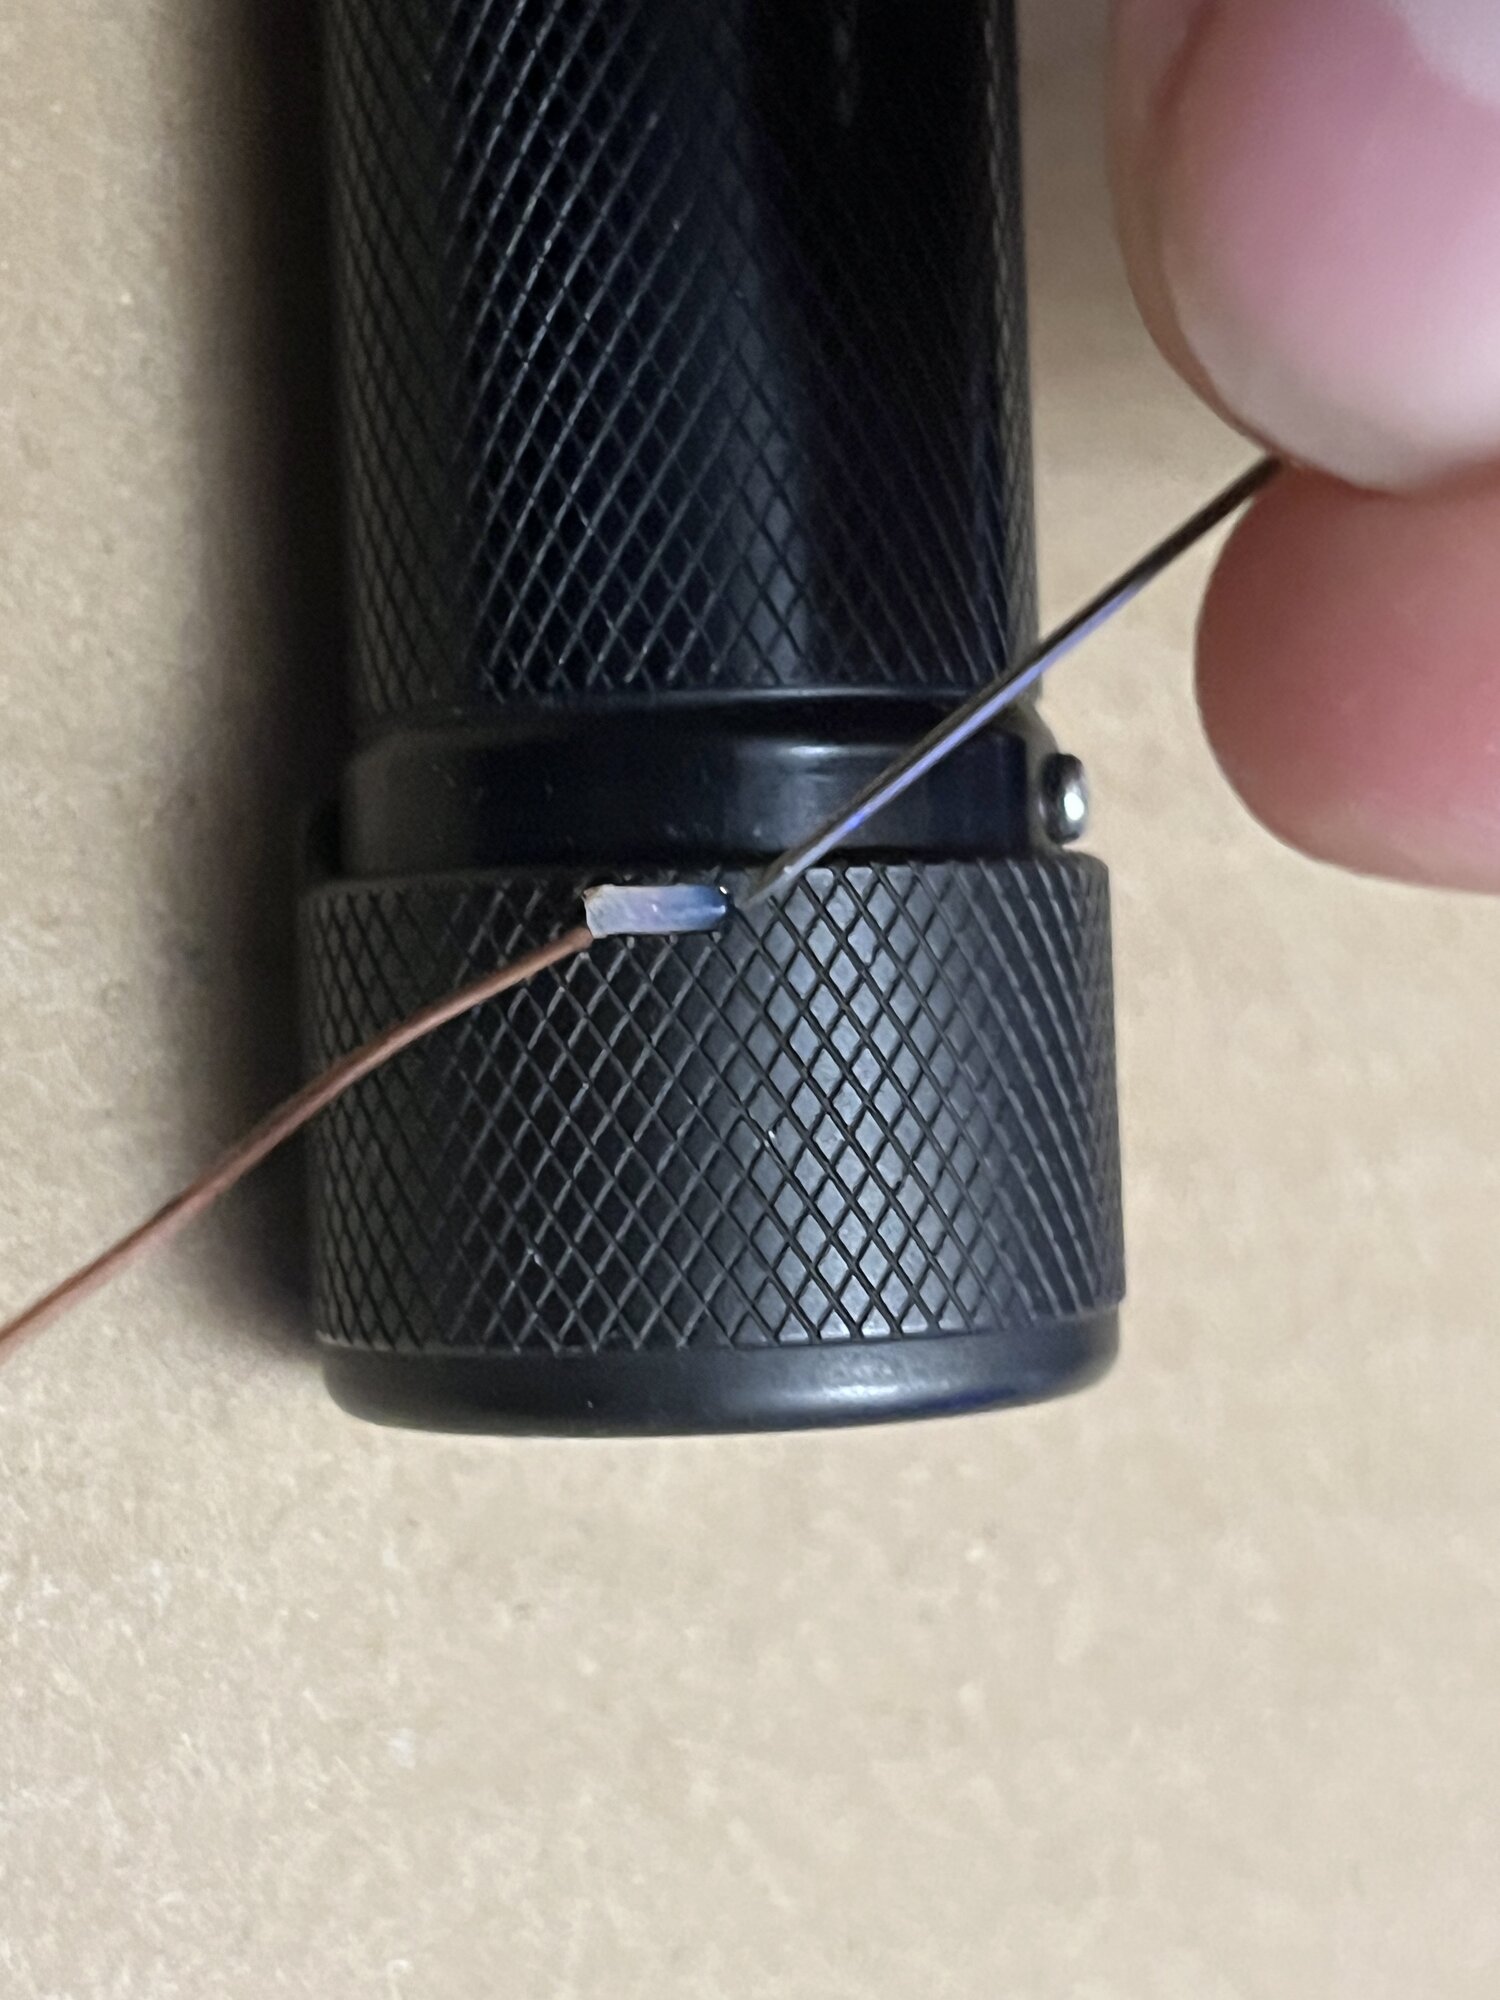
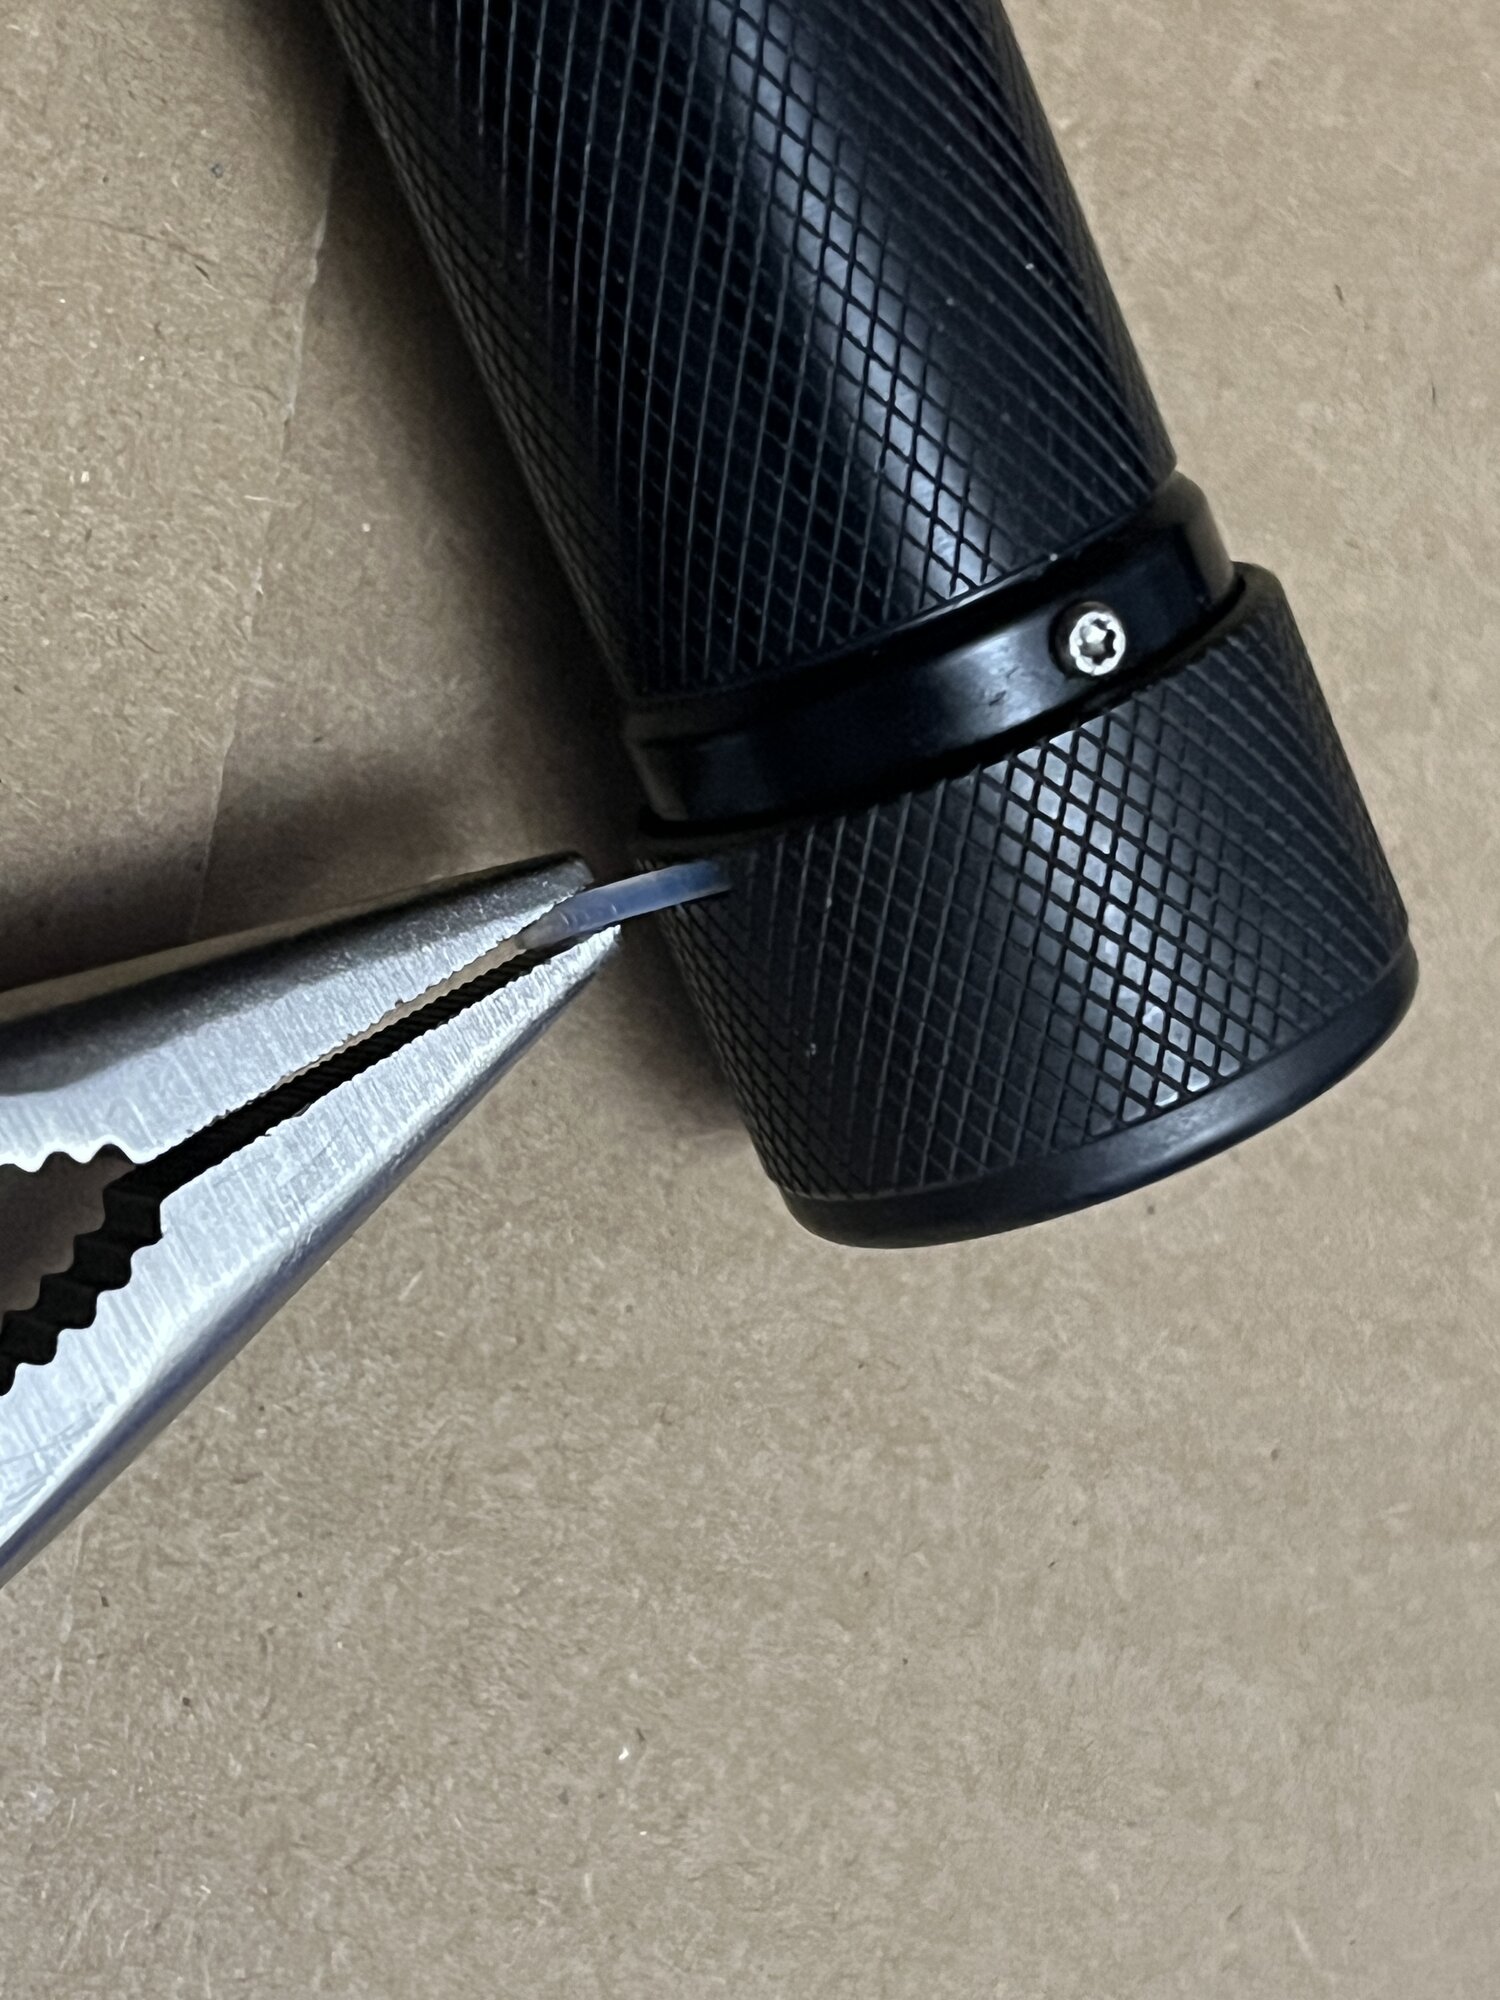
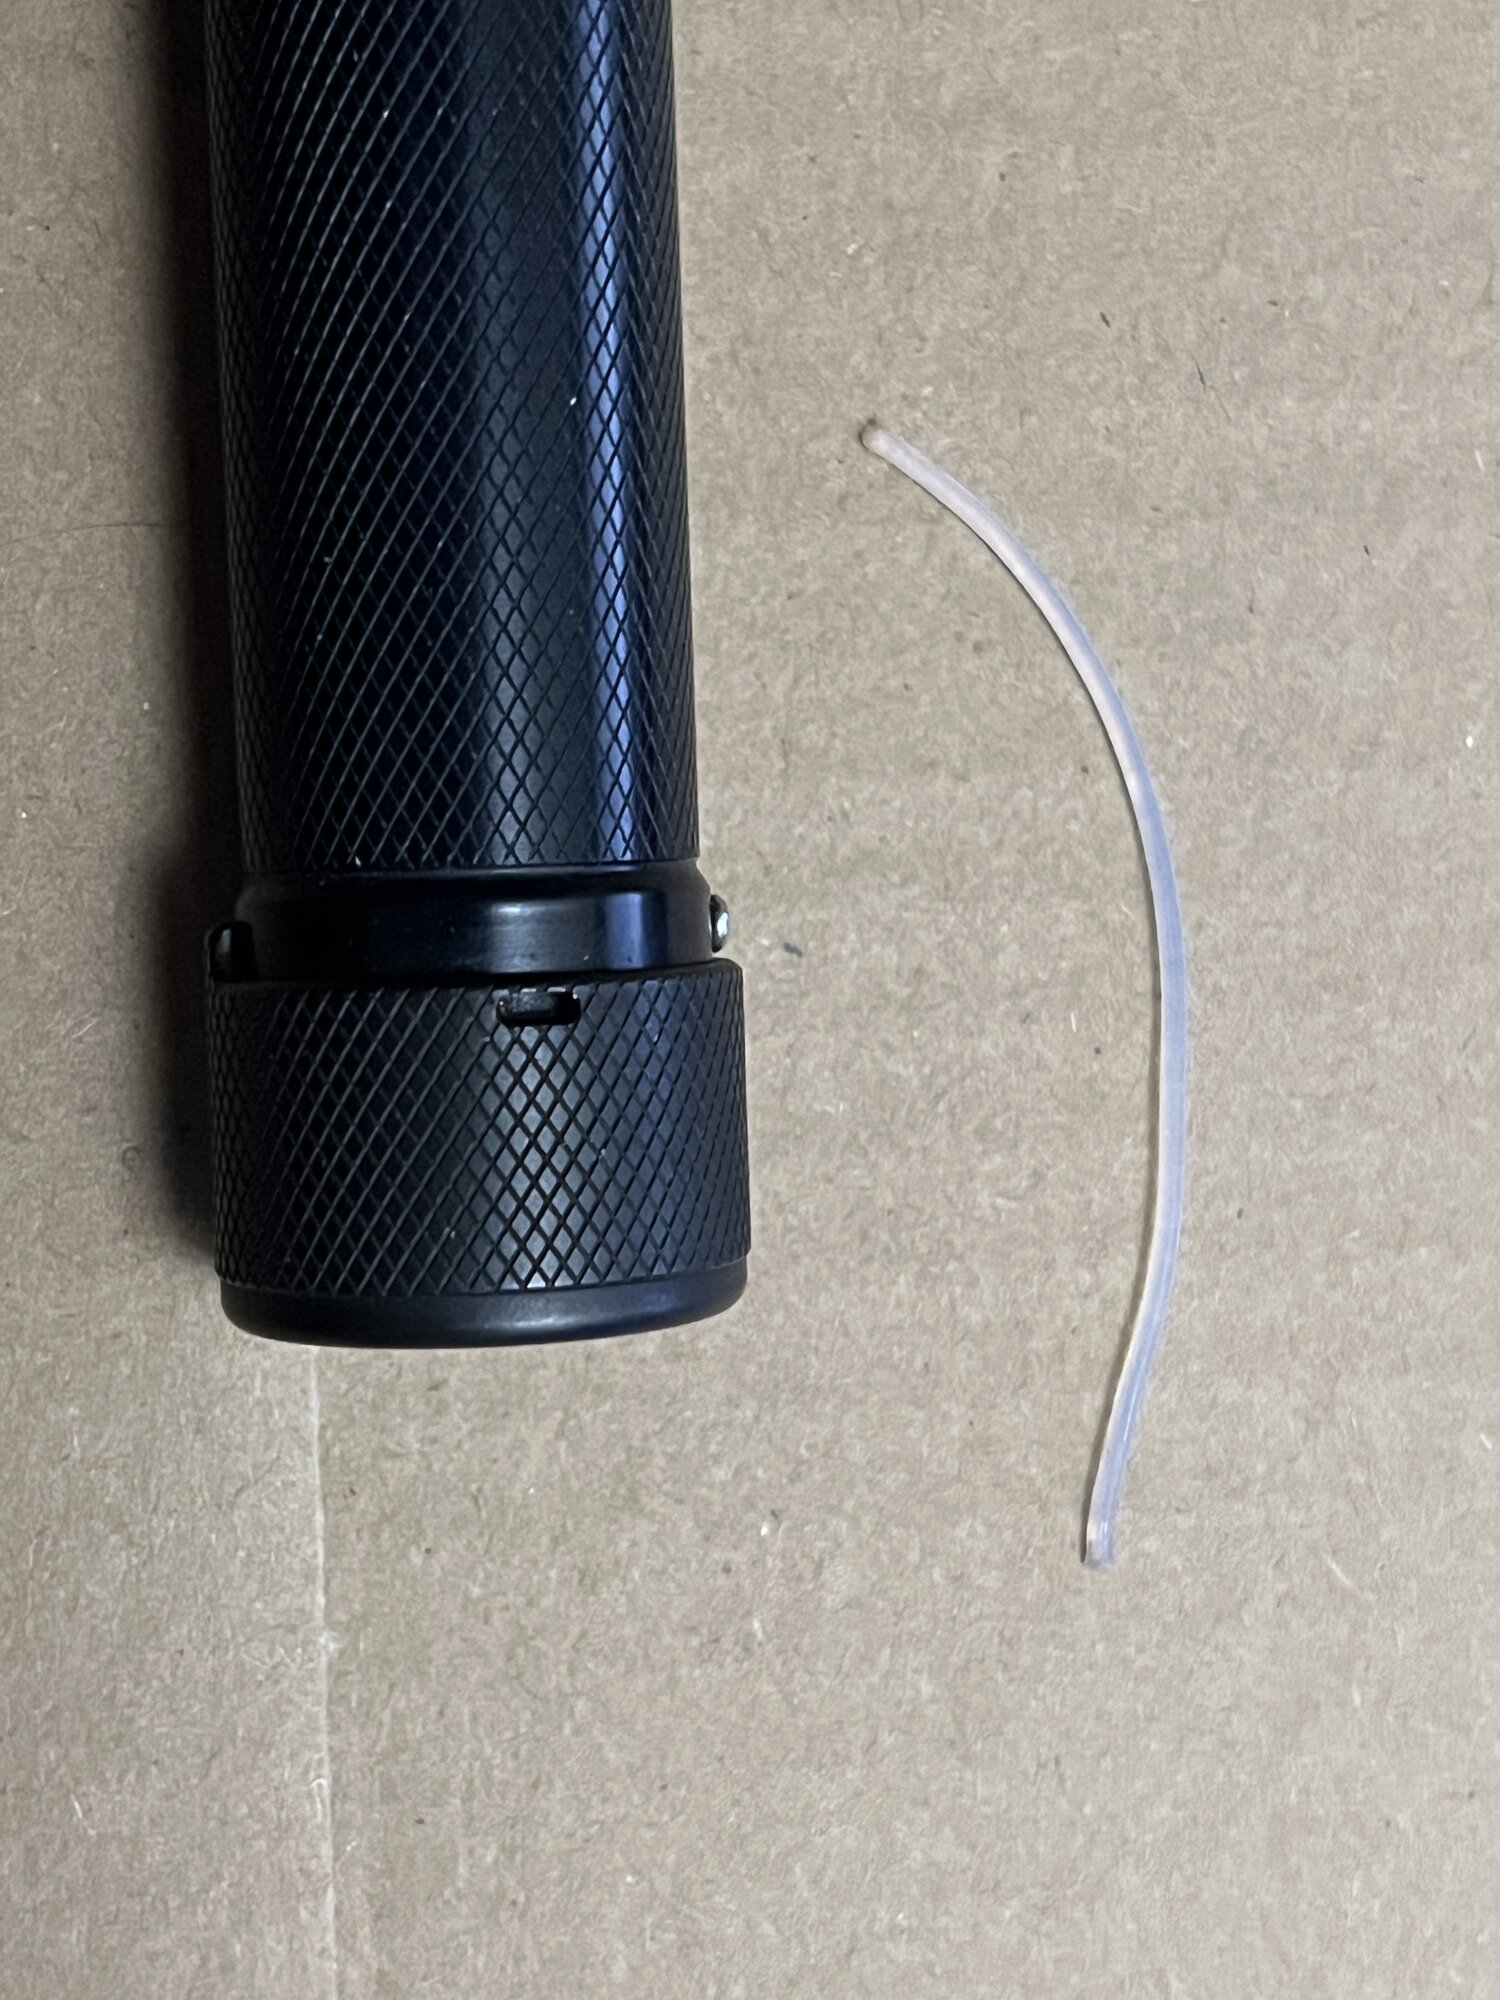
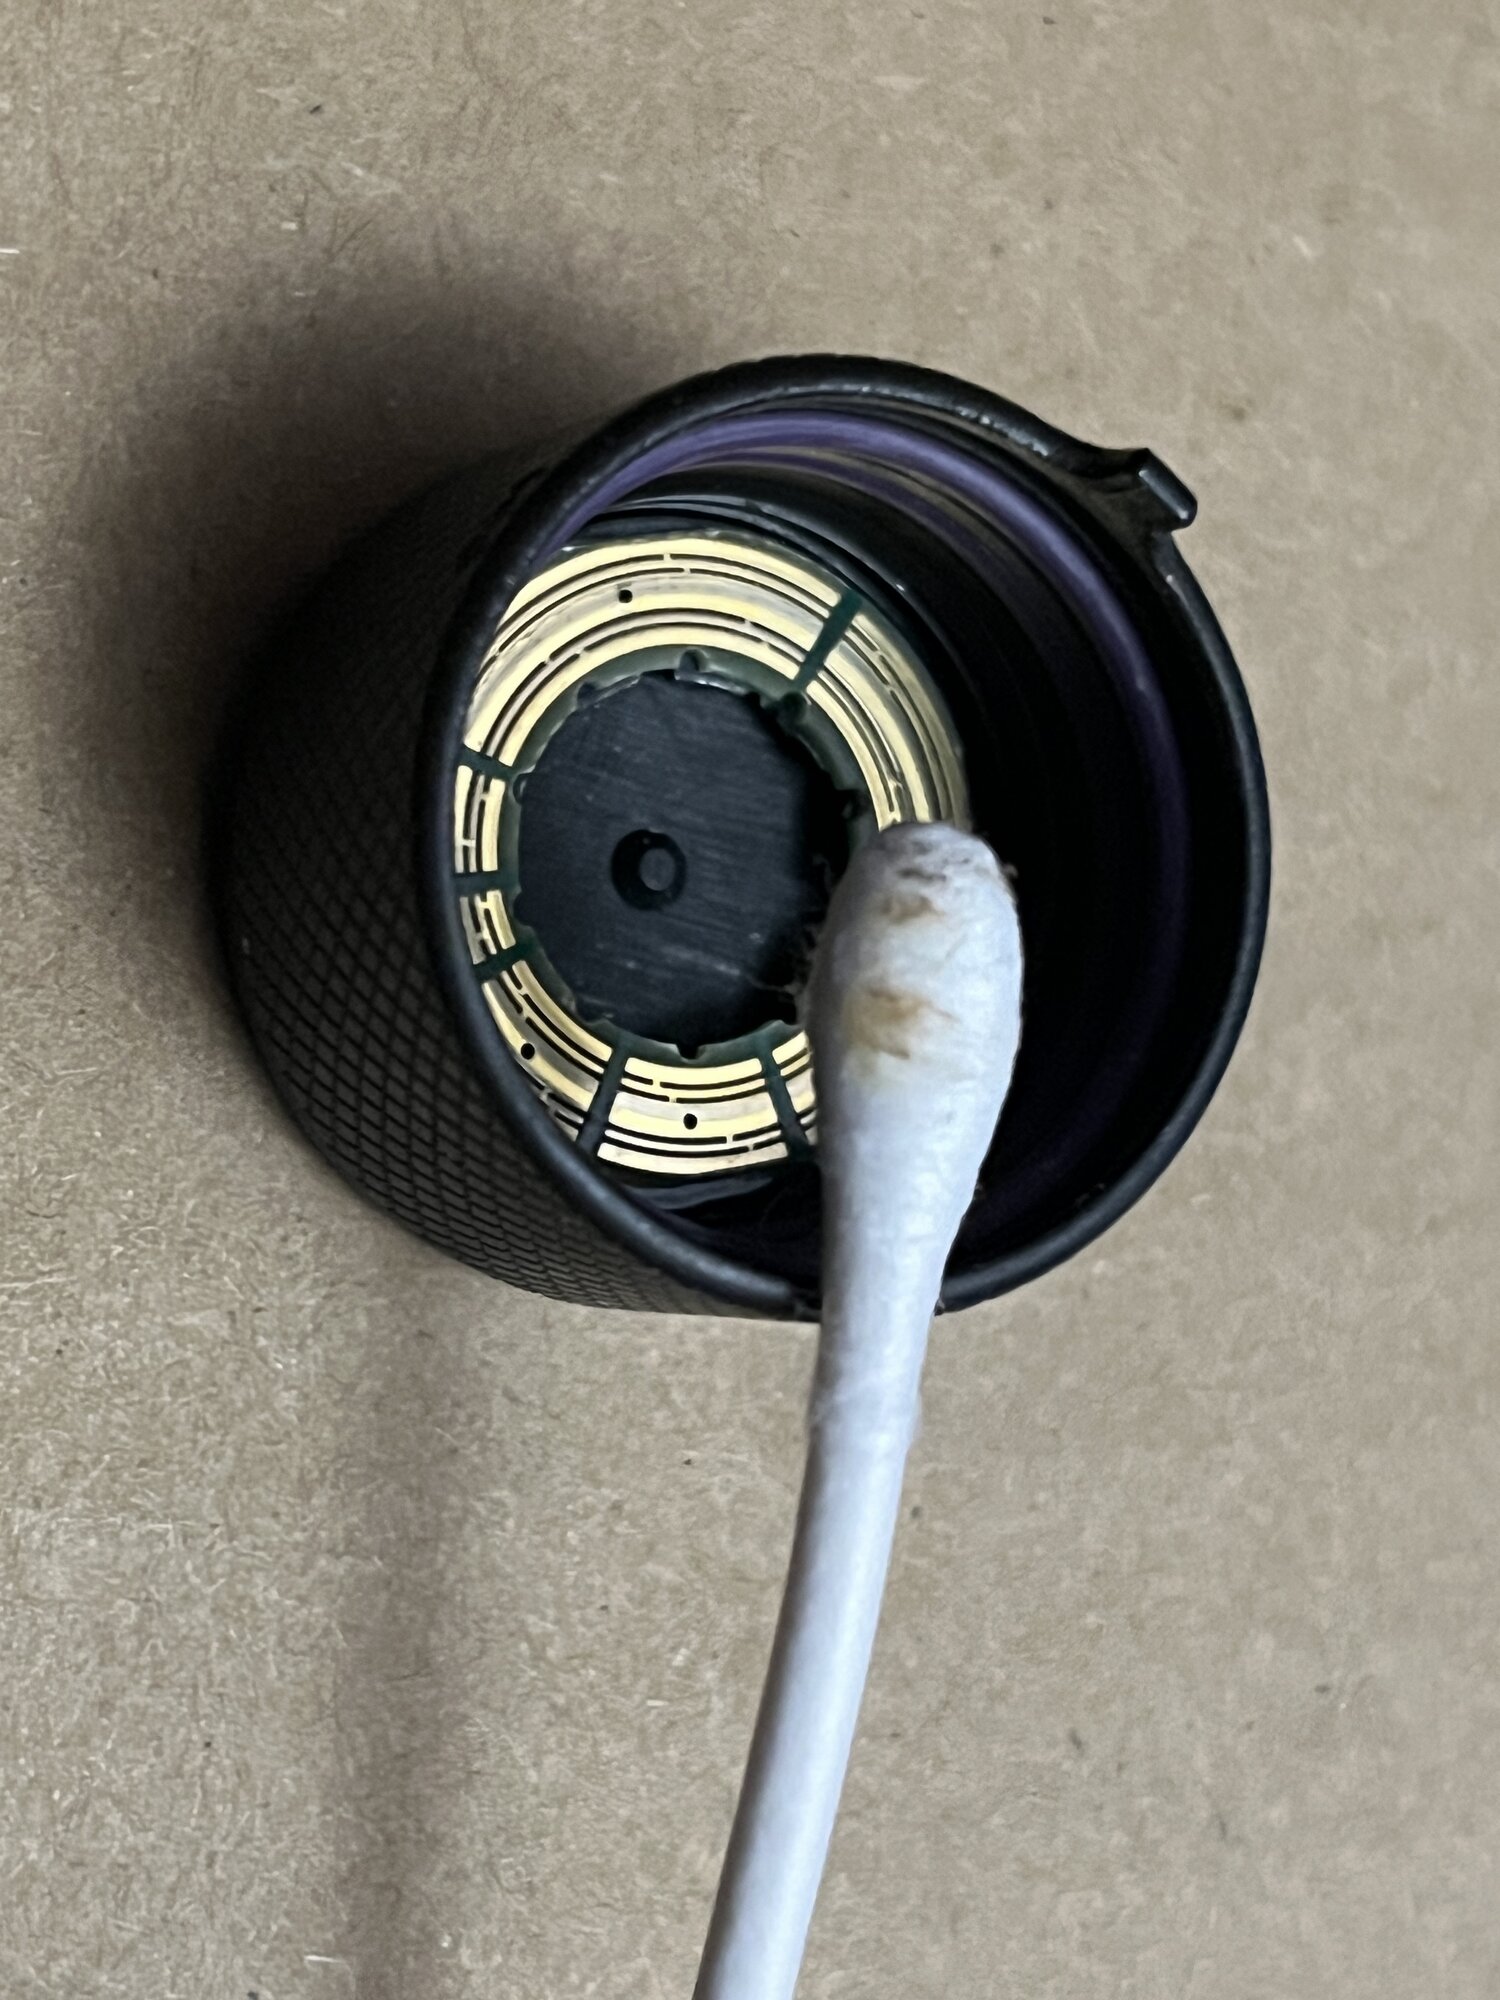
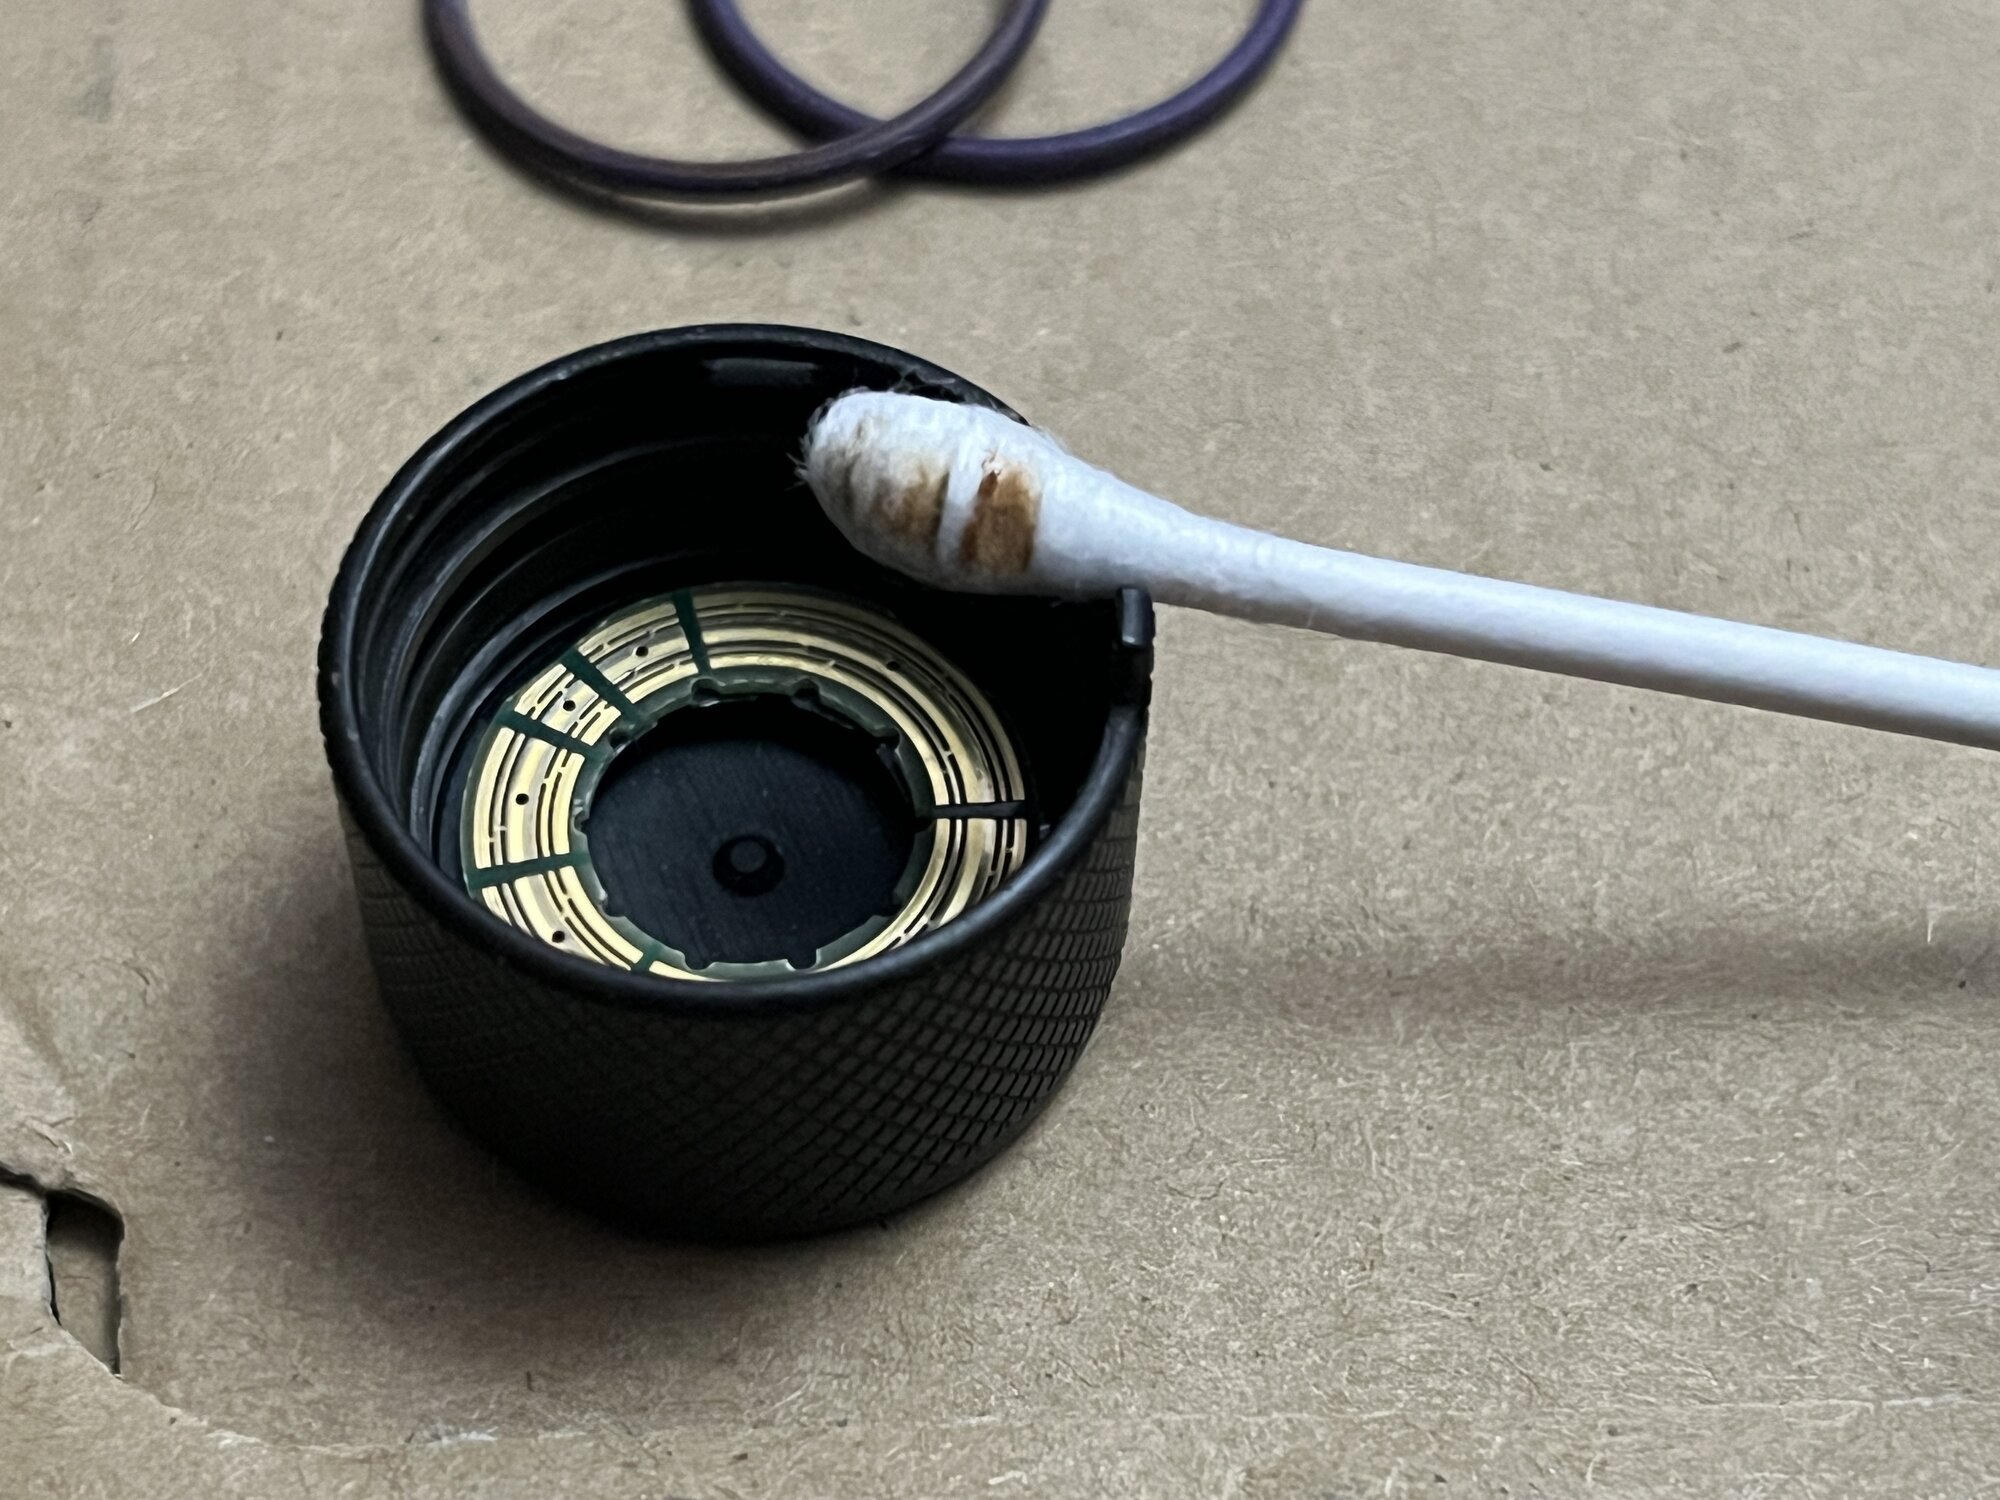
I’d honestly forgotten about the old thread. Allow me to instead fill in the gaps between that version and what we have now, along with some of what’s asked for. To begin with the coated wire isn’t a thing on this model, it has been replaced by a plastic strip which will likely last longer if you take it in and out of the flashlight several times. The process to remove it is slightly more complicated than the old wire though, this plastic is slick, and grabbing it involved sliding something in under the plastic and then poking it with a needle and pushing it over the thing until it’s out far enough to grab it with something else and pull it out.

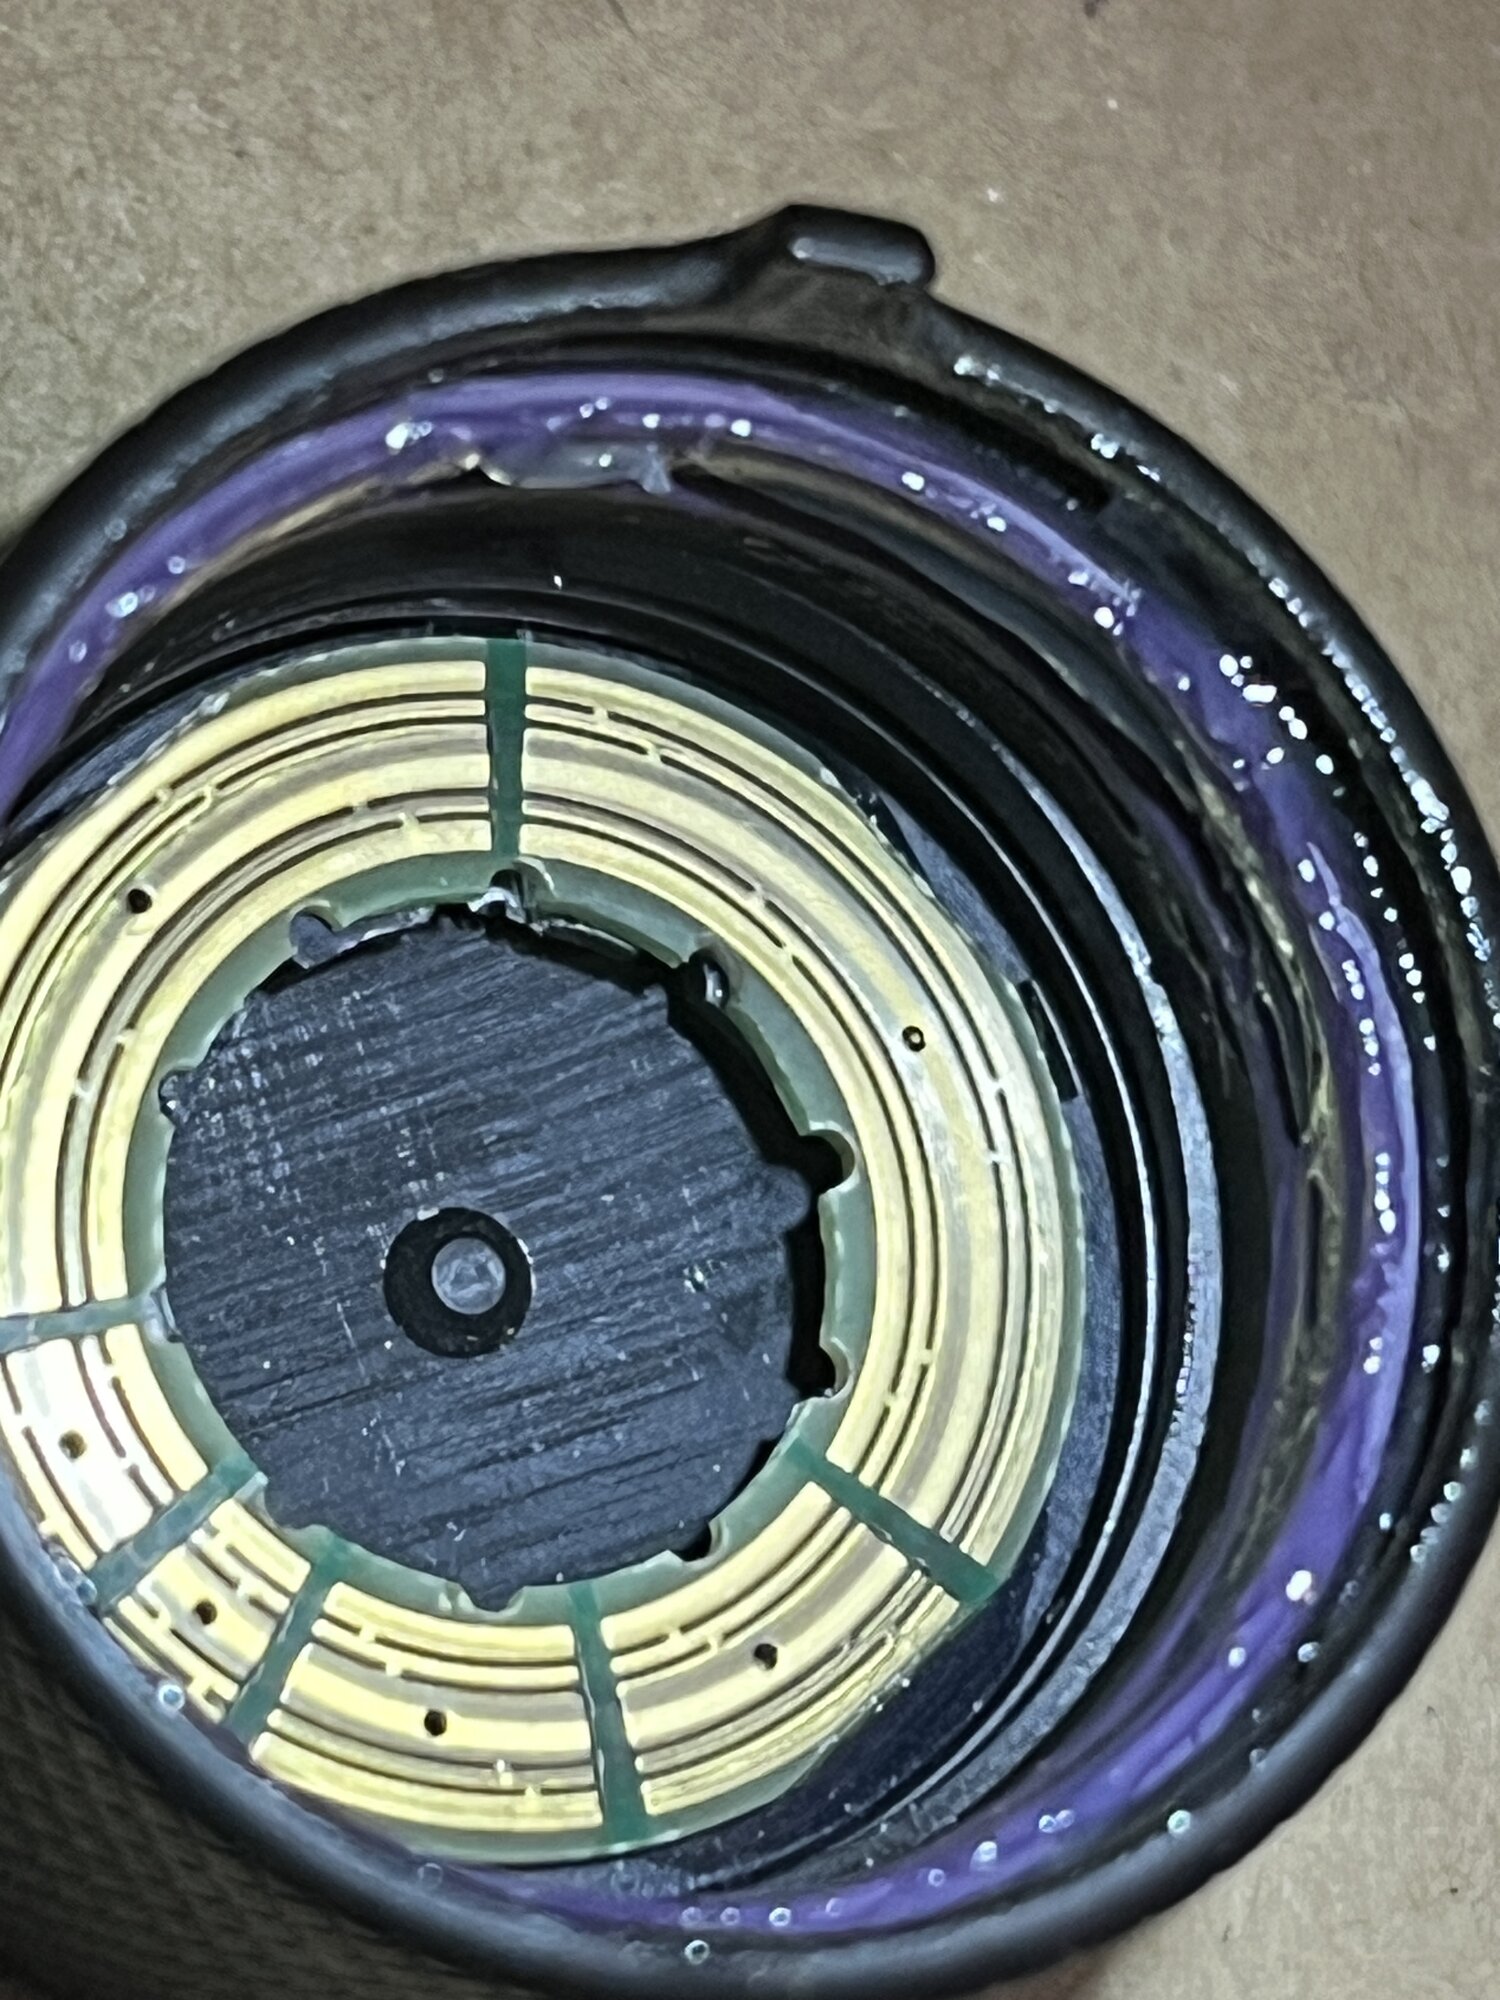
On the inside it’s pretty much the same as in the other look inside, shown here is some of the rusty stuff that’s mixed in with the new grease, as mentioned it looks a lot the surface rust you get after bluing steel.

I’ve not removed the tailcap PCB, but looking at it here it looks a lot like it’s glued to the boot retaining ring, so sliding something out by the edge you should be able to just unscrew it.
 

Attachments

  • IMG_6292.jpeg
    IMG_6292.jpeg
    384.7 KB
  • IMG_6293.jpeg
    IMG_6293.jpeg
    299.7 KB
  • IMG_6294.jpeg
    IMG_6294.jpeg
    416.6 KB
  • IMG_6295.jpeg
    IMG_6295.jpeg
    439.6 KB
  • IMG_6300.jpeg
    IMG_6300.jpeg
    384.3 KB
  • IMG_6301.jpeg
    IMG_6301.jpeg
    434.7 KB
  • IMG_6306.jpeg
    IMG_6306.jpeg
    483.8 KB
@LRJ88 Does your Rotary had a "rubber cap" (my guesd it is rubber) on the hole of the Rotary cap? I ask because older Rotaries did not have this rubber cap.
It does. Looking at it i'd not be too upset if it didn't, i could easily fashion something else to block the hole otherwise. I'd just removed it already here since it's quite easy to do so, and i wanted more to show the other steps to actually disassembling this version, a large part of getting the plastic to this point was just poking through one end with a copper wire until the whole port was showing plastic.
 
Interesting and potentially vital update; while messing about with tailcap i first went with the same grease that HDS sells with their replacement o-rings since i wanted it to be slightly firmer, in the pics above i instead decided on trying Nitecore’s lithium grease on the o-rings just to see what’d happen. 20 minutes after putting it together it had gotten noticably stiffer, an hour after it was hard to twist the tailcap overall. Fearing contaminants in the grease i disassembled the tailcap again, taking it apart i noticed the o-rings being slightly more snug in their slots this time around, having that in mind i wiped everything clean and added the first grease again. At first, no issues, then after a few minutes it had started seizing too. A few more attempts with this, also trying Haynes lubri-film, the o-rings had gotten larger time by time. This morning after sitting a few hours the tailcap required considerably more effort at first, even if it gets slightly better with repeated twisting.

My conclusions based on this and when the issue started appearing is that the material in the o-rings started expanding after coming into contact with the Nitecore grease, leading to them swelling up in place and acting more like a brake instead of a glide surface. I’m getting some new o-rings and will try more grease on them to see what happens, if it’s not just this material being iffy. I can’t recommend using the Nitecore grease for this application as it is.
 
Last edited:
Interesting and potentially vital update; while messing about with tailcap i first went with the same grease that HDS sells with their replacement o-rings since i wanted it to be slightly firmer, in the pics above i instead decided on trying Nitecore’s lithium grease on the o-rings just to see what’d happen. 20 minutes after putting it together it had gotten noticably stiffer, an hour after it was hard to twist the tailcap overall. Fearing contaminants in the grease i disassembled the tailcap again, taking it apart i noticed the o-rings being slightly more snug in their slots this time around, having that in mind i wiped everything clean and added the first grease again. At first, no issues, then after a few minutes it had started seizing too. A few more attempts with this, also trying Haynes lubri-film, the o-rings had gotten larger time by time. This morning after sitting a few hours the tailcap required considerably more effort at first, even if it gets slightly better with repeated twisting.

My conclusions based on this and when the issue started appearing is that the material in the o-rings started expanding after coming into contact with the Nitecore grease, leading to them swelling up in place and acting more like a brake instead of a glide surface. I’m getting some new o-rings and will try more grease on them to see what happens, if it’s not just this material being iffy. I can’t recommend using the Nitecore grease for this application as it is.
The Nitecore grease appears to be a silicone-based grease, which is fine for most rubbers but will cause silicone rubber to swell. Sounds like the HDS O-rings are silicone.
 
The Nitecore grease appears to be a silicone-based grease, which is fine for most rubbers but will cause silicone rubber to swell. Sounds like the HDS O-rings are silicone.
Might well be that then. Nitrile o-rings shouldn’t be an issue though, so i’ll be getting those. Seems to be 22 OD and 1 or 1.5mm thickness, so that’s going in the shopping basket today.
 
A wee little update with both good news and bad.

The good news is that something akin to a Malkoff boot fits perfectly in the HDS except it lacks the nub to actually let it press the button, the button is 14mm wide and the rim/flange/whateveryouwannacallthething is 19mm in diameter and 2mm thick, make of this information what you will.

Indexing the PCB after putting it back was made through this process, you'll have to follow this very specific process and it's so advanced you might want to read through this twice. Ready? Ok, you tighten the PCB and retaining ring until snug, put it on the body, check high and low, if both are fine you're good to go. If either isn't as it should be, adjust it by then instead, first snug it down.

I've yet to receive the o-rings, but looking at the spare parts for the Malkoff and comparing sizes i'm half sure already that 20,57x1,78 will work in it, otherwise i'll just have to get others and keep trying. It's a fun experiment regardless.
 
Indexing the PCB after putting it back was made through this process, you'll have to follow this very specific process and it's so advanced you might want to read through this twice. Ready? Ok, you tighten the PCB and retaining ring until snug, put it on the body, check high and low, if both are fine you're good to go. If either isn't as it should be, adjust it by then instead, first snug it down.

Thanks for this info. How is the PCB removed from the tail cap? Does it just unscrew?
 
Thanks for this info. How is the PCB removed from the tail cap? Does it just unscrew?
Pretty much, it sits on a funky disc-type thing so you have to be a bit careful to not mess up the PCB itself. It has several notches which i’m guessing are used to be able to screw/unscrew the retaining ring. If you plan on removing the PCB from the ring it has a large notch which could be used as an index as well.
 
The rubber buttons (actually neoprene) are the same for Rotary and Executive.
The O-rings in the tail are EDPM. Don't use anything but the HDS lube... or just don't take the tail apart... actually, do take the tail apart so we can sell you another one when it gets messed up.
The tail caps are 302 stainless. It isn't rust inside but a left over of the blackening process which is a nitride coating.

I don't get on here much. My last 2 week paycheck from working on the ambulance had 240 hours on it... 80 regular and 160 OT hours...
People need to stop doing stupid things and having others hold their beer and watch. I thought I saw stupid when I worked as a LEO... I was wrong!
 

Latest posts

Back
Top