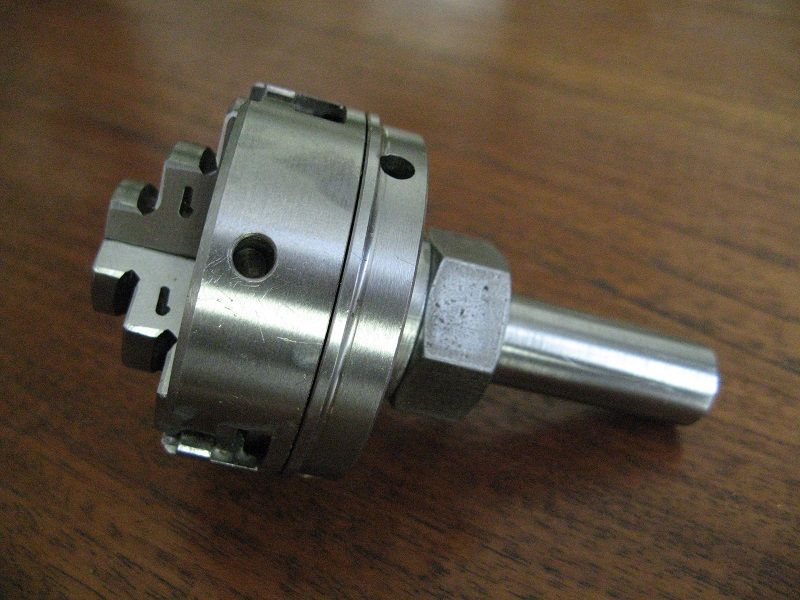
So I had a go at making a Chuck Adapter Spindle for Jay R and thought I'd take some photos to document the process and explain some of the operations if anyone's interested.
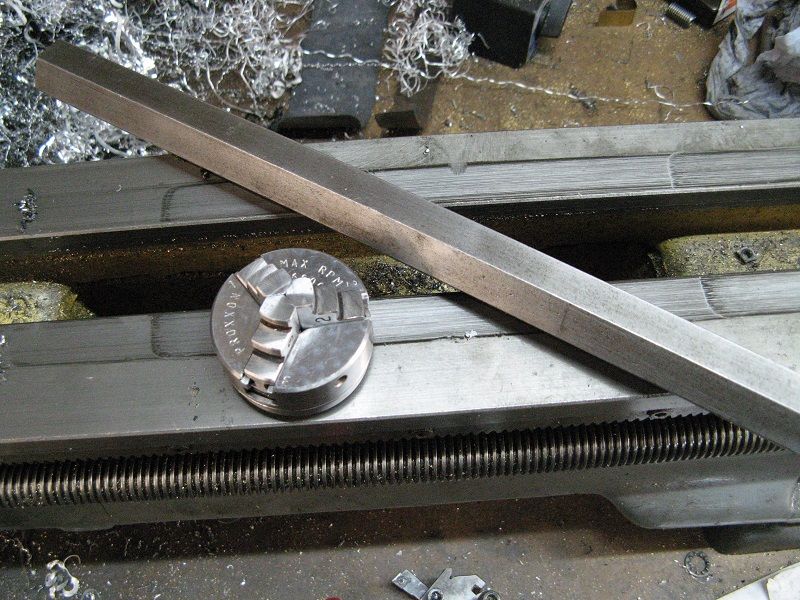
I started with some 22mm mild steel hex bar.
Also shown is the mini chuck I will be adapting to fit into a power drill, which uses a standard 13mm chuck.

The band saw was used to cut the bar roughly to length.
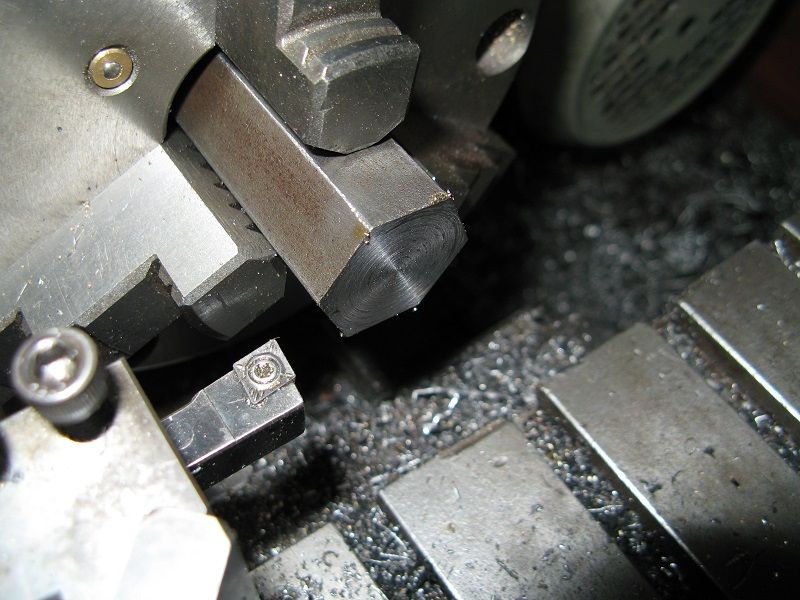
The bar was turned to length on the lathe and the two ends were flattened.
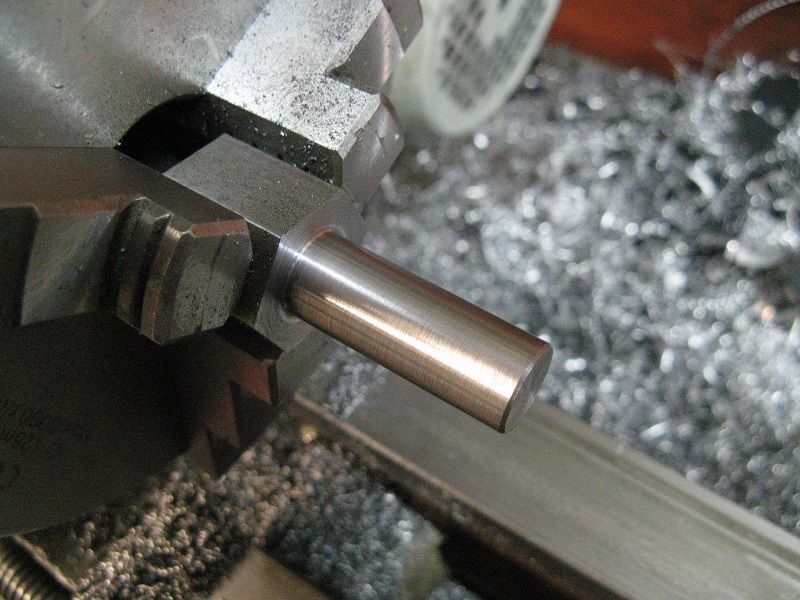
One end of the bar was reduced down to a diameter of just under 13mm, to act as a shaft for the drill chuck.
The end of the shaft was chamfered and the shaft was then smoothed, using various grits.

The other end of the bar was reduced down to 16mm, with a chamfer added to the bar end and a land added just before the shoulder.
The land section makes thread cutting easier and safer.
Chamfers were also added to both ends of the hex section.
Thin brass sheet was used to prevent damage occurring to the part's shaft when being gripped by the lathe chuck.
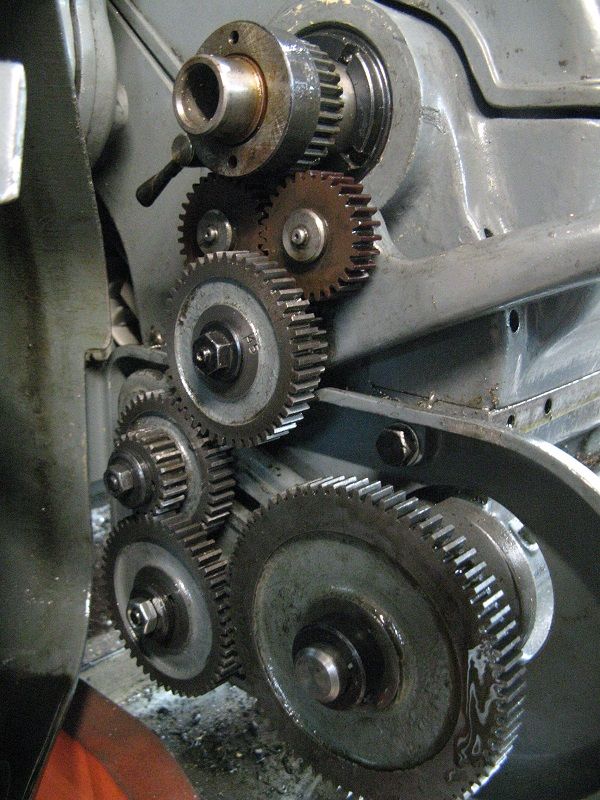
The specific gearing gets setup in the lathe's gearbox for cutting a 1mm pitched thread.
These gears link the chuck with the lead screw, which will drive the cutting tool along the work at a stead rate of 1mm per chuck revolution.
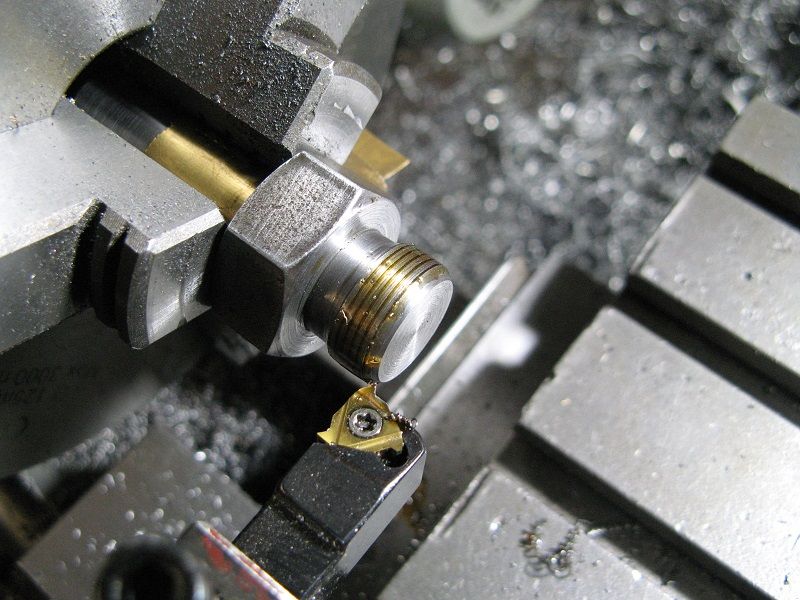
Thread cutting begins, using plenty of cutting fluid and repeated shallow cuts.
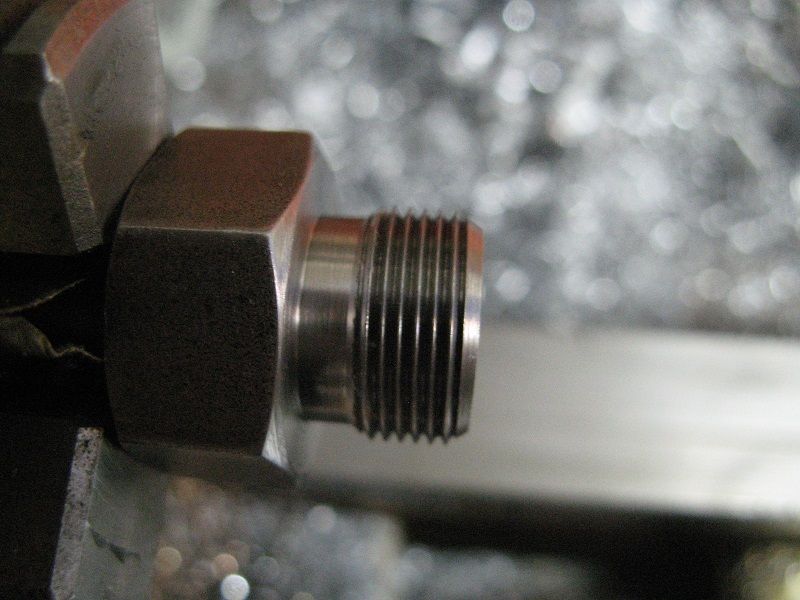
Cutting of the threads is complete and the part is now finished.
When coming close to the expected required depth of the threads; the cutting tool was moved away and the small chuck was test fitted.
This was repeated after every subsequent cutting pass until the chuck screwed onto the spindle smoothly.
The whole process probably took around three hours.
(I apologise if the photos aren't showing up. Seems to be a Photobucket issue, which is pretty infuriating since I pay for the damn service)


