
(Disclaimer, the pics work on my computer, but not on my phone).
So I scoured the inter webs to the best of my ability for a detailed instruction guide on how to build a Convoy S2 flashlight. I couldn't find one anywhere, and since this is my first build, I was more than intimidated by it. I was able to get most of the information I needed through various articles I found, but they didn't have pictures so I had to kind of figure it out on my own and by asking questions. So here is my version of a how-to so hopefully other new builders can have something to follow for their first builds.
Parts list (all purchased from mtnelectronics.com):
Convoy S2 host (gray)
Nichia 219C D280 on 16mm Noctigon - 80+ CRI 5000K
QLITE REV.A 7135*8 3.04A LED DRIVER - 17mm
20mm AR Coated Glass Lens (bought this on a whim and actually broke the original so I ended up needing it)
Tools list:
Soldering iron
Solder
Snap ring pliers
Thermal compound
So.... Here we go!
The Convoy host came with everything but the LED and driver. Lanyard, switch, copper pill, reflector, lens.

So first I disassembled the body and the pill. I used a pair of snap ring pliers (necessary) to remove the pill from the light head. Much after the fact and after many questions, I finally realized there is a retaining ring on the bottom of the pill that you have to remove in order for this particular driver to fit. The retaining ring did not fit back on the pill with the Qlite driver, due to the 7135 circuits being so close to the edge.
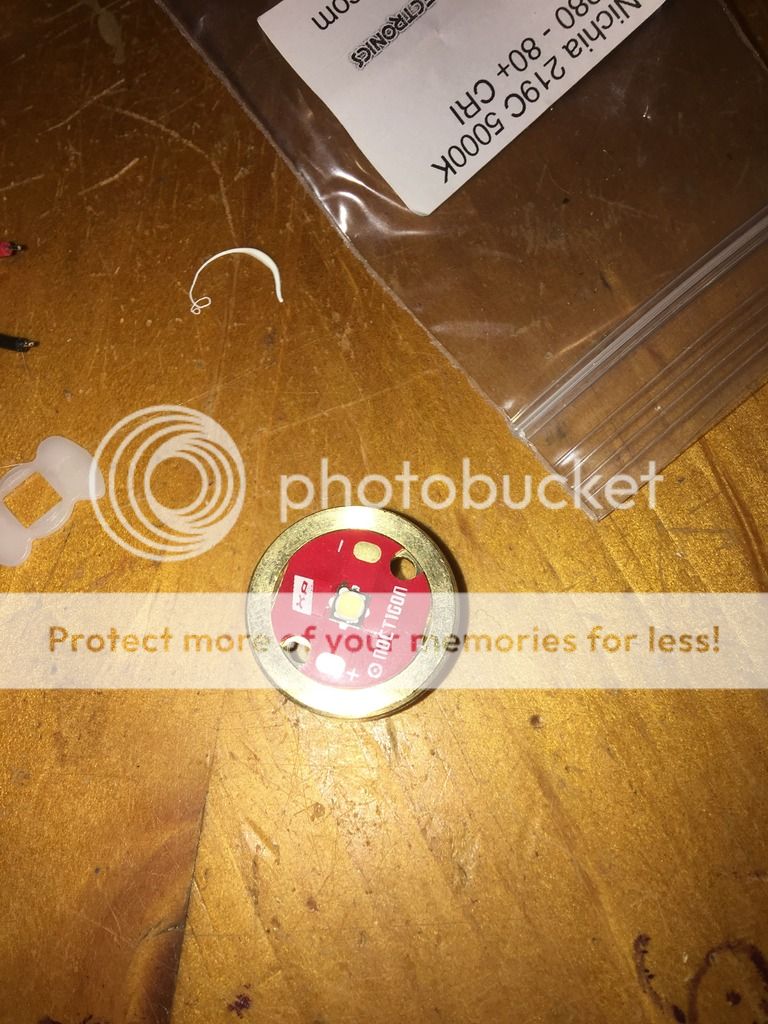
Once the pill was disassembled, I used a small dab of thermal compound on the top recess before seating the LED assembly.
Once the LED was seated, it looked like this. The little white plastic device in the back HAD to be used on mine, otherwise it didn't work. It took a lot of trouble shooting in the end to realize since I didn't have the plastic insulator cap installed, the LED was shorting out on the reflector when it was assembled.
The Qlite driver has four stars on it, with which you choose your mode banks. You select the bank by soldering from the star to the rim of the circuit board. I selected the 3rd bank for my usage, but it turns out I read them the wrong way and I actually selected the 2nd bank by accident. The stars are read from left to right AS YOU SEE THE PRINT ON THE CIRCUIT BOARD. So essentially, this next picture is upside down. This is my first EVER solder job on ANYthing, so forgive the blobs and hideous work.
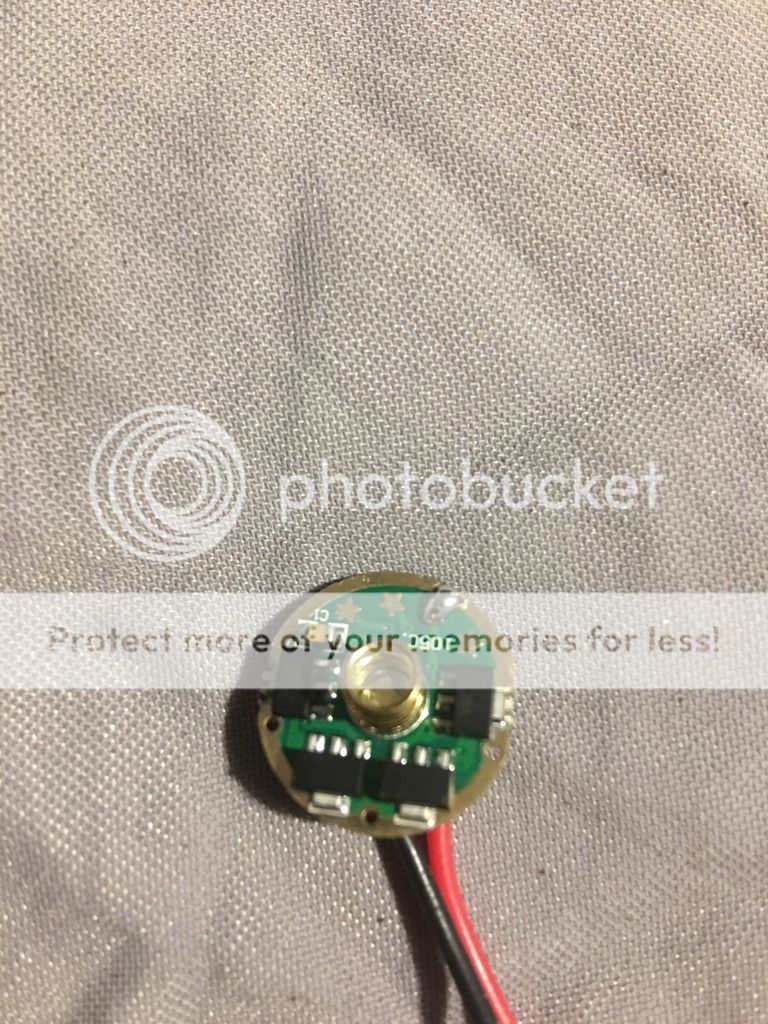
Once I selected my mode bank, I fed the wires through the pre-drilled holes and seated the driver into the bottom of the pill. As I said earlier, the metal retaining ring does not fit back on the pill with this driver, so I had to solder the driver in place.

Once the driver was seated, this was what the pill looked like, before making the connection to the LED.

I trimmed the wires down to where the bare ends folded over and just overlapped the bare contacts on the LED board. They were pretty simple to solder, but again, they are ugly, since it's my first solder project.
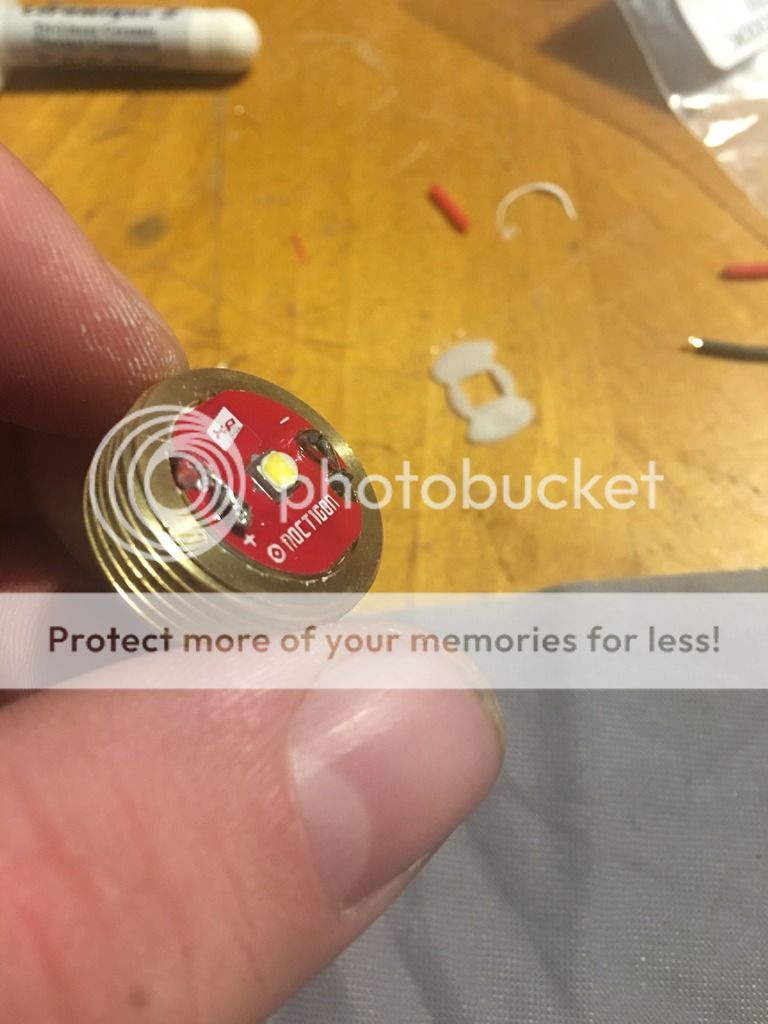
Don't forget to put the white plastic insulator clip over the top of the LED board to keep the connections from grounding out on the reflector when it's assembled. I had to disassemble and reassemble this thing about 10 times with different batteries and tail switches to try to figure out why it was not coming on.
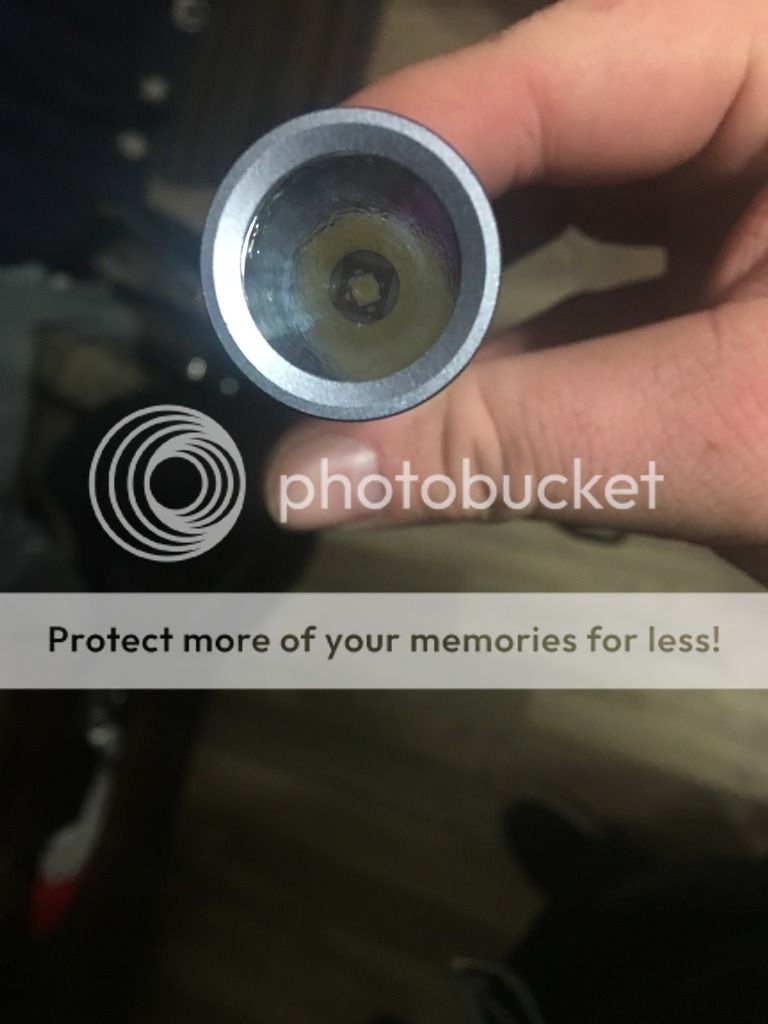
Here is a dark picture of the assembled light head.
I found the key is to treat this thing with respect and not to force or torque anything down with strength. Just feed the threads with ease and let them go where they're going to go. Use the snap ring pliers to get down where your fingers can't reach.
I am not 100% in love with the Nichia tint. I prefer the XML2 in my stock Convoy I bought. All in all though it was an exhilarating project and I've ordered parts to build two more with different drivers and LEDs. Partly for more practice and part for comparisons of parts.
I hope this helps somebody in the future and I can't wait for the next build! I'm no expert, but if anybody else has questions or clarifications, please let me know. I have had a great experience with this forum and loads of help from members, so I can only hope to pass on a little bit of knowledge.
So I scoured the inter webs to the best of my ability for a detailed instruction guide on how to build a Convoy S2 flashlight. I couldn't find one anywhere, and since this is my first build, I was more than intimidated by it. I was able to get most of the information I needed through various articles I found, but they didn't have pictures so I had to kind of figure it out on my own and by asking questions. So here is my version of a how-to so hopefully other new builders can have something to follow for their first builds.
Parts list (all purchased from mtnelectronics.com):
Convoy S2 host (gray)
Nichia 219C D280 on 16mm Noctigon - 80+ CRI 5000K
QLITE REV.A 7135*8 3.04A LED DRIVER - 17mm
20mm AR Coated Glass Lens (bought this on a whim and actually broke the original so I ended up needing it)
Tools list:
Soldering iron
Solder
Snap ring pliers
Thermal compound
So.... Here we go!
The Convoy host came with everything but the LED and driver. Lanyard, switch, copper pill, reflector, lens.

So first I disassembled the body and the pill. I used a pair of snap ring pliers (necessary) to remove the pill from the light head. Much after the fact and after many questions, I finally realized there is a retaining ring on the bottom of the pill that you have to remove in order for this particular driver to fit. The retaining ring did not fit back on the pill with the Qlite driver, due to the 7135 circuits being so close to the edge.
Once the pill was disassembled, I used a small dab of thermal compound on the top recess before seating the LED assembly.

Once the LED was seated, it looked like this. The little white plastic device in the back HAD to be used on mine, otherwise it didn't work. It took a lot of trouble shooting in the end to realize since I didn't have the plastic insulator cap installed, the LED was shorting out on the reflector when it was assembled.

The Qlite driver has four stars on it, with which you choose your mode banks. You select the bank by soldering from the star to the rim of the circuit board. I selected the 3rd bank for my usage, but it turns out I read them the wrong way and I actually selected the 2nd bank by accident. The stars are read from left to right AS YOU SEE THE PRINT ON THE CIRCUIT BOARD. So essentially, this next picture is upside down. This is my first EVER solder job on ANYthing, so forgive the blobs and hideous work.

Once I selected my mode bank, I fed the wires through the pre-drilled holes and seated the driver into the bottom of the pill. As I said earlier, the metal retaining ring does not fit back on the pill with this driver, so I had to solder the driver in place.

Once the driver was seated, this was what the pill looked like, before making the connection to the LED.

I trimmed the wires down to where the bare ends folded over and just overlapped the bare contacts on the LED board. They were pretty simple to solder, but again, they are ugly, since it's my first solder project.

Don't forget to put the white plastic insulator clip over the top of the LED board to keep the connections from grounding out on the reflector when it's assembled. I had to disassemble and reassemble this thing about 10 times with different batteries and tail switches to try to figure out why it was not coming on.
Here is a dark picture of the assembled light head.

I found the key is to treat this thing with respect and not to force or torque anything down with strength. Just feed the threads with ease and let them go where they're going to go. Use the snap ring pliers to get down where your fingers can't reach.
I am not 100% in love with the Nichia tint. I prefer the XML2 in my stock Convoy I bought. All in all though it was an exhilarating project and I've ordered parts to build two more with different drivers and LEDs. Partly for more practice and part for comparisons of parts.
I hope this helps somebody in the future and I can't wait for the next build! I'm no expert, but if anybody else has questions or clarifications, please let me know. I have had a great experience with this forum and loads of help from members, so I can only hope to pass on a little bit of knowledge.