Restoring vintage flashlights

bykfixer

Flashaholic
Joined
Aug 9, 2015
Messages
20,477
Location
Dust in the Wind
A typical 'battery pack' pre-1919 to 21...


Think toilet paper roll w/ logo


Here's what author Stuart Schneider said in his "collecting flashlights" book.


Now another pair of Francos from nearly 100 years ago.


Got this jewel going today...

Silver plated brass number circa 1911.


Patent applied for...


Turned out SUH-WEEEET!!!

Same routine of polish with Mothers wheel polish, scrape tarnish from the inside, spit shine lens and reflector, check body etc with ohm checker, install new #14 (arrived with a hong kong GE) insert carbon zinc cells turn it on and enjoy that flood beam from a domed lens.
Flicker and dimming prompted a dental pick to rivets to remove plaque and dab on some Tarn-X.

The switch is sensitive, but I'm happy as is...


This one is next.

It's an early Franco with a crude switch.


Lots of work to do on this one, but all in all this one is pretty solid.
 
Last edited:

rookhawk

Newly Enlightened
Joined
Jun 16, 2016
Messages
4
Love this thread! Tell me, are there any vintage flashlights that were extremely high quality and "high end" when made, or did the concept of luxury torches usher in with modern times?

Any holy grail searches for rare, super high quality vintage stuff by chance?
 

bykfixer

Flashaholic
Joined
Aug 9, 2015
Messages
20,477
Location
Dust in the Wind
Well....

Some featured here are from the cave man days of flashlights where things were built the best way they knew how.
Some were built with style in mind where others built for utility. But all were built with best stuff available at the time.

Some of the lights I'm restoring seemed to be lightly used where others lived the normal life of a flashlight until... I say until as if to say it was likely used until it was replaced with something more modern.

Like with most gadgets as knowledge became available so did improvements.
There were peaks and plateus along the way.

I'm sure there were 'ultimate' products for the wealthy. They would've been one of a kind similar to a gold plated Samsung cel phone of today. But in terms of a company building a product that stood head and shoulders above the rest... I'm not aware of any in particular.
If say, the US president bought a flashlight, it would've probably been a silver plated brass body like the last one I showed lit up. Secret Service agents possibly the one I showed as next to get going. The queen of England perhaps a wood cased electric candle...

You can check out 'gotalight' .com, or the flashlight museum and click on other world class collectors pages to see various 'jewelry' type of flashlights.
My collection revolves around 'cop' lights with some others I find interesting or especially useful for specific tasks.

I'd say the holy grail would be any lights that used 'glove catch' switches, or the kind without a switch like the paper bodied, leather covered "Comet" style which were some of the very first ever made and extremely hard to come by.

A book by Bill Utley called of all things 'flashlights' covers the early years and beyond. He placed a rarity rating next to pictures of them. 1 being easy to find. 10 being the rarest. He has pictures of several 10's in there.

Hope that helped answer your questions.
Welcome to the site btw.
 
Last edited:

bykfixer

Flashaholic
Joined
Aug 9, 2015
Messages
20,477
Location
Dust in the Wind
Fascinating, Interesting , Awesome! .....loving that silver plated light, very bling!

It's absolutely insane how inexpensive these things are. $8 here, $12.99 there...
But I may have to melt down a couple for the $ the metal brings to pay the bill for all those 10 packs of vintage bulbs I acquired. Sheesh.
 

bykfixer

Flashaholic
Joined
Aug 9, 2015
Messages
20,477
Location
Dust in the Wind
Ok, got two more going.
The 2D Franco mono cell I spoke at the top of in post #17 and the one at the bottom of post #21.


So the rest of this post is to explain how to get an old non working flashlight going again.
This applies to nearly any flashlight of any age.
Credit goes to Steve Gitterman for teaching me this.

First you need a digital multi mode reader or other device to check for continuity. Using the 'ohms' checker on mine I check for basic continuity.


Is electricity moving along the path?
Hot or ground touches the metal strip. Other touches the rivet. Once the meter goes "beep" from the tail to the rivet you're good there.

But it will not go "beep". Chances are current is interupted between the strip and the rivet. Usually crud around the rivet. In the case of both lights here crud on the strip also played a role.


A few basic tools are needed.
Dental pick with end to scrape plaque from between the rivet and metal strip.
Sandpaper to remove thick build up
Cotton tip'd swab and a solvent like Tarn-X, De-oxit or other precious metal restorer.
Dim flashlight with a clip to fasten to the light to see what you're doing.

Remove thick build up, pick as much plaque as possible, and rub on solvent until q-tip no longer gets soiled.
Let dry.
Retest with meter. Repeat as necessary.At some point you'll hear "beep". It took a few tries with both lights shown here.

Next step is current past the switch.
Move switch to 'on' position.

Chances are the next rivet is also dirty.
Repeat cleaning.
Retest.

Also check both ends of the switch.

This external switch was very soiled.
Most switches have internal parts that generally stayed pretty clean over the years.

So you heard a "beep" past the switch. But you have to have continuity all the way to the point that touches the reflector.
Clean the strip from rivet to reflector.
Once you have a "beep" from end to end, look at your reading.
The lower the ohms the brighter the light will be. A little change can make a big difference between a dull yellow beam and a nice bright one.

I saw this before trying to light it.
A little more time spent getting dull metals even cleaner.


Resulted in another ohm less resistance.

Insert cells, hit switch and VIOLA!

Moved onto the baby light repeating steps listed above...


Yep, again there was light.

Since these were so ugly on the inside I chose to see them light before sprucing up the outside.
The one from post #17 should clean up pretty well. The ribbed vulcanite has fragile spots from alkaleak rot. A gentle bath will likely be all that part gets.

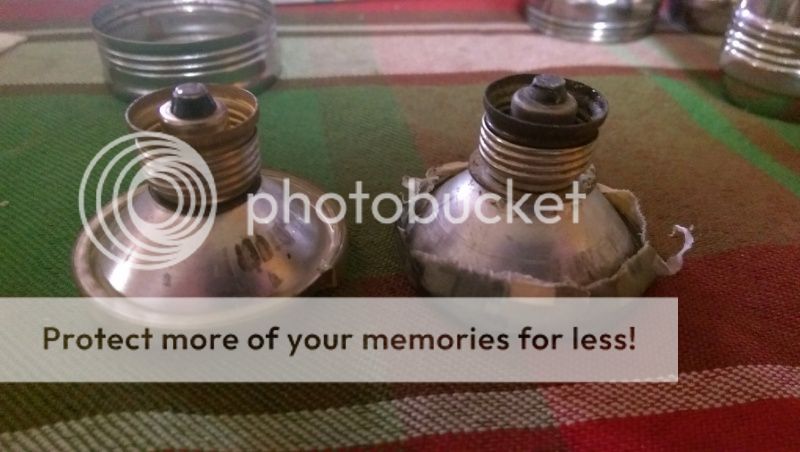
The one from post #21 used to have silver plating over brass. Except for a few crevices it looks like brass at both ends.
The plain rubber on the outside is in good shape so that'll likely get some kind of treatment to make it look fresher.

I'll know after cleaning the metal parts better.

Then, maybe the switch swap in that Burgess from post #9...finally...

Now the beam shots. The baby light is suprisingly small yet that #14 is surprisingly bright.

Versus a typical 2x 123 light.
Yes that is a 2 C cell light.


CRI is splendid indeed.


It's brightest spot is the outside edge.


About 10' away from the ceiling fan.
Unlike a map reader that is bright to about 3', these 'walleye' lens lights illuminate an average sized room well enough to find the light switch, keep from tripping over the dog or from stepping on a lego piece barefoot.

I imagine way back in 1910 or so this thing must've been seen as nothing short of a miracle.
 
Last edited:

bykfixer

Flashaholic
Joined
Aug 9, 2015
Messages
20,477
Location
Dust in the Wind
Alright, so I completed what I wanted to do with the Francos mentioned in the previous post. Then today got a switchless lipstick size 1aa going.

2D Franco first...

Overall she looks pretty good.

Some leaker ugly remains though.


Kinda permanent I'd say.
From across the room it's not noticed.


Chose to keep this onboard.
Adds to the character imo.


Lots of shine left in places the leakers didn't harm things...

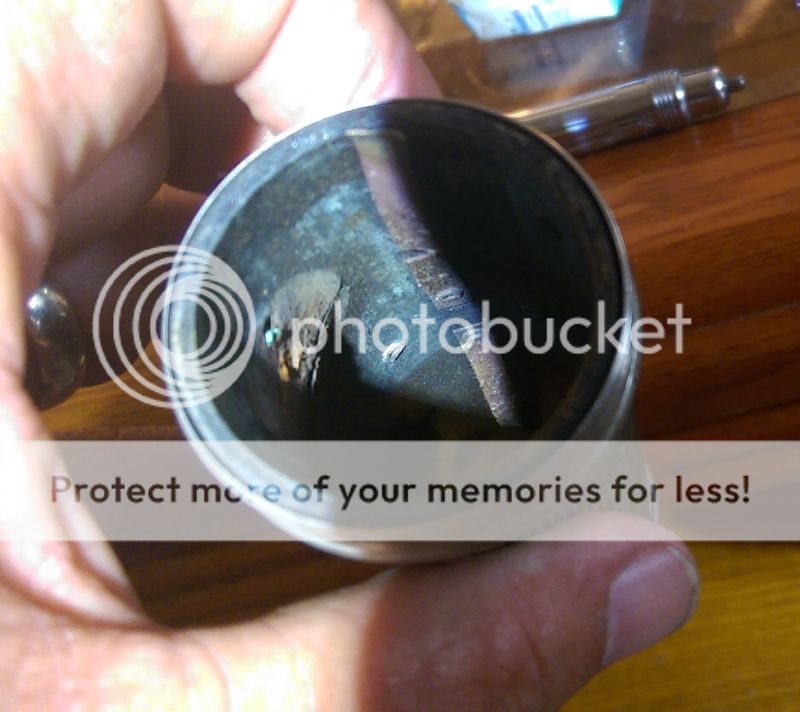
While cleaning I brushed up against a weak conduit strip and suddenly it was in my lap.


I managed to get this fragile thing spotless without breaking it. Yet broke it while cleaning the outside of all things. Snagged it with a buffer cloth.
Ugh!
But not to worry. Wifey had some copper foil in stock...


A copper cast was made. Works great!

So now it shines brighter than the baby light...

Which btw will have remaining 'petina' at various areas but still looks pretty good for its age.


Switch is working way better now that all the moving parts are metal to metal instead of metal to crud.


A little 'character' remains. But all in all it looks pretty good.


Worthy of going in the vintage EDC section.


But now to the lipstick light.
A bit of cleanup and some metering showed this little dude would take some thinking outside the box.
The spring refused to conduct electricity and the 'activator pin' refused to touch the bulb.

Here's how this one works..


When that little metal pin is not touching the body the light is off.


Twist to tighten, pin touches body and you get light. Bright light from a #112 bulb with a fresh double A.
Inside the cap it says "patent applied for". No other markings of any kind are on this one.

How I got it going (after ensuring all metal was clean)


Copper foil to the rescue.
Yup, a wrap of copper foil creates a conduit between the body and battery and spring allows the cell to 'squish' into the body.


And a slight hook added to the pin via small needle nose pliers bending the little rod that fastens to the outside and touches the bulb on the inside.
The whole thing is kinda crude but it works. And works well.
All my jewel thief lights work now.

Next is a couple of non working penlights and eventually switch swap on the Burgess...
 
Last edited:

bykfixer

Flashaholic
Joined
Aug 9, 2015
Messages
20,477
Location
Dust in the Wind
Very nicely done!

Thanks!

It's really enjoyable to take a flashlight somebody had hoped "somebody will give me $8 for this hunk-a-junk" and turn it into a show piece.
But the real thrill is when it lights again.

Hopefully somebody somewhere who has an old hunk-a-junk that for all intensive purposes appears like it should work, and finds this thread helpful.

My next hurdle is figuring out why a few won't turn off. lol

I have one that I removed the switch from that still lights. Huh? :shrug:
 

bykfixer

Flashaholic
Joined
Aug 9, 2015
Messages
20,477
Location
Dust in the Wind
Todays light that wouldn't turn off;

A HIPCO 2 C from the mid 1950's. A "machine age" era flashlight with a simple on/off slider switch.

The exterior was pretty good when it arrived.

This is one that when the tailcap is placed on the light, even before fastening the light turned on.

No need to ohm it looking for dead spots, the idea was to inspect it to see what part of the switch is touching where when batteries are inserted.


Enter a Coast G25 inspection light.
Side bar: In previous posts I've mentioned using a Solitaire clipped to the body as I work inside the applicable light. What that 2 lumen number does is allow me to reach inside and see what I'm doing shadow free, but not be so bright it blinds or causes a huge contrast of light vs dark so eyes stay adapted to available room lighting.
The G25 is a 4LED well difussed number that shows things in great detail to give me cause of where I need to focus when tweaking inside a light.
Certainly better CRI can be achieved with an incan such as a mini mag. But the Coast sits around near my work spot, has a simple on/off clicky and over time has become the one my eyes have gotten used to. It does a fine job of showing corrosion, breaks or other issues as needed.

Back to the HIPCO


This simple slider moves to or away from the reflector assembly.
Note; the inside was lit with a formerly non working Franco circa 1911.


Scratches on the inside of the reflector led me to think maybe the slider has constant contact?
Turns out that was the case.

A simple tweak at the top portion of the slider to add more angle to the upper end solved that issue.

But why after all these years would the tip of that slider begin to make constant contact?
Perhaps at some point some one installed a deeper reflector assembly?
Well I have 3 different 2C HIPCOs like this. All have the same issue. All have the same shape reflector. Coincidence? Probably not.

Build up of tarnish at the rear of the switch not allowing it to slide all the way off?
Not the case in all 3. In one that was tarnished pretty good perhaps but the other 2 worked perfectly.

Being a pre-alkaline battery light I tried both alkalines and carbon zincs in it and got same results, so in this one the slightly larger diameter actually reduced rattle some. That caused me to think perhaps at some point they were all loaded with alkalines, whose slightly larger girth squashed the strip against the light body and eventually straightened the slider just enough to make constant contact.

Anyway, it works well now. So I noted some corrosion in various places inside the light.


Inside the tail cap for example.

After applying Mothers wheel polish to the outside, doing a spit shine to the lens and reflector I called it a day.


Ginger resting after a hard day of... resting.


Things looking good.


A red sharpie enamel completed this part.


Looking (clap) Dyno-myyyyyt!!


Sitting among friends.

Now this one isn't completed just yet. At some point this weekend I'll ohm it, then clean the inside better to get electricity to flow better. Not that it's dim, mind you. But in other lights I did that to the PR2 burned a brighter white and I think this HIPCO can as well.

Brain storm edit.
After swapping the reflector of the properly working light into the other 2 they worked normaly.
Hmmm.
But why?
Brain storm time. What is different?
Well the properly working one has that plastic ring around the reflector. The others do not.
Could it be that simple?


Clear tape around it.
Sure enough it went to working proper...briefly.
Next thought. Can clear tape conduct electricity?

Duct tape is nice n thick.


It worked like a charm.


Now all three work properly.

The one at the top burns way brighter than the other 2 using same cells to fuel it. So... as suspected a bit of grunge removal should get the other 2 working like new.
The duct tape is temporary until I can devise a plastic ring for the other two reflectors.

For kix n giggles I tried the duct tape trick on a burgess that burns without a switch.

Note the missing switch.

Welp, it don't light now.
So it must not have been a fluke that the plastic ring is not only a glass protection, but is part of the circuit interuption on some flashlights.
Neat.
 
Last edited:

bykfixer

Flashaholic
Joined
Aug 9, 2015
Messages
20,477
Location
Dust in the Wind
Got another classic going tonight.


It is called a vulcanite baby miner light.
It's a hard baked rubber like tires of the time. Think modern tricycle tire. 'Baby' equates to 2C these days.
It was probably widely used by police back then in around 1914.

It arrived today. Looked clean both inside and out. All but one rivet inside. My thought was "watch it not work"....


Yup... that right one stopped conductivity cold.

It has an orange peel reflector.

Light orange peel'd silver plated tin.


Patents were granted in Sept and Dec 1914. So this one is probably early 1914.

Anyway after cleaning the rivets for a few hours they finally conducted electricity. Still no conduit rivet to rivet on each side of the switch. Uh oh.
Failed switch is bad.

Simple slider mechanism that should work...


No contact when off


Contact when on.

It should work...
So a bit of careful shaping, bending and poking with a dental pick made the ohm meter chirp.
Viola.
More work was done to the rivet in the picture above to the right with the tip of a toothpick soaked in Tarn X and bent to a right angle. I twisted, then rocked it side to side. Another toothpick with same method was pushed into and pulled out like a piston for about 10 minutes total. Then let it dry for about 30 minutes. It finally let out a loud BEEP of the ohm meter.
Finally satisfied with the volume of the ohm check beeps I slid in some Rayovac carbon zincs and she lit real nice and flicker free.


Love the rainbow corona of these.


And the full moon beam..
Complete with craters. lol
The pic is about an 8' wide circle on the ceiling of my den from about 5' away.
Love these old room lighters.


This one came with a working Mazda bulb. Quite possibly the original 1914 one.
Nice.
It now has a Chicago Miniature #14 from the 1950's.

Basically the switch was the issue. Yet tarnished rivets hid that for a while.

And areas of the switch not making contact were/are inside a permanently attached mechanism. It's fickle but works. So another work of art of a flashlight now adorns a shelf along side several other formerly non working ones from decades gone by.
 
Last edited:

bykfixer

Flashaholic
Joined
Aug 9, 2015
Messages
20,477
Location
Dust in the Wind
Another Franco rescued.
This one is a 2D coal miner light circa 1915.

Upon arrival there was no tailcap spring.
Borrowed one from another light and inserted batteries...nothing.

Ok time to inspect it.
Turned on a light to inspect inside and was shocked at what I saw...or rather didn't see.


There was nothing inside.
Or at least not the usual array of metal strips.
Hmmmmm.

There was a short metal strip at the lens.


First thoughts were 'dratz, stuff is broken.'
But noticed the end of the strip was curved like from the factory. Huh?


I don't get it.

Could this be a double wall number? Could there be hidden metal strips?


A peek inside later I saw metal.
Woohoo. Time for continuity check.
"BEEP" goes the meter. Heck yeah.

A normal application of Tarn-X then another, and so on. After leaving the saturated Q-Tip on the rivets a minute or two tarnish was disolving.
Soon things looked good.
Yet to 'beep' past the switch.

Phone rings. A friend from London was on the other end. While we chatted I soaked rivets with Tarn-X.

Soon after I heard "BEEEEP" and set about installing batteries.
My friend heard "it lit hellyeah woohoo!"


This one has a moon within a moon.


Tail stand pic.
This one is a room lighter also.

Love, love, love these old Vulcanite lights by Franco.

Now that it's going I 'll update later for both this one and the baby when exterior restorations are accomplished.
 
Last edited:

lightlover

Flashlight Enthusiast
Joined
Feb 28, 2001
Messages
1,901
Location
London, UK (Parallel Universe)
"But not to worry. Wifey had some copper foil in stock..."

What kind of Enthusiast has such a HELPFUL wife?

Sir Bykfixer,
You are lucky!

[ PS - Sir byk - have you bought a "Modern" light lately?
(Like something LED, f'rinstance?)
Or are just just intent on showing the rest of us up? ]
 

ven

Flashaholic
Joined
Oct 17, 2013
Messages
22,533
Location
Manchester UK
A PK light (or 10)springs to mind light lover :D

Watching a scoobie doo cartoon as you do....some flashlights in the grave yard which looked cool(like a flashlight should look basically). Really reminds me of this latest fix mr fixer:) It looks like a "proper" flashlight ! Great write up and pics as always, always a pleaser to check out.
 

bykfixer

Flashaholic
Joined
Aug 9, 2015
Messages
20,477
Location
Dust in the Wind
"But not to worry. Wifey had some copper foil in stock..."

What kind of Enthusiast has such a HELPFUL wife?

Sir Bykfixer,
You are lucky!

[ PS - Sir byk - have you bought a "Modern" light lately?
(Like something LED, f'rinstance?)
Or are just just intent on showing the rest of us up? ]

My wife is really cool.
She has a bunch of cool stuff from her metaloargy days. She used to fashion stuff into shapes. One was a silver spoon and a penny she set on a railroad track to be smashed by a train, then soldered together in shapes of some kinda tropical plant leaf. lol Somebody at a craft show paid her $75 for it.

Bought a Mag XL 50 this week. Does that count?

Waiting on the PK PL-2 to arrive.

A PK light (or 10)springs to mind light lover :D

Watching a scoobie doo cartoon as you do....some flashlights in the grave yard which looked cool(like a flashlight should look basically). Really reminds me of this latest fix mr fixer:) It looks like a "proper" flashlight ! Great write up and pics as always, always a pleaser to check out.
Jinkies Ven, I'm blushing.
It's a great feeling to see these old junk drawer items become useful again.

So Ven it went down something like this:
I'm studying a hollow rubber tube wondering how the heck they got electricity to flow from point A to B in that thing in 1915 when my phone chimes I have an email from two friends who are chatting about an upcoming project.

It involved a 3D drawing. So while downloading a 3D app I'm answering these fellows playing 'devils advocate' as it were. Meanwhile I'm discovering hidden conduits in that light. Awesome!

3D app is done downloading. Open a drawing and go to 'flick it' bigger and it twirls. Holy crap!! That's awesome.
So in one minute I'm in 1914 trying to repair a cop light then in suddenly 2017 looking at an item that has yet to be introduced to the world. It was wild.

Grinning ear to ear already when the phone rang I say hello and this Ringo Starr voice says "hello bykfixer". lol. Then suddenly the light lit.

And then as if things weren't already cool enough you chime in about "scoobie doo" flashlights.
Aint life a gas?
 
Last edited:

bykfixer

Flashaholic
Joined
Aug 9, 2015
Messages
20,477
Location
Dust in the Wind
Both lights nearly complete.


The 2D looks waaaaay better.
The baby was already pretty nice on the outside.

The baby and the fickle switch was really bugging me. Then it got where it was difficult to light at all, and when it did I saw a flickering dimness.

Dabbing tarn-x soaked q-tips onto and into eyelets and rivets did no good. So even though switches usually stay clean inside I had to try.
Several dabs of tarn-x later it was running out of all crevices. So I did it again. Then let it dry. That time it worked. Woohoo! No longer fickle.

The 2D silver parts got a good rub down with the same wheel polish and buffed to a nice shine.

Both bodies got a gentle bath with very diluted soapy water. Nothing else.


I'd like to thank the inventor of tarn-x, mothers wheel polish, craftsman for making a multi-curved end dental pick, oral b for making a toothbrush with long bristle at the front, mr. mangnifer dude for showing me tiny crevices in a blown up view, my wife for having a supply of toothpicks and q-tips, kobalt for great pliers, coast for the g25 inspection light, plus whoever made the double a's inside, powerade for making mountain berry blast flavor, klein for a great multi meter at a great price, stores that sell all items listed, lightlover for talking about bill uteleys book on flashlights, ebay sellers who sell old flashlights, rayovac for still making carbon zincs that fit old flashlights, cpf and anybody who took the time to read this post.


Still a wee bit of metal shaping left on the 2D.


2D before:

During:


After:

Aint she somethin'?
 
Last edited:

ven

Flashaholic
Joined
Oct 17, 2013
Messages
22,533
Location
Manchester UK
:laughing:

She is mr fixer! Something about the D size.................just so comfy in hand:) After these pics and scooby doo, i need a slide switch UI, simple on off that just works(well maybe after up to 90yrs of not). Does not seem that long back(yeh right , who am i trying to kid) , exploring the bunk bed and looking for LEGO pieces until you find it on the bottom of your bare foot, from a fall guy(remember that?) stunt impression off the top!OUCH)
But with a plastic type light ,not a metal(more than likely an eveready of some kind). Back in the 80's (now feeling young has really gone out of the window), if the cells leaked or the light failed....................it was either chucked somewhere to be found then tested years on, or the bin straight off!
 

bykfixer

Flashaholic
Joined
Aug 9, 2015
Messages
20,477
Location
Dust in the Wind
:laughing:

She is mr fixer! Something about the D size.................just so comfy in hand:) After these pics and scooby doo, i need a slide switch UI, simple on off that just works(well maybe after up to 90yrs of not). Does not seem that long back(yeh right , who am i trying to kid) , exploring the bunk bed and looking for LEGO pieces until you find it on the bottom of your bare foot, from a fall guy(remember that?) stunt impression off the top!OUCH)
But with a plastic type light ,not a metal(more than likely an eveready of some kind). Back in the 80's (now feeling young has really gone out of the window), if the cells leaked or the light failed....................it was either chucked somewhere to be found then tested years on, or the bin straight off!

Here-ya-go....


Your son would say "seriously dad?" lol.

[emoji54]…sure is. Very nice work.

The 'aint she something' was a quote from Gran Torino when Clint Eastwood was admiring his 72 model. It played about the time I was doing that post.
 
Last edited:
Top