PoliceScannerMan
Flashaholic
Sure is, love it. Actually I think datiled made it.
You can become a Supporting Member.

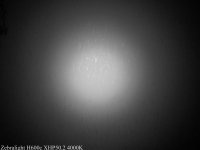
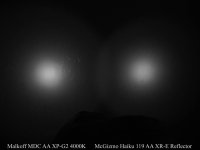
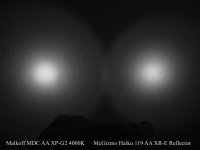
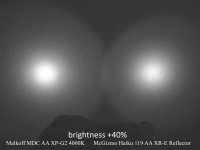
This is what I am doing. Just ordered a host with XR reflector from Don and custom engine from CPF with a Samsung LH351D.I have an XR reflector with the Samsung LED and it's quite floody.
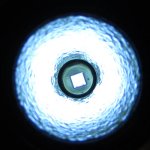
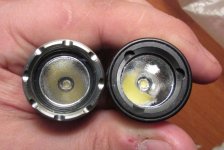
Do you have a Mahi head?Did you install the LE first, then seat the reflector down over it?
It's hard to tell regarding your beam shot if all is well, but assuming you've seated the reflector correctly all should be well.
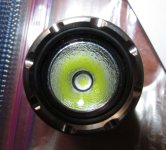
The window o-ring (outer) doesn't look properly recessed into its channel. I usually use a fine coating of silicone grease so it slides in smoothly and coax it around with the back of my thumb nail. It seats correctly with no twisting that way.
Yes, but we're talking about the Haiku yeah.Do you have a Mahi head?
I was just wondering how to beam profile compared.Yes, but we're talking about the Haiku yeah.
 I've re-sent one last night, maybe you can check?
Thanks for your observations and comments! The primary ground path is through the lip of the battery tube into the rear shoulder on the E-Can. The tight seat of MCPCB against the shoulder of the head is primarily intended as a thermal path from MCPCB to head.My first Haiku came in the mail today and I've had a little time to play with it, disassemble it, etc. I have to say I've very impressed with the design. All the usual stuff like aesthetics, ergonomics, etc. live up to the hype. But what I was really pleased to see was the thought that went into the head design.
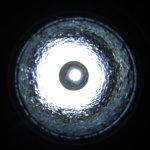
What first stood out in disassembling the head is the use of o-rings. There are four in the head and they're used in pretty interesting ways. The o-rings to seal + retain the window are a neat alternative to a threaded bezel ring which adds another part and set of threads. The o-ring as a centering ring for the LED/reflector is an elegant alternative to some specially made plastic piece that's not as widely available.
What's really cool, I think, is the fourth o-ring—the one around the body of the reflector. As I put the head back together, I wondered if it wouldn't fit more nicely with two o-rings instead of one. That would keep the reflector pointed straight without any tipping. But then I realized that maybe the tipping is a feature, allowing for a small amount of adjustment for an LED that's slightly off center. We're only talking a few thousandths of an inch, but that's probably all that's needed.
Okay so that's cool, but it gets even better. The next feature I see is a shoulder that serves as a stop for the MCPCB. Where other head designs just have you screw the pill in until the board mashes into the underside of the reflector, pushing the whole stack against the window and o-ring, the Haiku head uses two separate "chambers" separated by that shoulder. The pill screws in until it reaches the shoulder, mechanically grounding it directly to the head. Independent of that, the reflector floats in its own bore, not rattling around but able to move in and out and tilt all around a small amount, ready to perfectly accept the emitter wherever it ends up in space. What an elegant design, with just a precisely machined head and standard size o-rings!
I imagine this stuff has all been discussed at length here over the years, but these details are not lost on a first-time owner either!