
You are using an out of date browser. It may not display this or other websites correctly.
You should upgrade or use an alternative browser.
You should upgrade or use an alternative browser.
The Nightsword project
- Thread starter get-lit
- Start date


Jenifer512
Newly Enlightened
Re: Superlights shoot-out 2011: The Short Arcs
A light of the century. This is amazing. You are like calling the aliens to move closer :).
more than a thousand watts! Nice one Bro!
A light of the century. This is amazing. You are like calling the aliens to move closer :).
more than a thousand watts! Nice one Bro!

get-lit
Flashlight Enthusiast
Re: Superlights shoot-out 2011: The Short Arcs
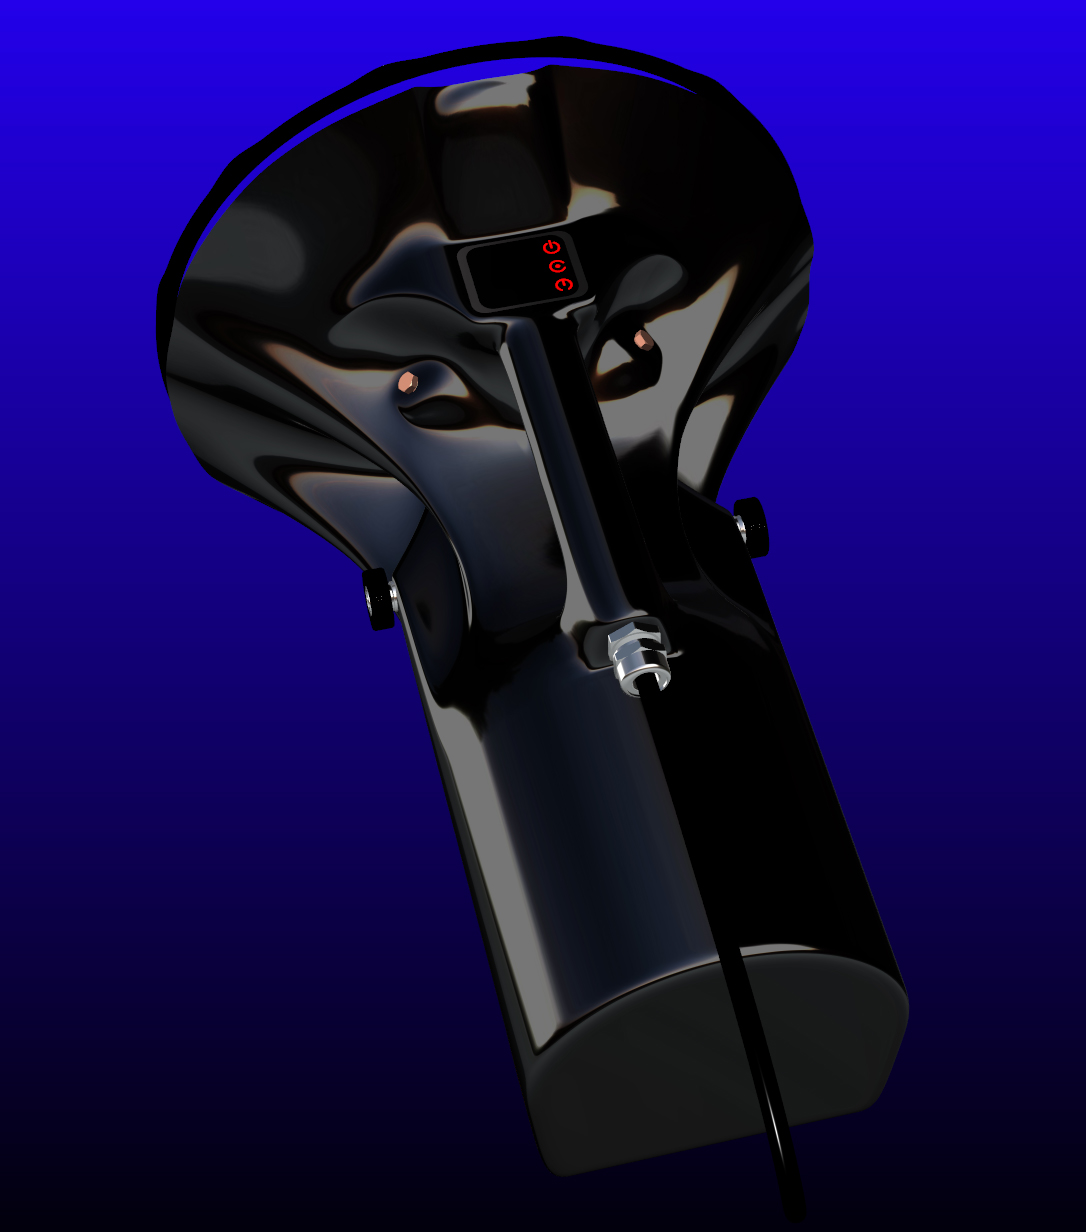
Hi all. Today I've updated the housing for weight-centered gimbal mounts... (click for large)

With allen/thumb screws attached... (click for large)

EDIT: I forgot to shorten the rear intake by 1/2" after testing back in the Spring. Now shortened, above two are still long... (click for large)

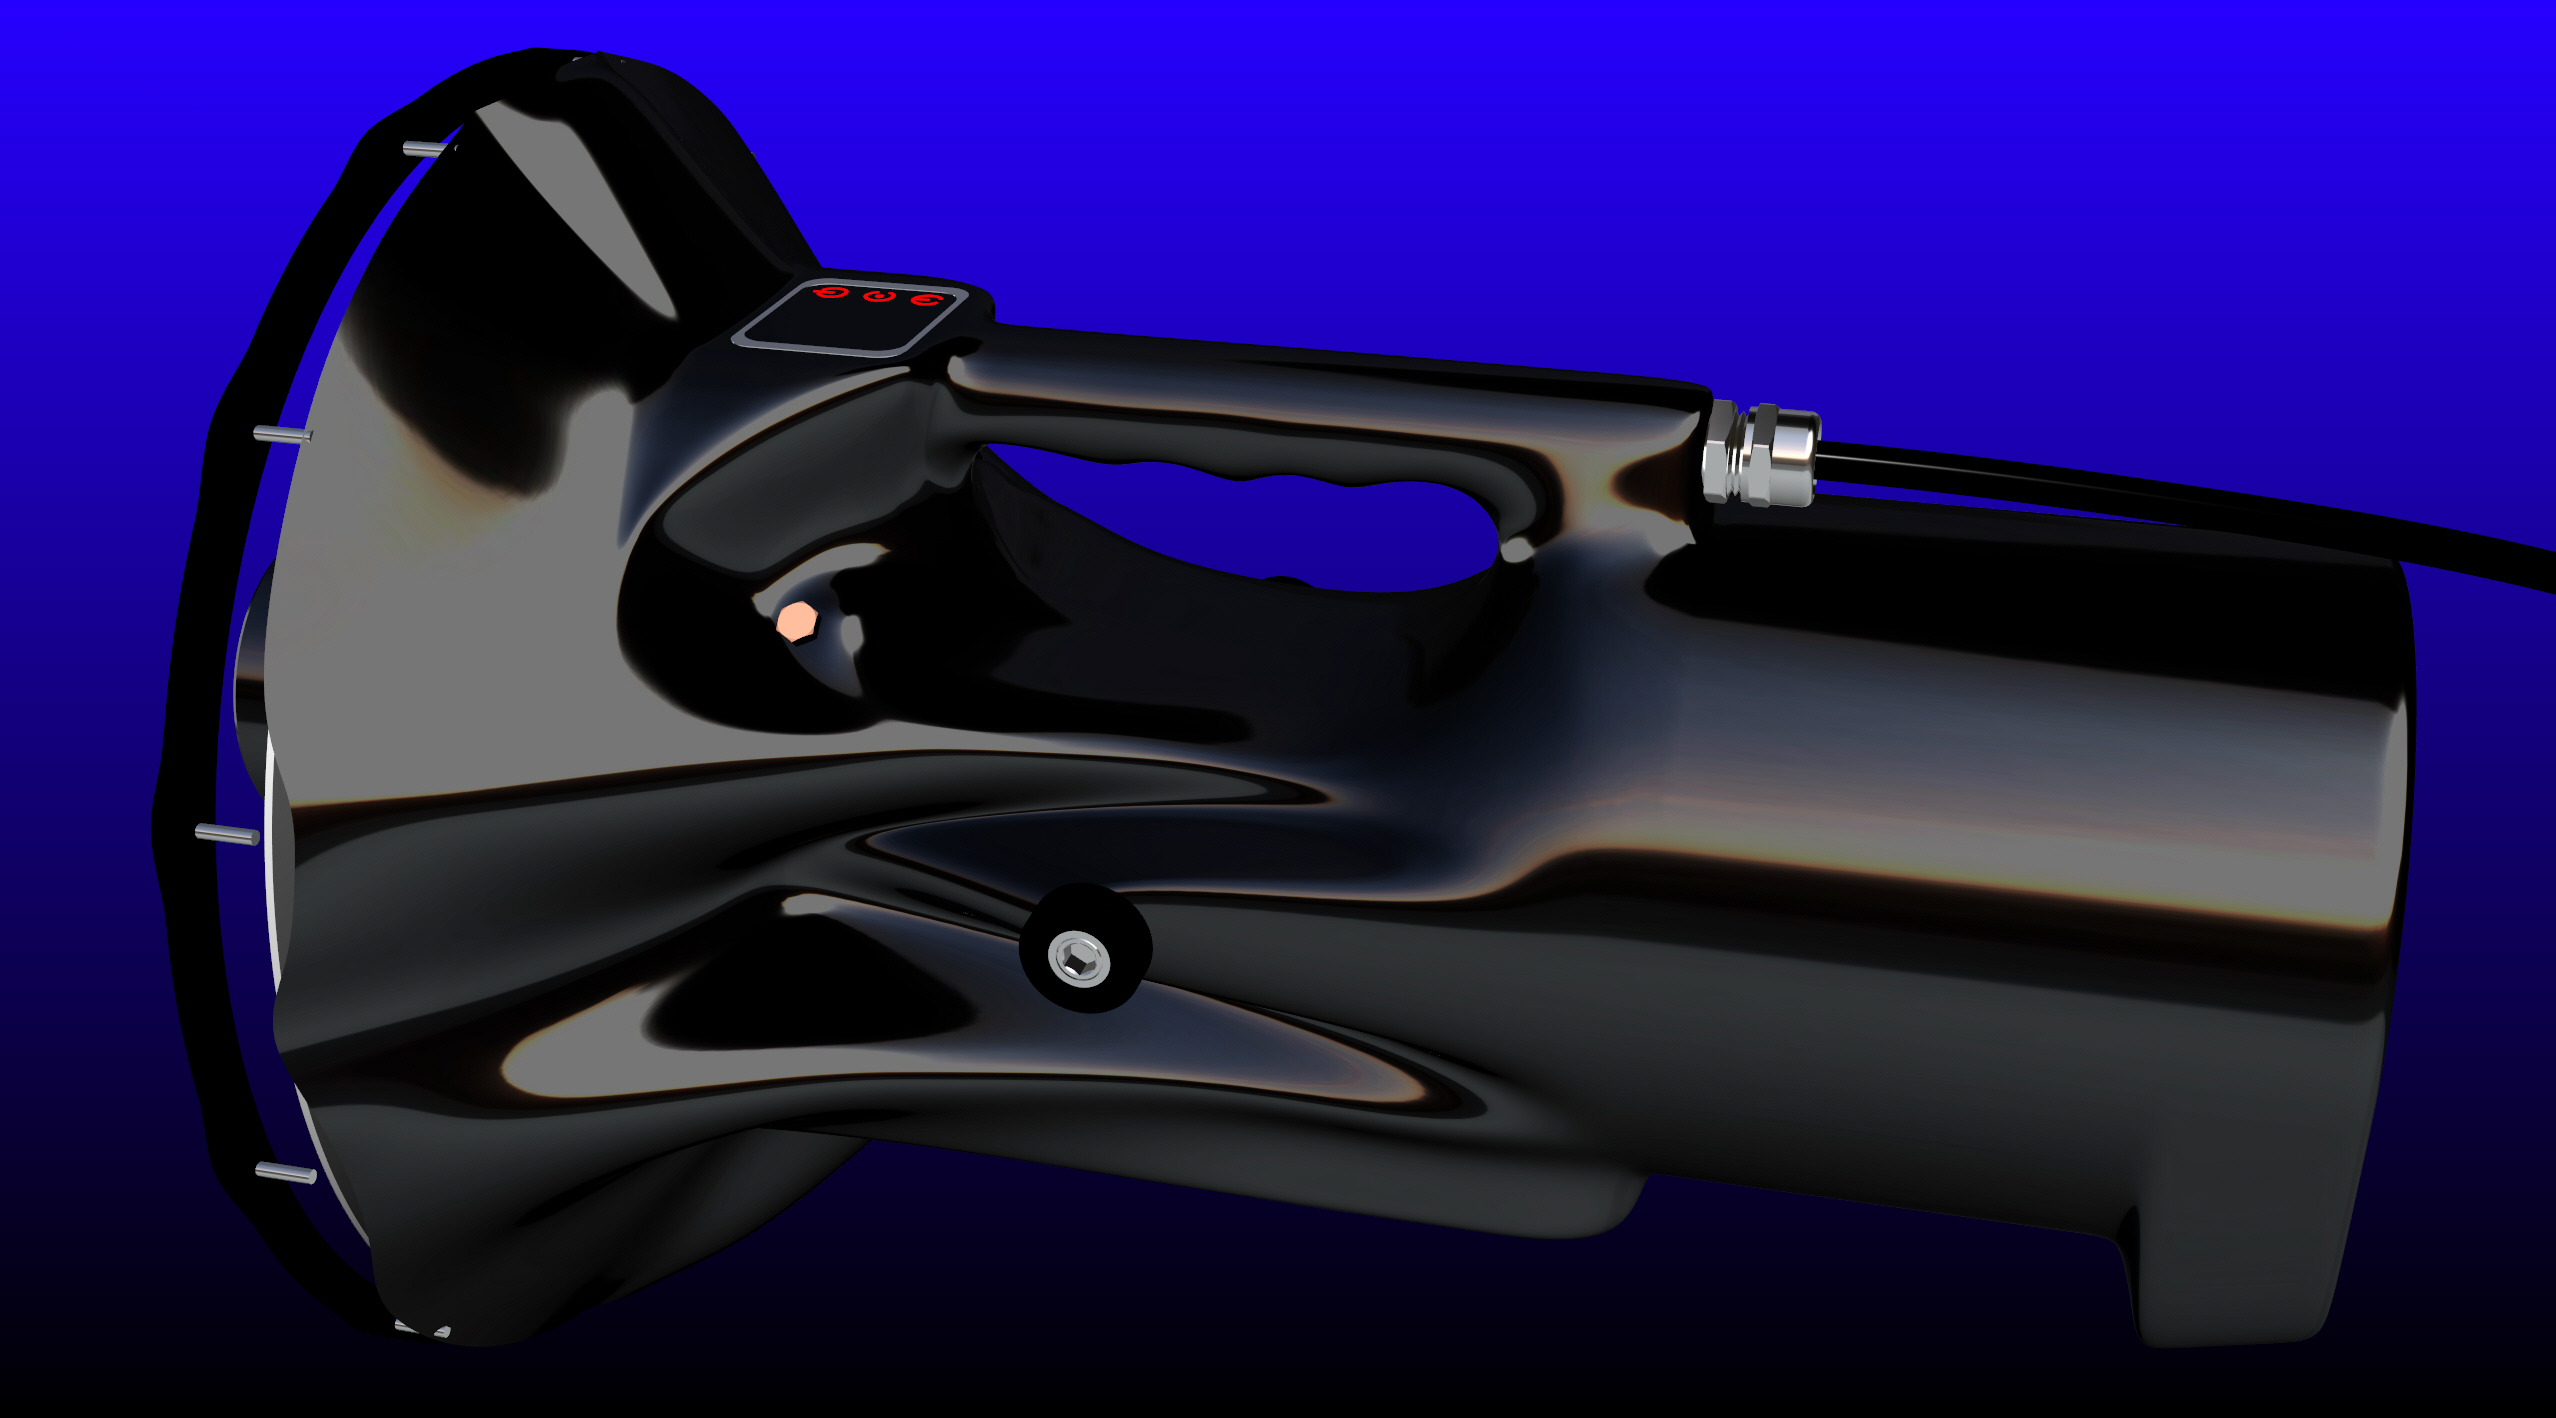
EDIT: The housing now has lamp alignment access plugs. These are small black nylon plugs below the controls, but here they are highlighted in copper... (click for large)

(click for large)

Hi all. Today I've updated the housing for weight-centered gimbal mounts... (click for large)
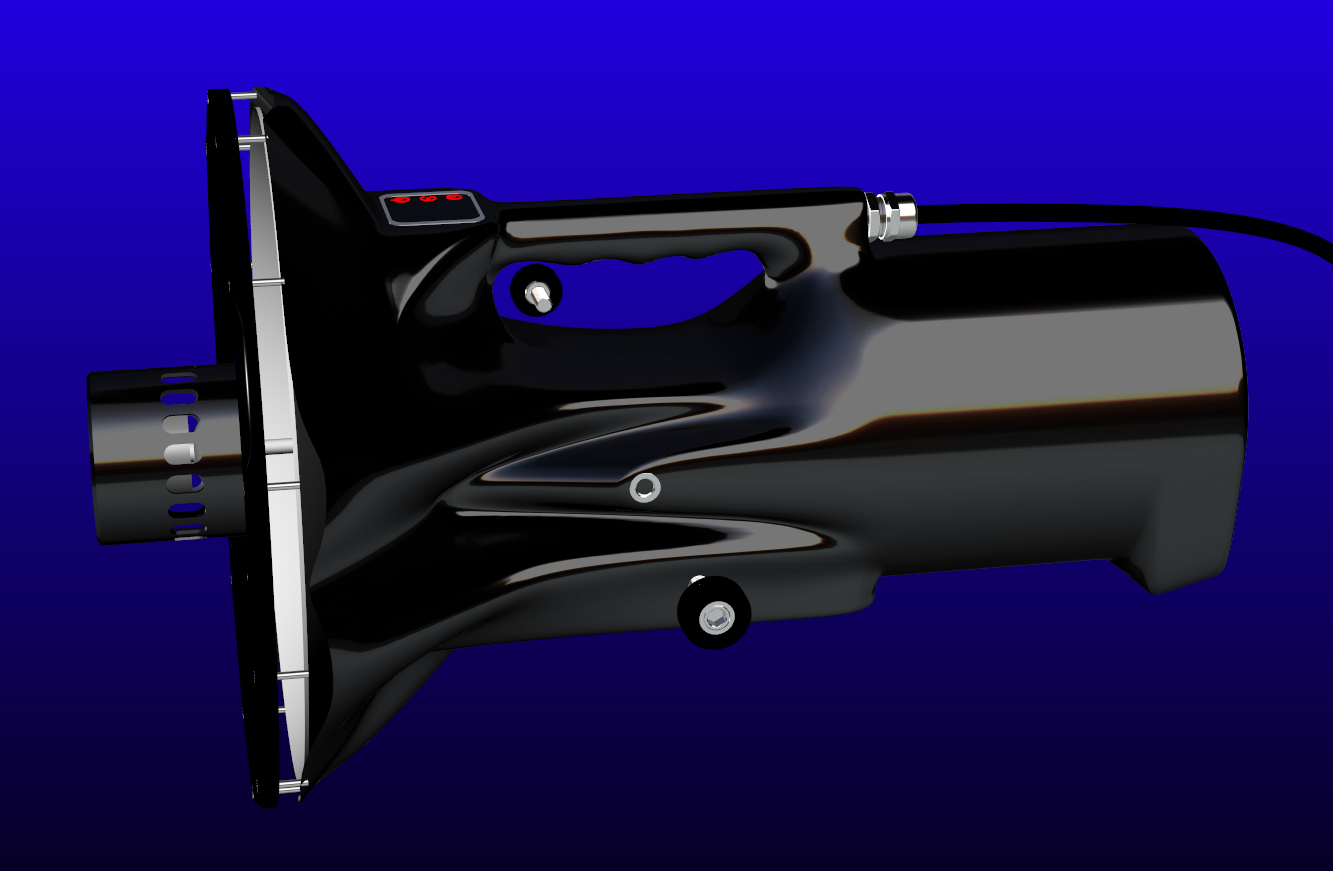
With allen/thumb screws attached... (click for large)
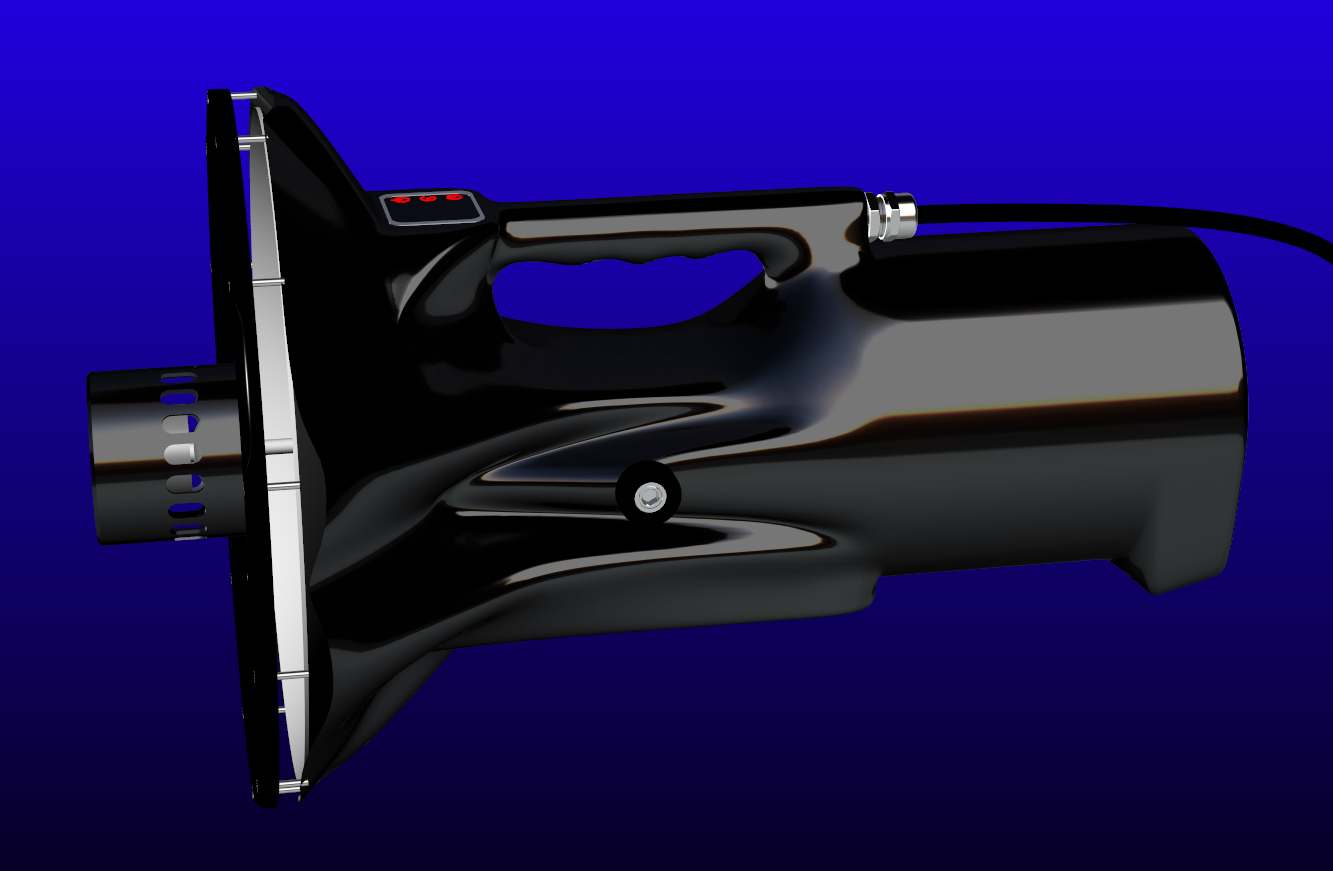
EDIT: I forgot to shorten the rear intake by 1/2" after testing back in the Spring. Now shortened, above two are still long... (click for large)
EDIT: The housing now has lamp alignment access plugs. These are small black nylon plugs below the controls, but here they are highlighted in copper... (click for large)
(click for large)
Last edited:

Re: Superlights shoot-out 2011: The Short Arcs
Looking sleek and gorgeous! Happy to see you posting on this marvel!
Looking sleek and gorgeous! Happy to see you posting on this marvel!
get-lit
Flashlight Enthusiast
Re: Superlights shoot-out 2011: The Short Arcs
I've ironed out some final touches to the housing before I was able to complete the lens bezel mount, which is the final step of the housing. I've also cleaned up some cosmetic lines. I've also tested stiffness and strength of composites and found that I can easily reduce the housing thickness by 25% while remaining very durable.
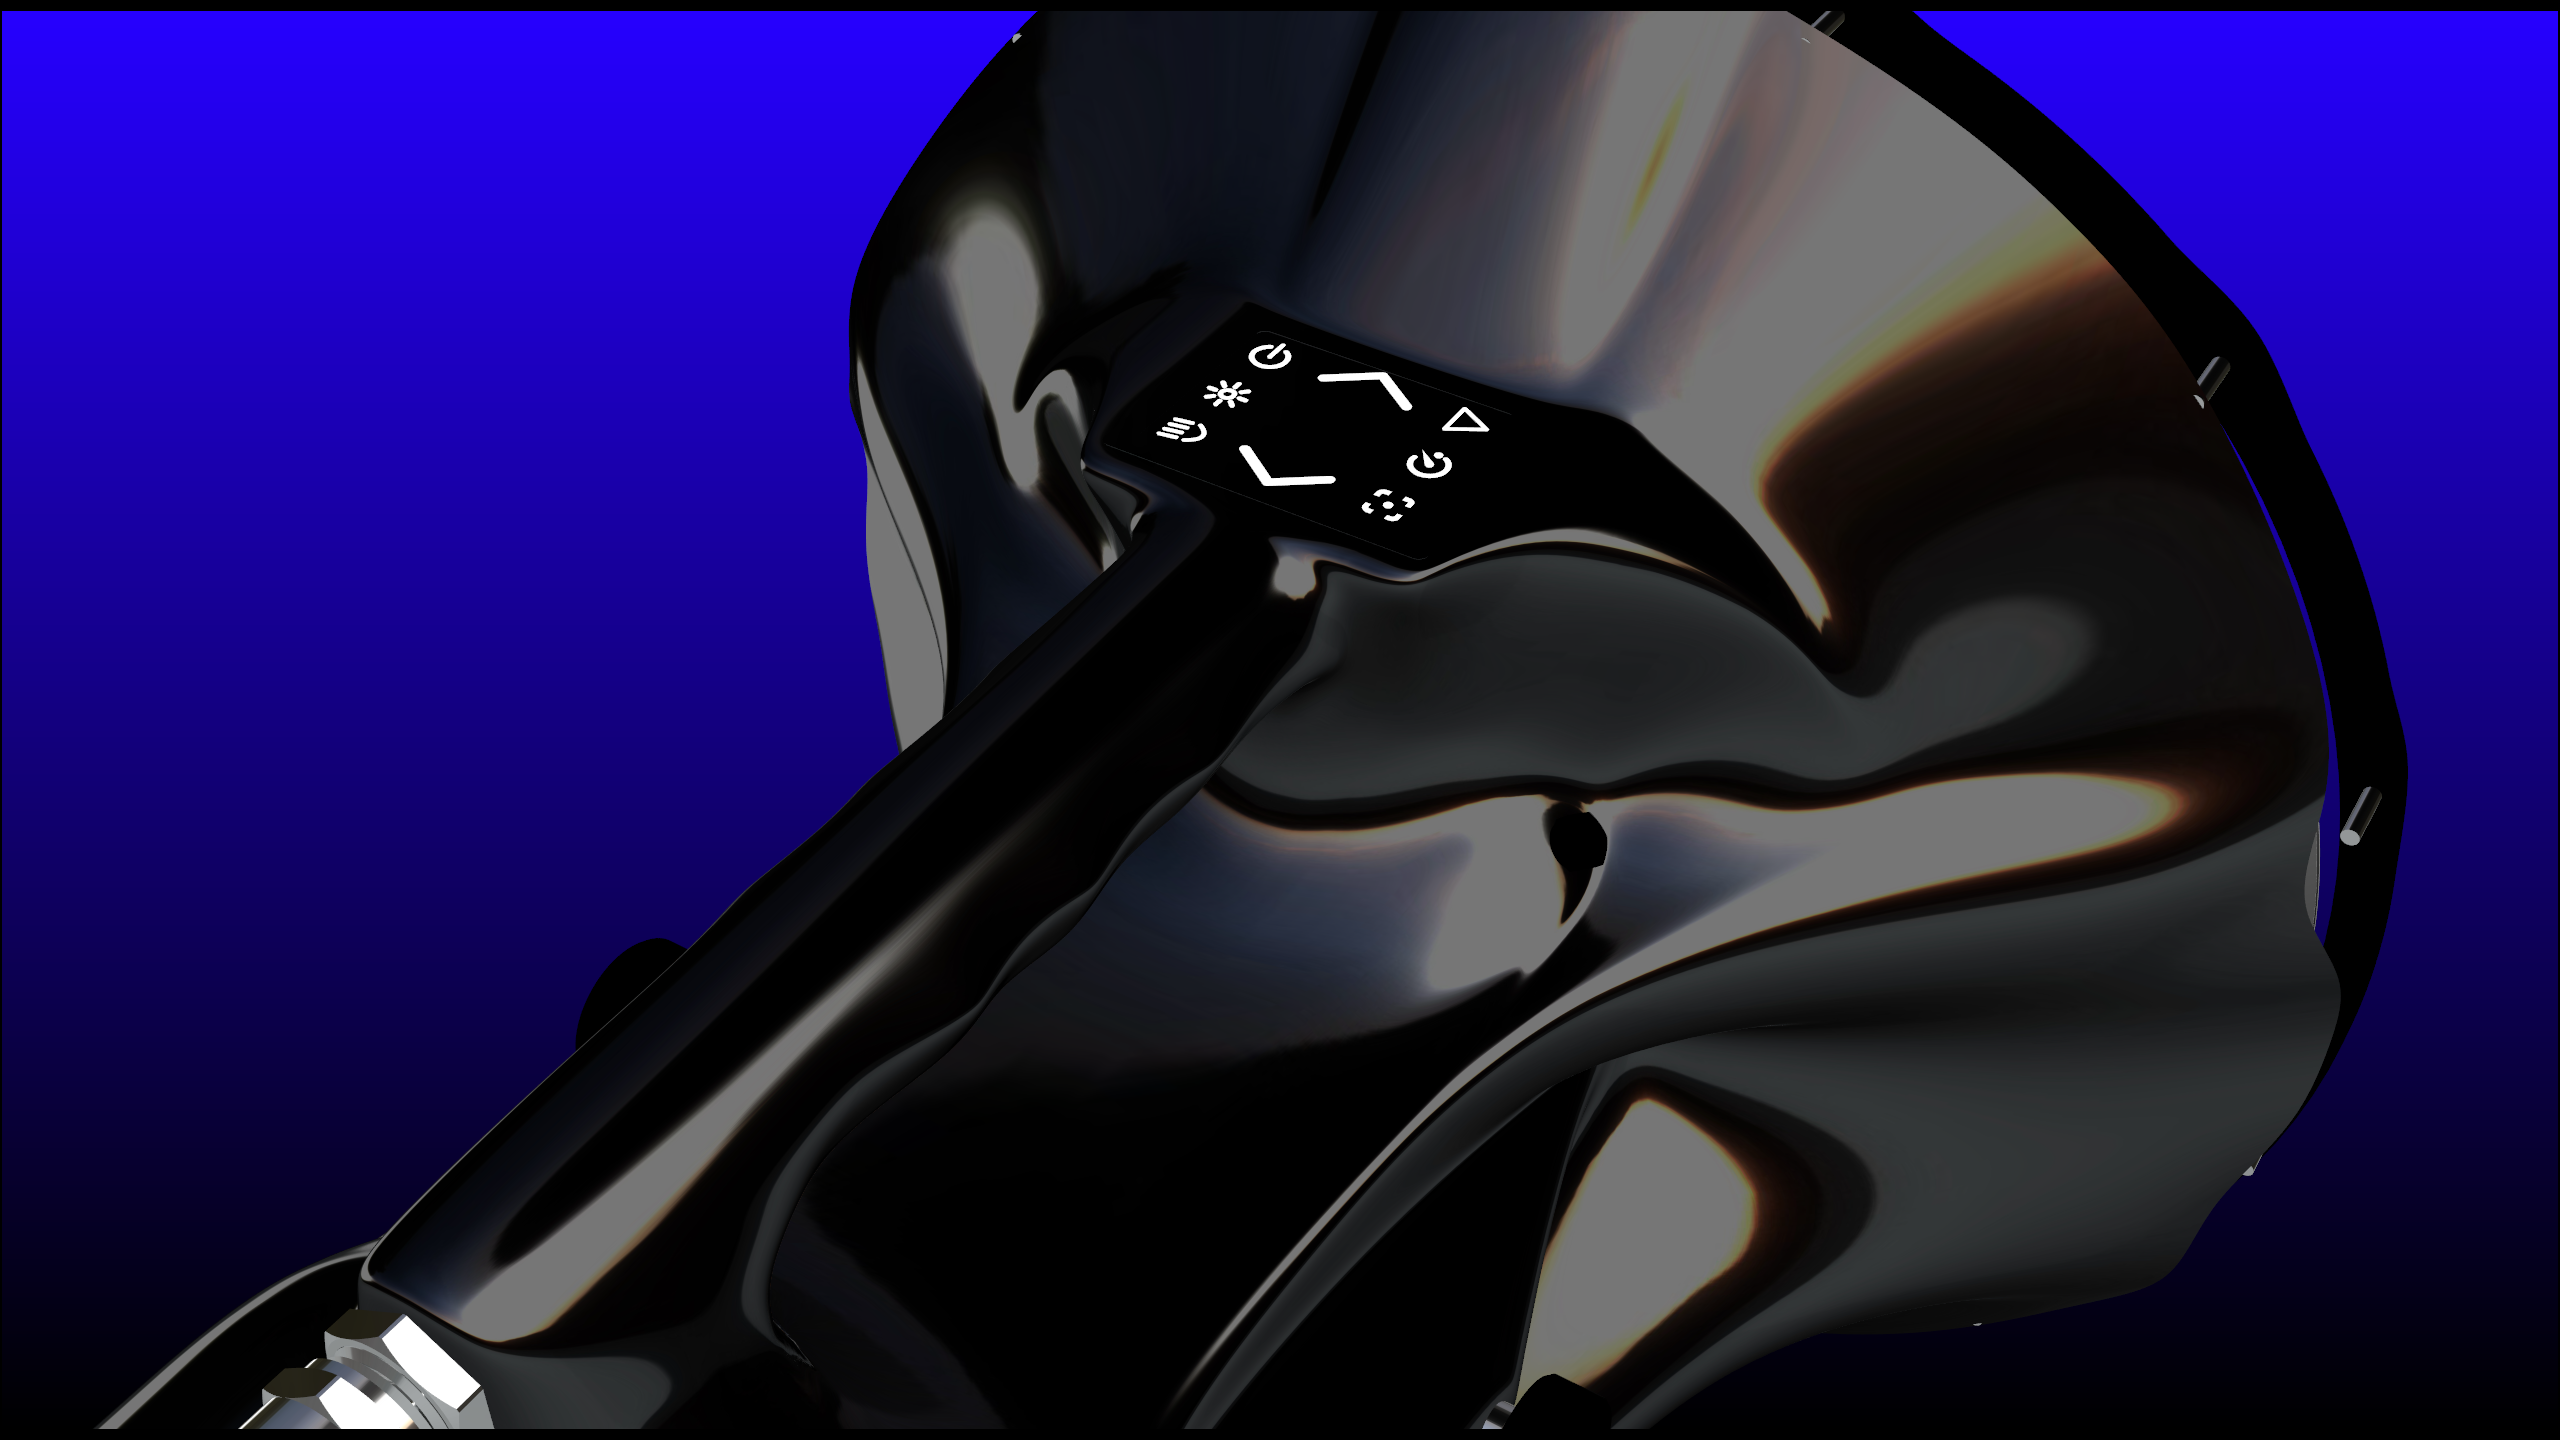
Sorry guys, I'm forgoing the digital display. These models reach end of life too frequently and I don't want it to become an issue. I'd also like to reduce electronic complexity. Instead will be a static LED backlit touch screen, with serial connection for the extended non-essential functions.
The static LED backlit display will have left and right columns of buttons, centered with up/down adjustment.
Left side (top to bottom): power, strobe, low power
Right side: play, timer, focus end stop adjust
Play simply repeatedly cycles the beam from spot to wide and return.
The center up/down will serve to adjust beam pattern, focus end stop, timer, and play speed.
Feedback will be via LED back light flashes. For instance an LED flash pattern would notify end of lamp life. Holding down a button could be used to reset lamp.
(Click for Large)

(Click for Large)

BTW, warning labels are ANSI symbols for bright light warning, ozone warning, hot surface warning, UV warning, fire warning, high voltage/shock warning, and explosion warning. (EDITED)
Regarding the lengthy discussion of graphic decals, at some point in that discussion I realized I preferred to go light on decals and instead enhance the form of the housing. Probably the only decals will be silver mirror logos embedded into the clear coat on the sides of the housing (as shown), and removable warning labels (as shown). I will include a small "CFP edition" emblem embedded into the clear coat as well (not yet shown), but otherwise not likely going nuts with graphic decals.
I also tend to prefer the cleaner look of the black bezel over the touch screen, instead of the stainless steel display bezel.
Taking a break for a few days and will then finish off the lens bezel mount to complete the housing.
I've ironed out some final touches to the housing before I was able to complete the lens bezel mount, which is the final step of the housing. I've also cleaned up some cosmetic lines. I've also tested stiffness and strength of composites and found that I can easily reduce the housing thickness by 25% while remaining very durable.
Sorry guys, I'm forgoing the digital display. These models reach end of life too frequently and I don't want it to become an issue. I'd also like to reduce electronic complexity. Instead will be a static LED backlit touch screen, with serial connection for the extended non-essential functions.
The static LED backlit display will have left and right columns of buttons, centered with up/down adjustment.
Left side (top to bottom): power, strobe, low power
Right side: play, timer, focus end stop adjust
Play simply repeatedly cycles the beam from spot to wide and return.
The center up/down will serve to adjust beam pattern, focus end stop, timer, and play speed.
Feedback will be via LED back light flashes. For instance an LED flash pattern would notify end of lamp life. Holding down a button could be used to reset lamp.
(Click for Large)
(Click for Large)
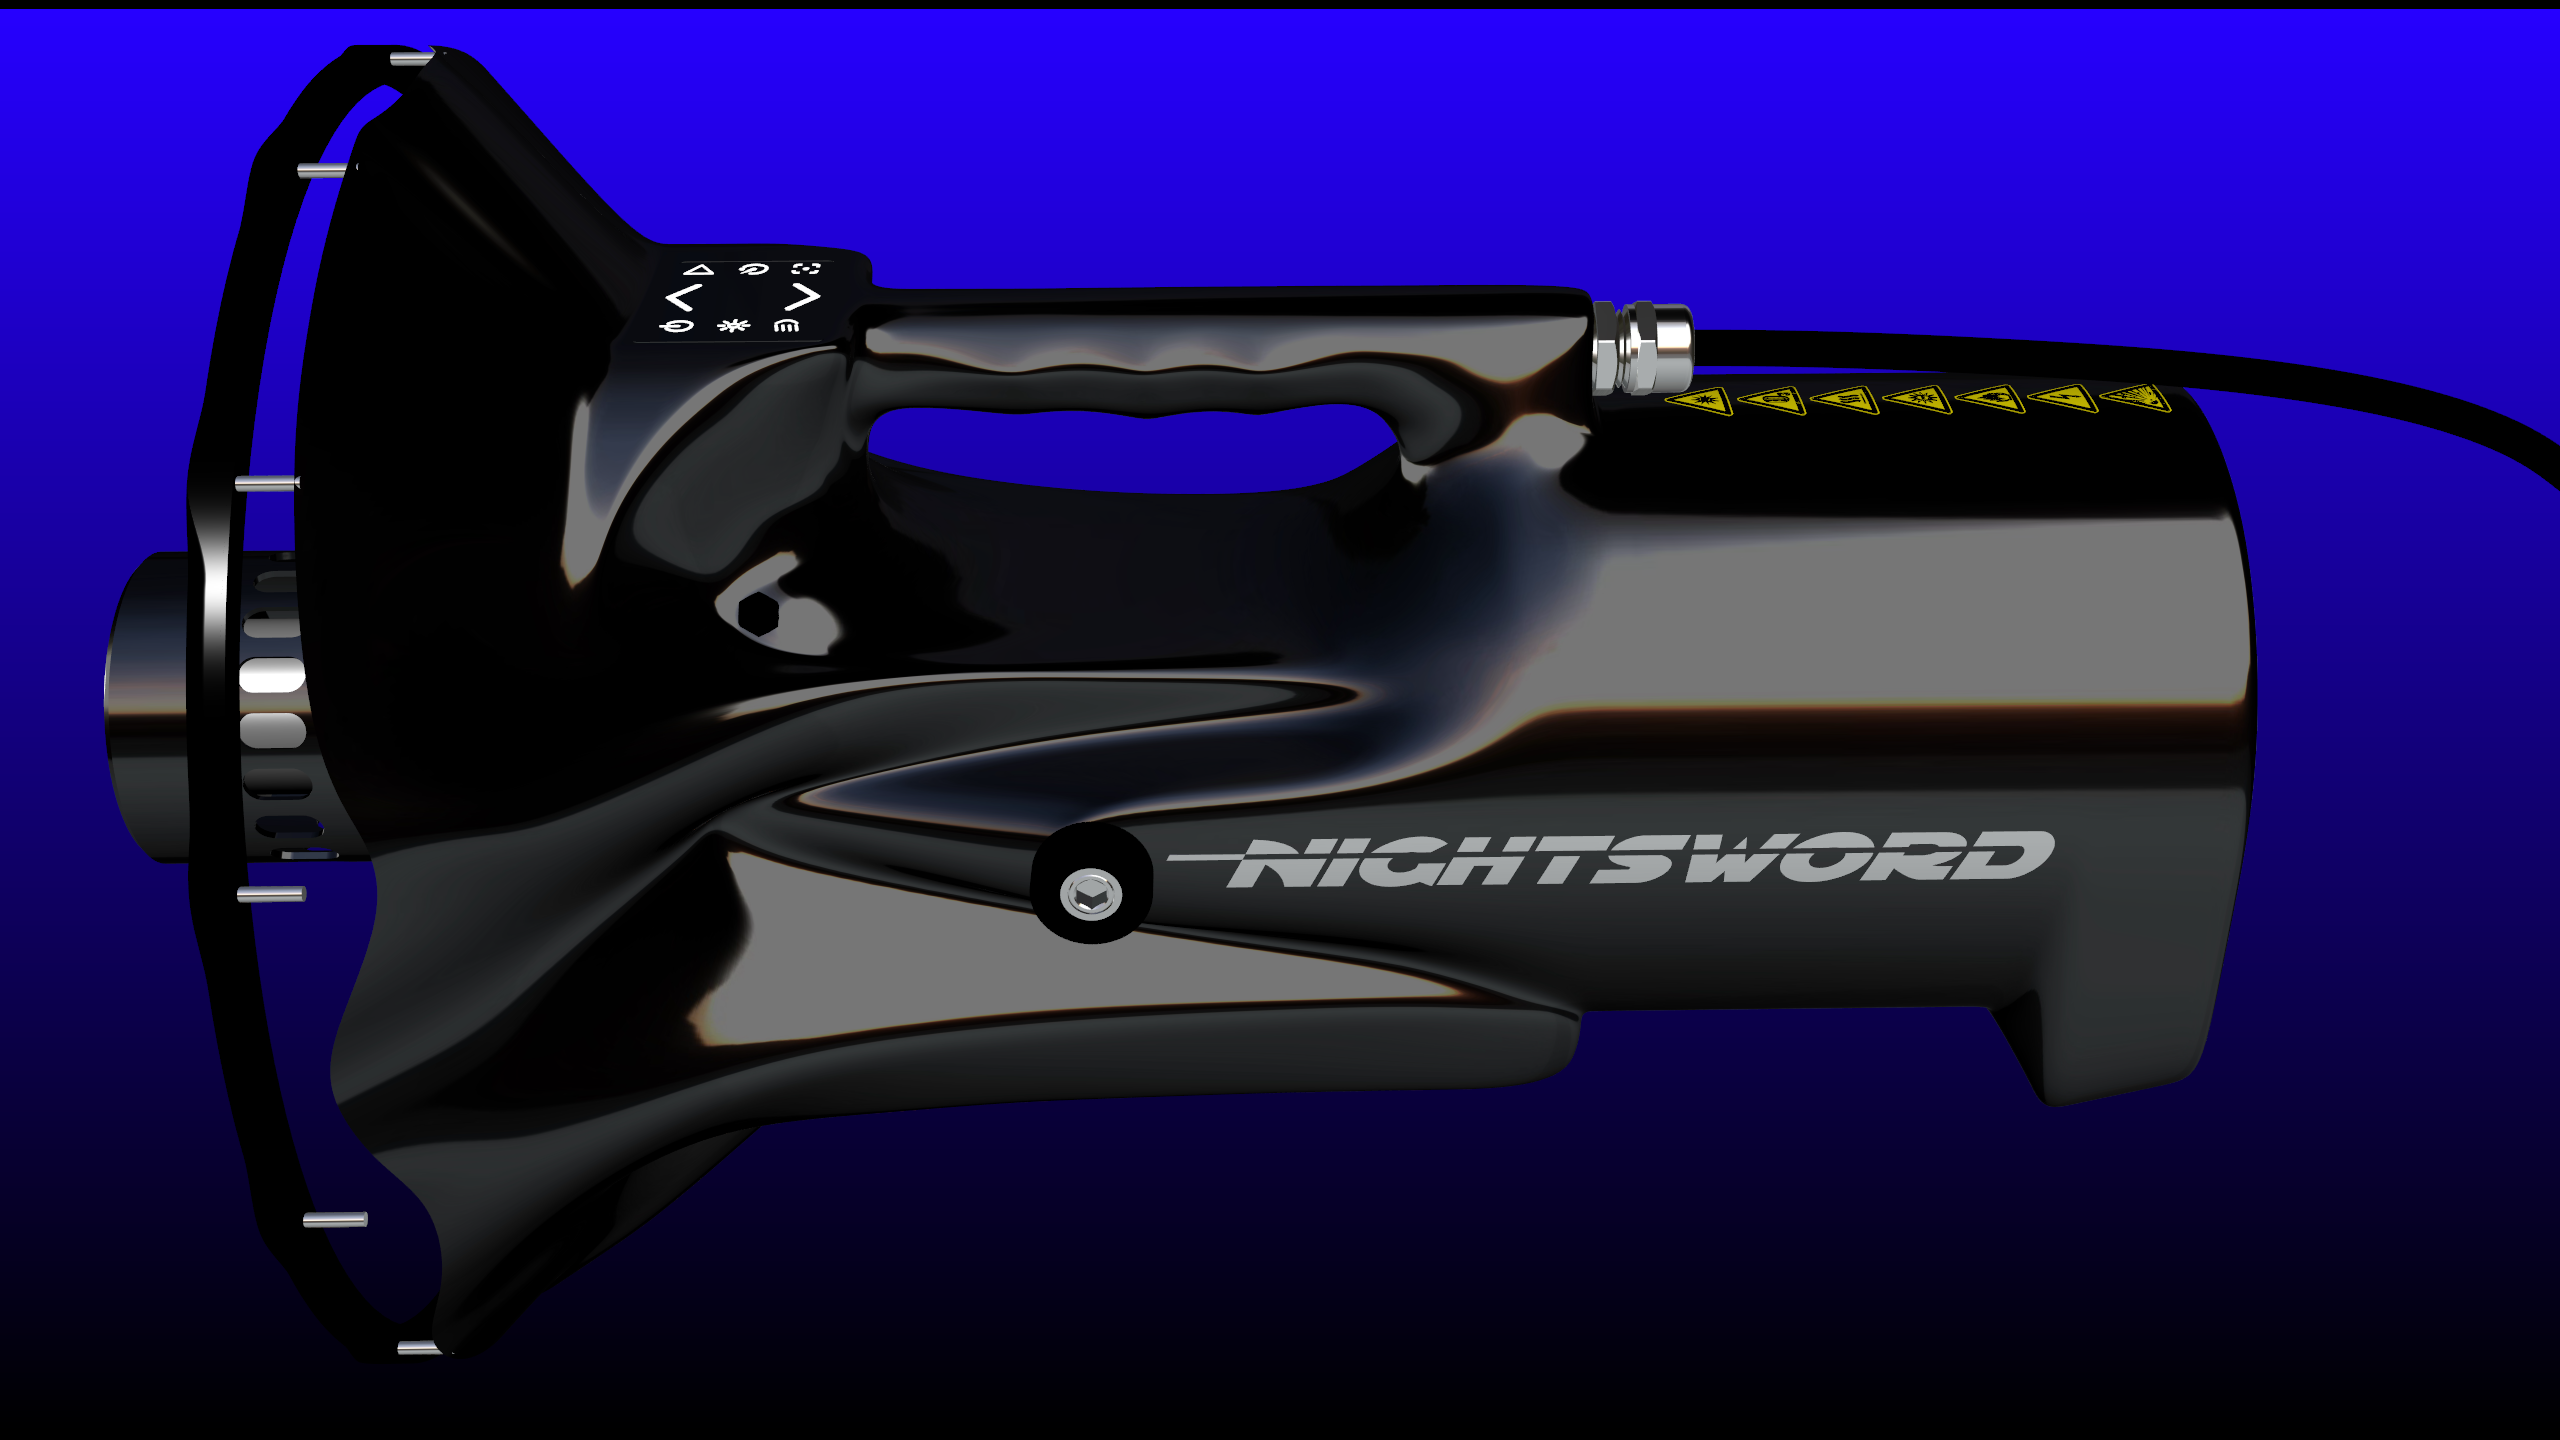
BTW, warning labels are ANSI symbols for bright light warning, ozone warning, hot surface warning, UV warning, fire warning, high voltage/shock warning, and explosion warning. (EDITED)
Regarding the lengthy discussion of graphic decals, at some point in that discussion I realized I preferred to go light on decals and instead enhance the form of the housing. Probably the only decals will be silver mirror logos embedded into the clear coat on the sides of the housing (as shown), and removable warning labels (as shown). I will include a small "CFP edition" emblem embedded into the clear coat as well (not yet shown), but otherwise not likely going nuts with graphic decals.
I also tend to prefer the cleaner look of the black bezel over the touch screen, instead of the stainless steel display bezel.
Taking a break for a few days and will then finish off the lens bezel mount to complete the housing.
Last edited:


![Pampers Sensitive Baby Wipes, Clinically Proven, Fragrance Free, Unscented, Water Based, Hypoallergenic, Multi-Use, Hand Wipes 336 Wipes Total (6X Flip-Top Packs) [Packaging May Vary]](https://m.media-amazon.com/images/I/41KLBHu9CAL._SL500_.jpg)






As an Amazon Associate we earn from qualifying purchases. Product prices and availability are accurate as of the date/time indicated and are subject to change.

Timothybil
Flashlight Enthusiast
Re: Superlights shoot-out 2011: The Short Arcs
That has to be one of the sexiest lights I have ever seen! The smooth flowing lines and the shiny ebony color just scream out, "Eat your hearts out, regular lights!" If nothing else, I am sure you could make a living as a graphics artist/designer. Glad to hear that the end of the process may be in sight. Really want to see some beam shots once it becomes a reality. I don't think I will ever be able to afford one, but I can dream.
That has to be one of the sexiest lights I have ever seen! The smooth flowing lines and the shiny ebony color just scream out, "Eat your hearts out, regular lights!" If nothing else, I am sure you could make a living as a graphics artist/designer. Glad to hear that the end of the process may be in sight. Really want to see some beam shots once it becomes a reality. I don't think I will ever be able to afford one, but I can dream.
Re: Superlights shoot-out 2011: The Short Arcs
I think everything you changed above is a very practical and efficient move. Still looks fabulous! When can I pre-order????
I think everything you changed above is a very practical and efficient move. Still looks fabulous! When can I pre-order????
get-lit
Flashlight Enthusiast
Re: Superlights shoot-out 2011: The Short Arcs
Hard to say, there's still a few good steps to completion...
- Complete the bezel mount portion of the housing
- Update internal support structures to match up with the final housing
- Create internal mount provision for cooling air flow/temp sensor
- Have handle portion of housing 3D printed to test grip comfort
- Programming
- *Order components that can only be ordered in mass quantity: touch panels, DC motors with encoders for beam adjust, front exhaust tube (special order because it can't be metal due to high ignition voltage and a unique high-temp composite is needed)
- Source a hardened Pyrex glass lens manufacturer and AR coating service, also looking into Gorilla Glass or Dragontrail Glass
- Have mold made for the bezel
- Perform test on retro-reflector with enhanced high-reflectance coating for durability at high temp near the lamp
- *Have new mandrel made for the revised retro-reflector
- Update the mount for the revised retro-reflector
- *Have molds CNC machined of aluminum for the housing halves, and internal support structures
- *Purchase materials for and set up vacuum forming composite layup process for the housing halves, and internal support structures
*These steps awaiting funding early next year. Proceeding with other steps in the meantime. The list may seem long, but it's only a very tiny fraction of the list of completed steps.
Hard to say, there's still a few good steps to completion...
- Complete the bezel mount portion of the housing
- Update internal support structures to match up with the final housing
- Create internal mount provision for cooling air flow/temp sensor
- Have handle portion of housing 3D printed to test grip comfort
- Programming
- *Order components that can only be ordered in mass quantity: touch panels, DC motors with encoders for beam adjust, front exhaust tube (special order because it can't be metal due to high ignition voltage and a unique high-temp composite is needed)
- Source a hardened Pyrex glass lens manufacturer and AR coating service, also looking into Gorilla Glass or Dragontrail Glass
- Have mold made for the bezel
- Perform test on retro-reflector with enhanced high-reflectance coating for durability at high temp near the lamp
- *Have new mandrel made for the revised retro-reflector
- Update the mount for the revised retro-reflector
- *Have molds CNC machined of aluminum for the housing halves, and internal support structures
- *Purchase materials for and set up vacuum forming composite layup process for the housing halves, and internal support structures
*These steps awaiting funding early next year. Proceeding with other steps in the meantime. The list may seem long, but it's only a very tiny fraction of the list of completed steps.
Last edited:
Timothybil
Flashlight Enthusiast
Re: Superlights shoot-out 2011: The Short Arcs
In re your Pyrex lens; have you checked with FlashlightLens? I am pretty sure the size you need isn't going to be stock, but if I remember correctly they do do custom work too.
In re your Pyrex lens; have you checked with FlashlightLens? I am pretty sure the size you need isn't going to be stock, but if I remember correctly they do do custom work too.
get-lit
Flashlight Enthusiast
Re: Superlights shoot-out 2011: The Short Arcs
Thank, I will be sure to check with them. Regarding the lens, it's currently configured at 11 1/4" diameter by 1/8" thick, which is about the same thickness as tempered window panes, but much smaller in area, so more than plenty for any head wind you're capable of even holding the light in. So wind is not a concern, and impact strength is the only consideration. I tend to prefer 1/8" tempered for strength vs weight for portability. For situations requiring ultimate durability at the expense of portability, a 3/16" glass lens could be made in the future. This would increase the weight by .55 lbs and offset center of gravity .32" making the light "slightly" front heavy when hand held. Of course, as discussed earlier on, the spider support could be added as well, but at the expense of "some" light loss.
Thank, I will be sure to check with them. Regarding the lens, it's currently configured at 11 1/4" diameter by 1/8" thick, which is about the same thickness as tempered window panes, but much smaller in area, so more than plenty for any head wind you're capable of even holding the light in. So wind is not a concern, and impact strength is the only consideration. I tend to prefer 1/8" tempered for strength vs weight for portability. For situations requiring ultimate durability at the expense of portability, a 3/16" glass lens could be made in the future. This would increase the weight by .55 lbs and offset center of gravity .32" making the light "slightly" front heavy when hand held. Of course, as discussed earlier on, the spider support could be added as well, but at the expense of "some" light loss.

London Lad
Flashlight Enthusiast
Re: Superlights shoot-out 2011: The Short Arcs
Form follows function personified! Well done.
Form follows function personified! Well done.
get-lit
Flashlight Enthusiast
Re: Superlights shoot-out 2011: The Short Arcs
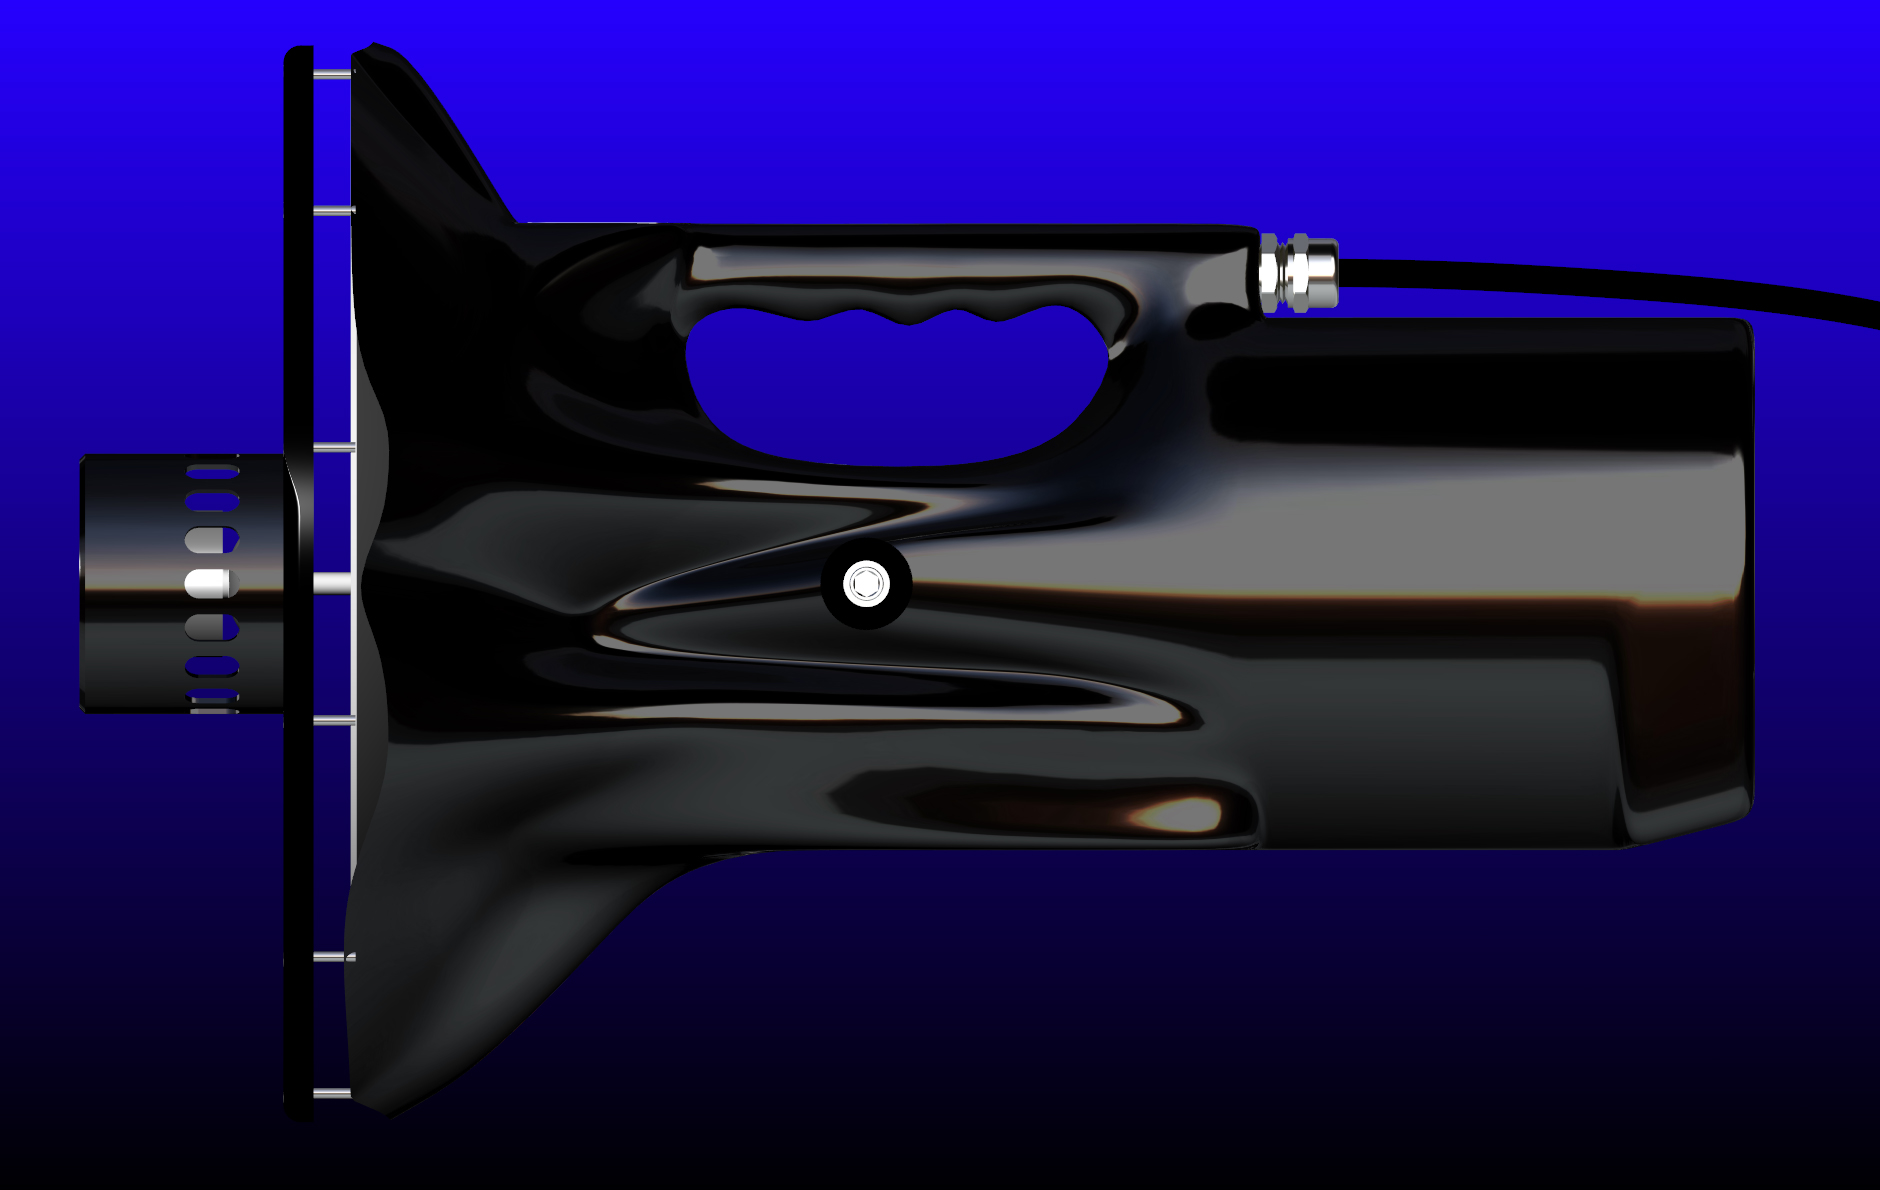
Thanks Lad. Here's proper renders, the others were in editing mode..
(Click for large)


I will update these when the bezel mount is complete.
Edit: bezel mount complete. Renderings updated.
Thanks Lad. Here's proper renders, the others were in editing mode..
(Click for large)
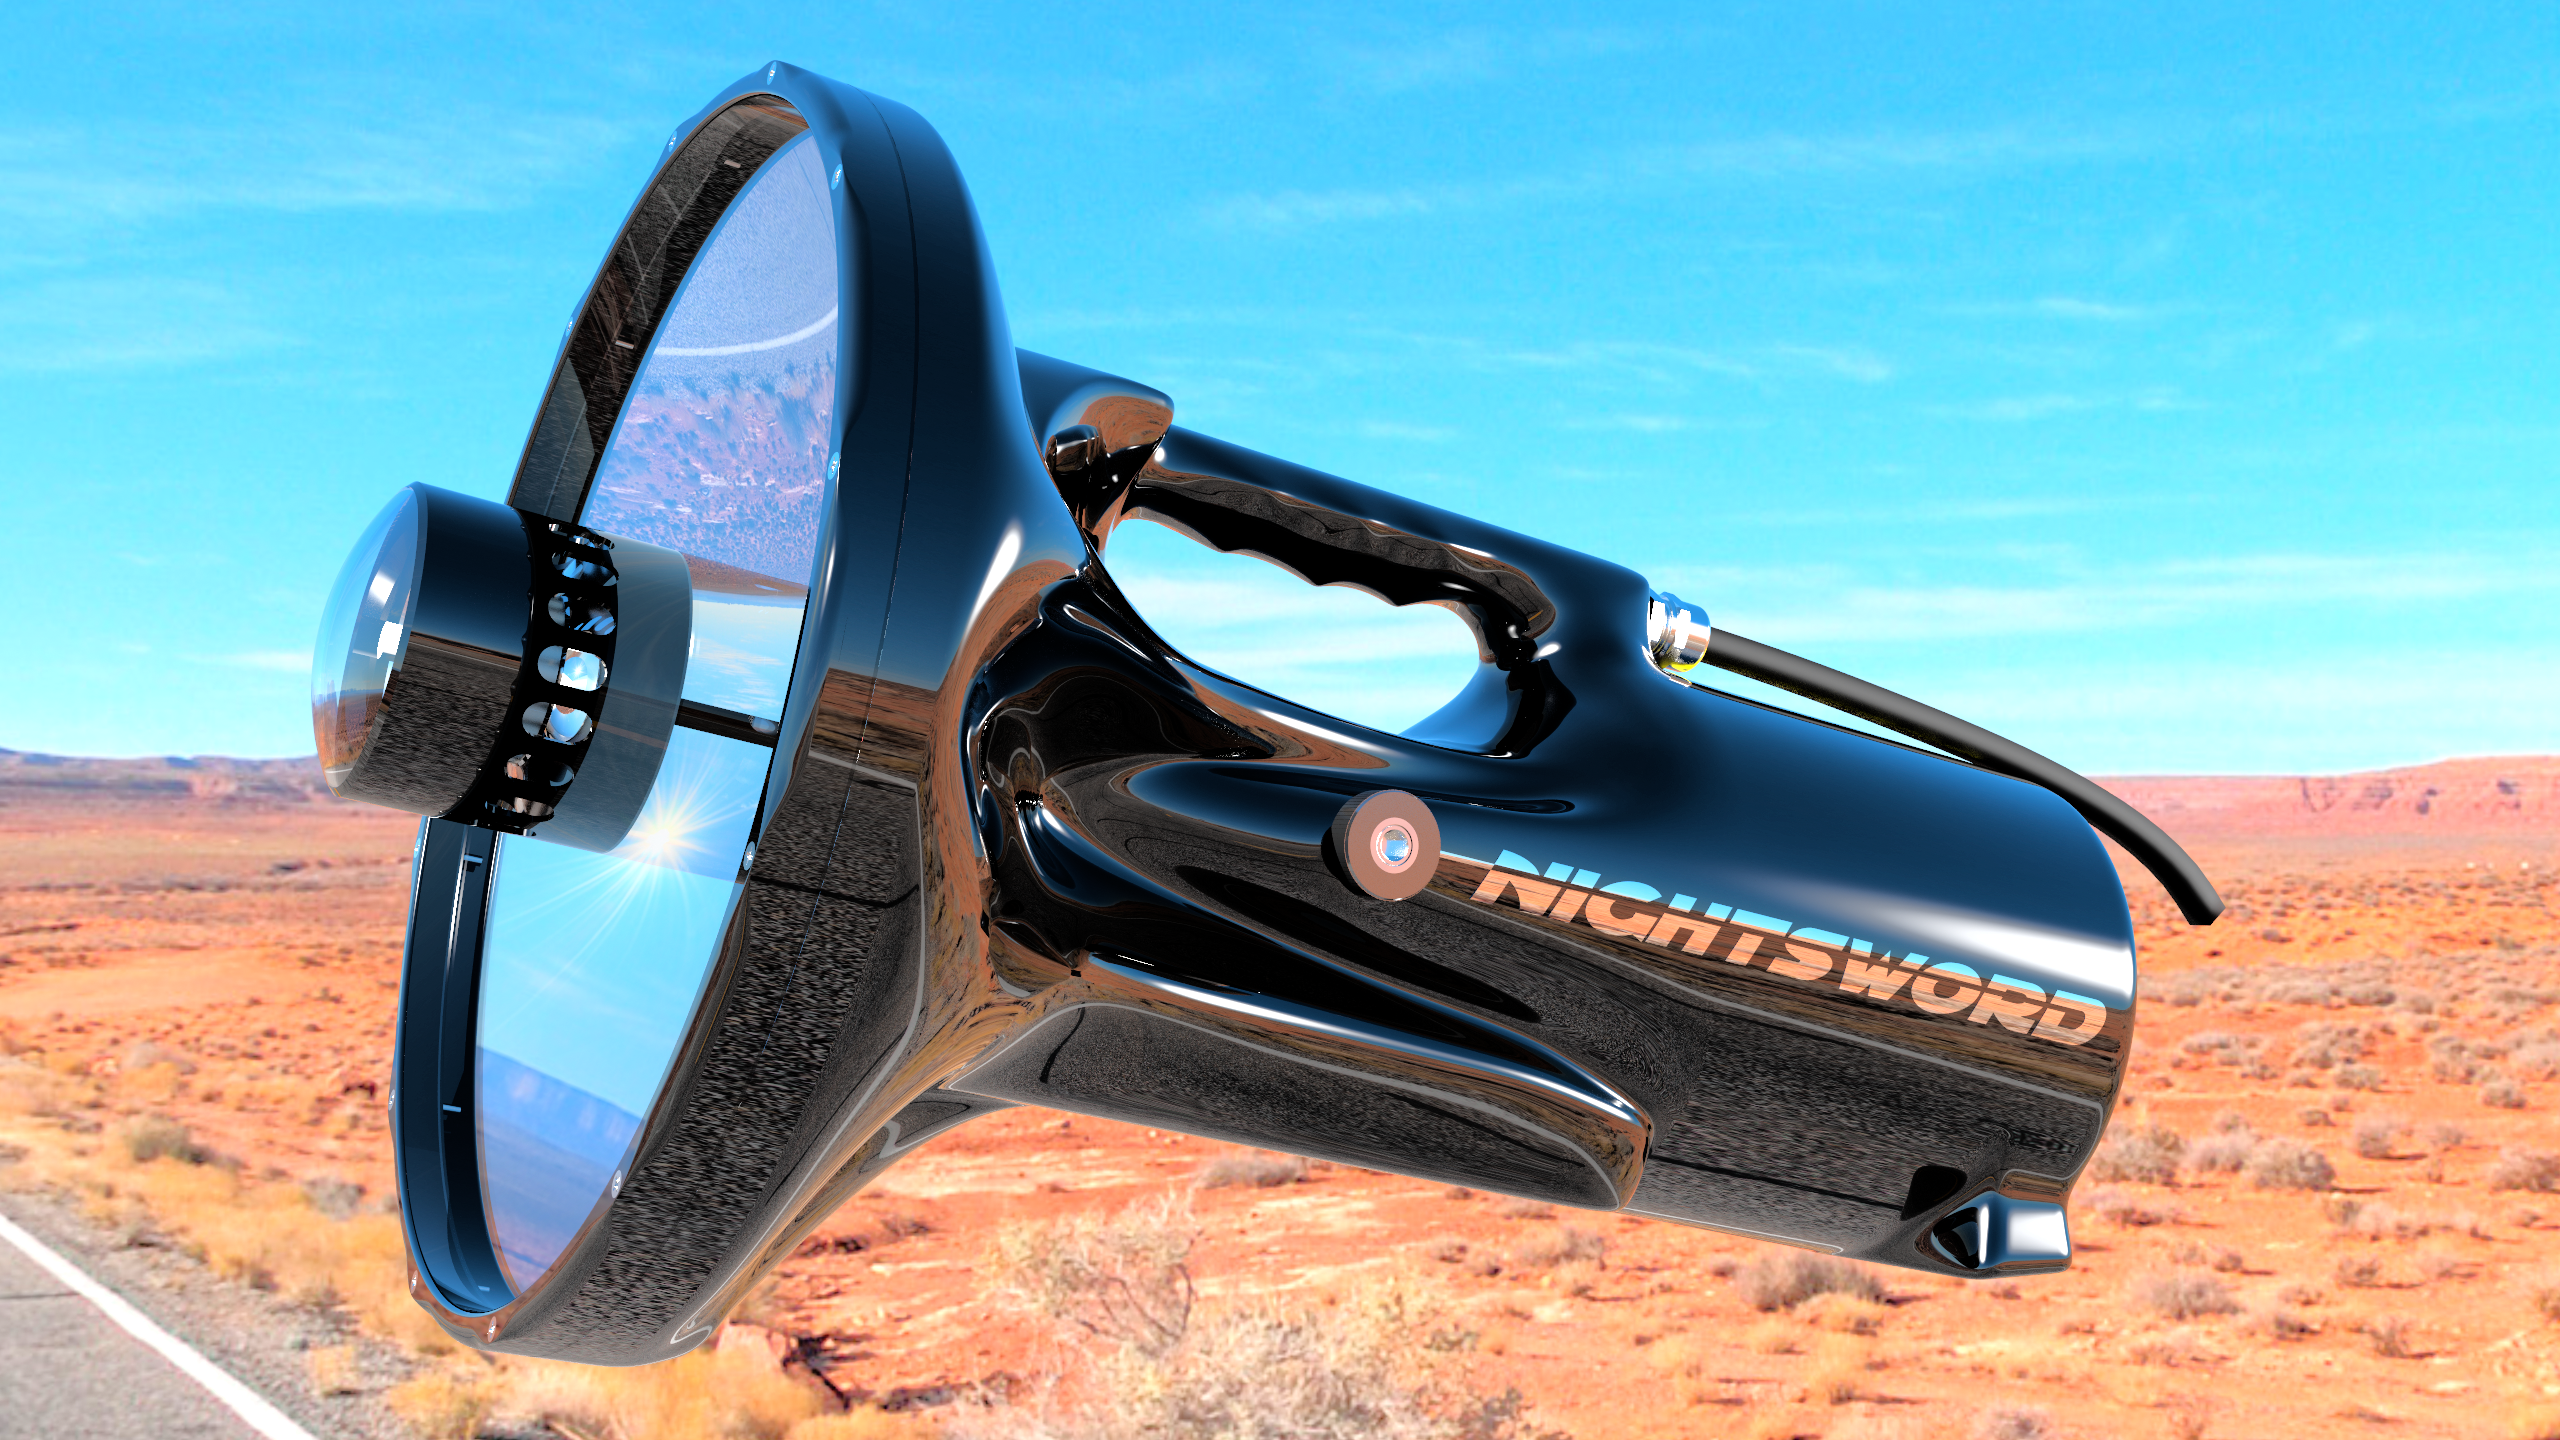
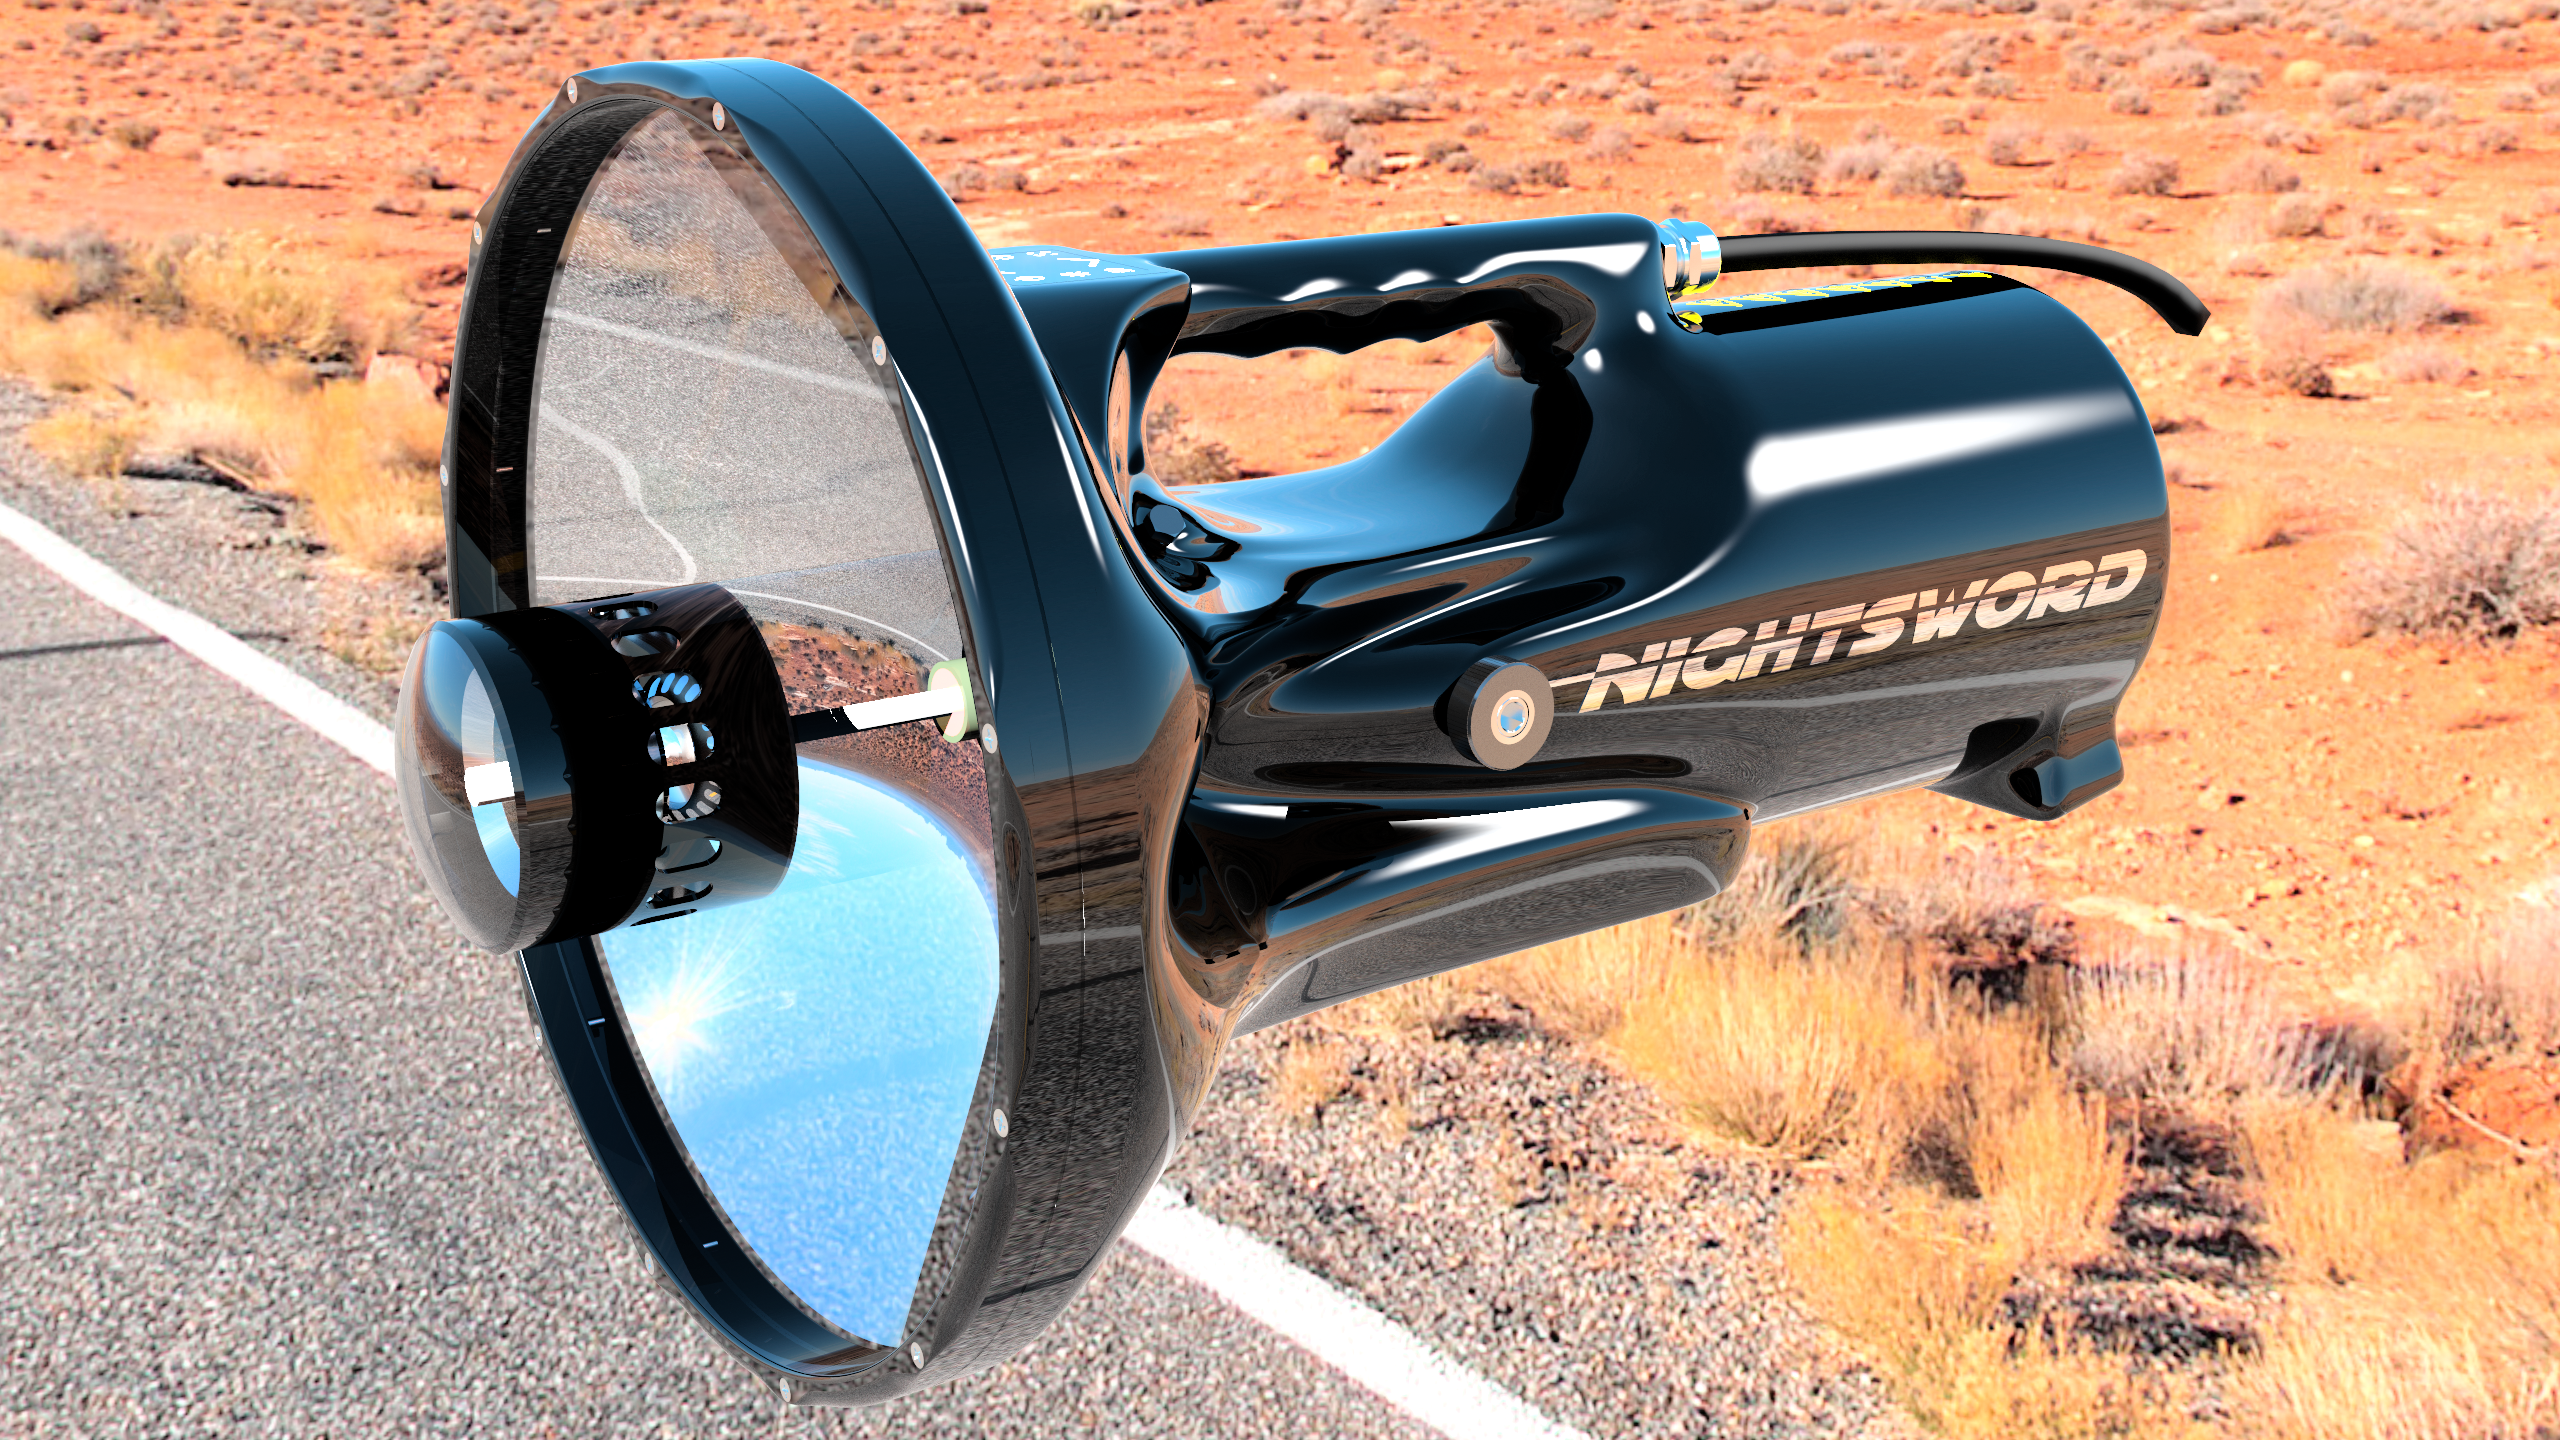
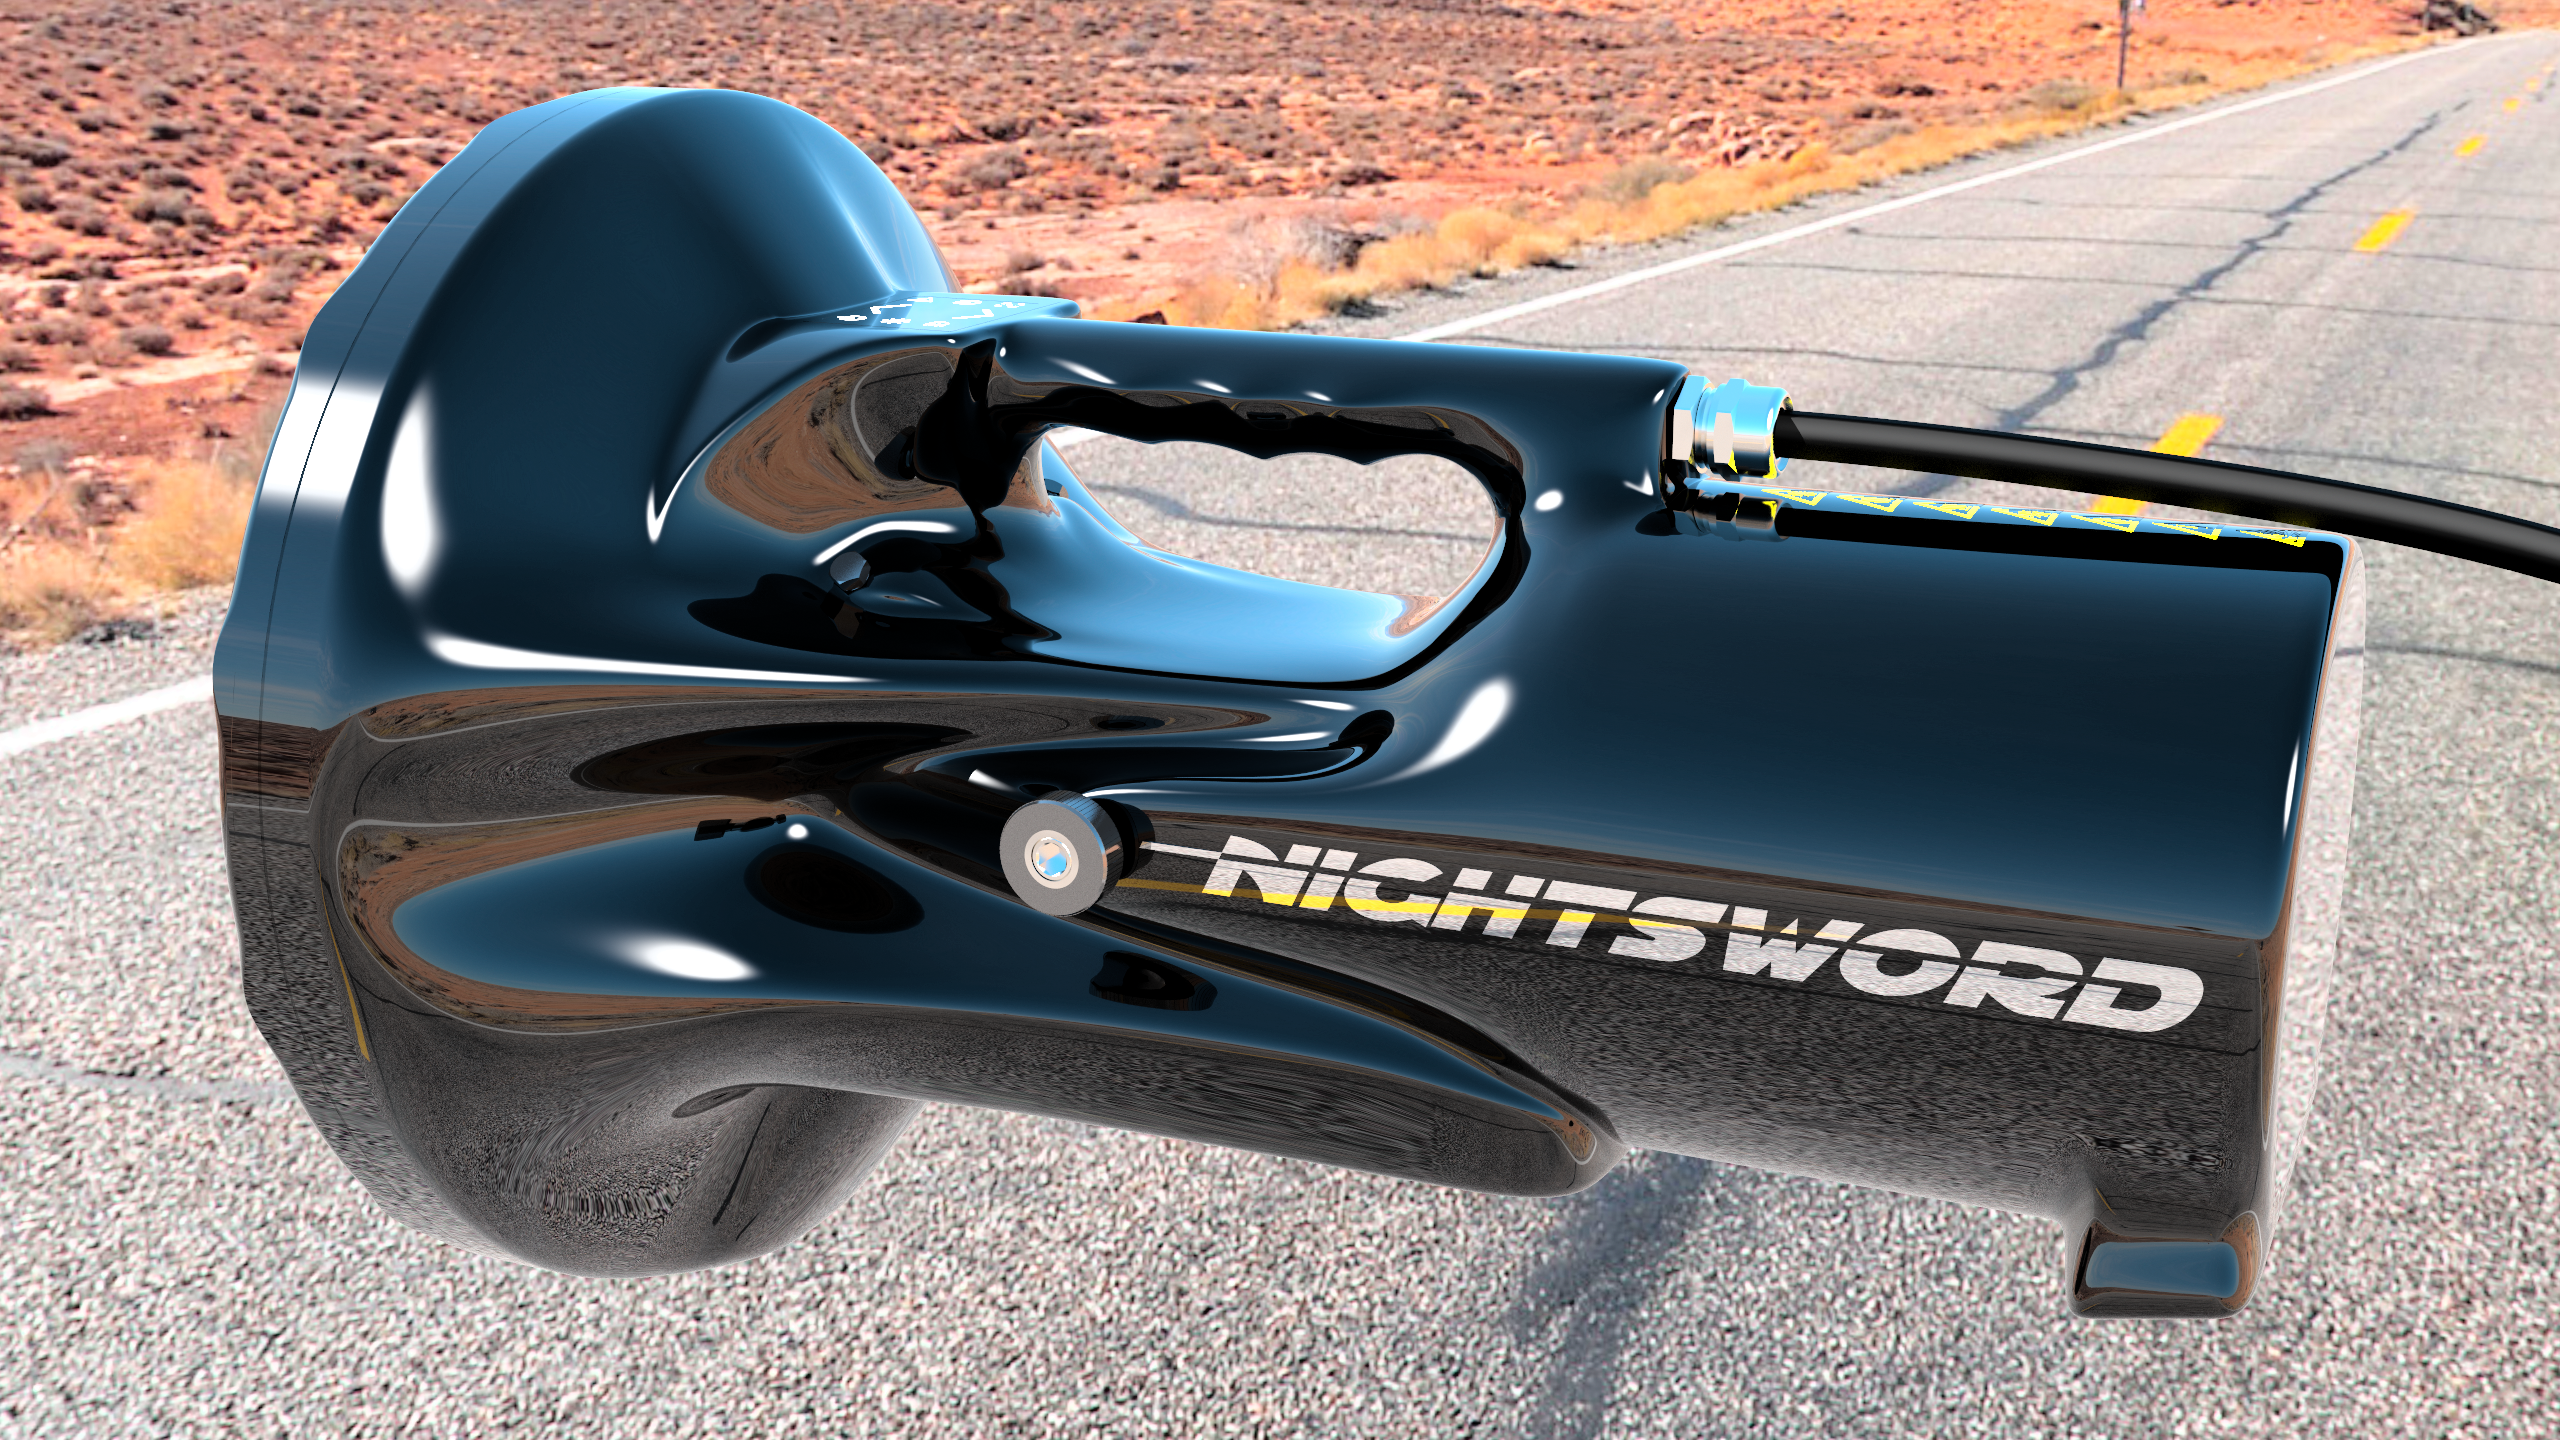
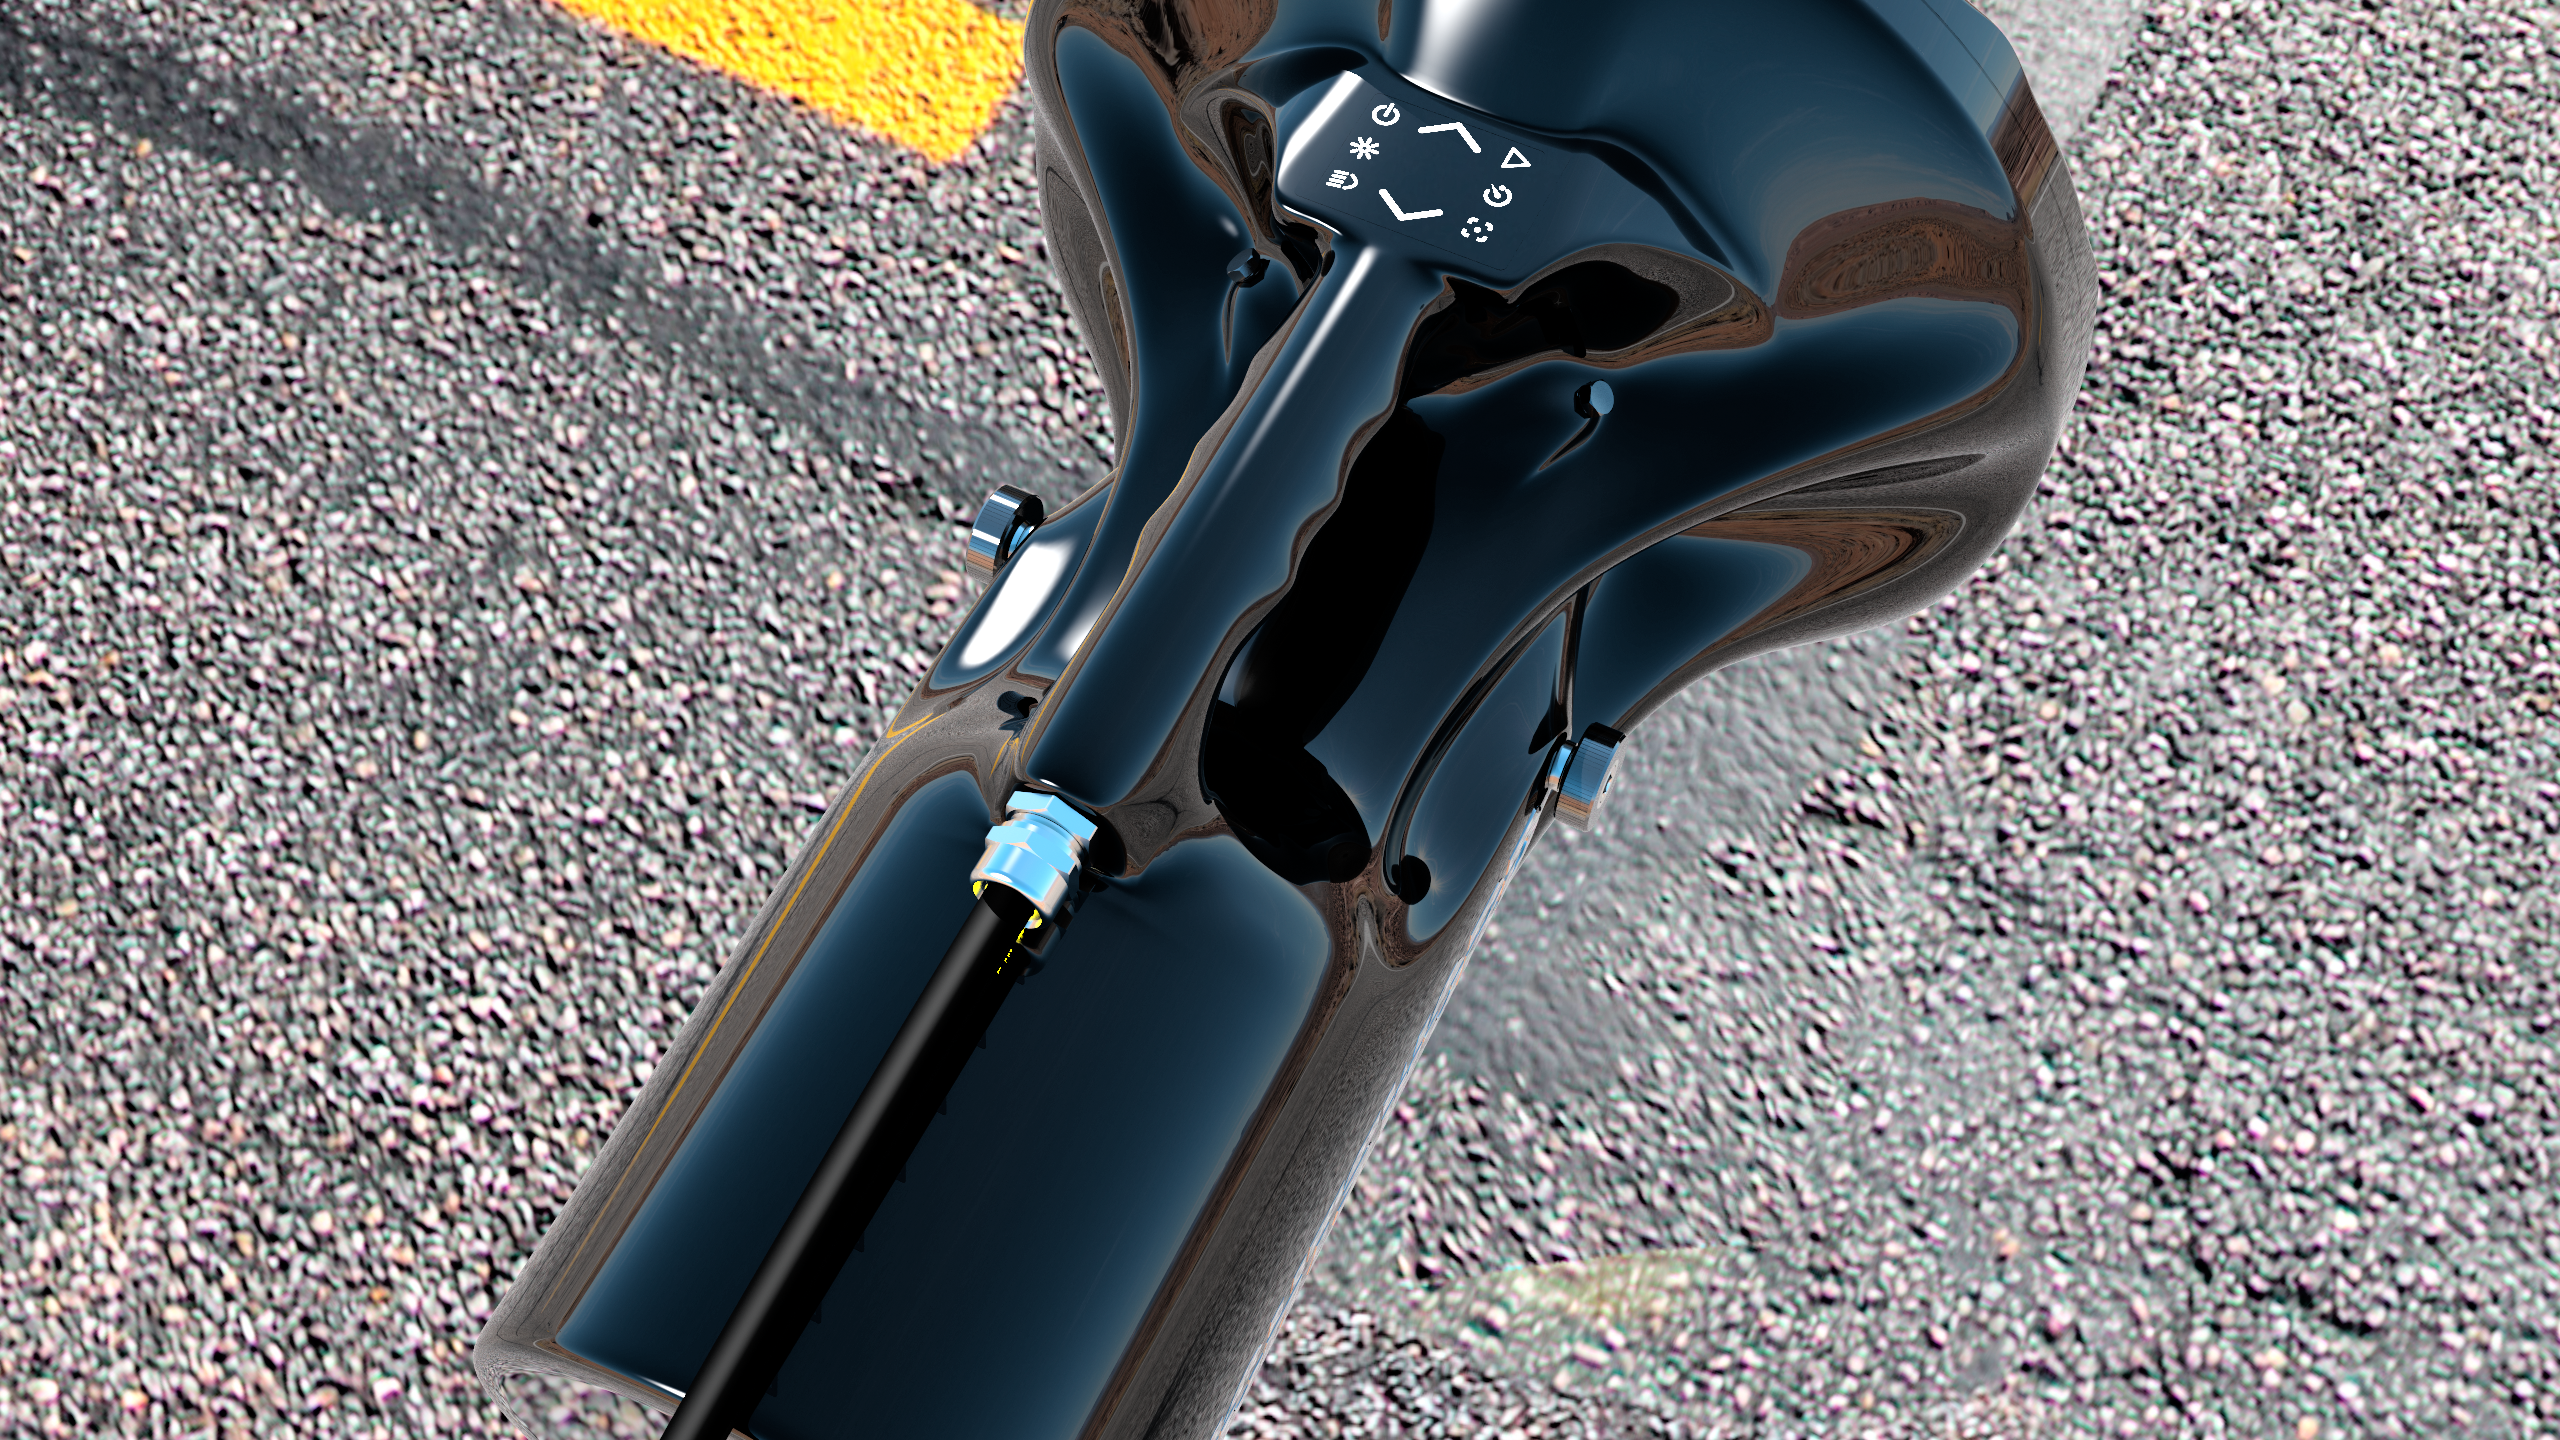
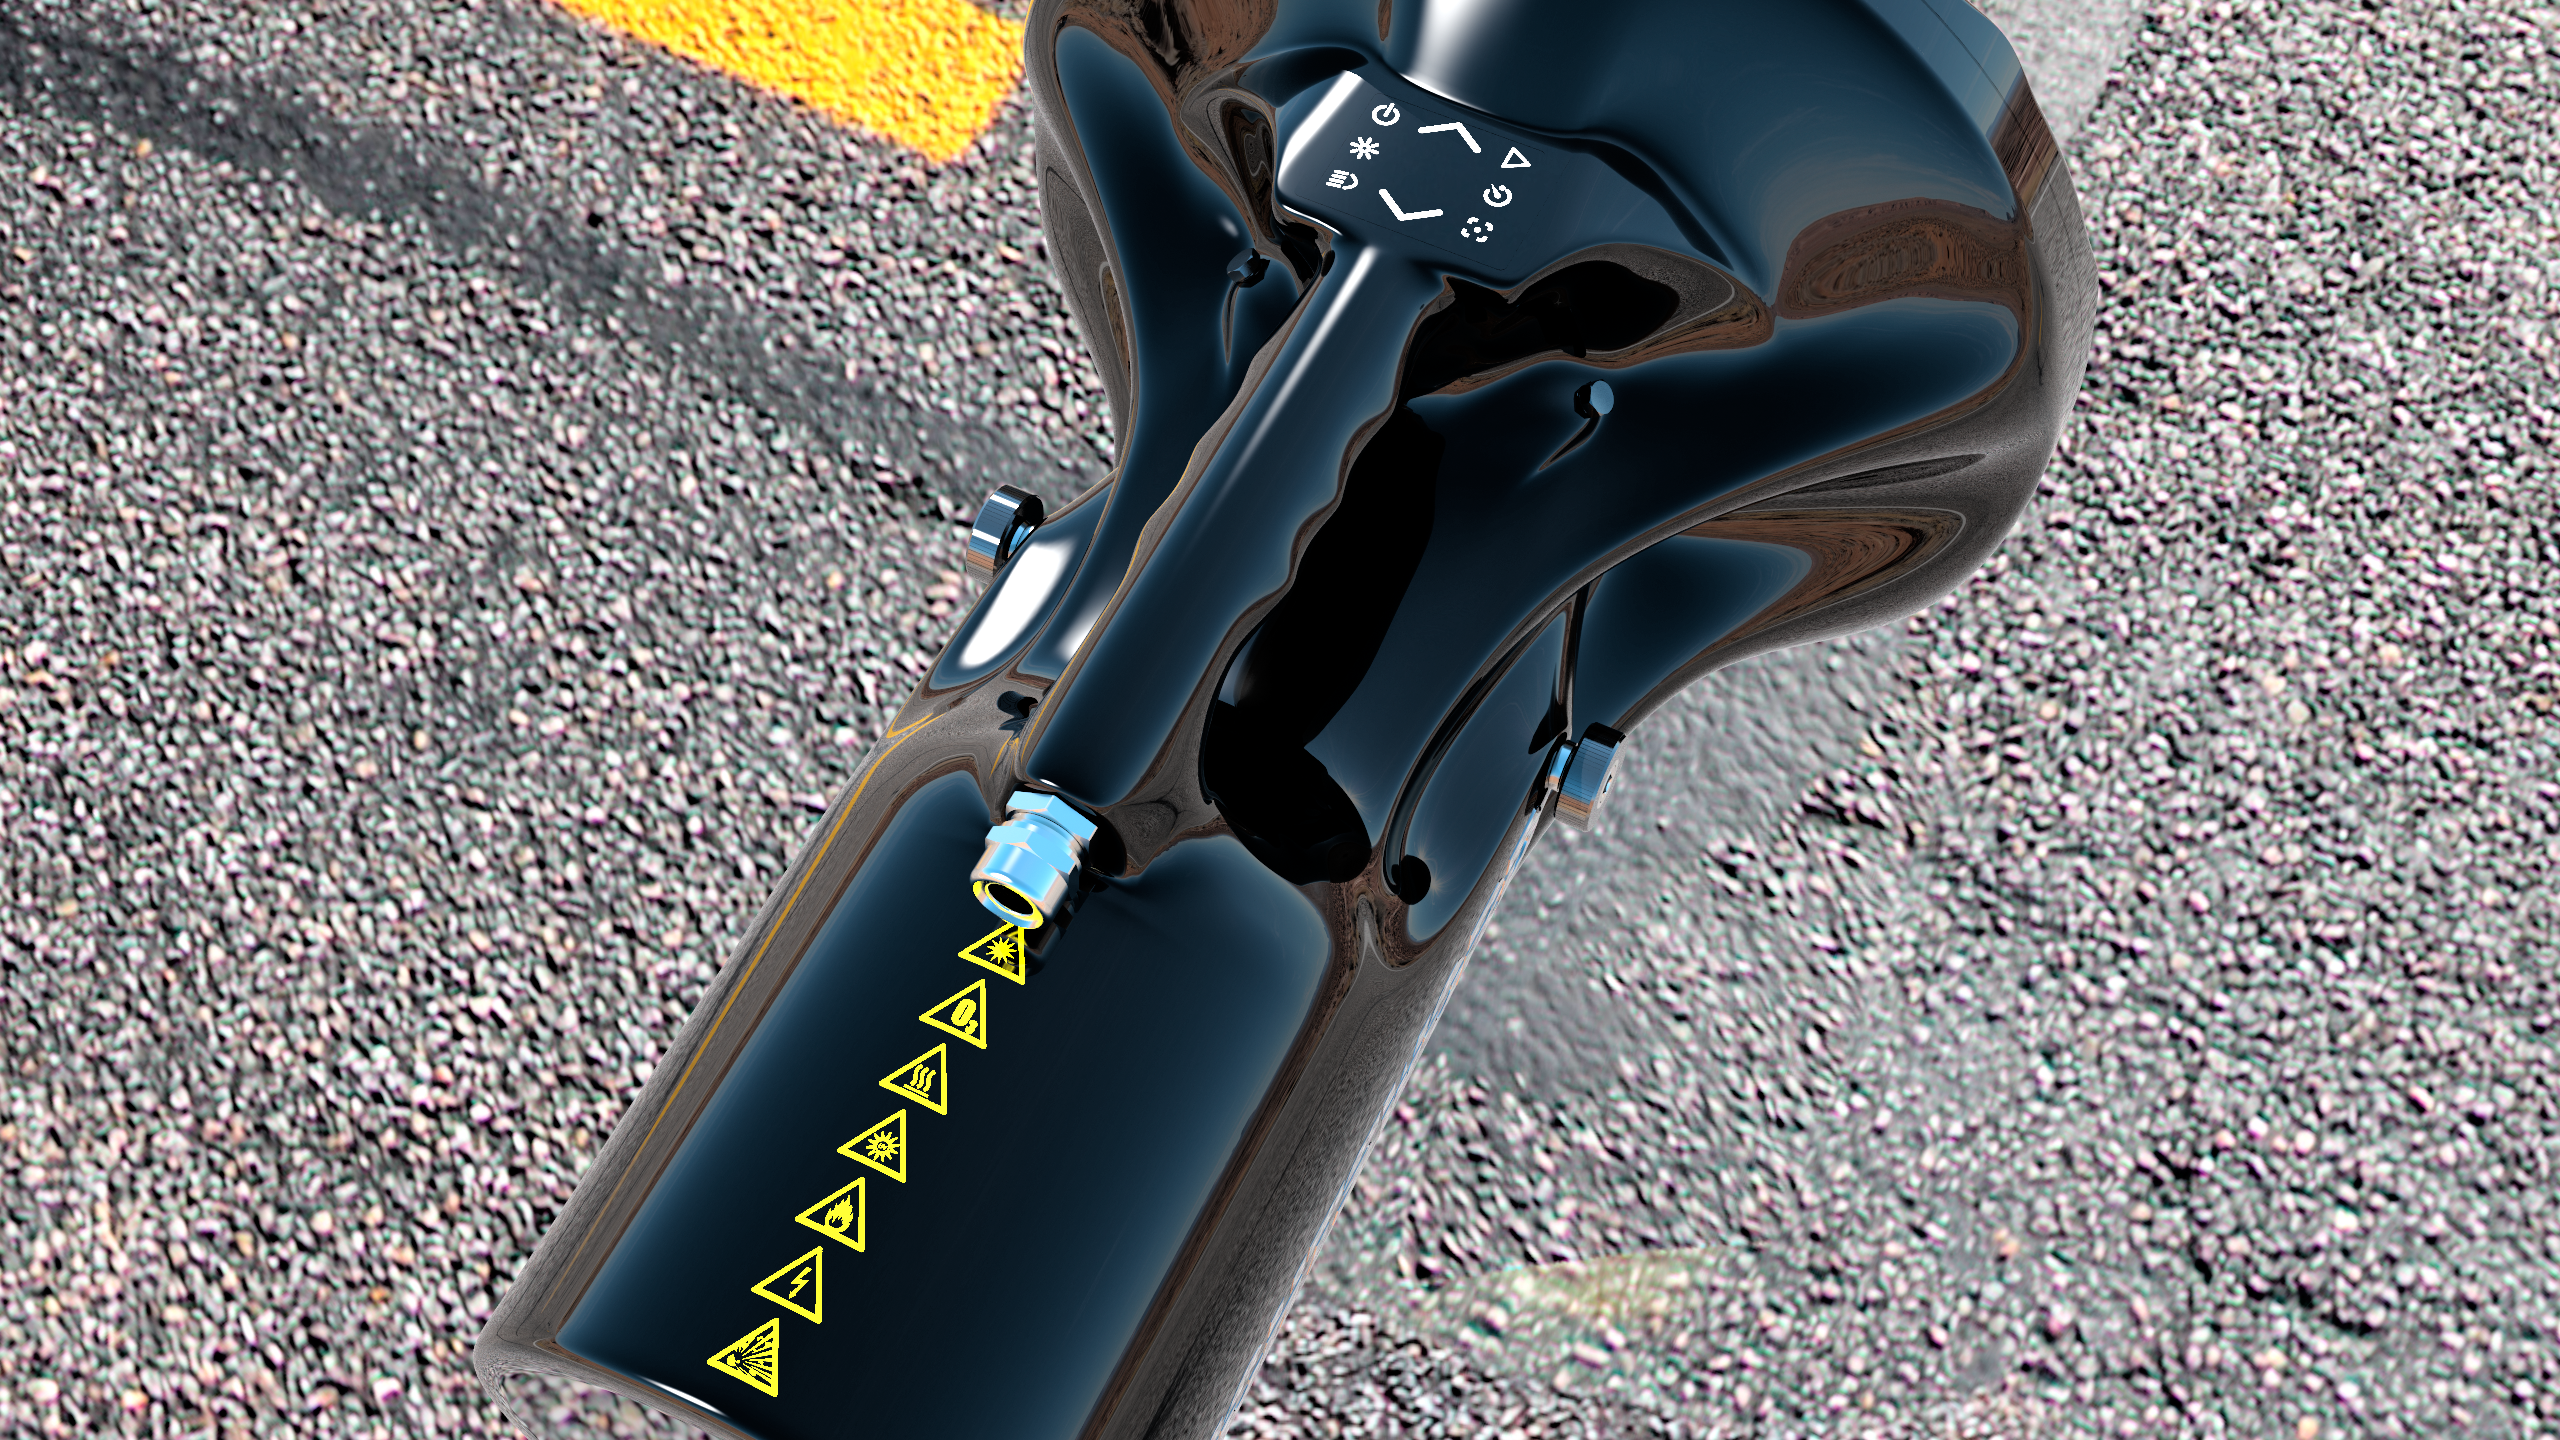
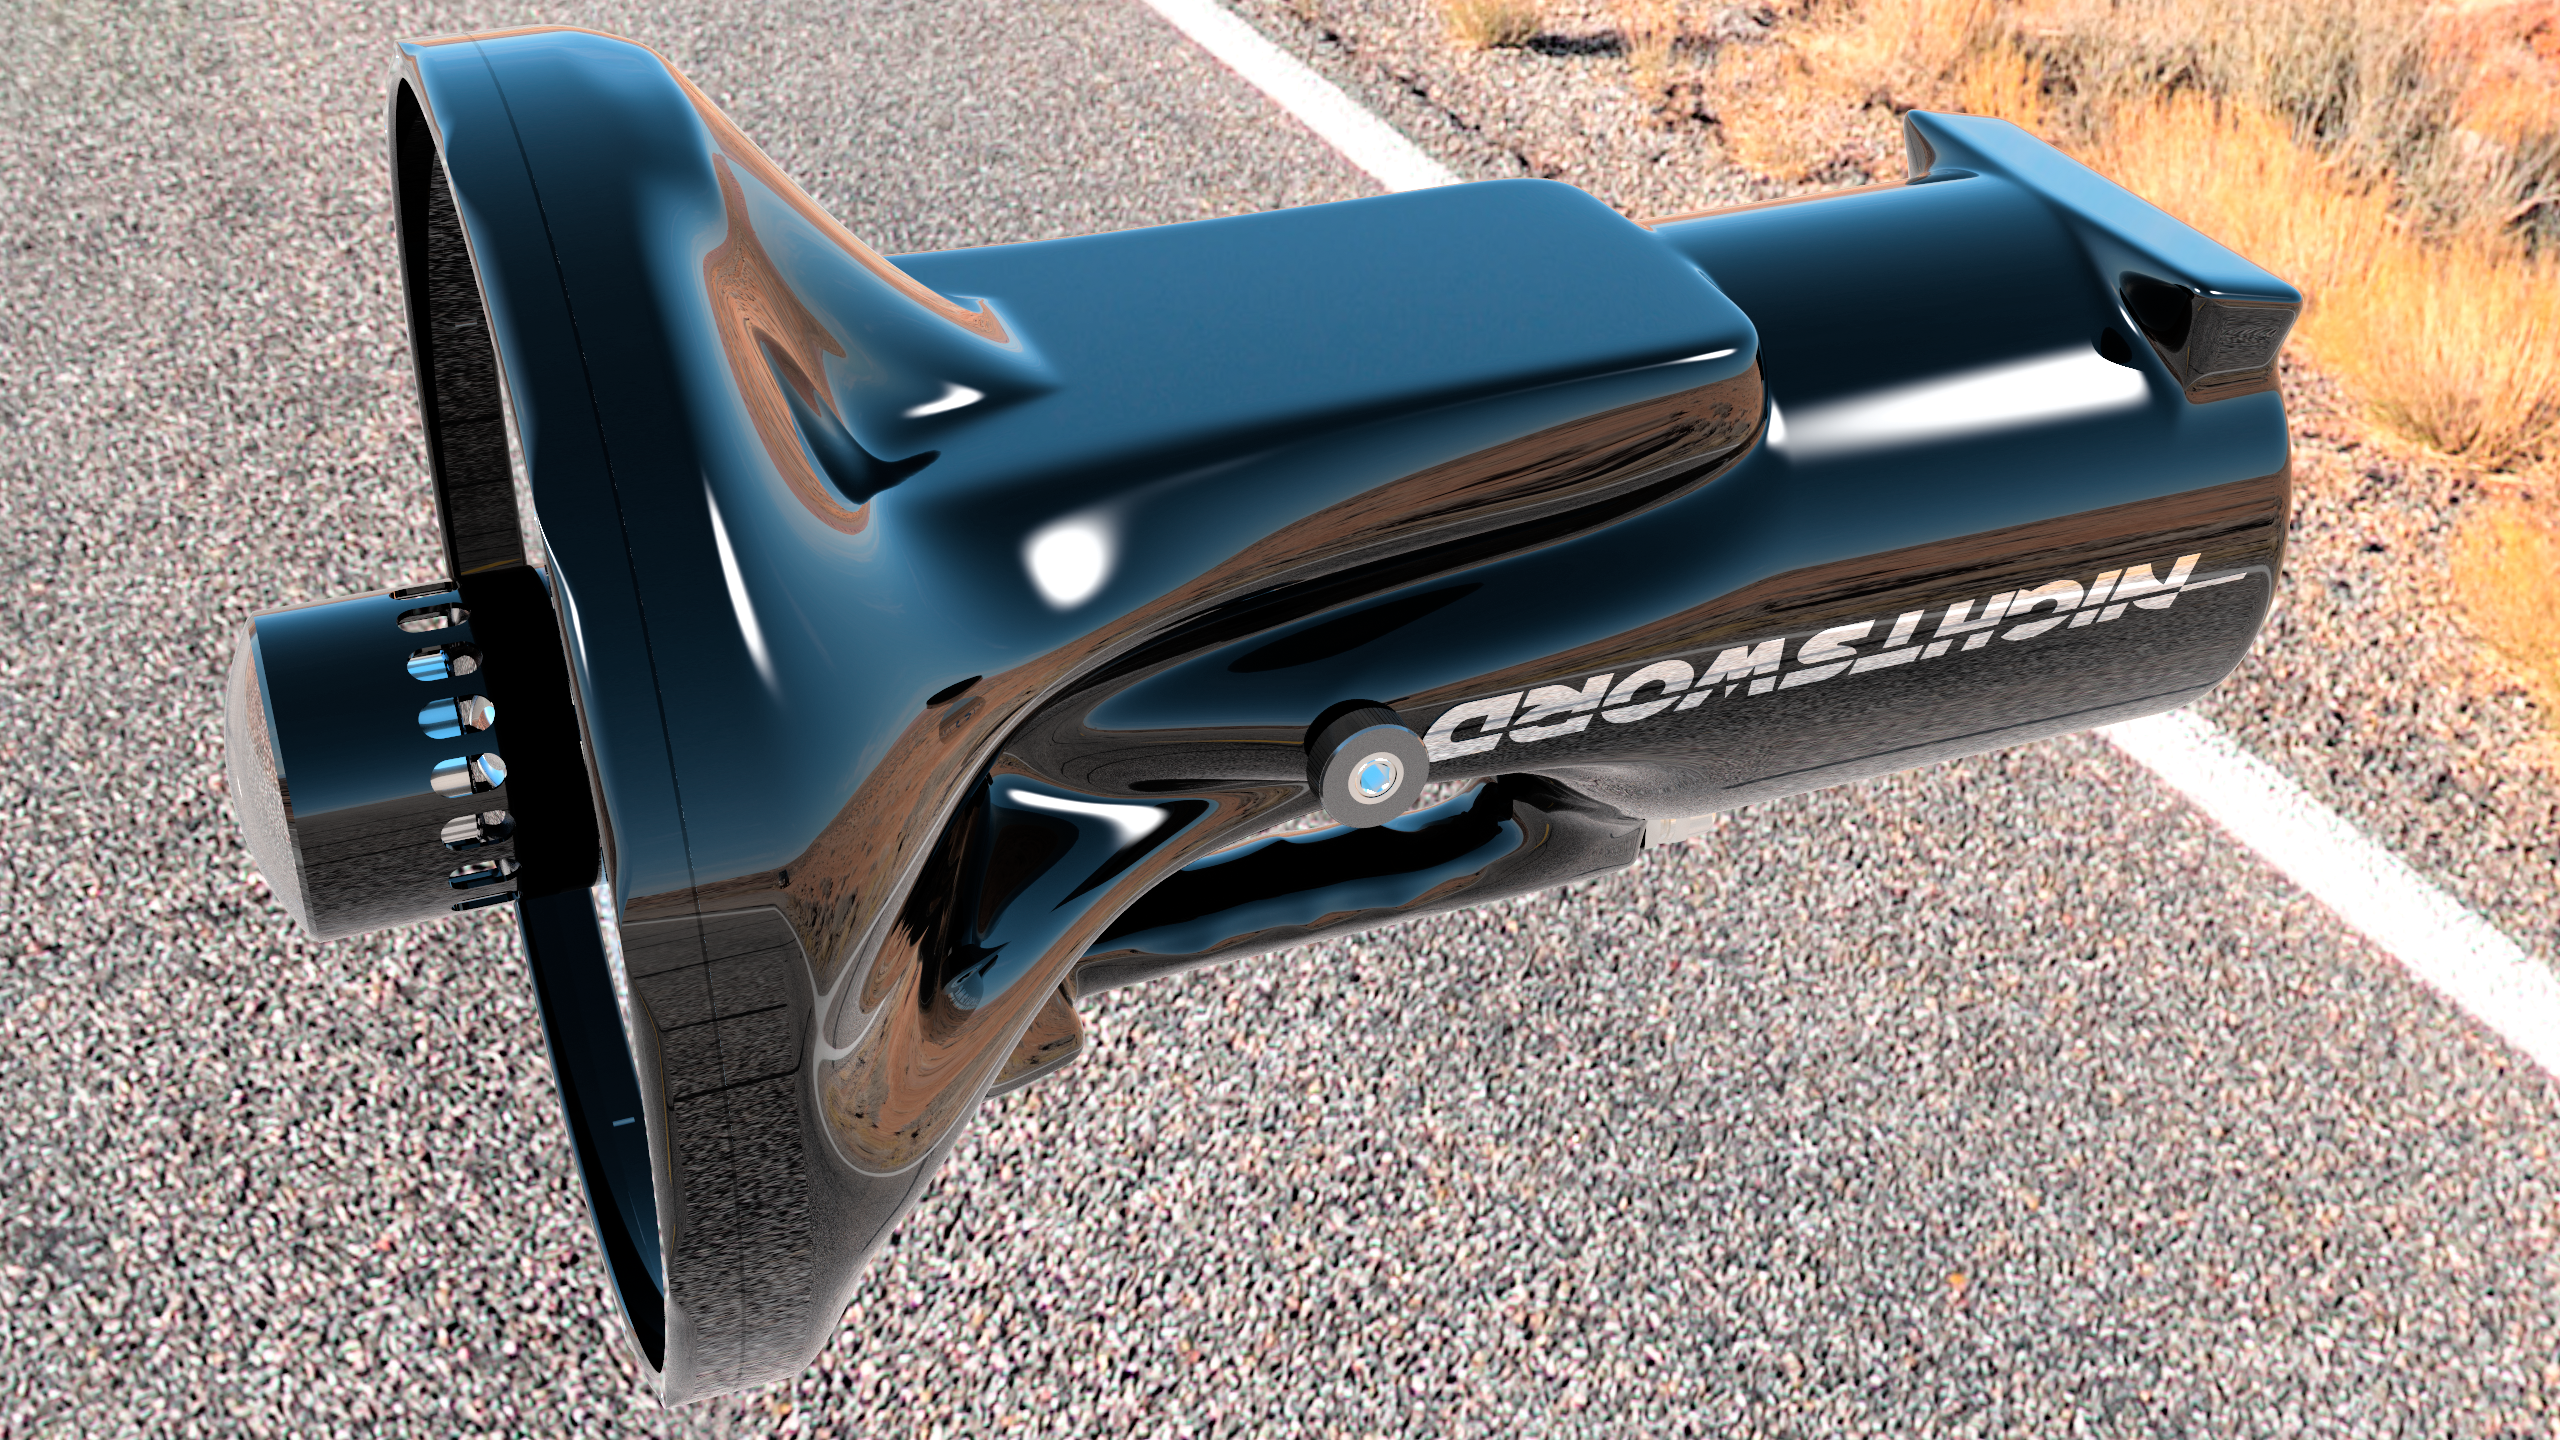
I will update these when the bezel mount is complete.
Edit: bezel mount complete. Renderings updated.
Last edited:
Blueknight
Newly Enlightened
- Joined
- Oct 23, 2010
- Messages
- 71
Re: Superlights shoot-out 2011: The Short Arcs
It may have already been mentioned,maybe you already thought of it so I might be talking out my back side,but what about rubber type feet/pads so when the light is sitting,it doesn't get scratched.
It may have already been mentioned,maybe you already thought of it so I might be talking out my back side,but what about rubber type feet/pads so when the light is sitting,it doesn't get scratched.
get-lit
Flashlight Enthusiast
Re: Superlights shoot-out 2011: The Short Arcs
I've completed the housing bezel mount and updated the renderings.
Yes thanks Bluenight, this has been covered. Adhesive pads will be used.
Edit - Renders updated. I cleaned up some lines to better blend with the bezel mount. I've also made the bezel deeper, changed up the rear feet, and made a flat ground contact area under the bezel, which is sloped to the rear feet. These can be seen in the upside-down render.
I've completed the housing bezel mount and updated the renderings.
Yes thanks Bluenight, this has been covered. Adhesive pads will be used.
Edit - Renders updated. I cleaned up some lines to better blend with the bezel mount. I've also made the bezel deeper, changed up the rear feet, and made a flat ground contact area under the bezel, which is sloped to the rear feet. These can be seen in the upside-down render.
Last edited:
Timothybil
Flashlight Enthusiast
Just fire the Nightsword up and melt it off! It would probablyl be great for snow tunnels.Glad to see it in real form.
Hope your doing well with all that snow.
S/F,
CEYA!
get-lit
Flashlight Enthusiast
Thanks Ceya. No snow here. I'm a few miles north of that lake effect snow band.
I'm having to re-create the CAD housing because at one point along the way I continued with a recovered file from a program crash, and apparently the recovery introduced a glitch that makes the file unsuitable for CNC milling. Not a huge deal because I'm able to recreate the new file by exactly matching up the T-Spline points of the old file. It's just a bit time consuming.
I'm having to re-create the CAD housing because at one point along the way I continued with a recovered file from a program crash, and apparently the recovery introduced a glitch that makes the file unsuitable for CNC milling. Not a huge deal because I'm able to recreate the new file by exactly matching up the T-Spline points of the old file. It's just a bit time consuming.
Latest posts
-
-

-

-
-

-
New Fireflylite Flashlights arrived! They are absolutely amazing!
- Latest: AMD64Brunette
-

-
